Epixel MLM Software - Back-office Administration
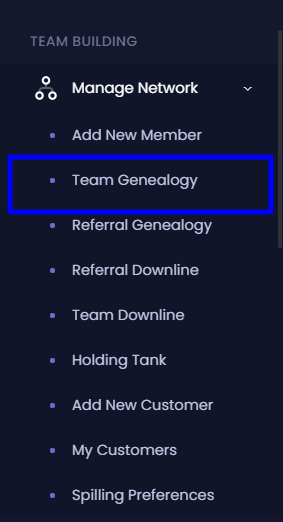
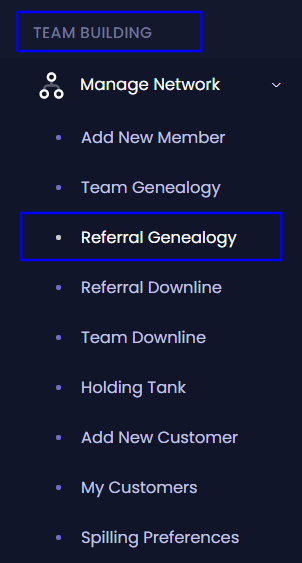
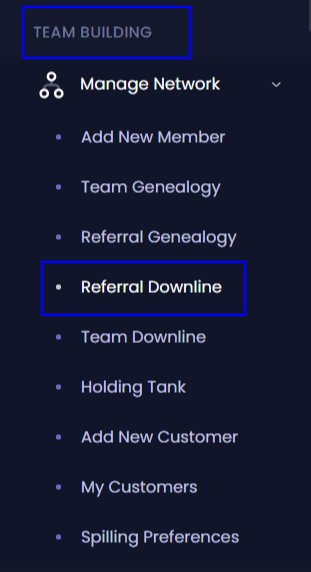
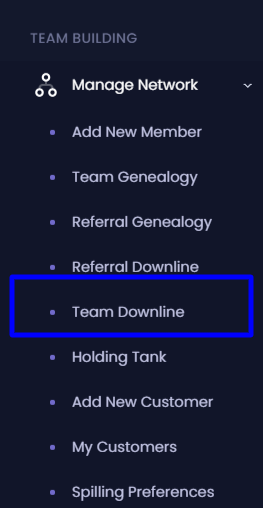
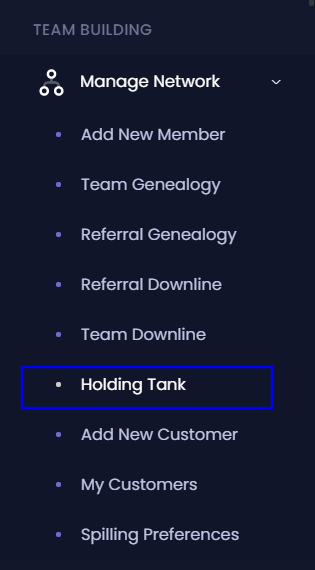
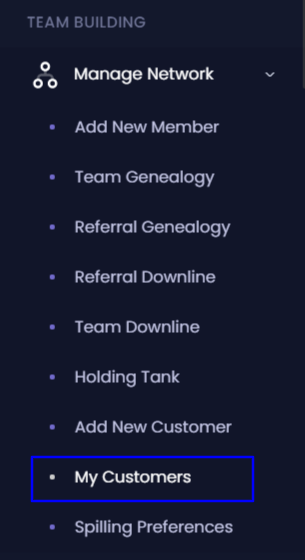
Manage Network
Manage Network
Manage Network :
You can manage your network of team members here. You can expand, organize, and can keep a track of your team building activities.
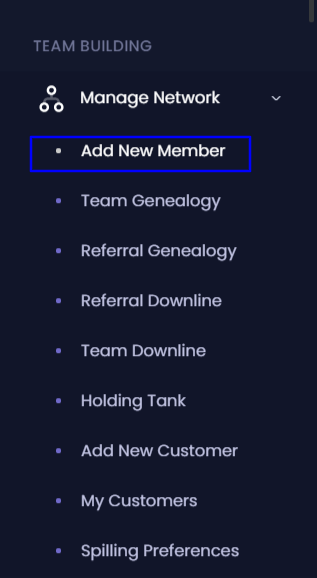
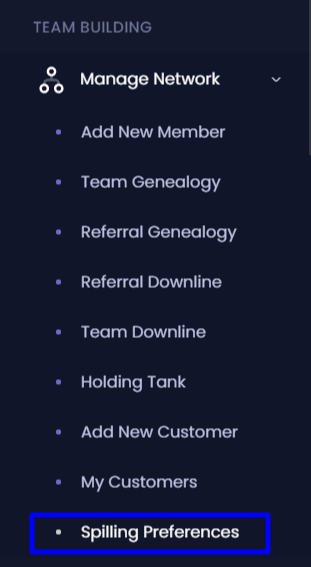
TEAM BUILDING
How can you expand your network?
You can expand your network by adding new members to your team by filling out some mandatory details of the new member. If you are adding new members from your back office you will be assigned as the sponsor of a new member unless you are logged as administrator then you can choose a sponsor for the new member.
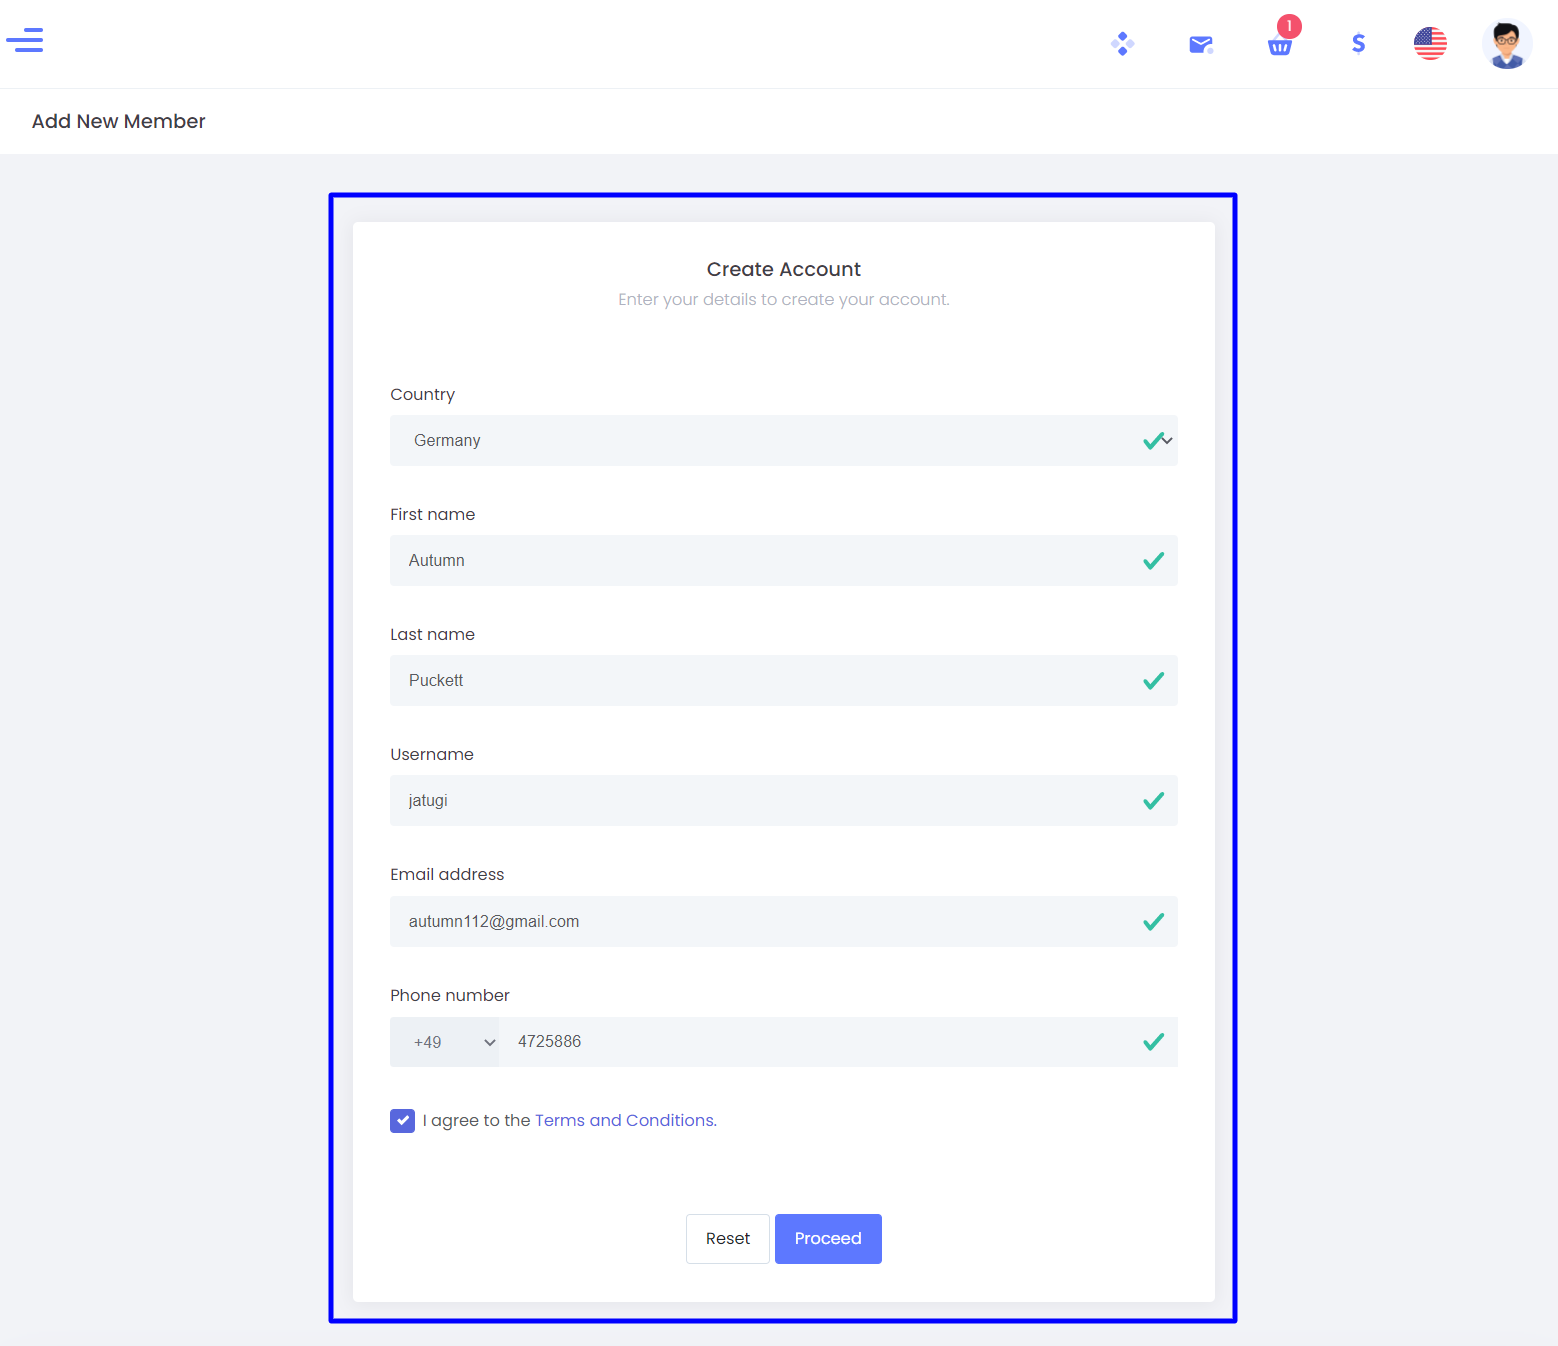
Step 1
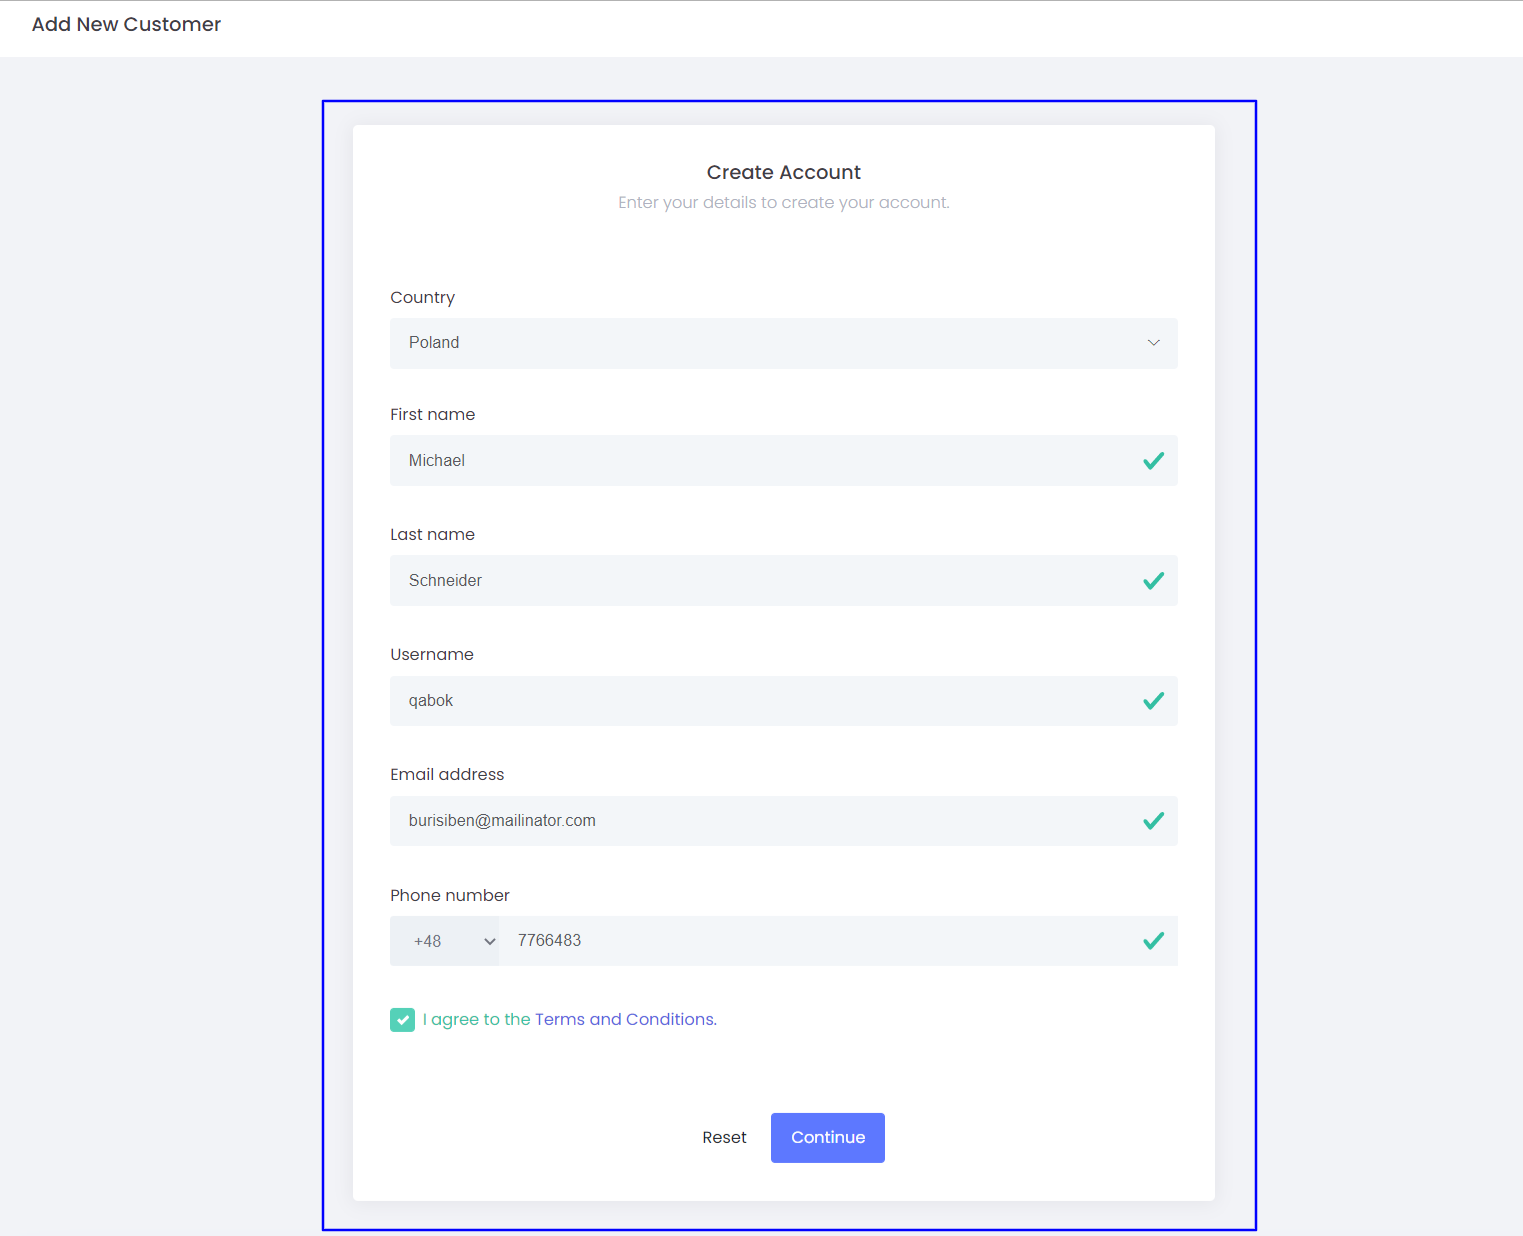
You can create an account by filling out the details in the registration form, the country code in the phone number field will be as per the country you selected and the terms and condition contents can be changed as per companies requirement.
Step 2
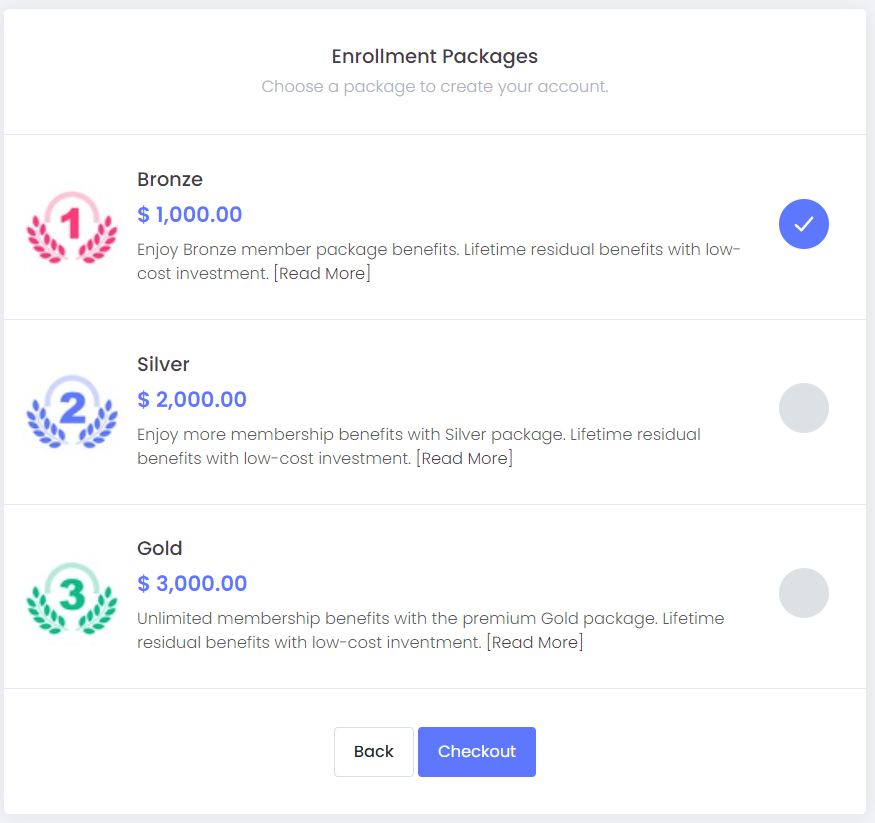
You can select the enrollment package with which the new user can join the system, the enrollment package selection is not applicable in case of free joining.
Note: Administrator can add/delete/edit the enrollment package as per companies requirement
Step 3
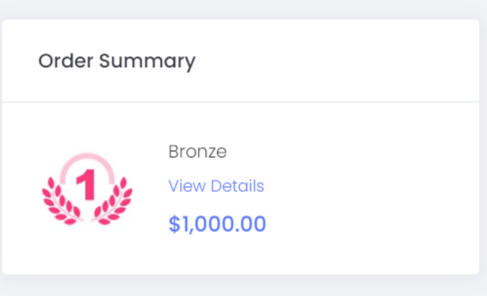
Once you select the package and checkout, you will be redirected to the Billing Page.
Order Summary
You can view the details of the product that you have purchased. Here we are able to view the tax amount of the package also.
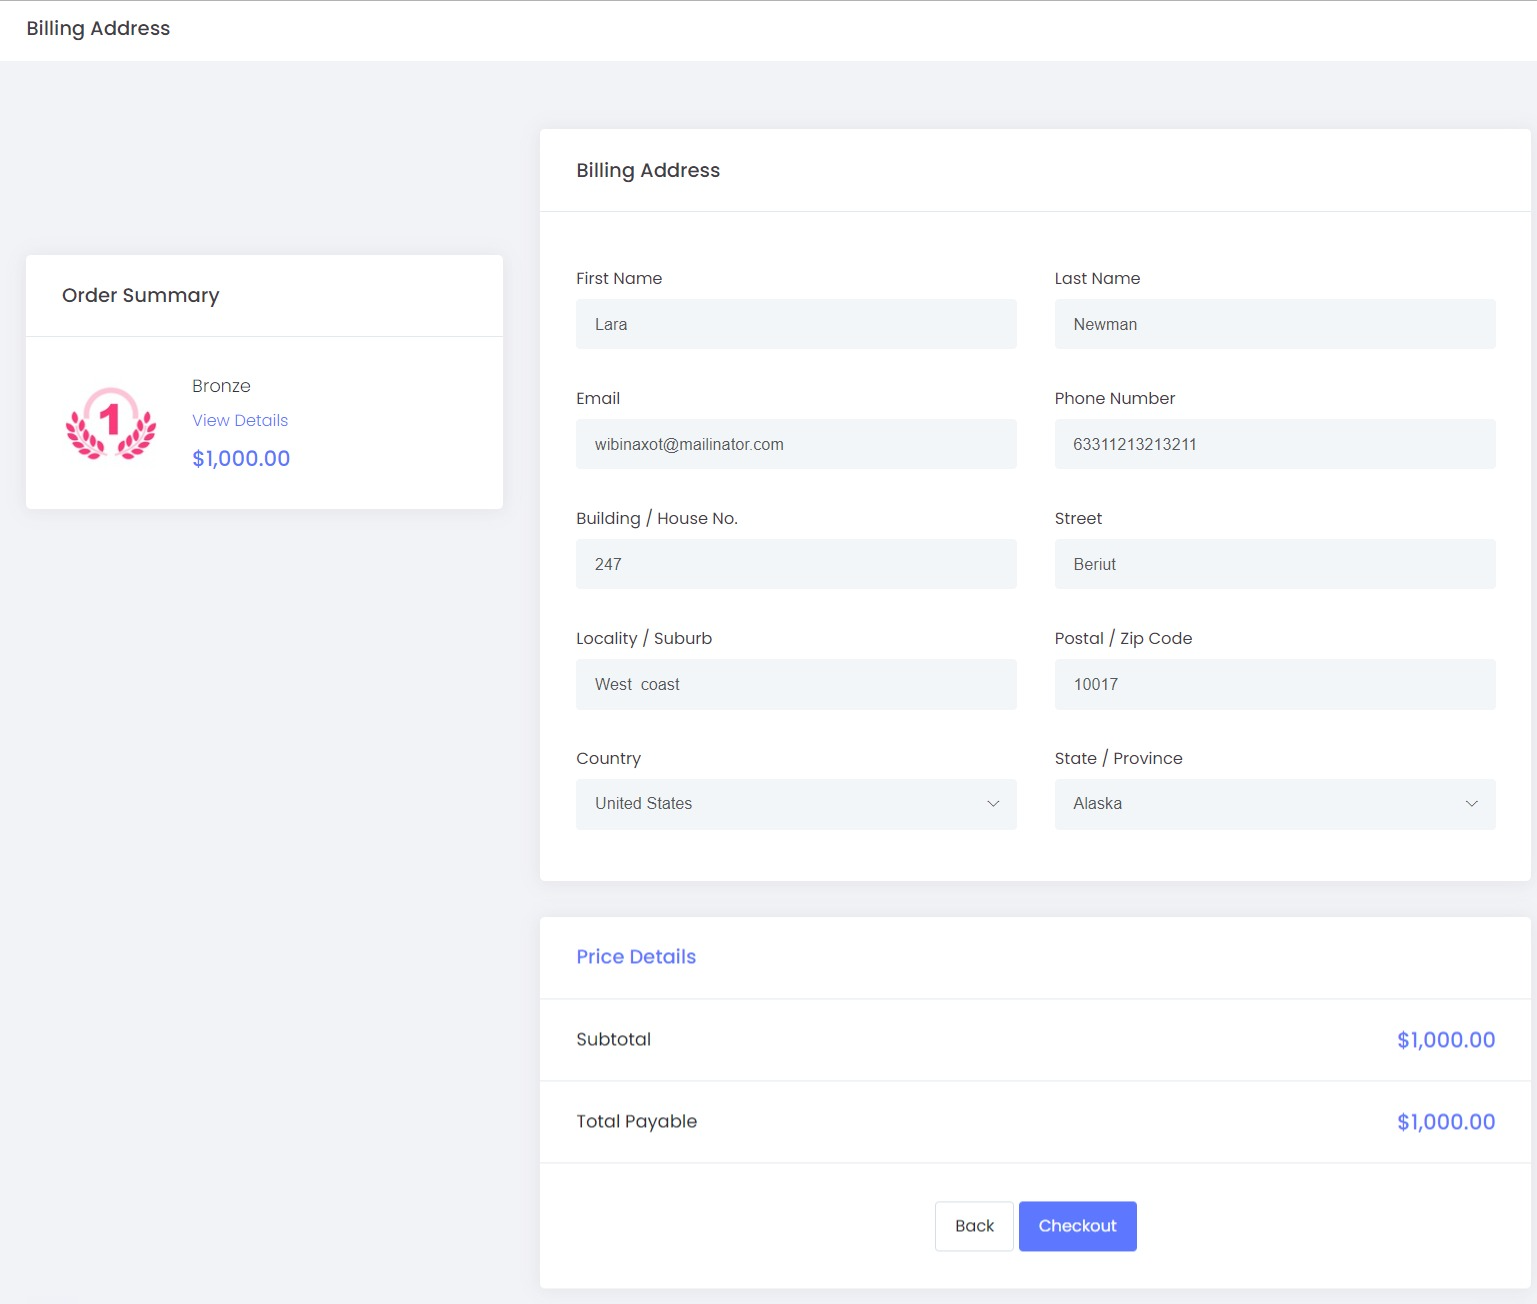
Step 4
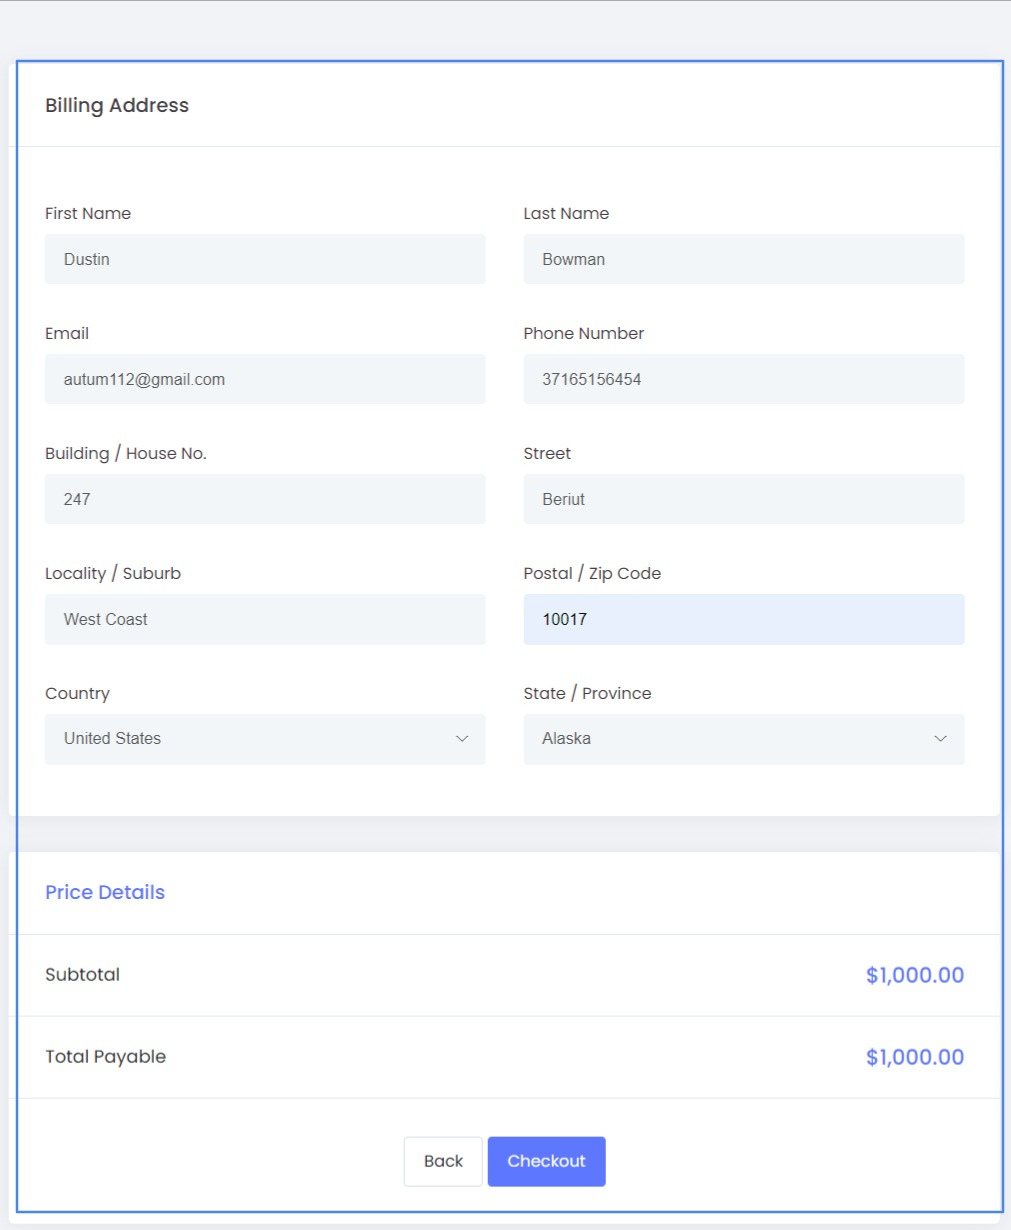
Billing details
Some of the fields will be prefilled while submitting the billing details, as per the details given in registration form. You can edit it as per the requirement and the rest of the mandatory details need to be filled.
Price details
You can verify the overall price details of the enrollment package and the amount that needs to be paid.
Step 5
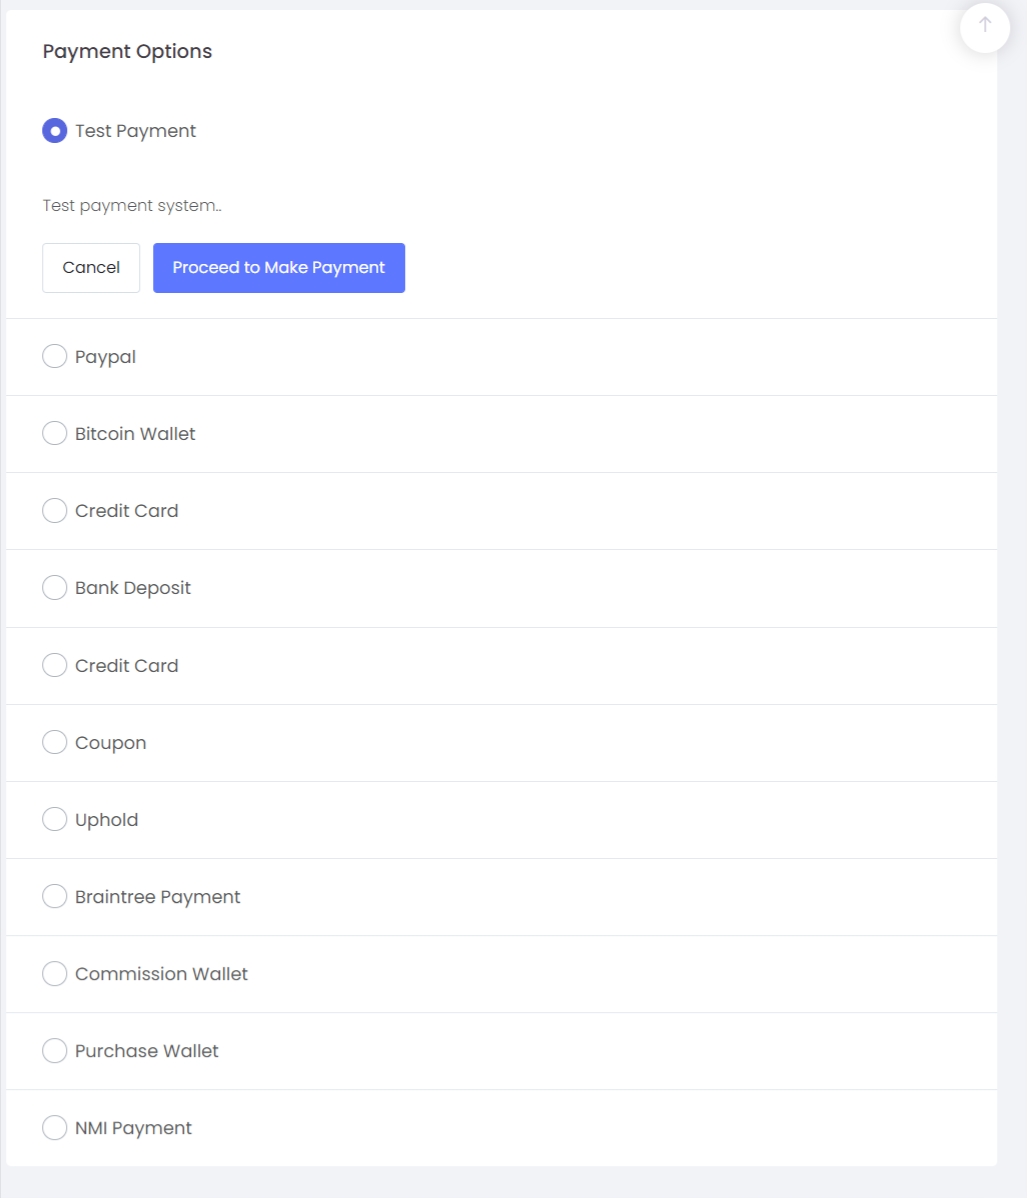
Once you check out after filling in your billing details, you will be redirected to the Review page, where you can choose the configured payment gateway. Here we are able to view the tax amount of the package also.
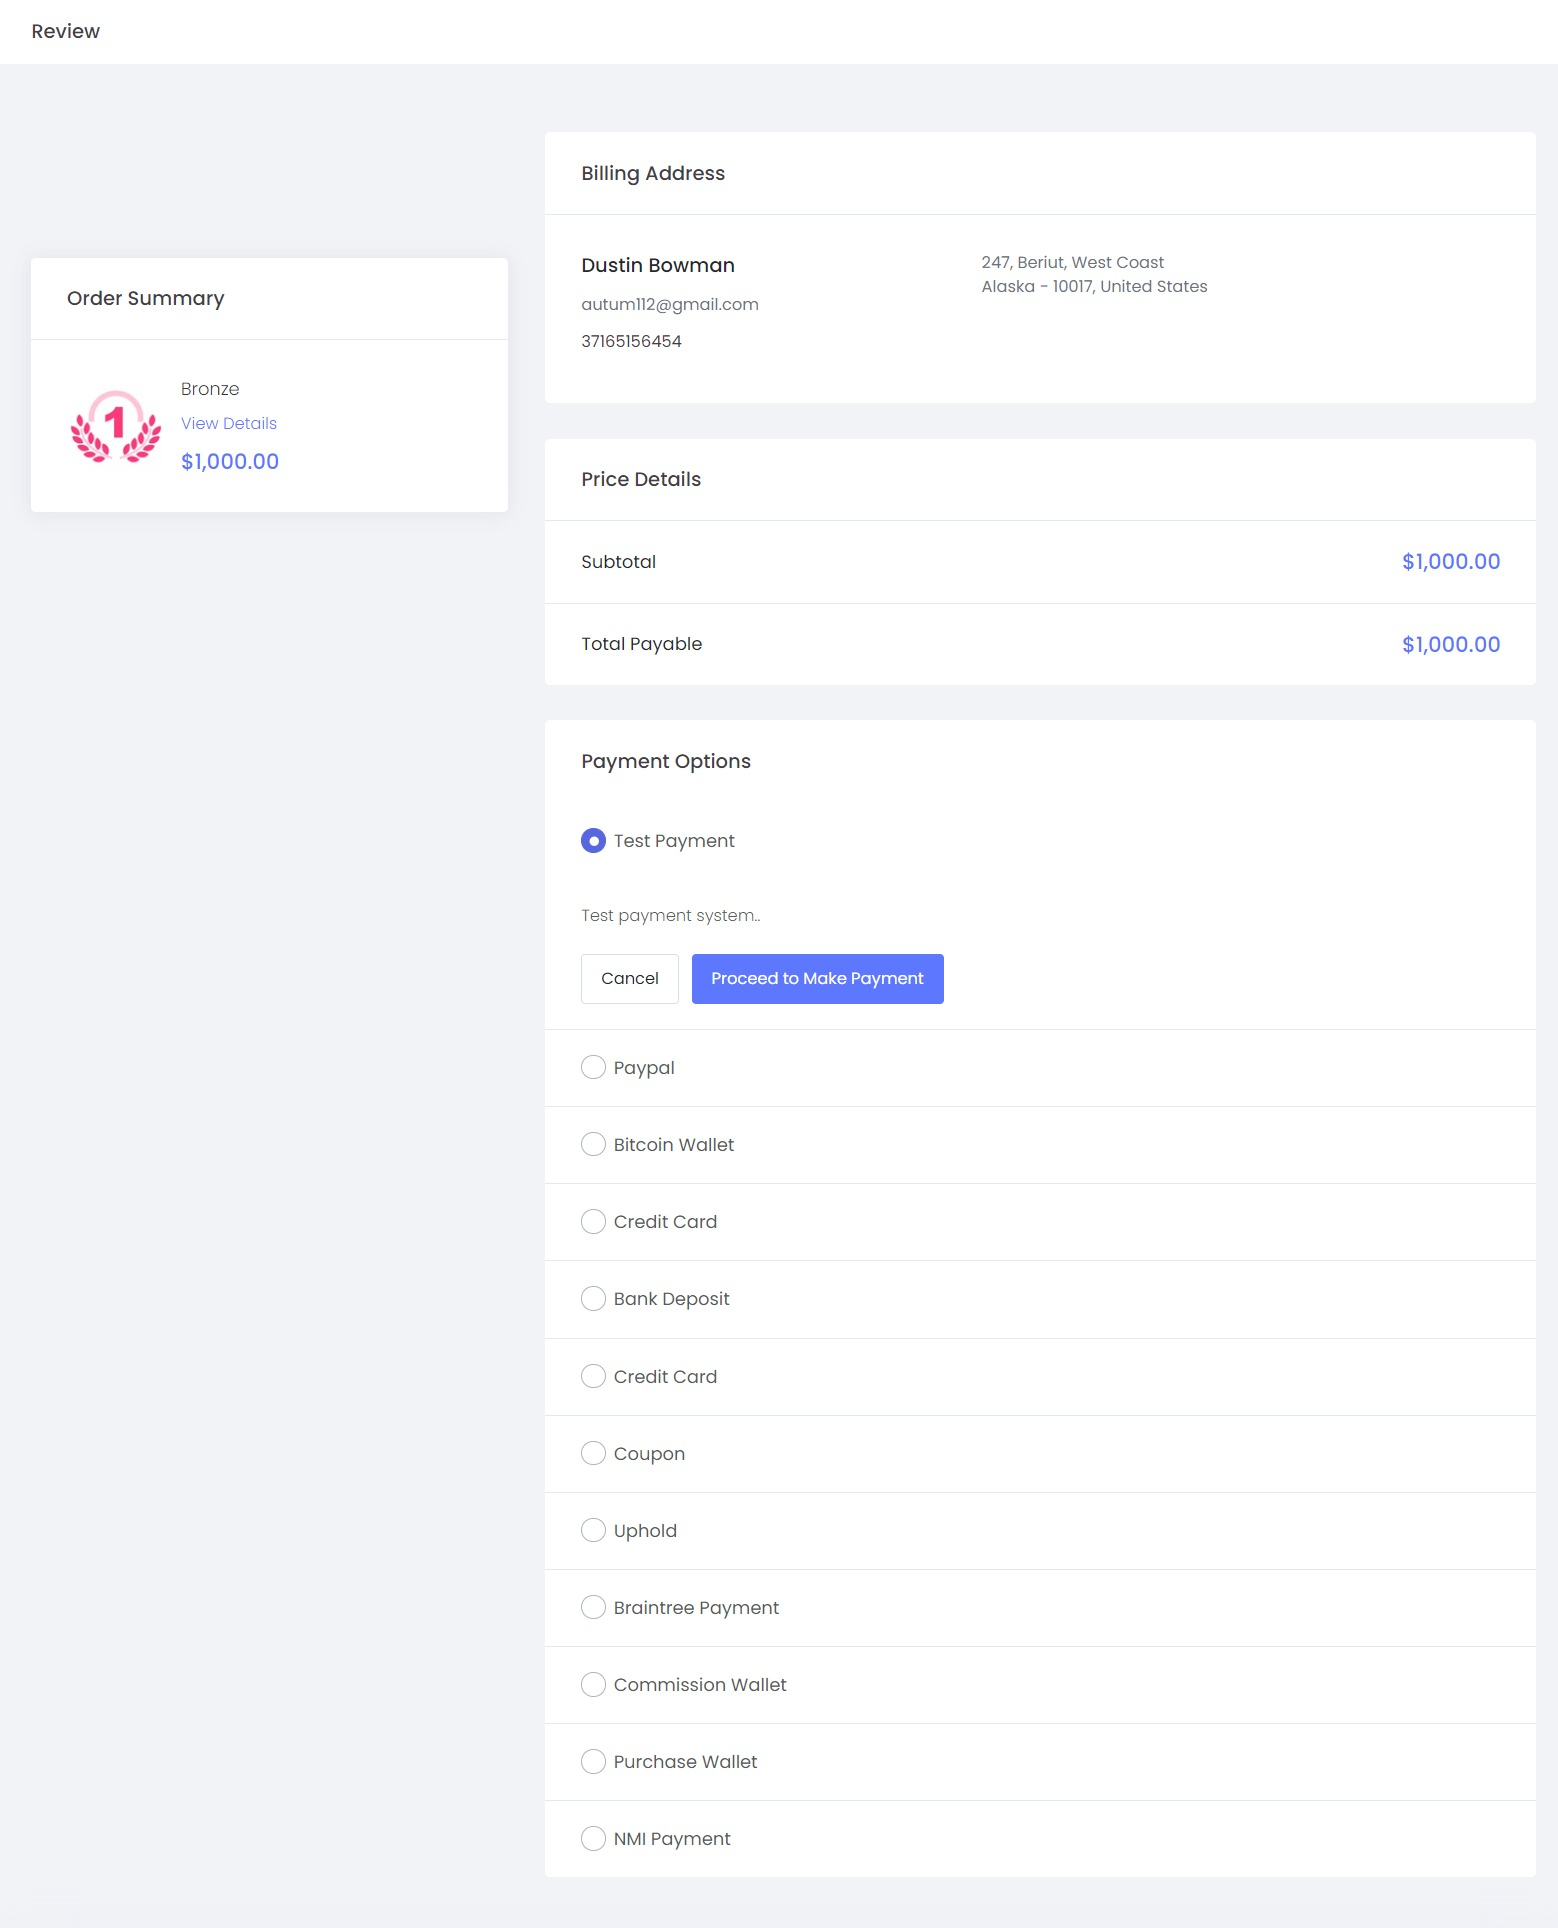
Select the payment options
You can select the payment option from the available payment method set by the admin of the system, Once you select the payment method you will be redirected to the respective payment gateway page and you have to fill in the required credentials.
Step 6
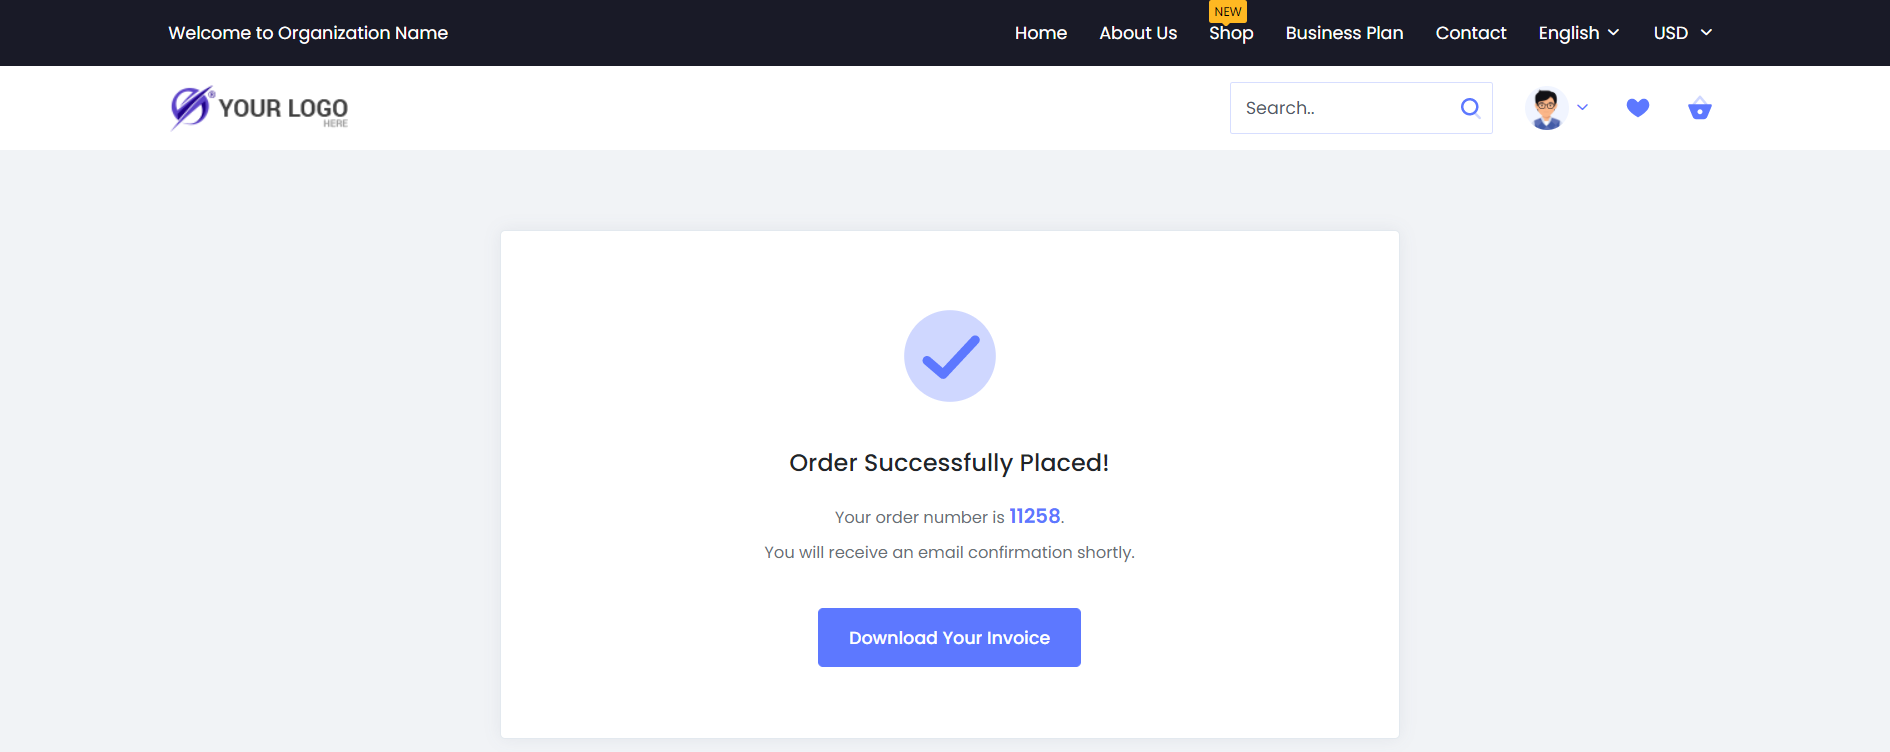
Once you check out you will be redirected to the Order Details Page
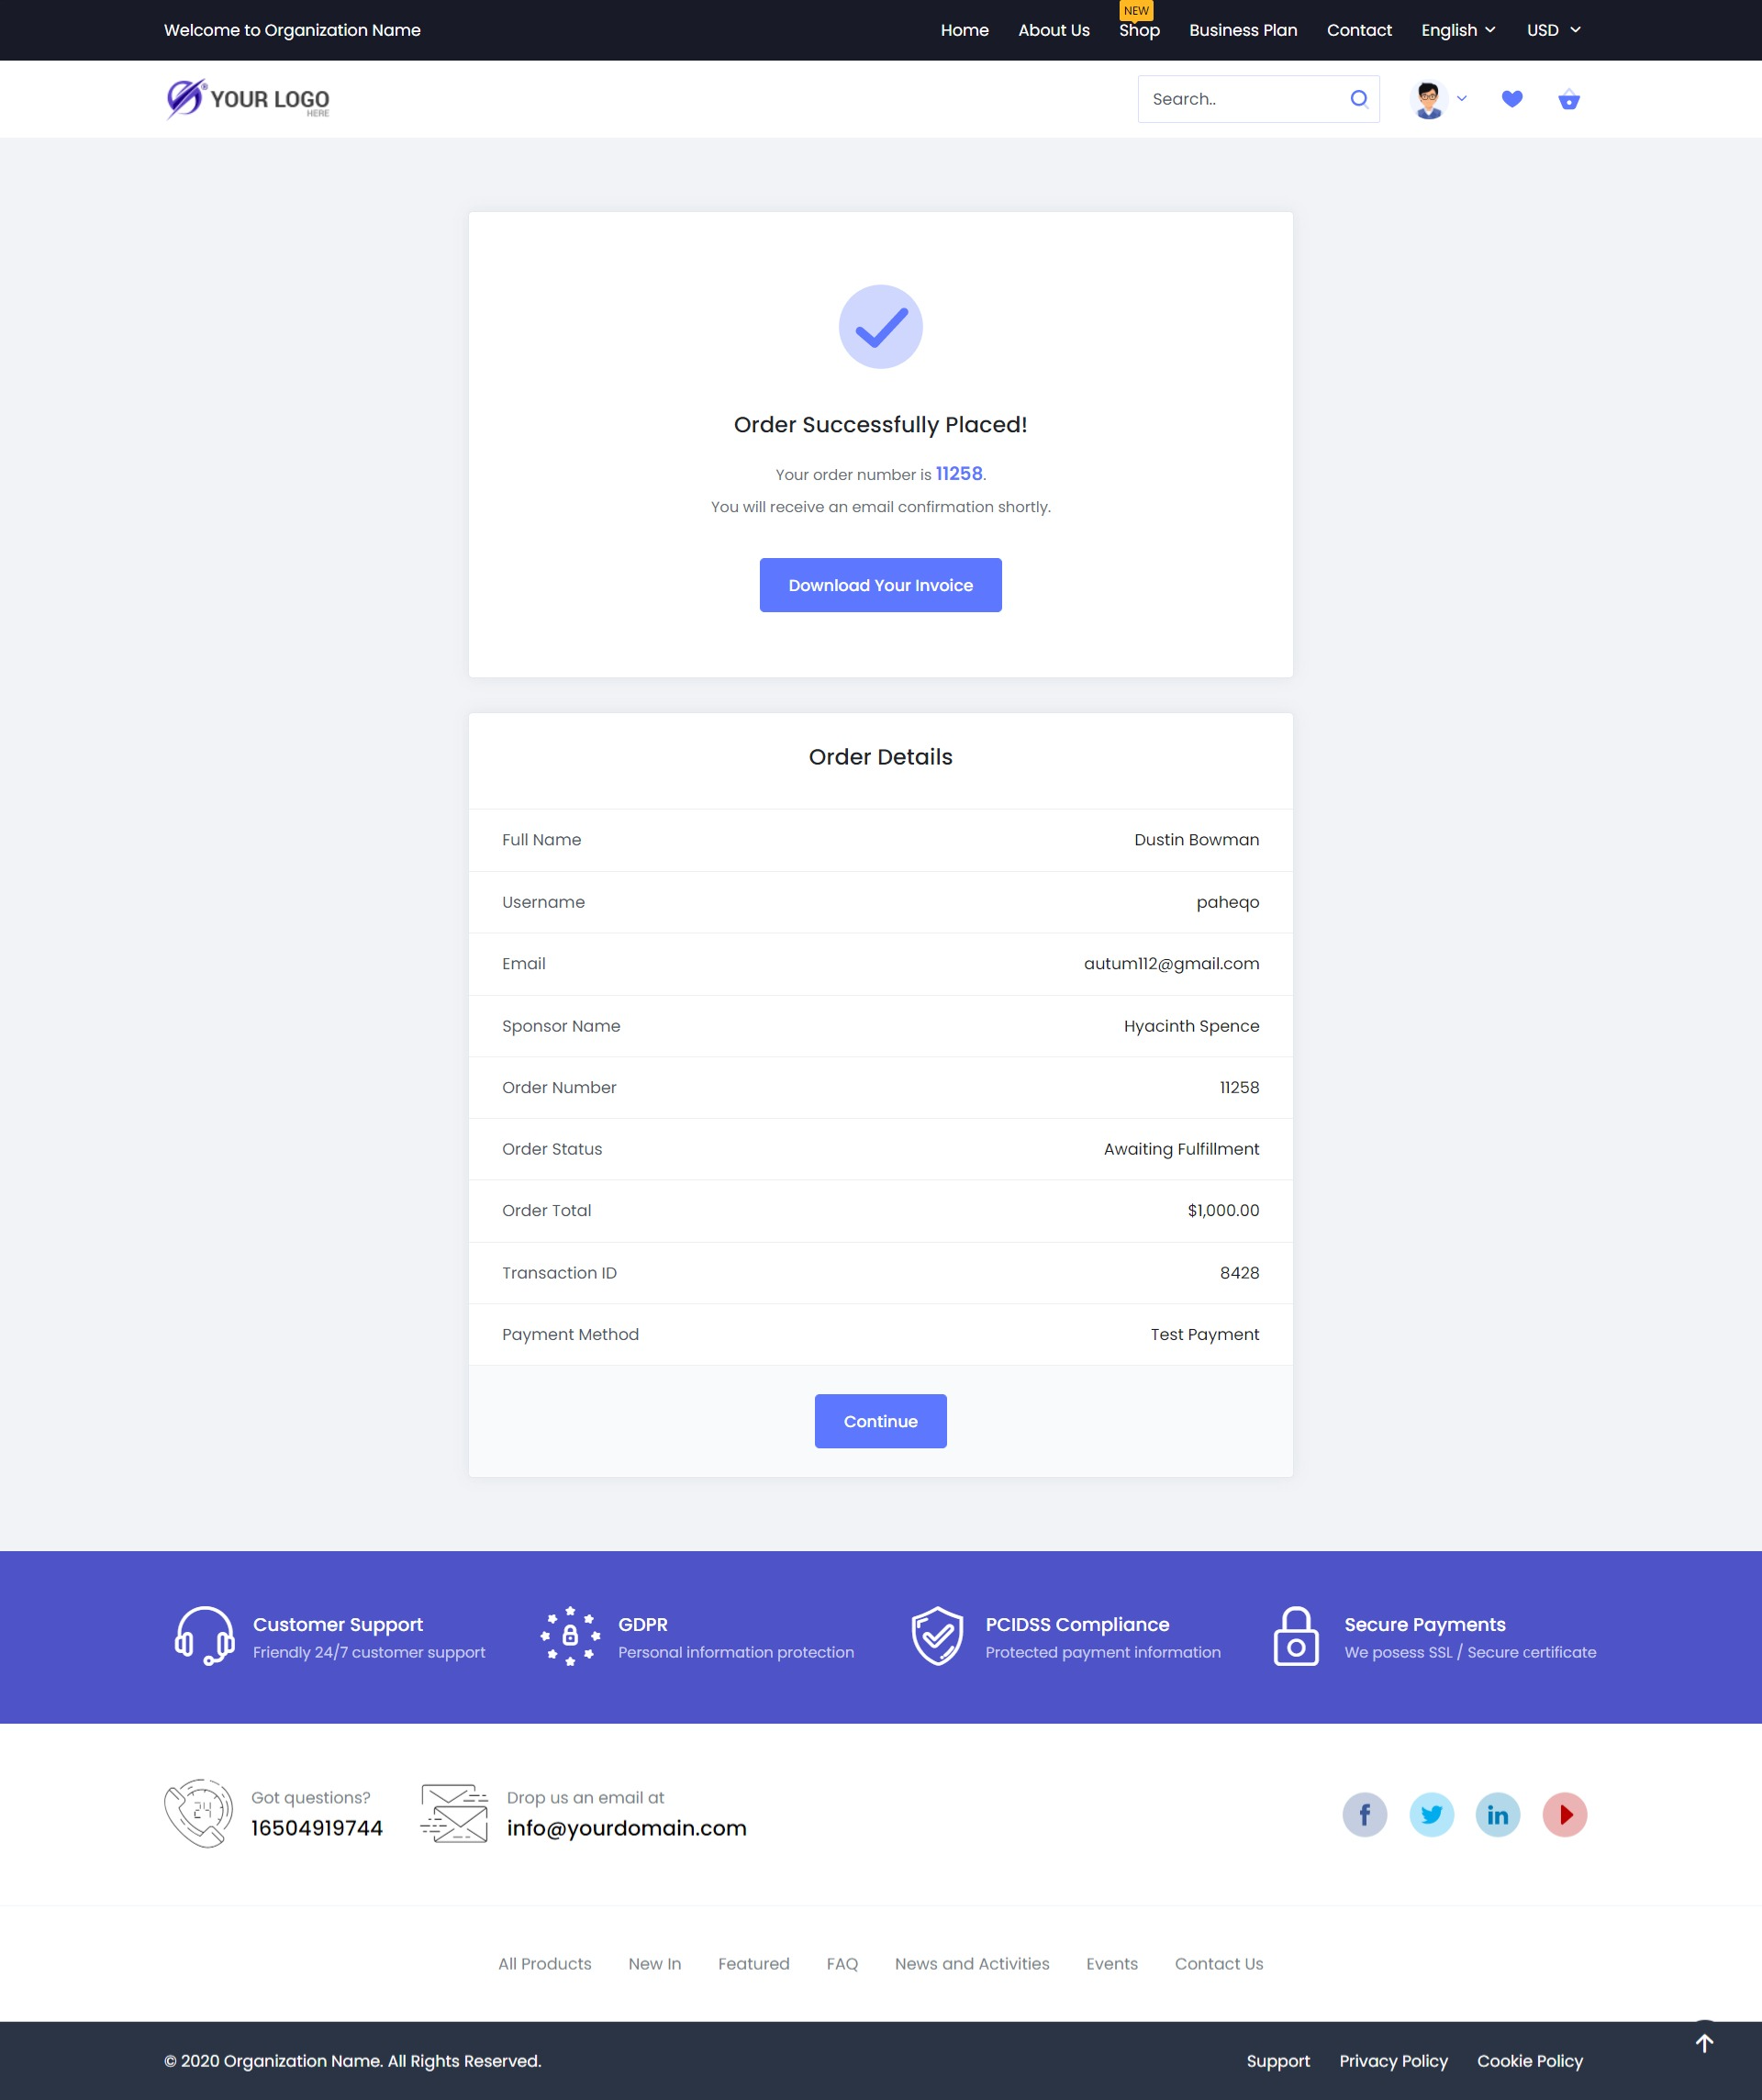
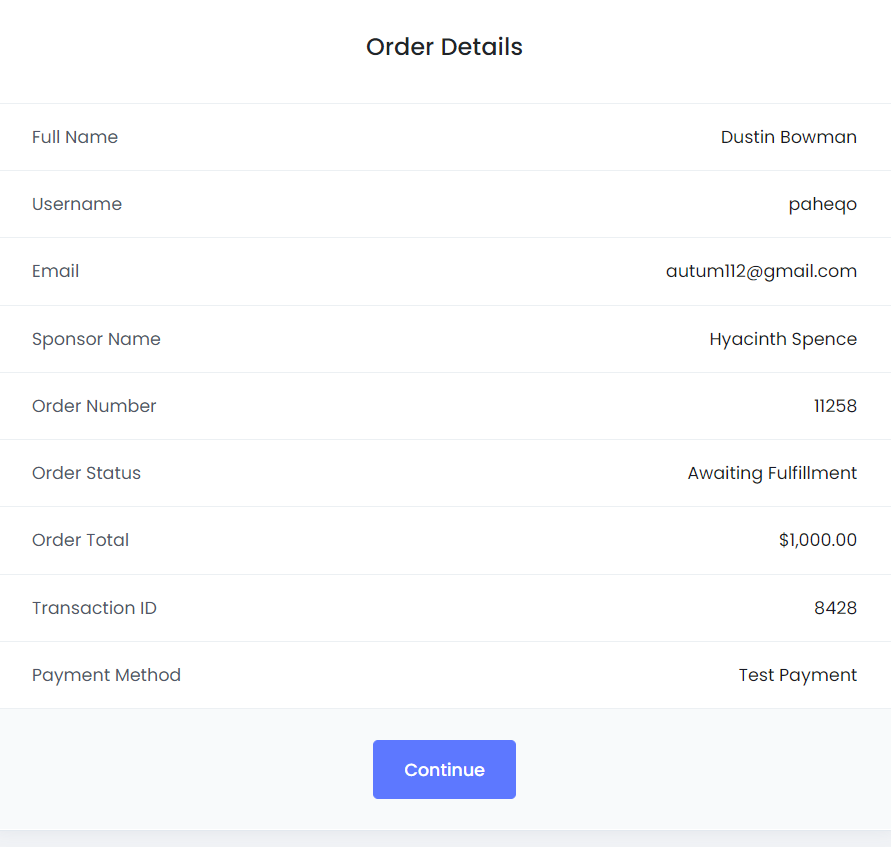
Order Details
You can see the overall order summary with the order status,order number , transaction ID and all other required details
You can also download the invoice of the order for future purpose which will be sent to your registered email address also.
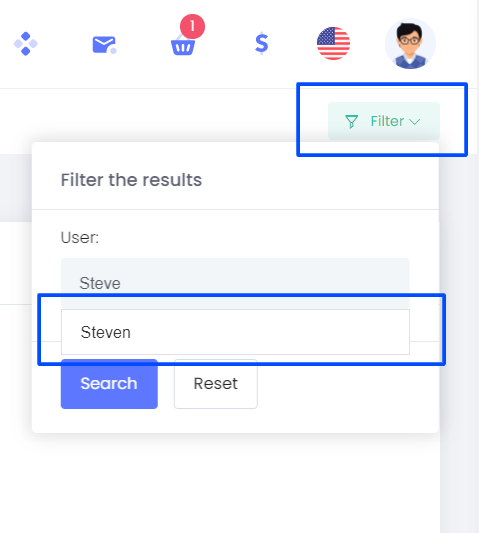
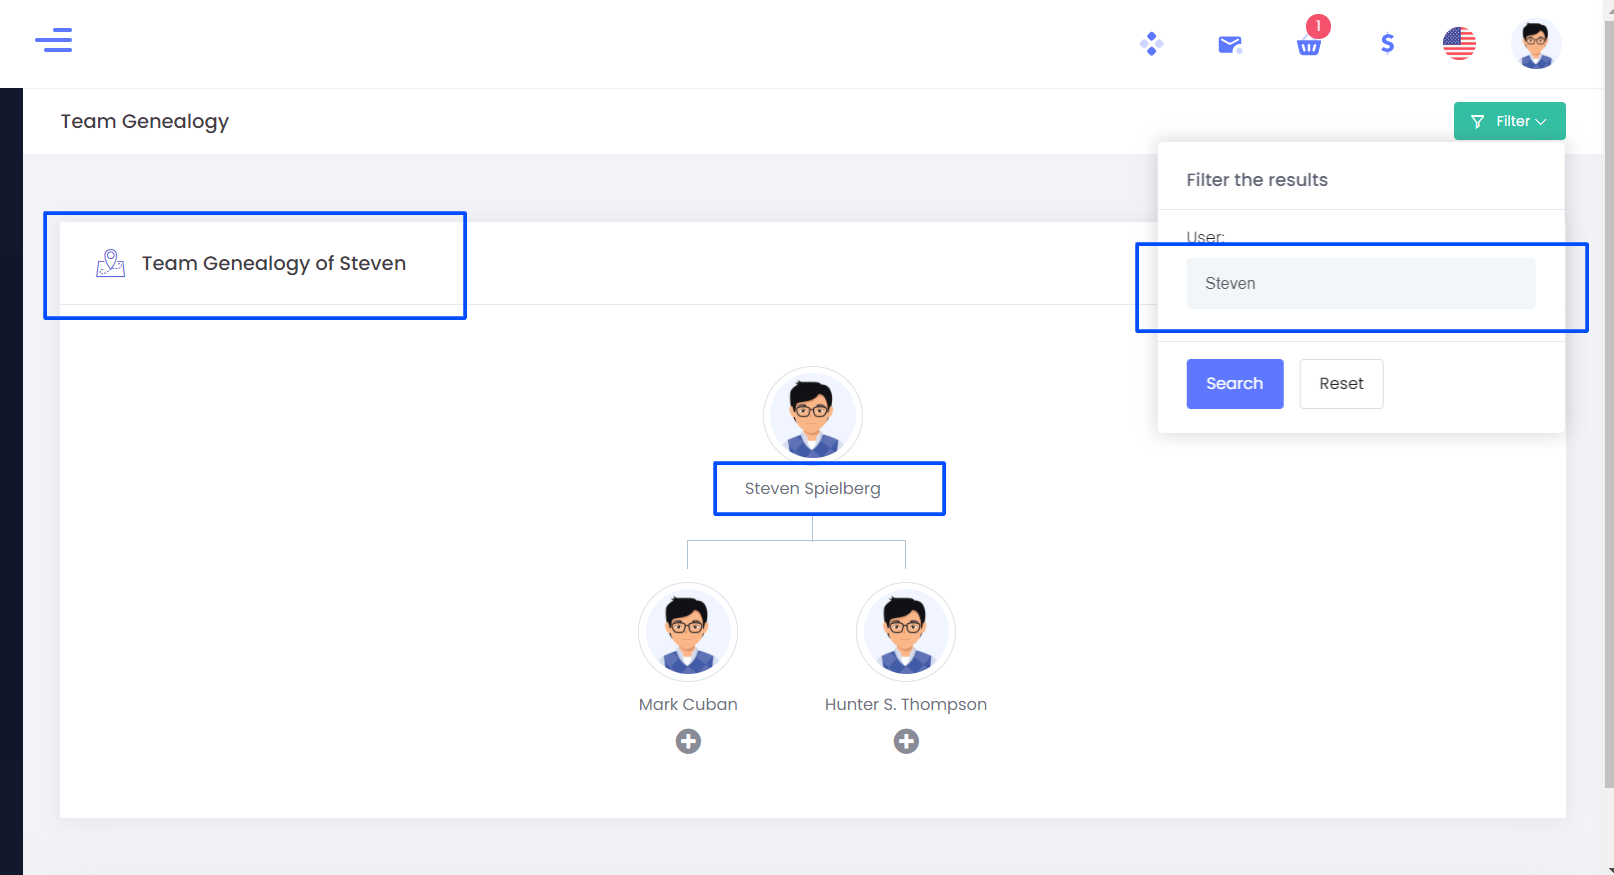
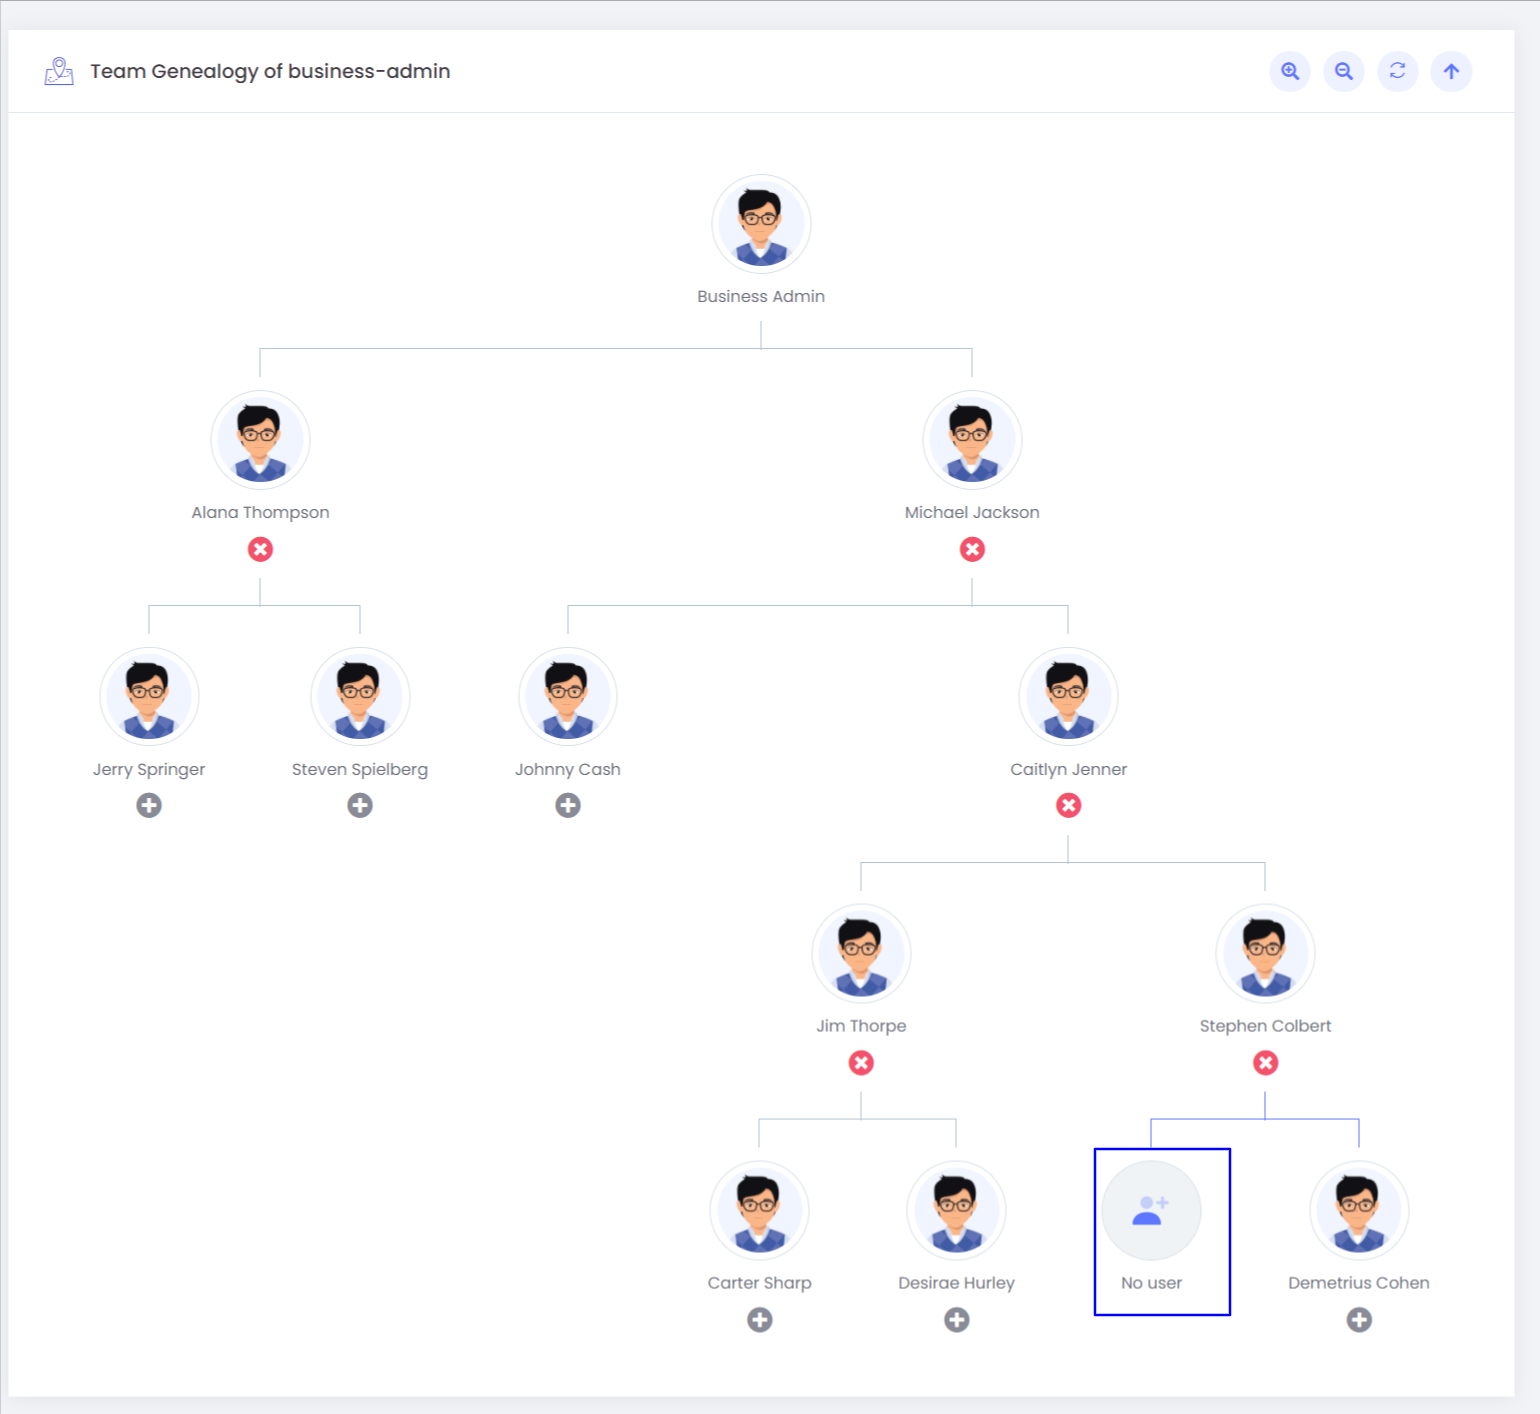
Team Geneology
Team genealogy shows the tree structure of your team showing the position of each team member in your network, the tree will be as per the plan [Binary/Matrix/ Unilevel]

Filter
Filter option helps you to reach the exact member details you are looking for by submitting the username
Zoom in
You can view the tree zooming as per your requirement.
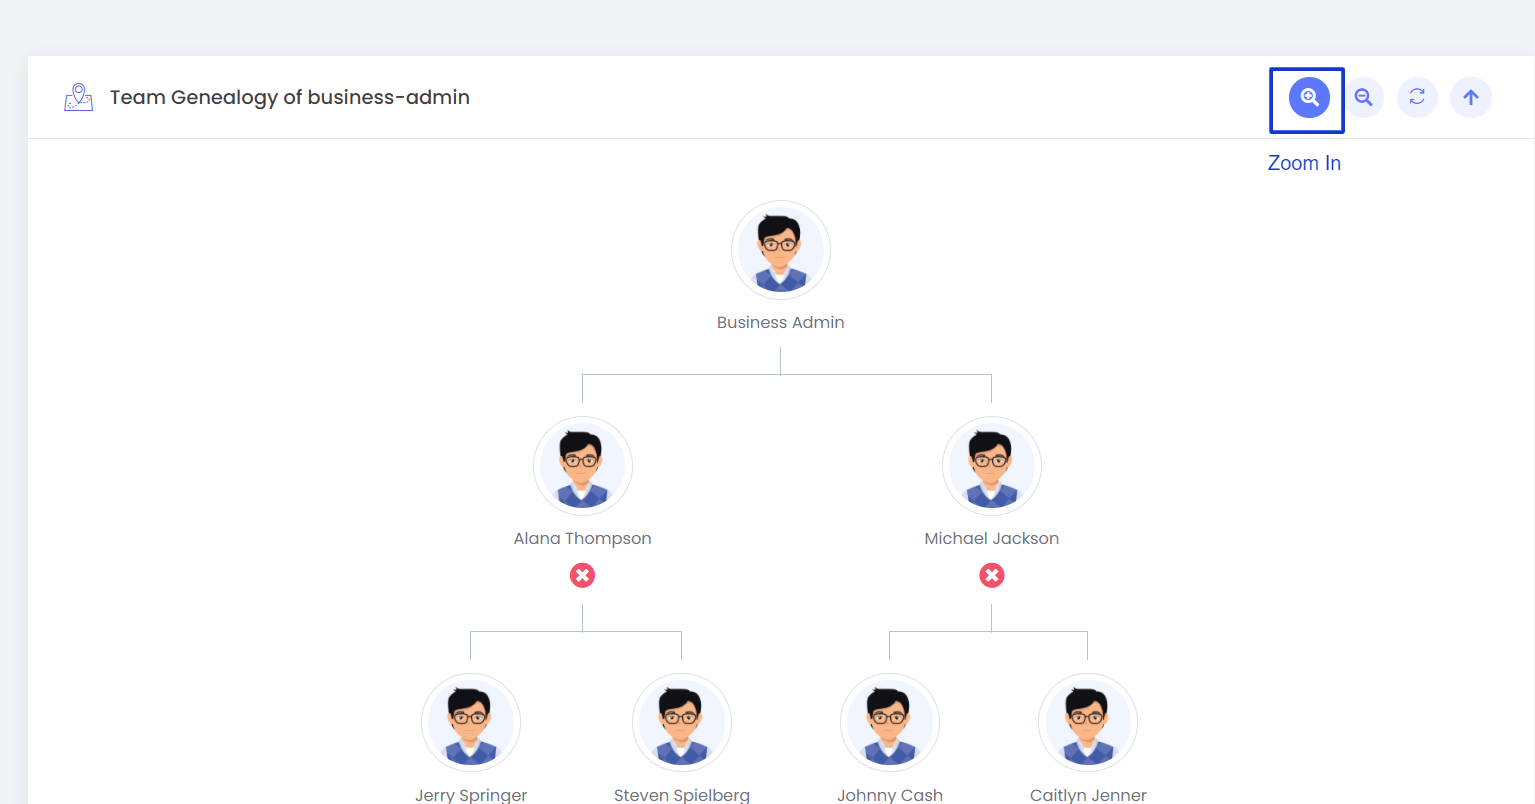
Zoom out
You can view the tree zoom out as per your requirement.
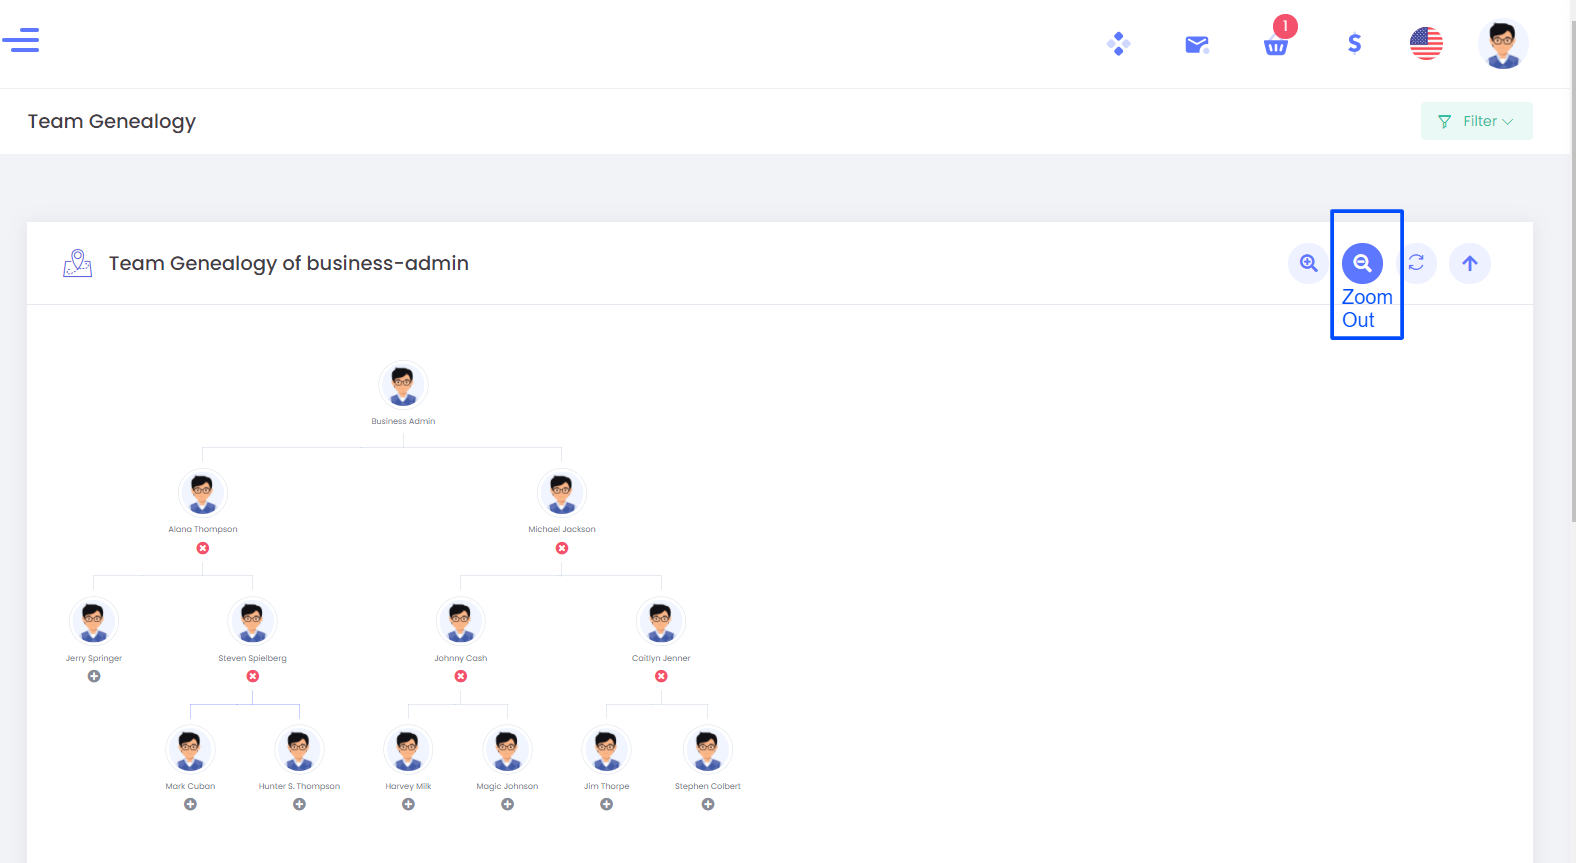
Reset
You can reset the tree structure and bring it back to the default view.
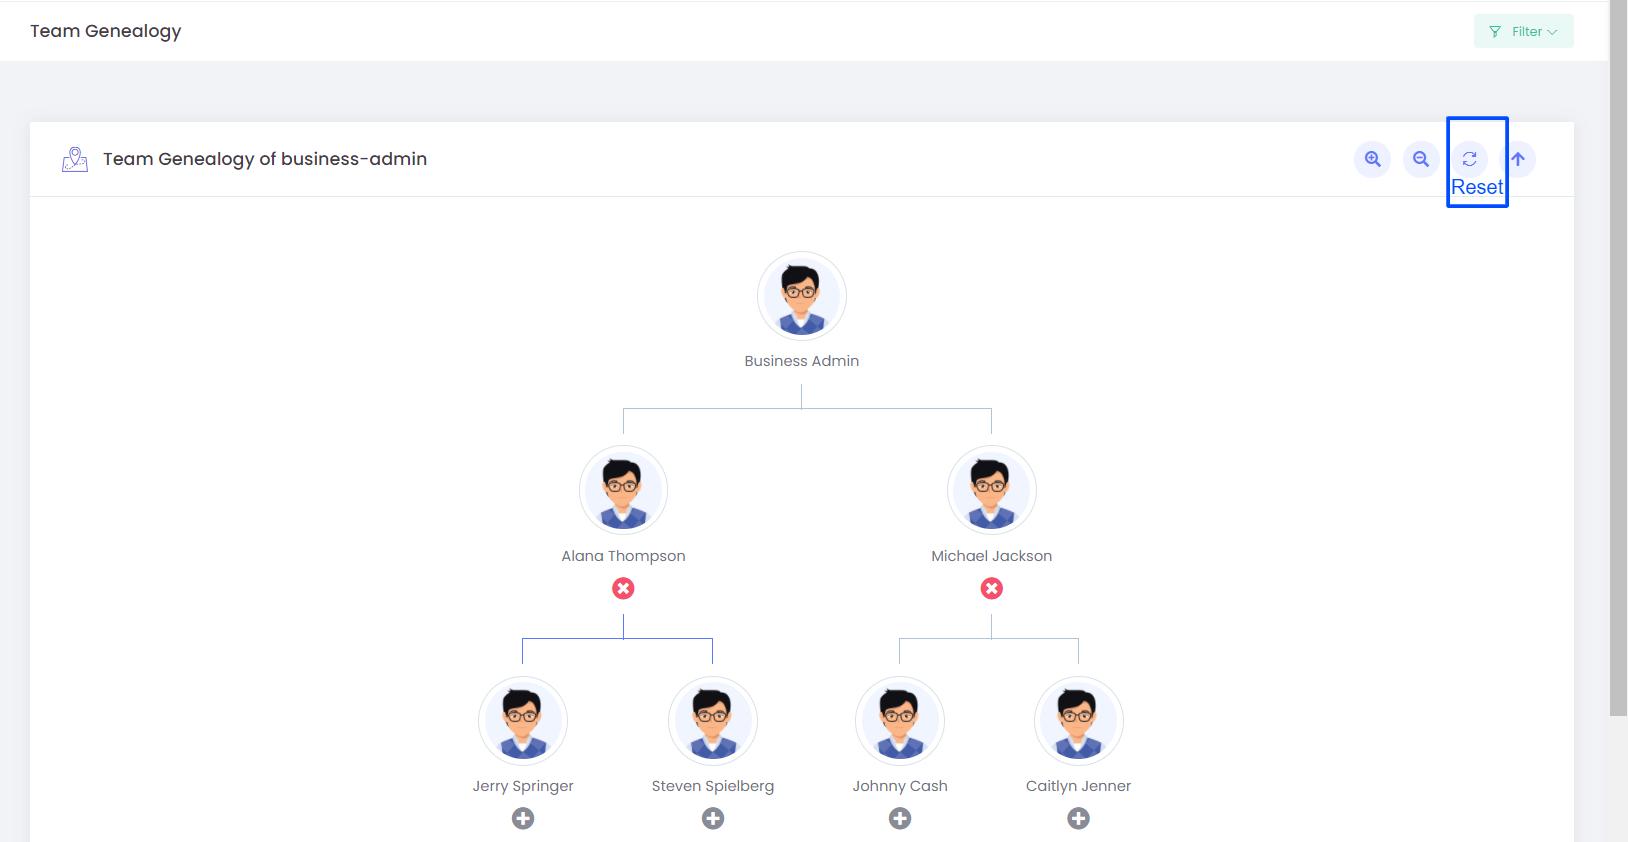
Up arrow
You can reach the top of the tree from the wherever point when you are using the Up arrow.

Adding New Members From Genealogy Tree
You can add a new user from the team tree structure so the new member will be added to the position selected.
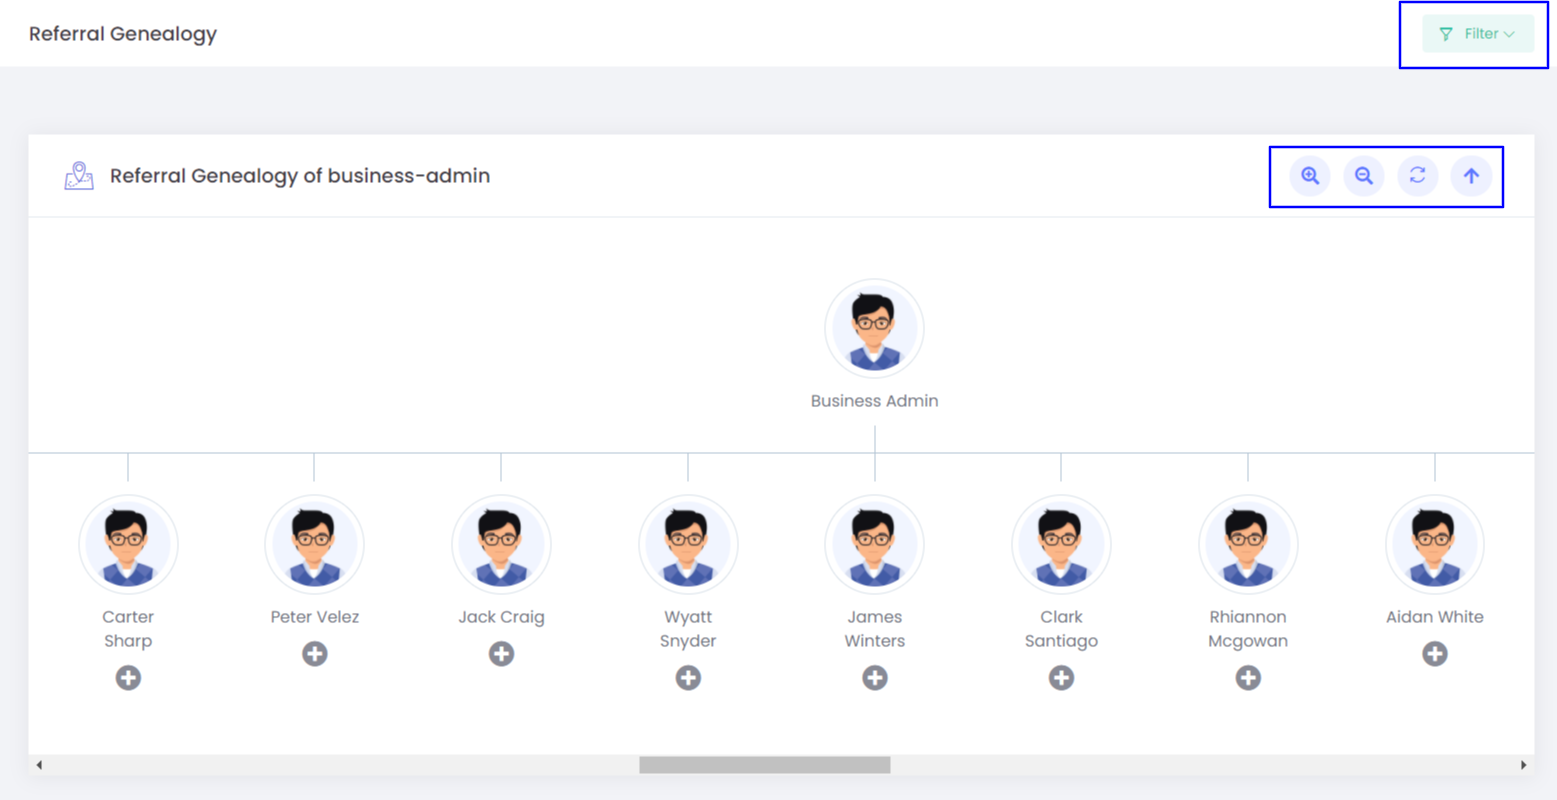
Referral Genealogy (Sponsor line Genealogy)
Sponsor line genealogy shows the referral structure of your team showing the sponsor line of each member in your network, the tree will be Unilevel.
Filter
The filter option helps you to reach the exact member details you are looking for by submitting the username.
Zoom in
You can view the tree zoom in as per your requirement.
Zoom out
You can view the tree zoom out as per your requirement.
Reset
You can reset the tree structure and bring it back to the default view.
Up arrow
You can reach the top of the tree from wherever point you are using the Up arrow.
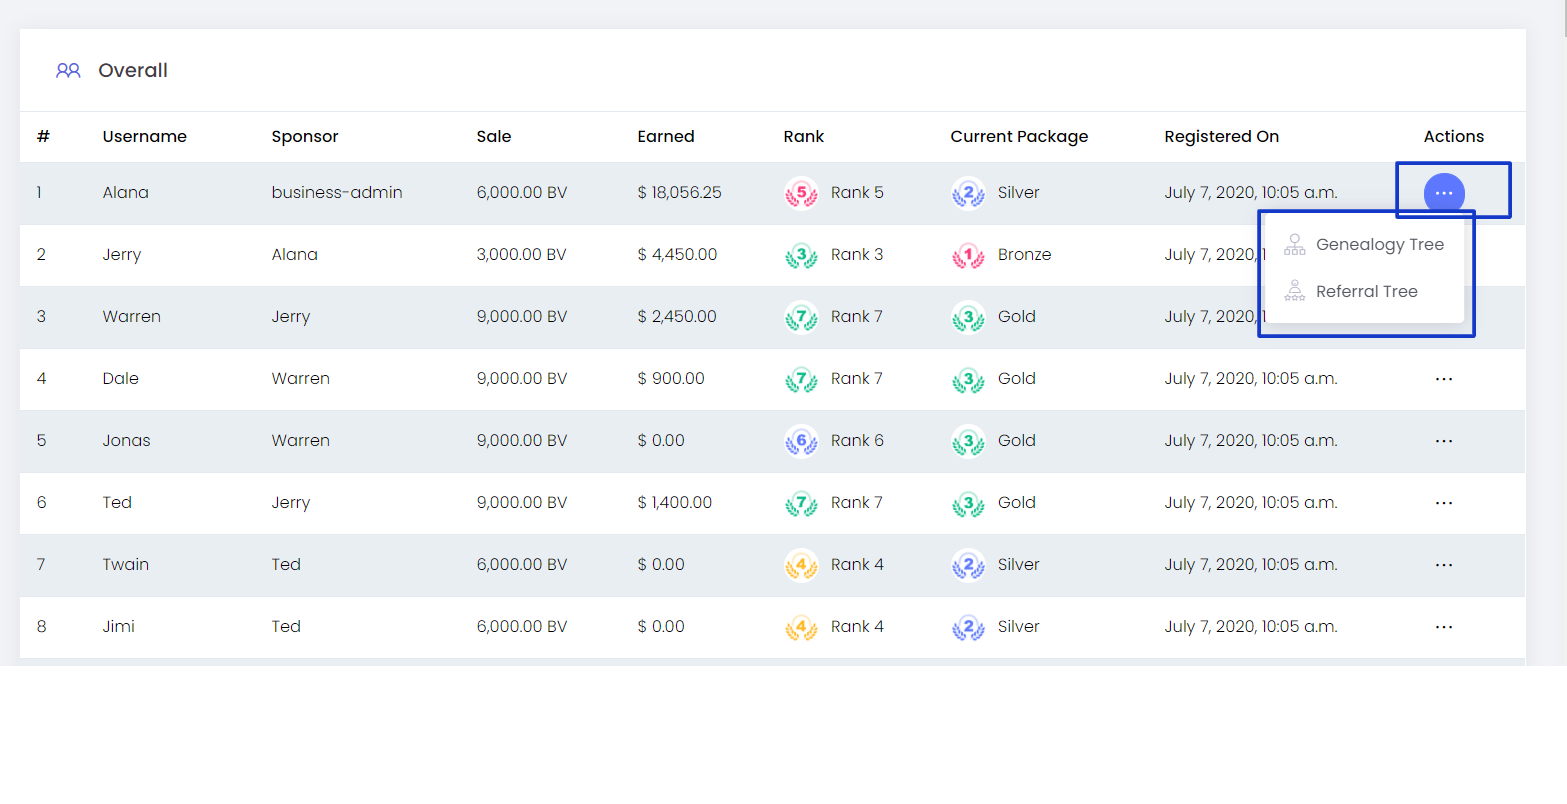
Refferal downline
Referral downline shows the details of directly referred members of your network.
Overall
All the member details who joined the network will be shown if you select overall.
This month
All the member details who joined this month will be shown if you select this month.
Filter
Filter option help you to reach the exact member details you are looking for by submitting the username
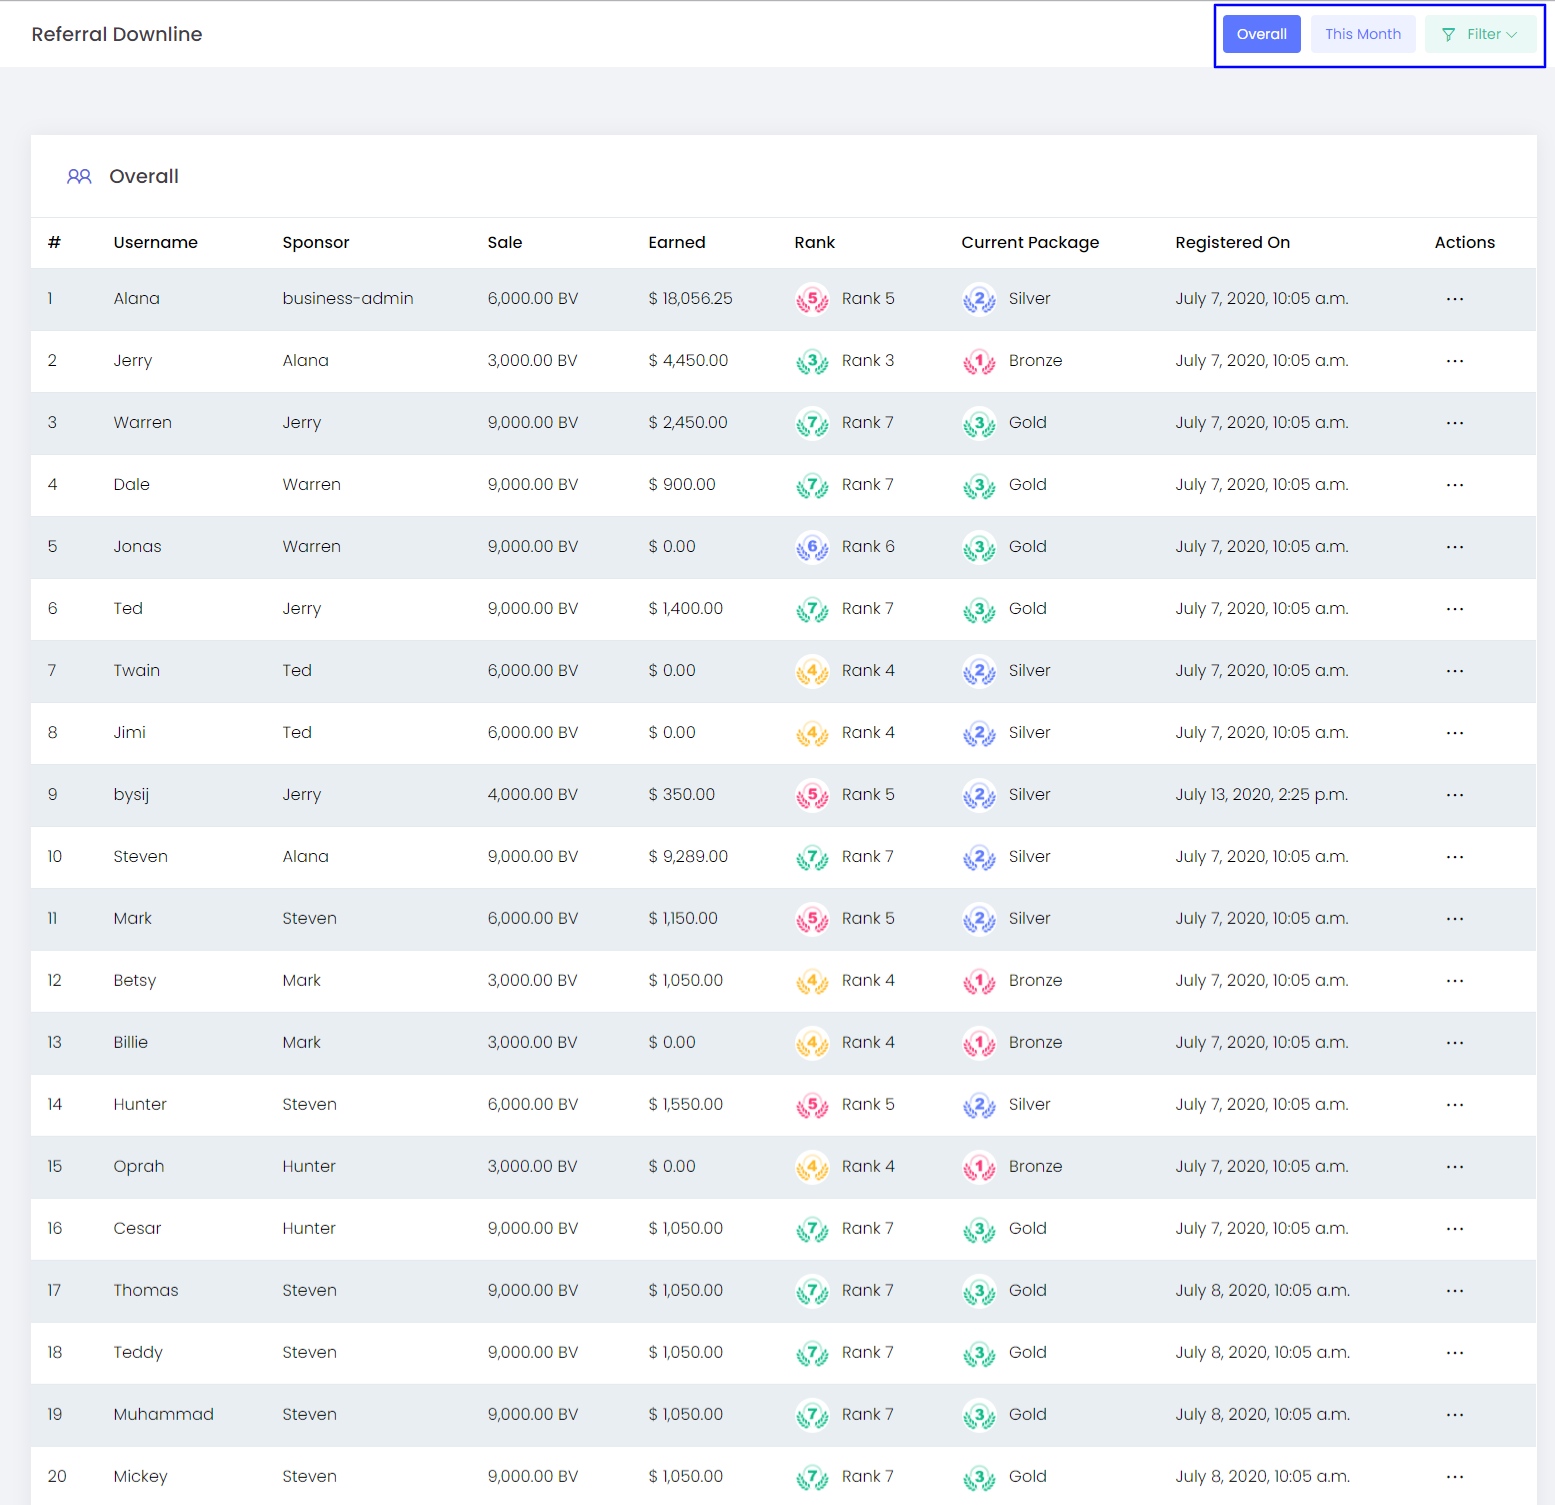
Member details
Username -User name of the team member which was given while registration
Sponsor - This shows Team members sponsors username
Sales-This shows the total sales volume generated by the team member as Business volume [BV].
Earned-This shows the total amount earned by the team member.
Rank- It shows the current achieved rank of the team member.
Current package - This shows the current selected package of the team member.
Registered on - This shows the registered date of the team member.
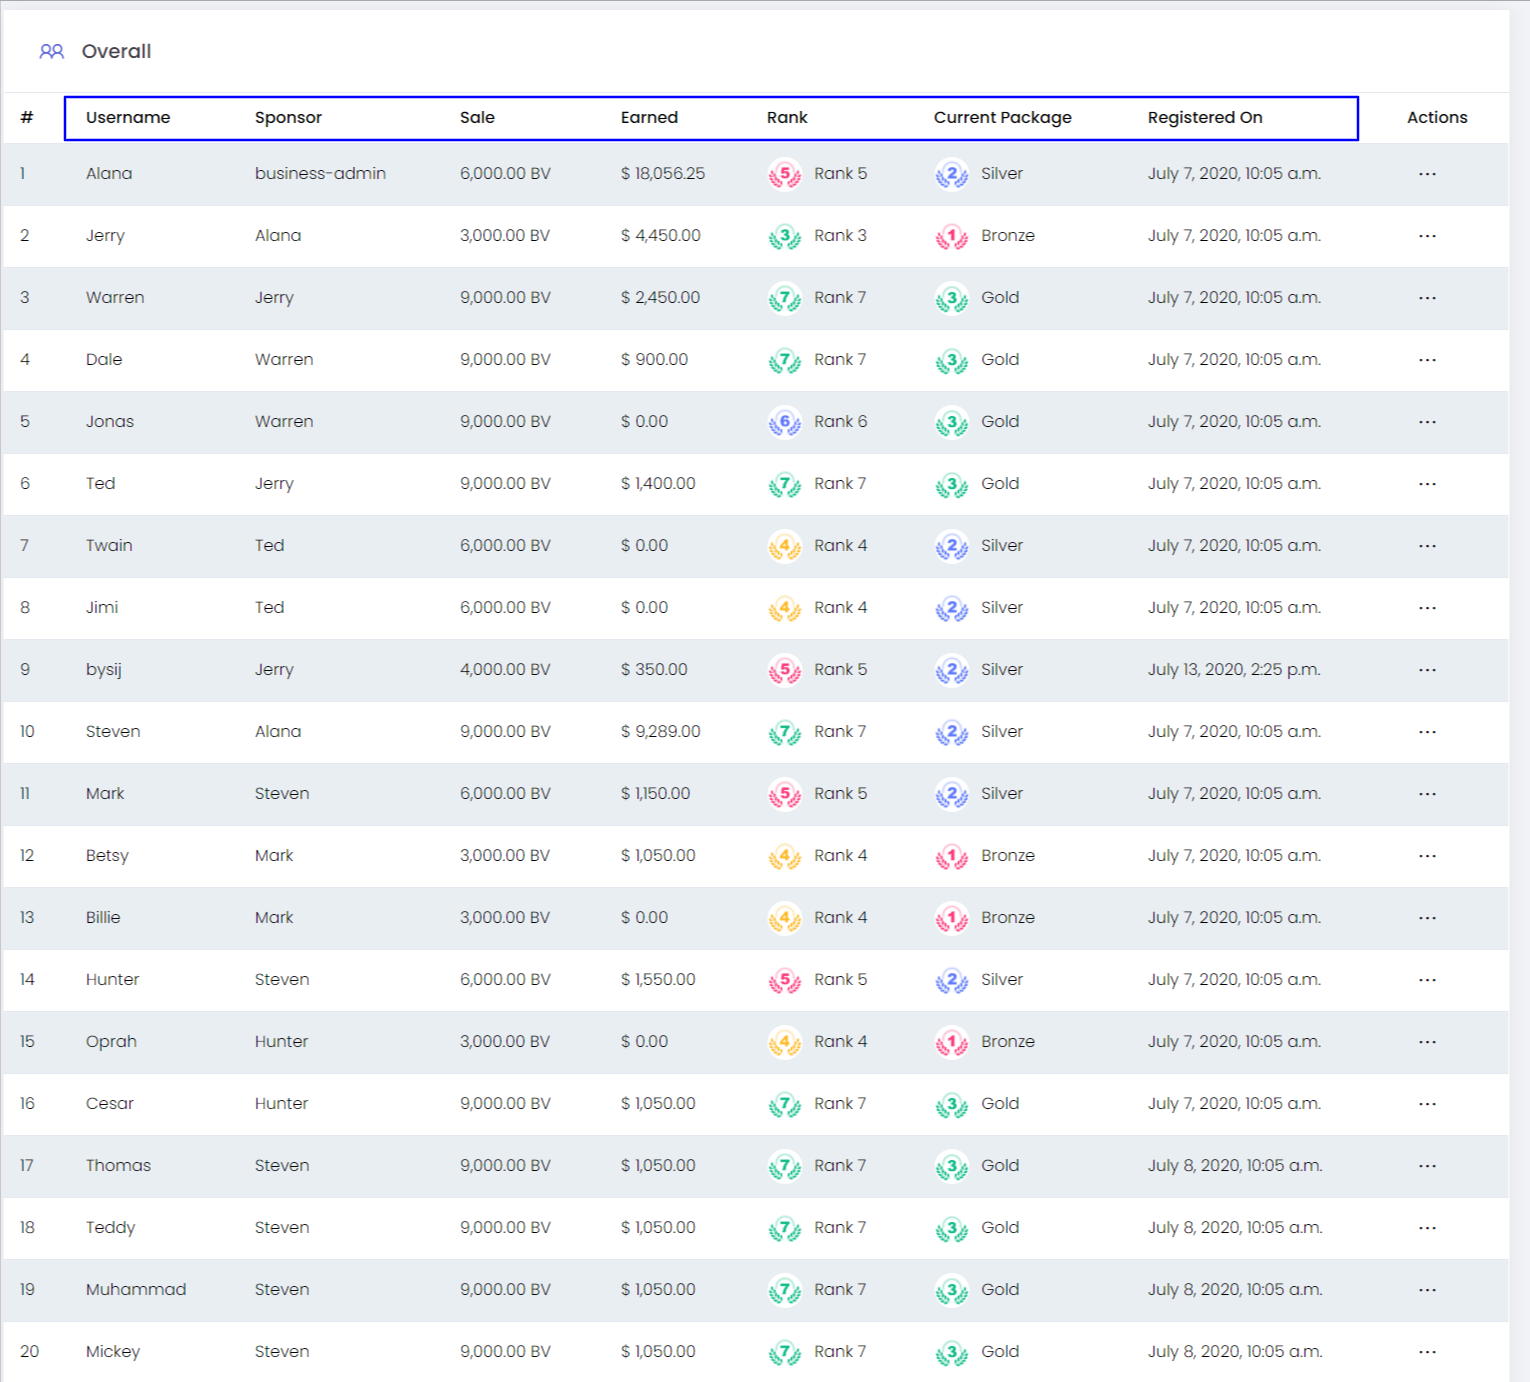
Actions - You can reach the tree structure of the team member via actions.
- Genealogy tree
- Referral tree
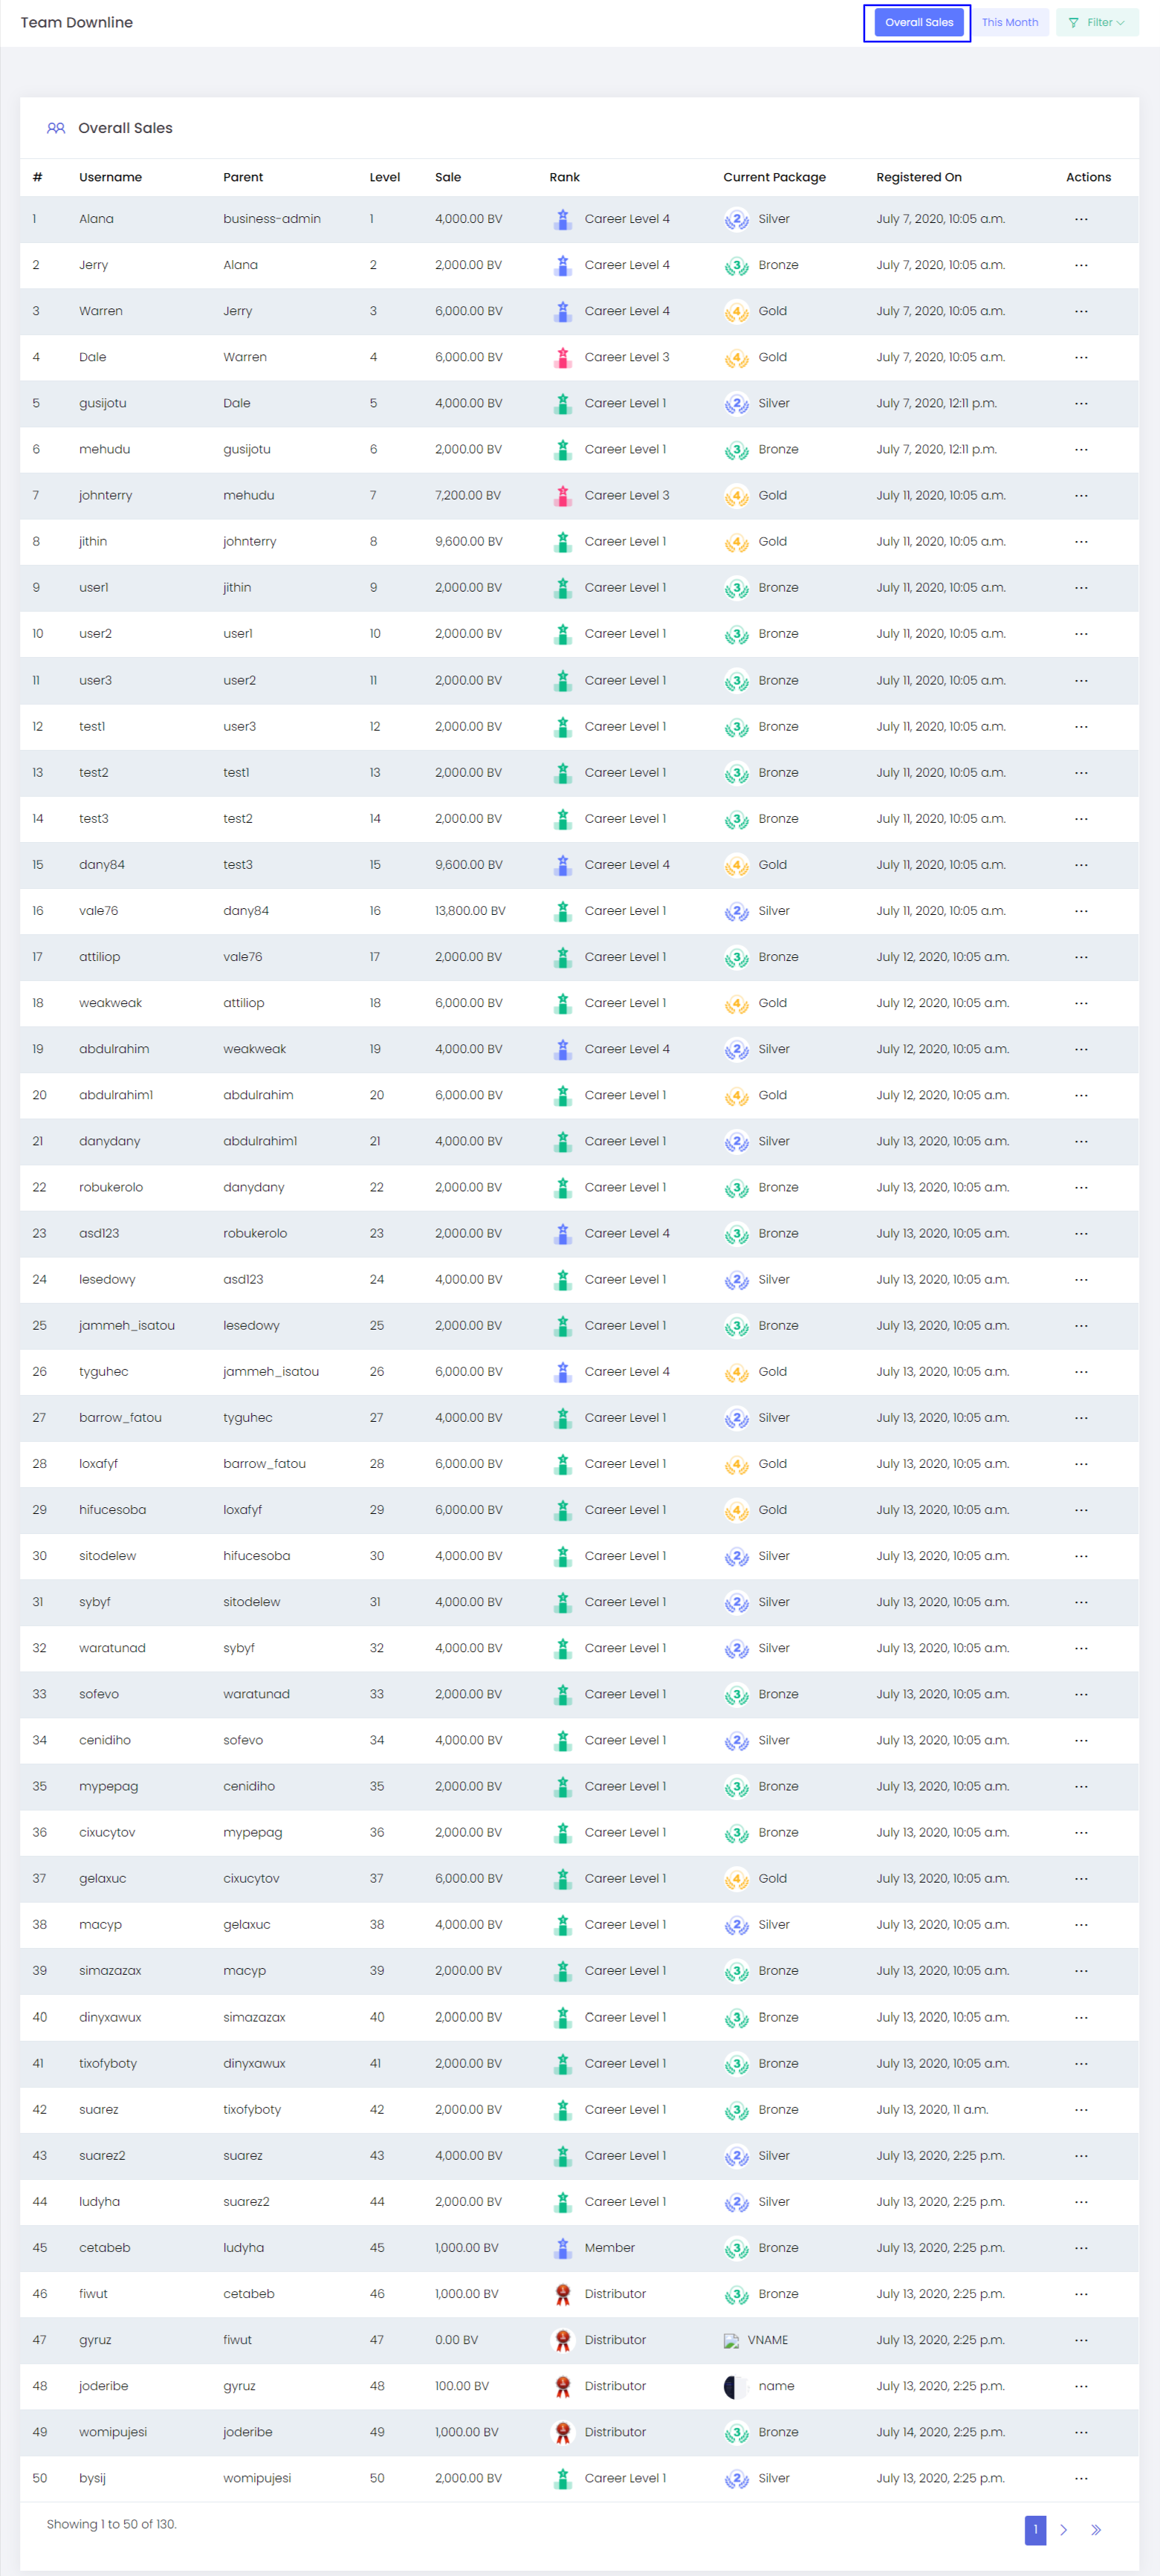
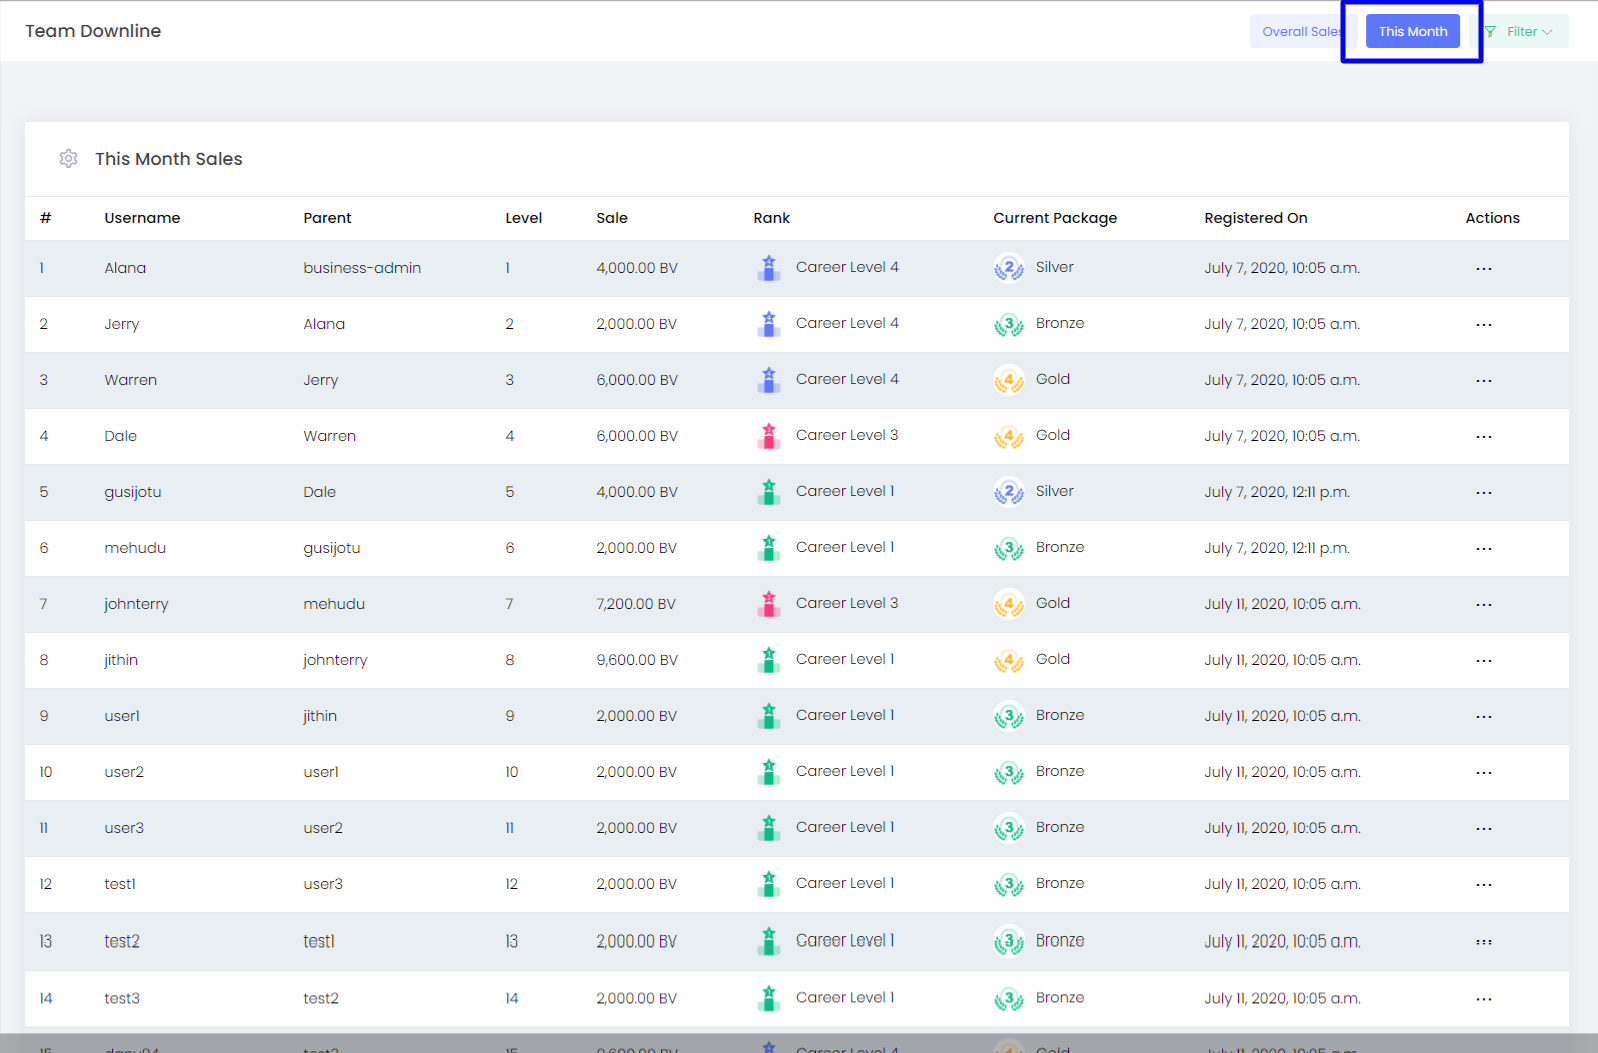
Team Downline
Team downline shows the details of all the members of your network.
Overall
All the member details who joined the network will be shown if you select overall.
This month
All the member details who joined this month will be shown if you select this month.
Filter
Filter option help you to reach the exact member details you are looking for by submitting the username, From date and To date
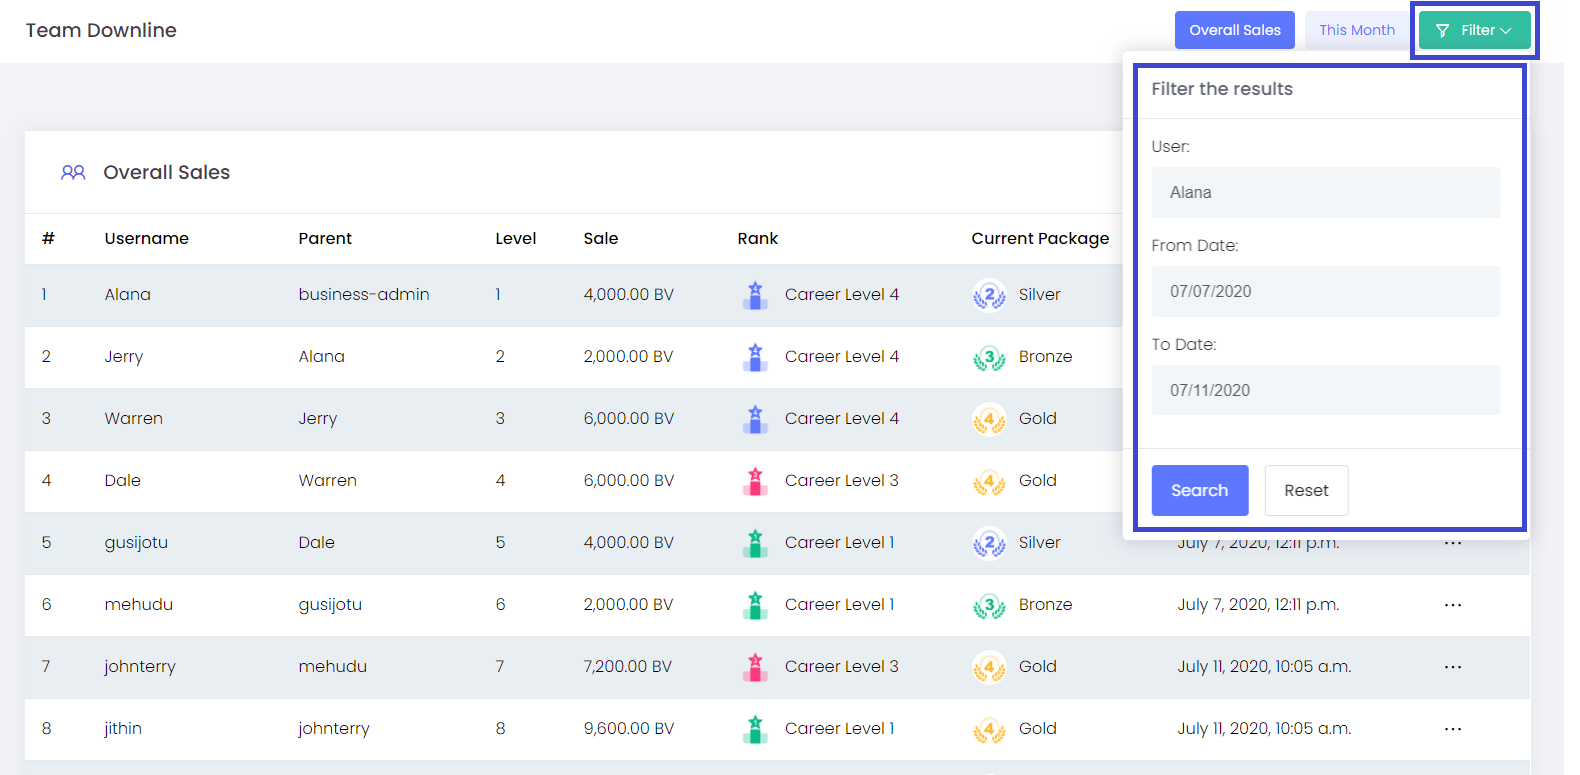
Member details
- Username -User name of the team member which was given while registration
- Parent -Team member’s parents username
- Level - The team members level in your team genealogy tree
- Sales -This shows the total sales volume generated by the team member as Business volume [BV].
- Earned -This shows the total amount earned by the team member.
- Rank - It shows the current achieved rank of the team member.
- Current package - This shows the current selected package of the team member.
- Registered on - This shows the registered date of the team member.
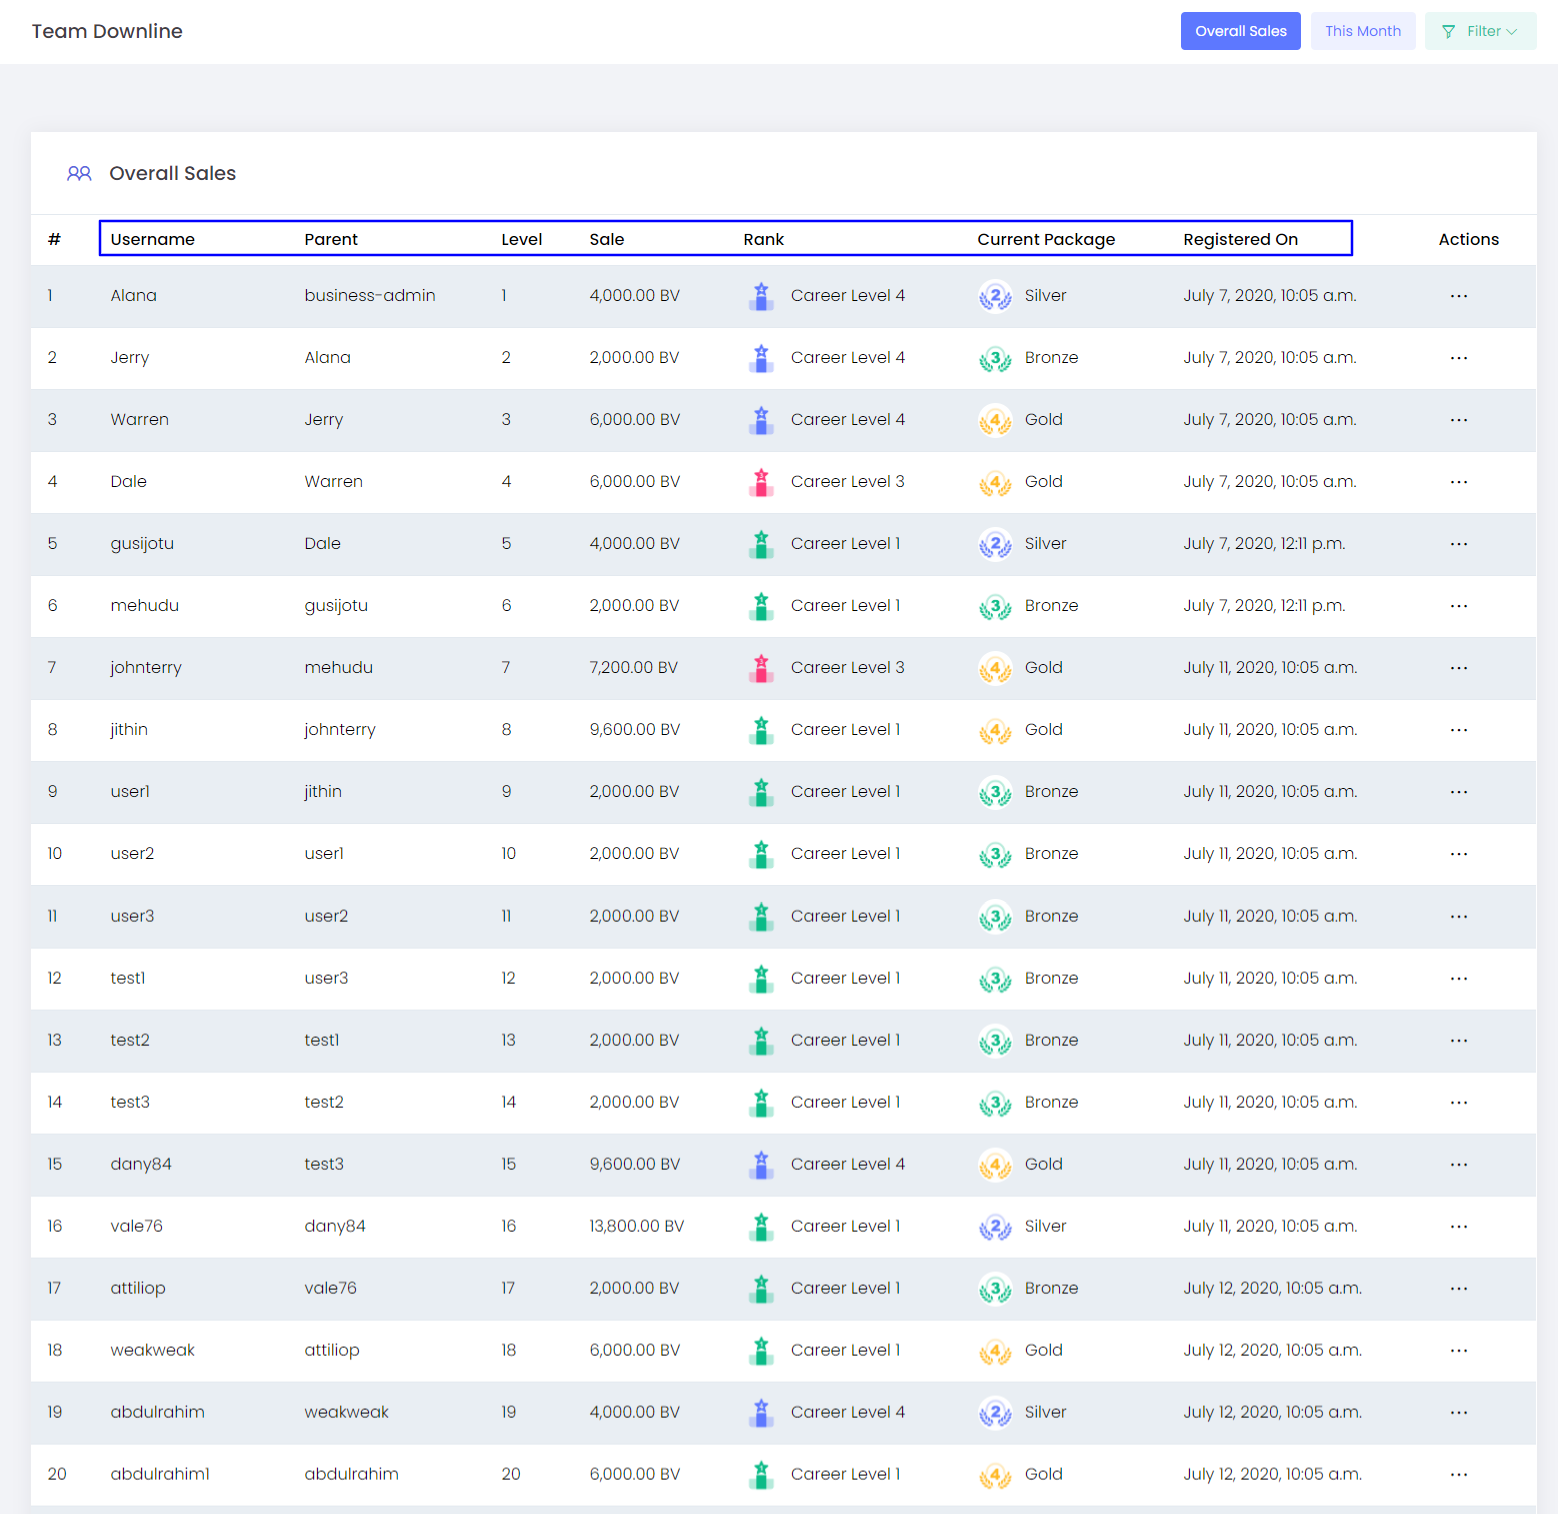
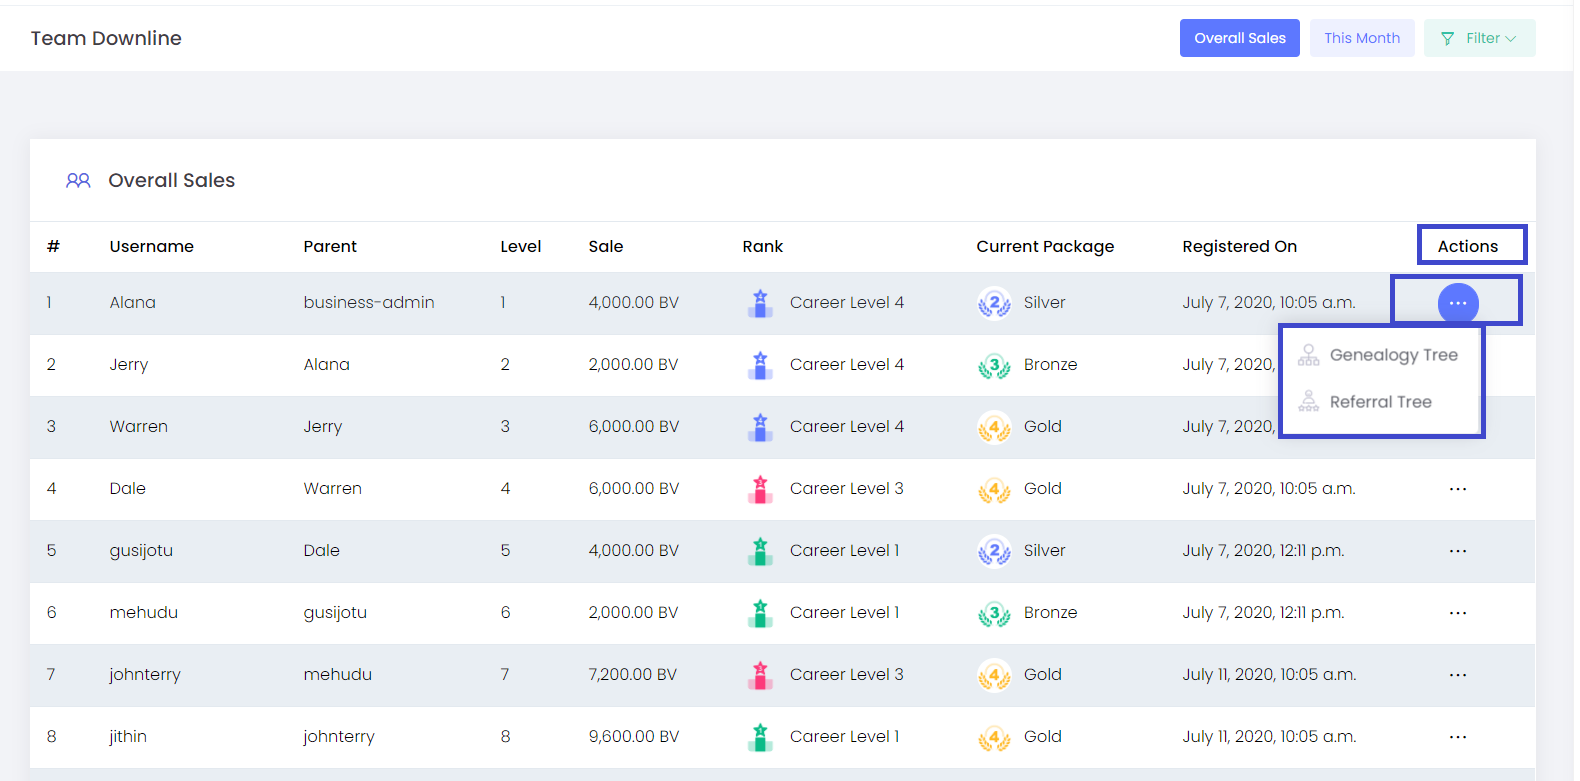
Actions - You can reach the tree structure of the team member via actions.
- Genealogy tree
- Referral tree
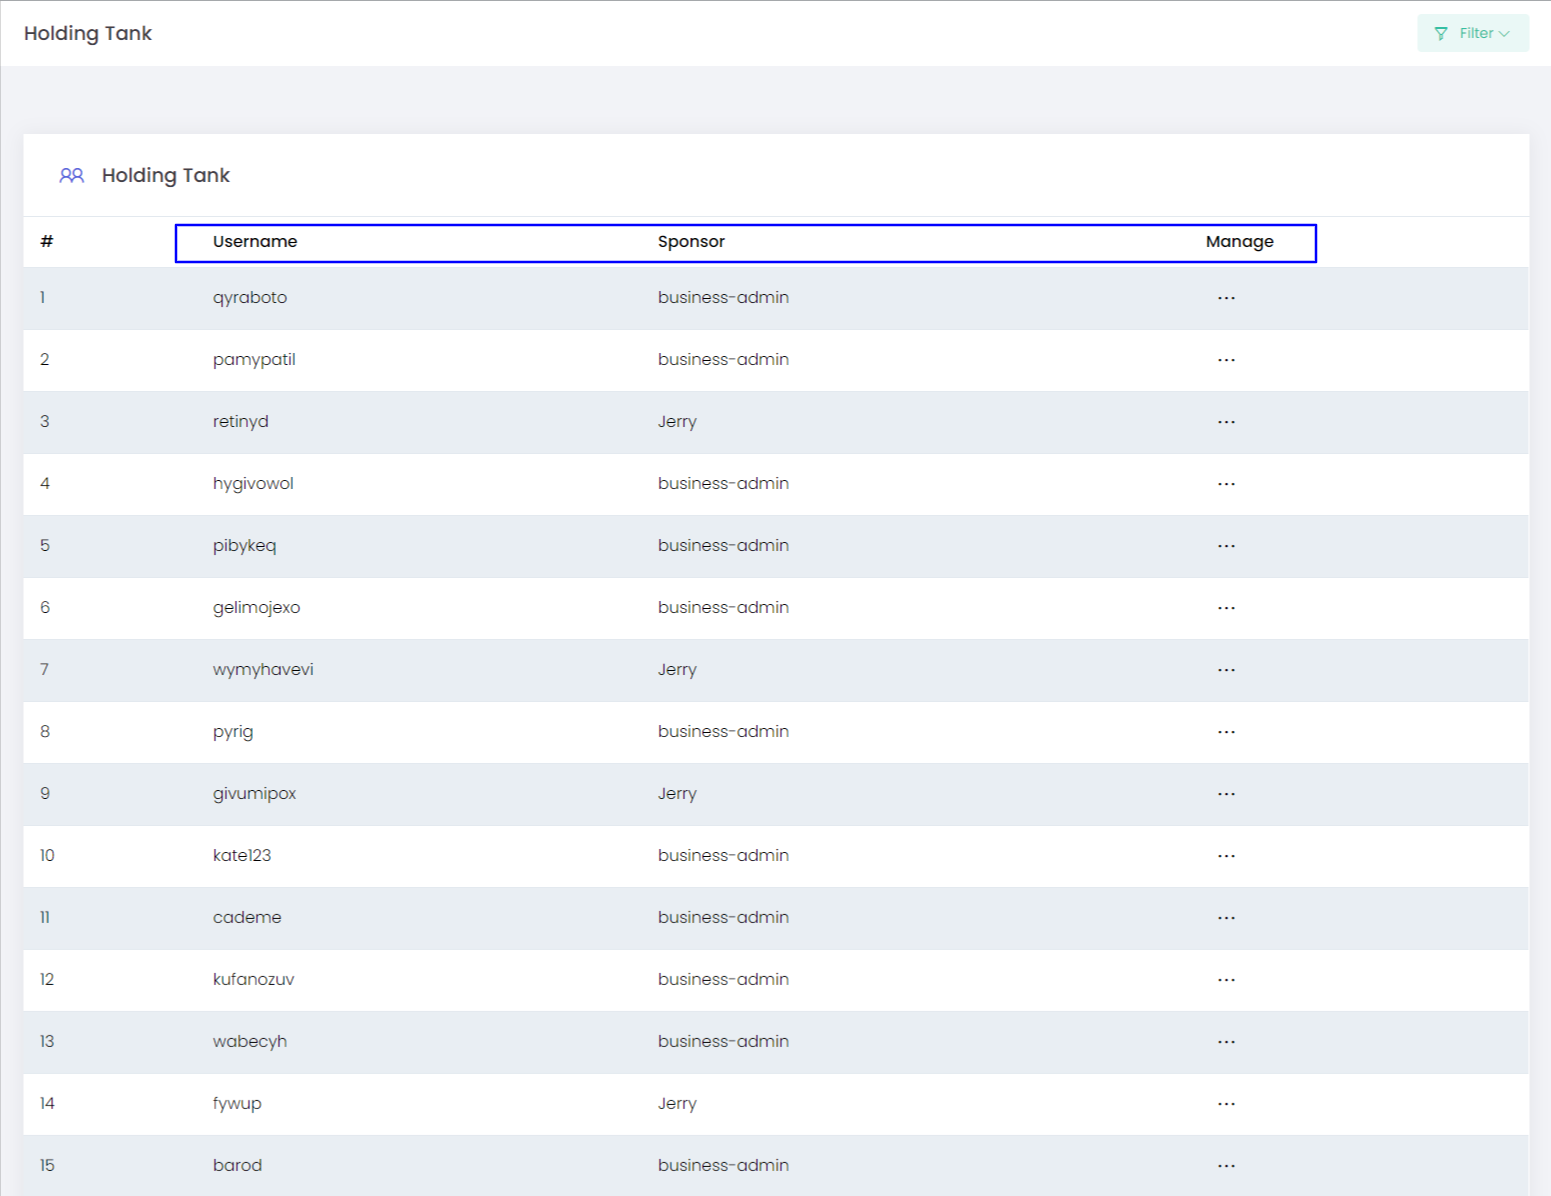
Holding Tank
Holding tanks keeps the user in a temporary pool once they successfully complete the registration and before they are placed in the tree. The admin or the sponsor user can assign a position to the team member as per requirement after verification. The new User will be placed in the holding tank if the recruiting sponsor enables holding tank placement in the spilling preference.
Member details
Admin can see the details of the members in the holding tank, the following are the details shown
-
User name
-
Sponsor
-
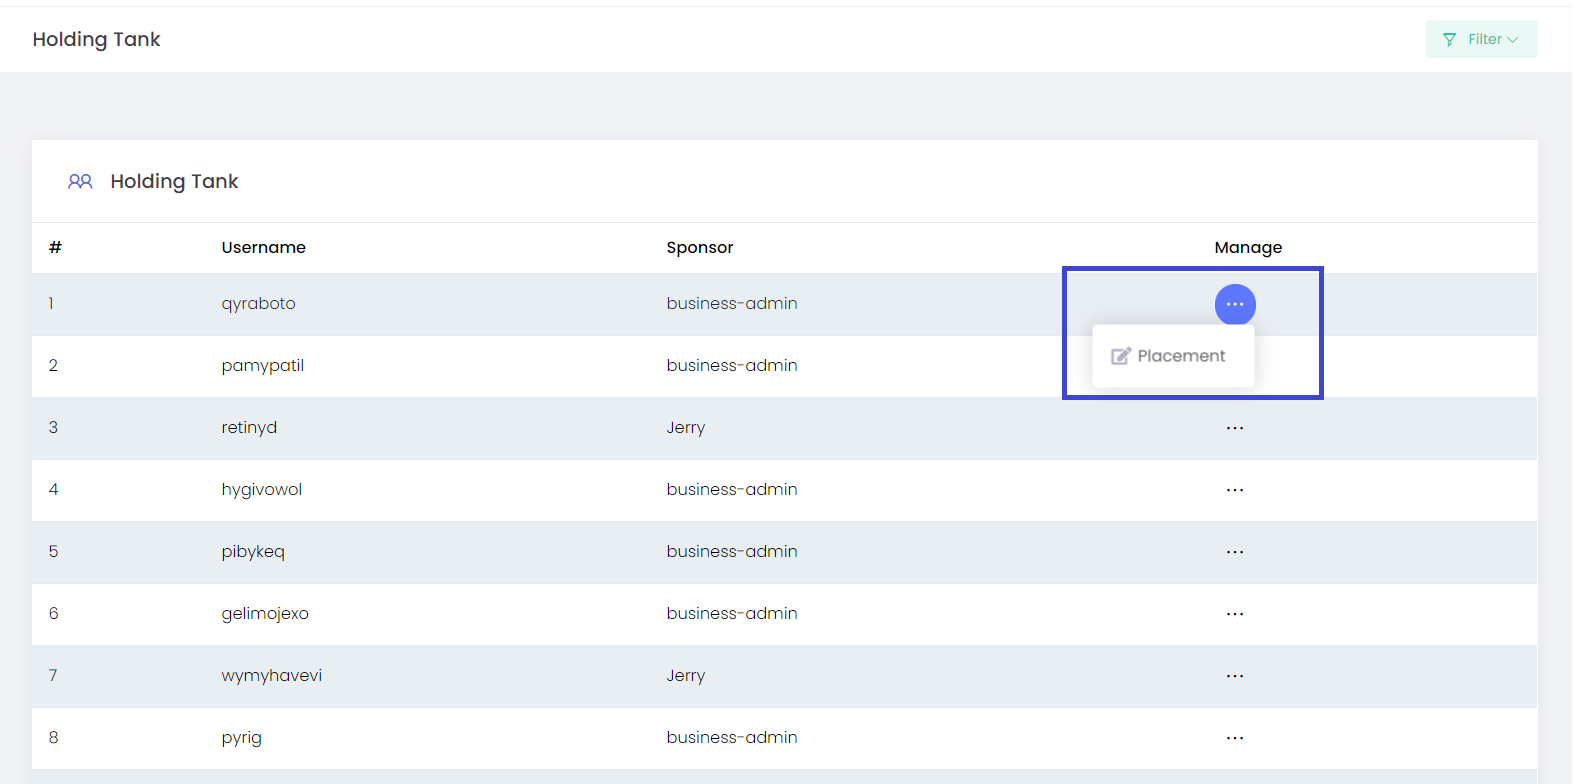
Manage
Manage Placement.
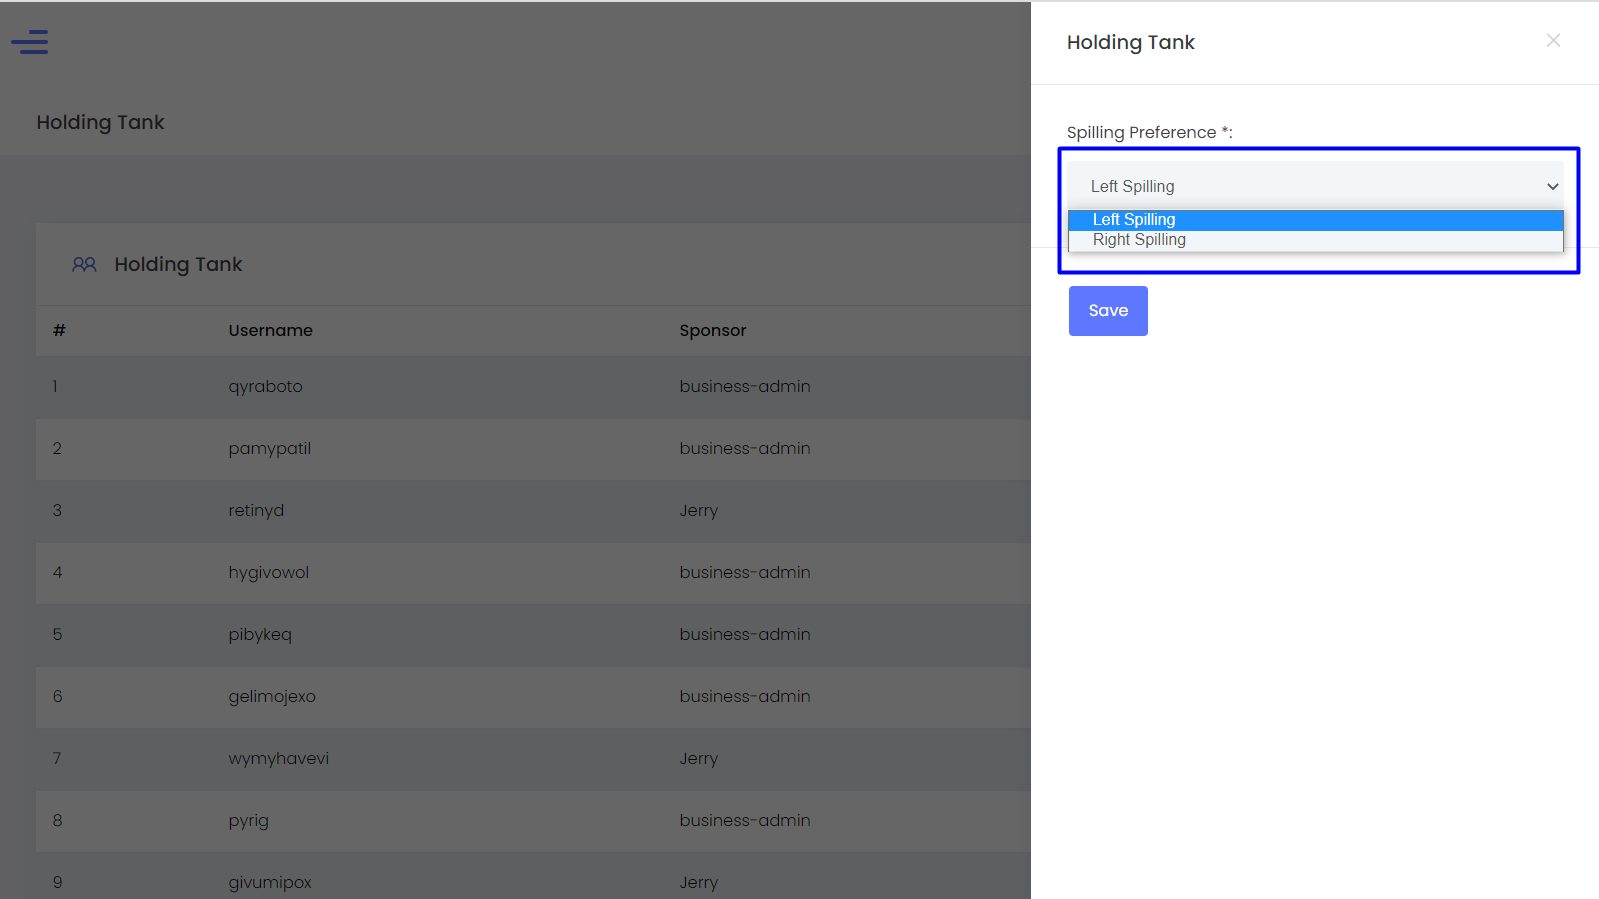
If we click on the managed placement we will get a Spilling Preference page in that we can select the user to left spilling preference or right spilling preference.
If we click on the manage placement we will get a Spilling Preference page in that we can select the user to left spilling preference or right spilling preference .
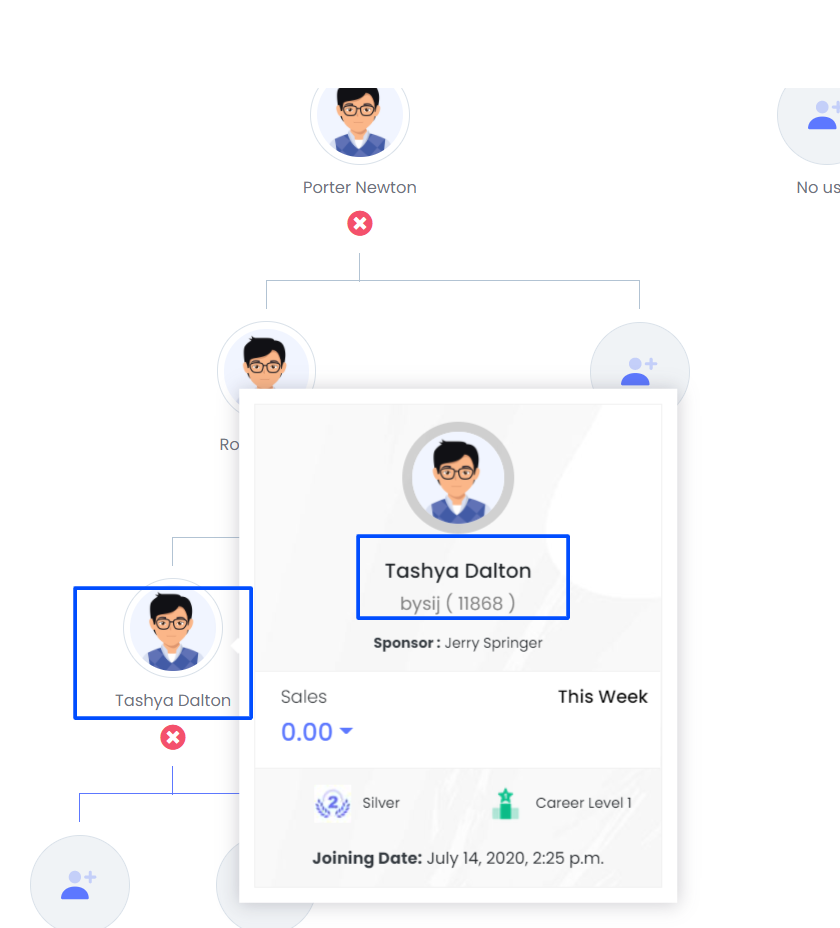
Suppose if we select the user to the left spilling preference the user will be placed in the left side of the genealogy tree. If we select the user to the right spilling preference the user will be placed in the right side of the genealogy tree.l
Here we can see that the user is placced in the left side of the tree as we select as left spilling preference.
Spilling Preferences
Admin or the logged-in user can set the spilling preference of the placement in the tree and the newly added users will be placed according to it.
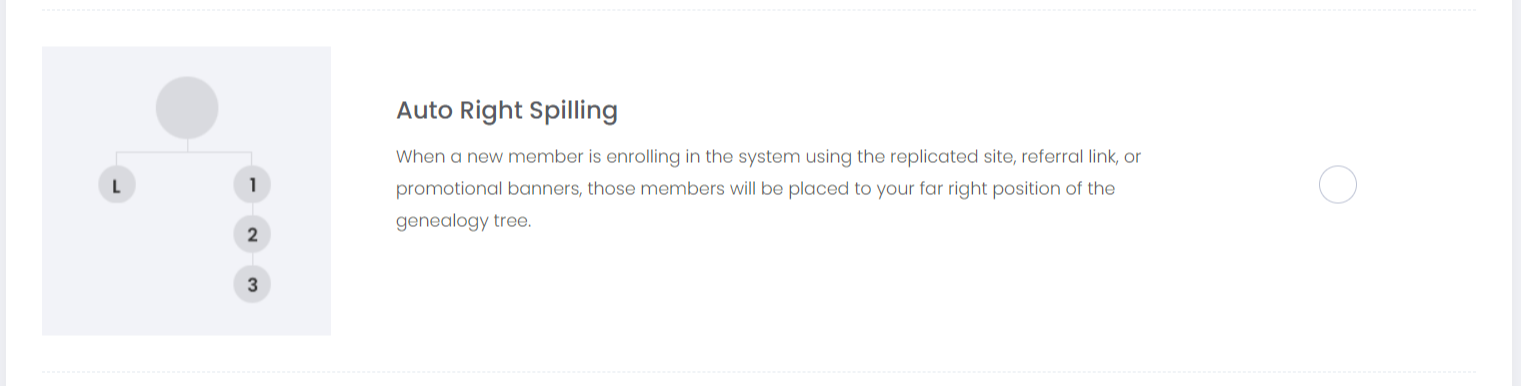
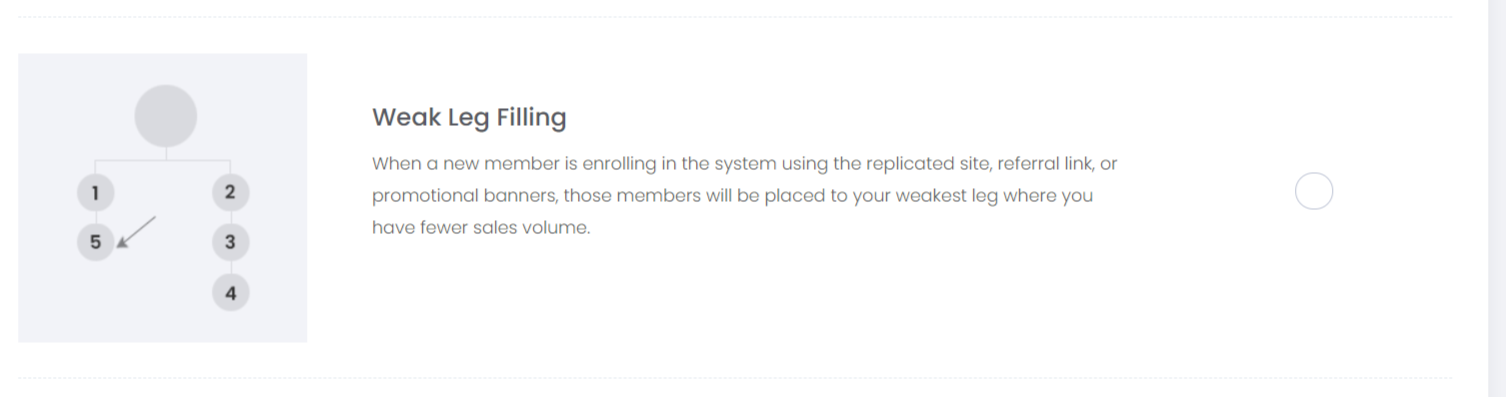
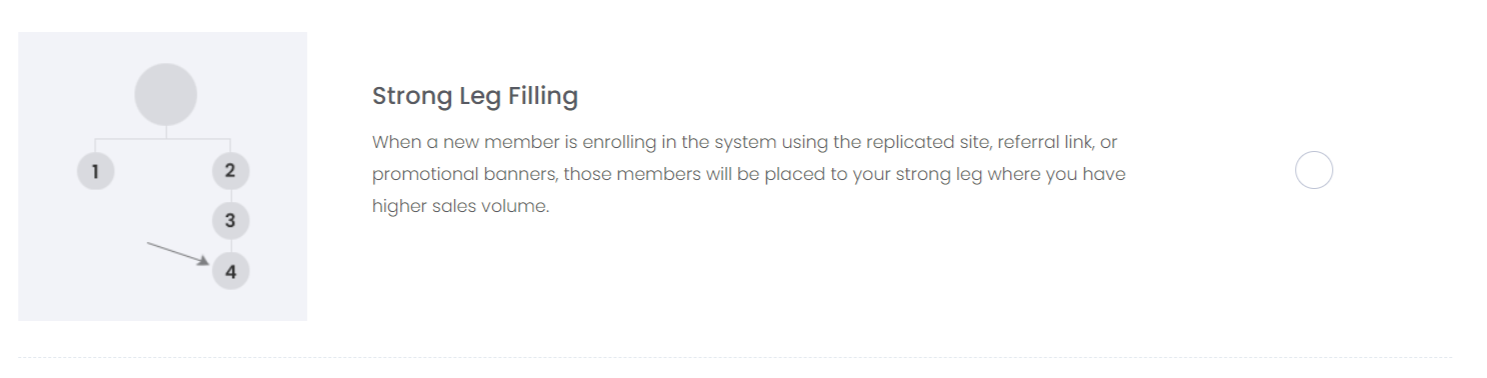
Here we have provided five spilling preference available in the system:
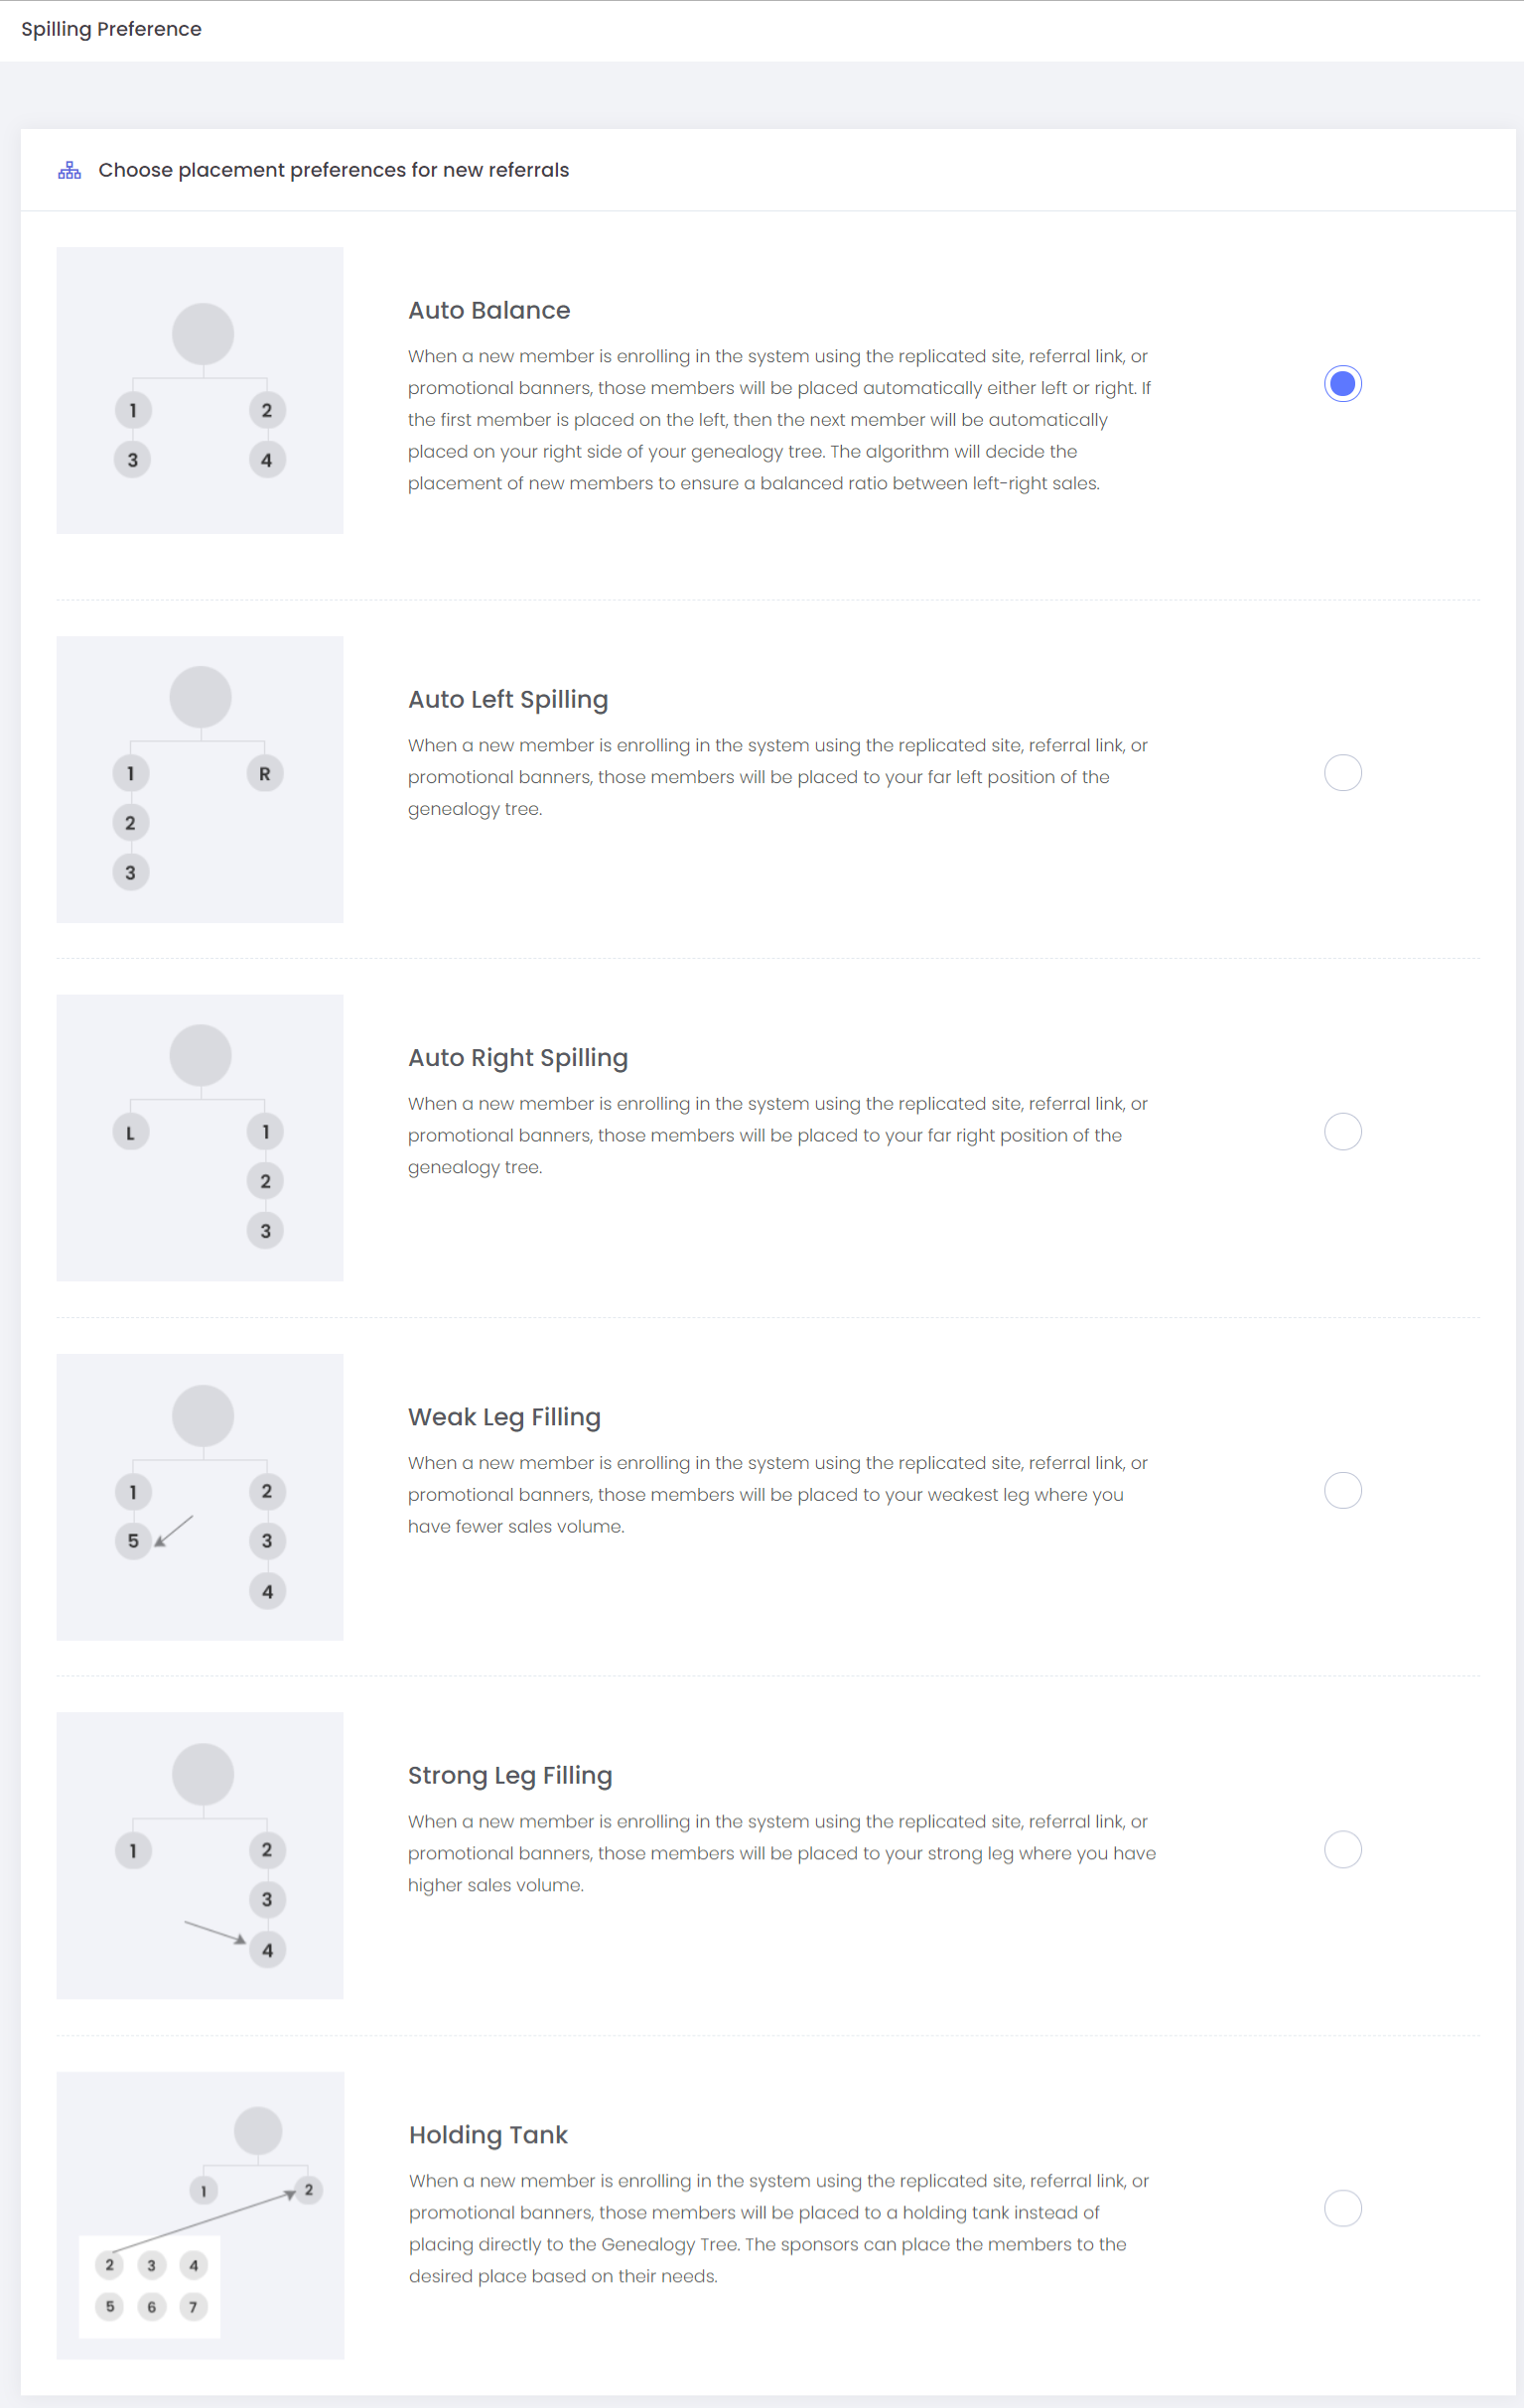
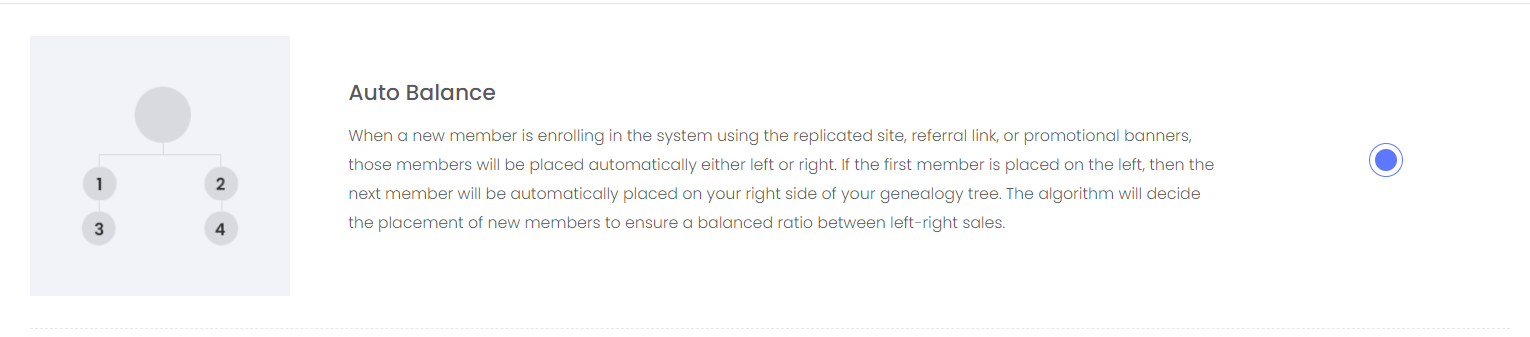
1. Auto balance
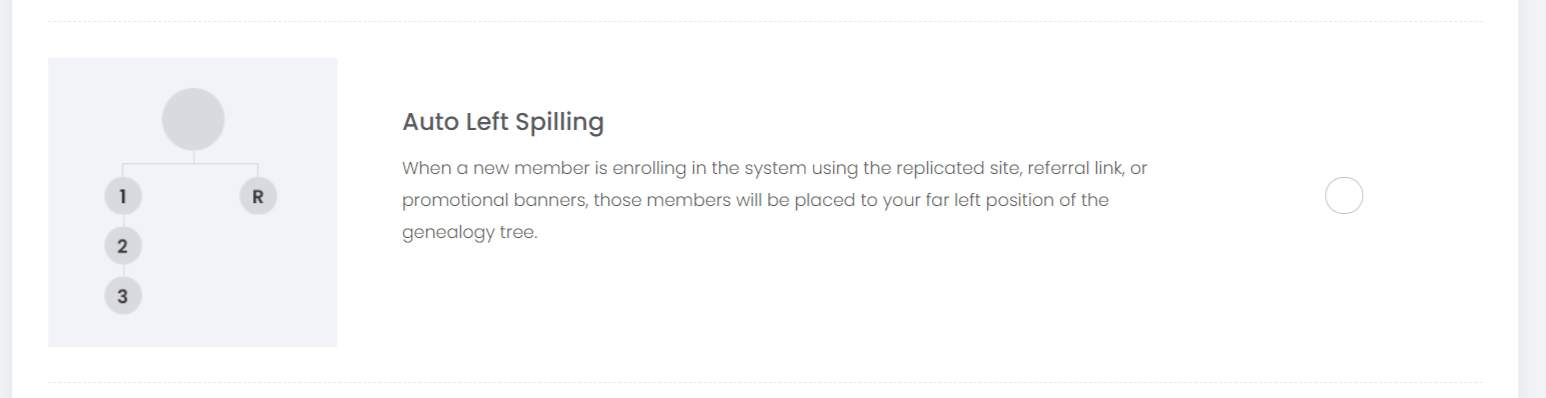
2. Auto left spilling
3. Auto right spilling
4. Weak leg Filling
5. Strong leg Filling
Add New customer
Customers are the group of users who have limited access to the system (eg: Can purchase the product/ subscribe to the learning materials etc. but have no membership access)
Note: The access to the system can be configured depending upon the project requirement.
You can add a new customer to your team by filling out some mandatory details of the new customer. If you are adding a new customer from your back office you will be assigned as the sponsor of the customer.
My customer
The customers that you have enrolled could be viewed from My Customer option
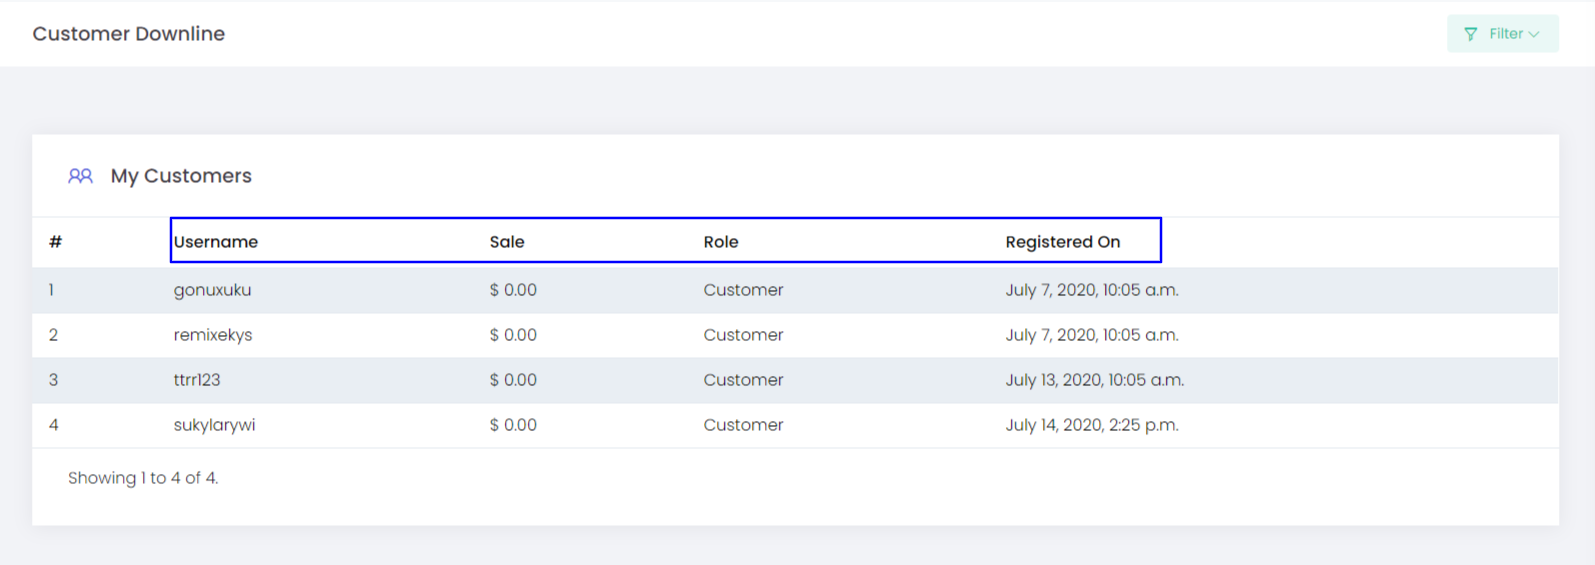
- Username - User Name of the customer which was given while registration
- Sale - Provides the sales details from each customer
- Role - If the system has different Customer roles it will be displayed here.
- Registered On - Shows the Date of enrolment into the system
Filter
Filter option help you to reach the exact customer details you are looking for by submitting the Username, From date and To date
