Epixel MLM Software - Back-office Administration
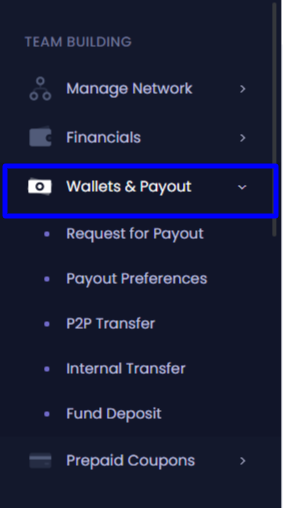
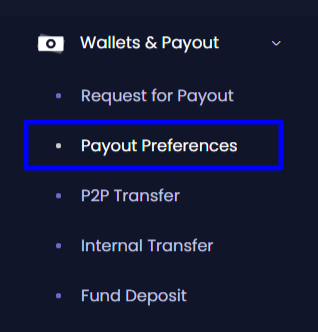
Wallets & Payout
Wallets & Payout
Wallets & Payout
Depending upon the requirement, Admin can create the wallets and also Payout options. Our software can provide different payout options like Paypal, Bitcoin, Bank, Credit Card, etc.
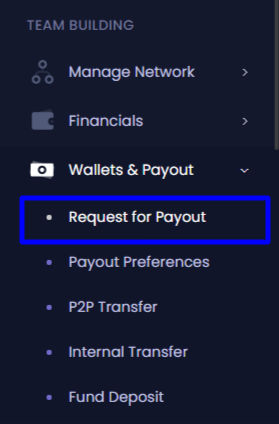
Request for payout
In this section, you can request for withdrawal of the amount available in your wallet. Depending upon the requirement we can choose the payout. We can provide one or more payouts depending on our requirements.
-
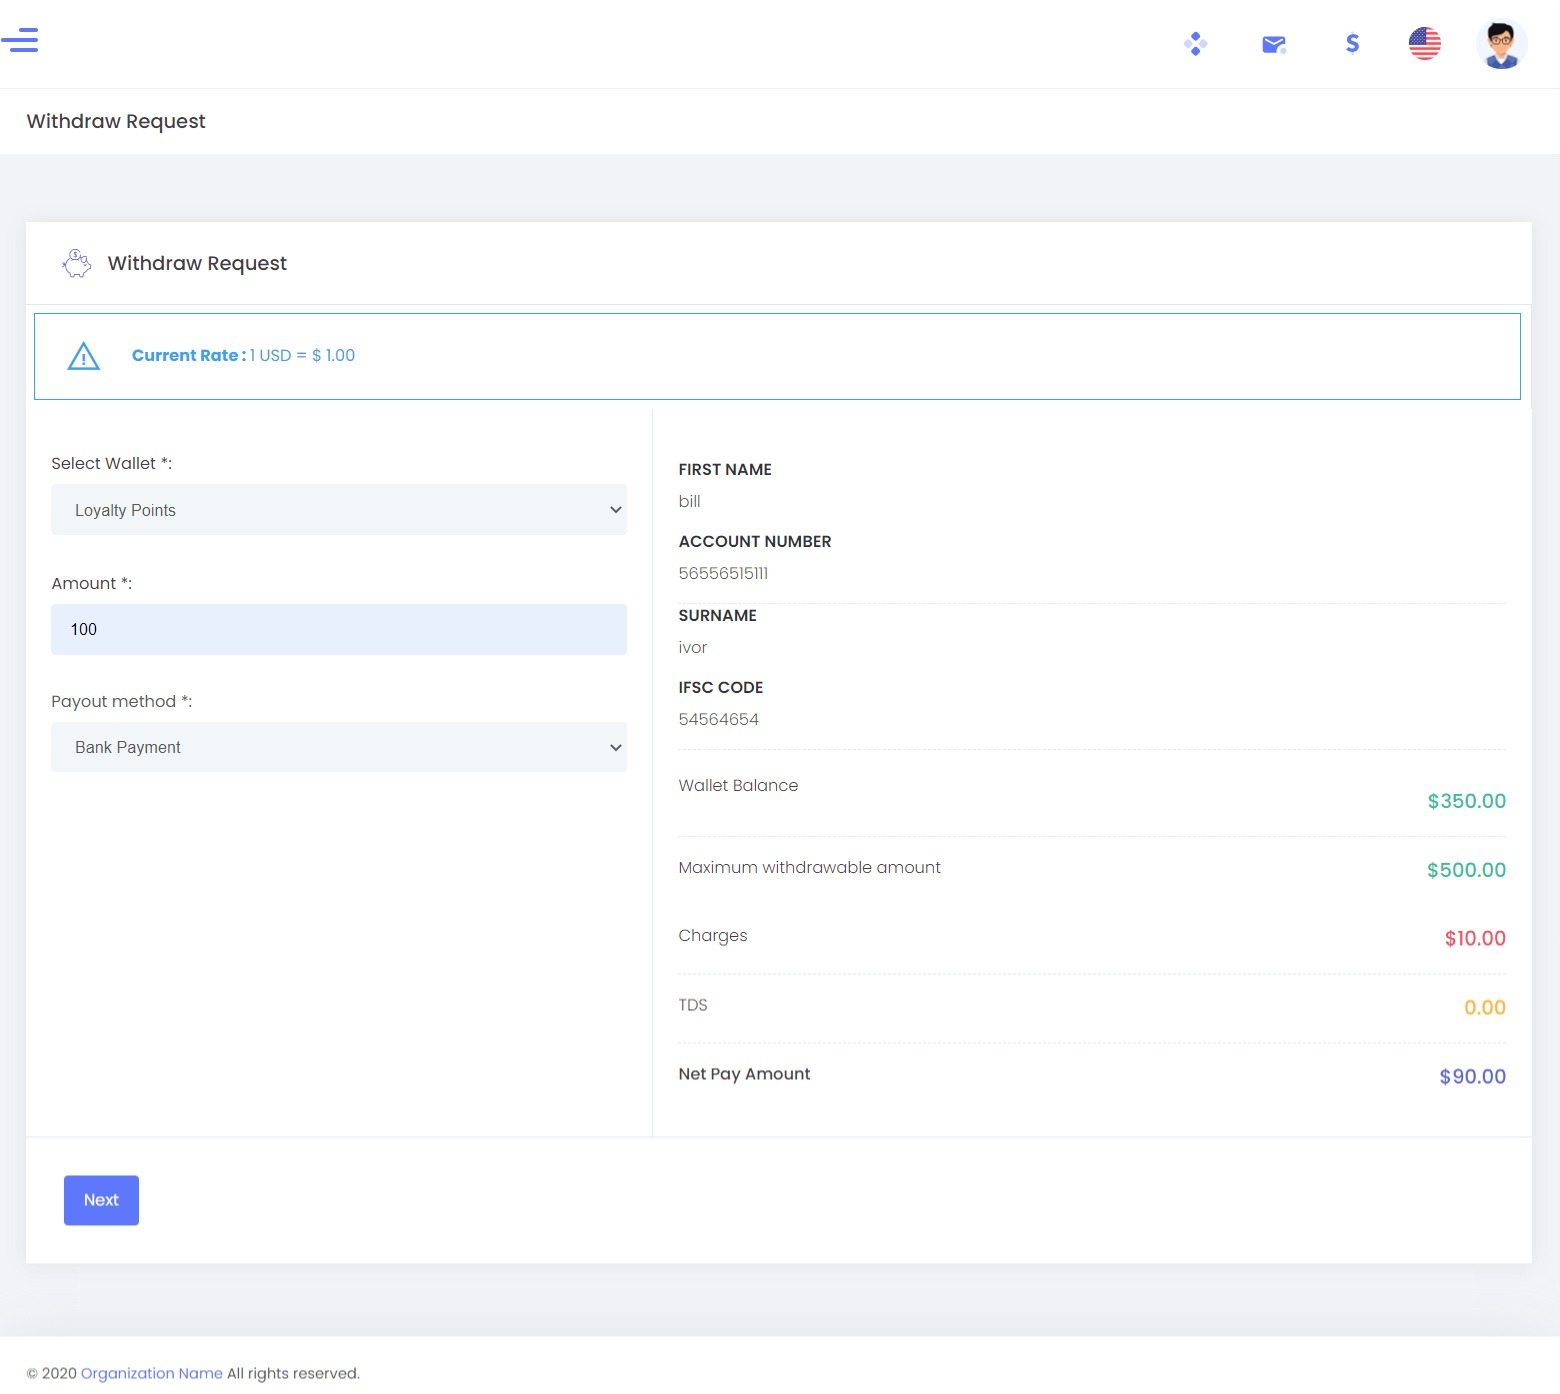
You can view the current conversion rate of USD to BTC. One USD is calculated based on the current/present-day value. Depending on that the currency conversion will take place.
-
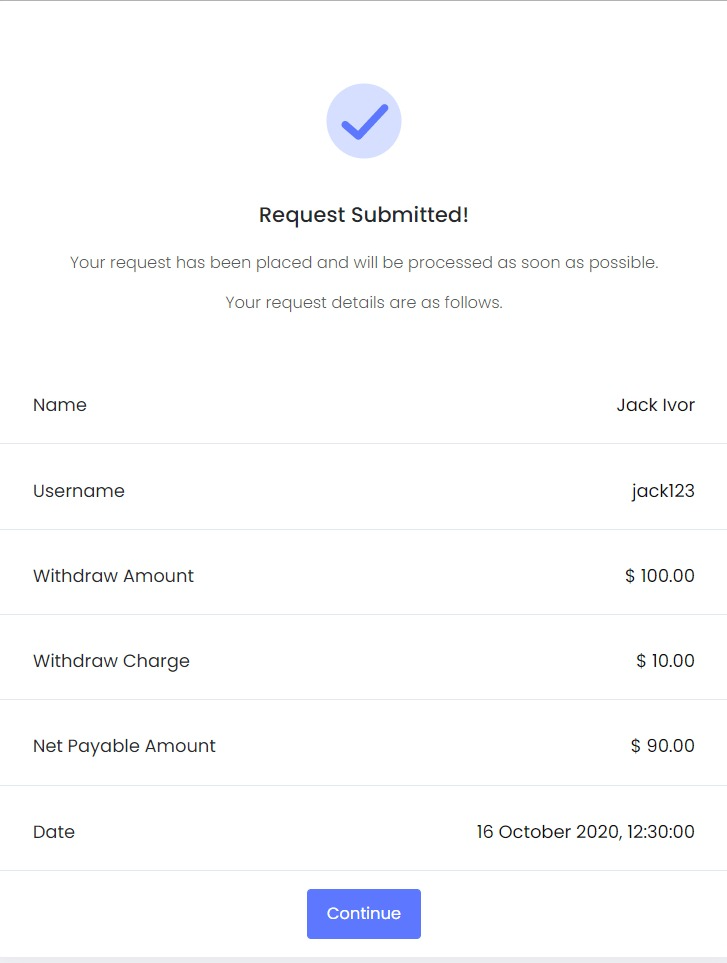
In this area, you can provide the details and submit a request for withdrawal.
-
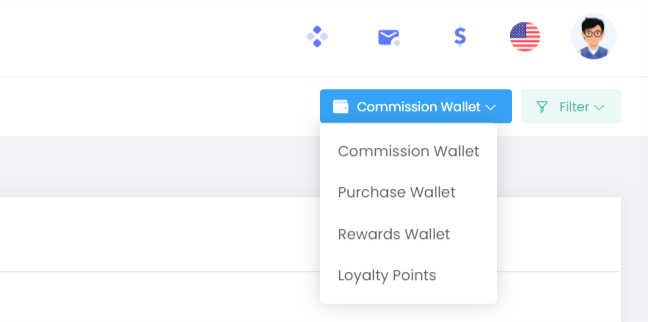
Select Wallet-You can select the wallet from which you want a withdrawal. We can select the wallet according to our wishes. If we enable the wallets then if we are able to view here and we can select here
-
Amount-You can provide the amount to be withdrawn.
-
Payout method-You can select the payout method from the available options. If we have enabled both the payouts then we are able to view here. For Eg: If we have enabled the Bank Method or Bitcoin then we can select here.
-
-
This area provides you with the details about the amount available and charges if any of the selected wallet, following are the details
-
Wallet Balance-Depending on the wallet that you choose you can see the balance amount available in that wallet.
For Eg: If we choose the commission wallet then we can see the balance amount available in that wallet.
-
Maximum withdrawable balance- Here we can view the maximum amount that can be withdrawn from that wallet.
-
Charges - Here we are able to view how much amount that is taken for transferring the amount from one wallet to another.
-
TDS- TDS(Tax Deducted at Source) or Charges - Sum of charges paid for the various transactions. Depending upon the requirement we can enable/disable this feature.
-
Net Pay Amount -Here we are able to view the total amount to be paid.
-
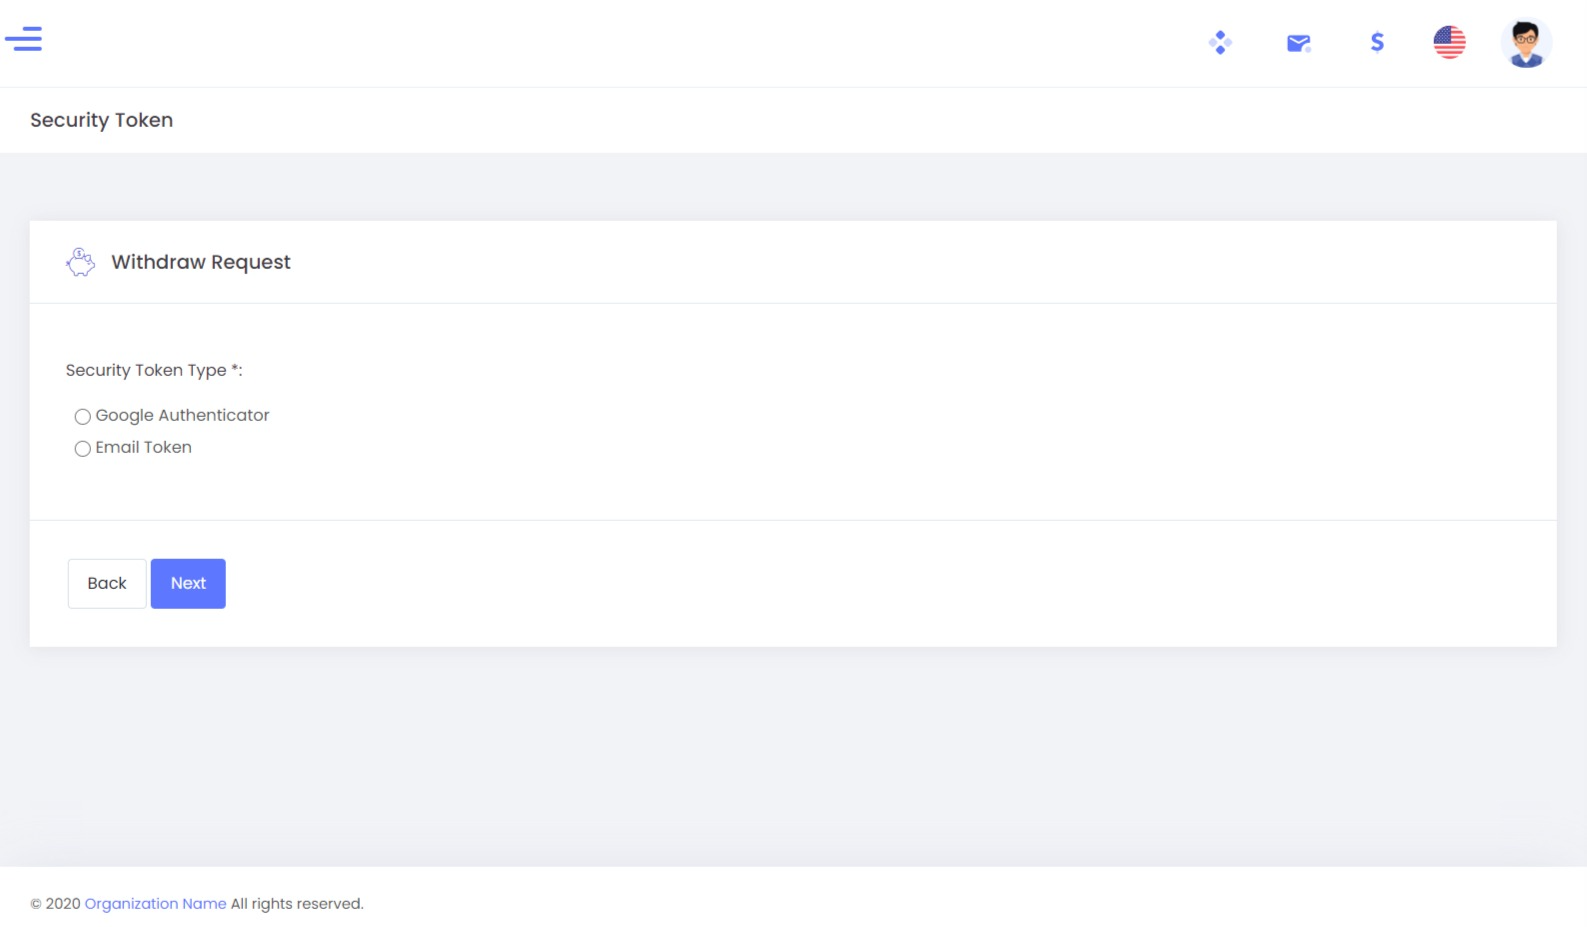
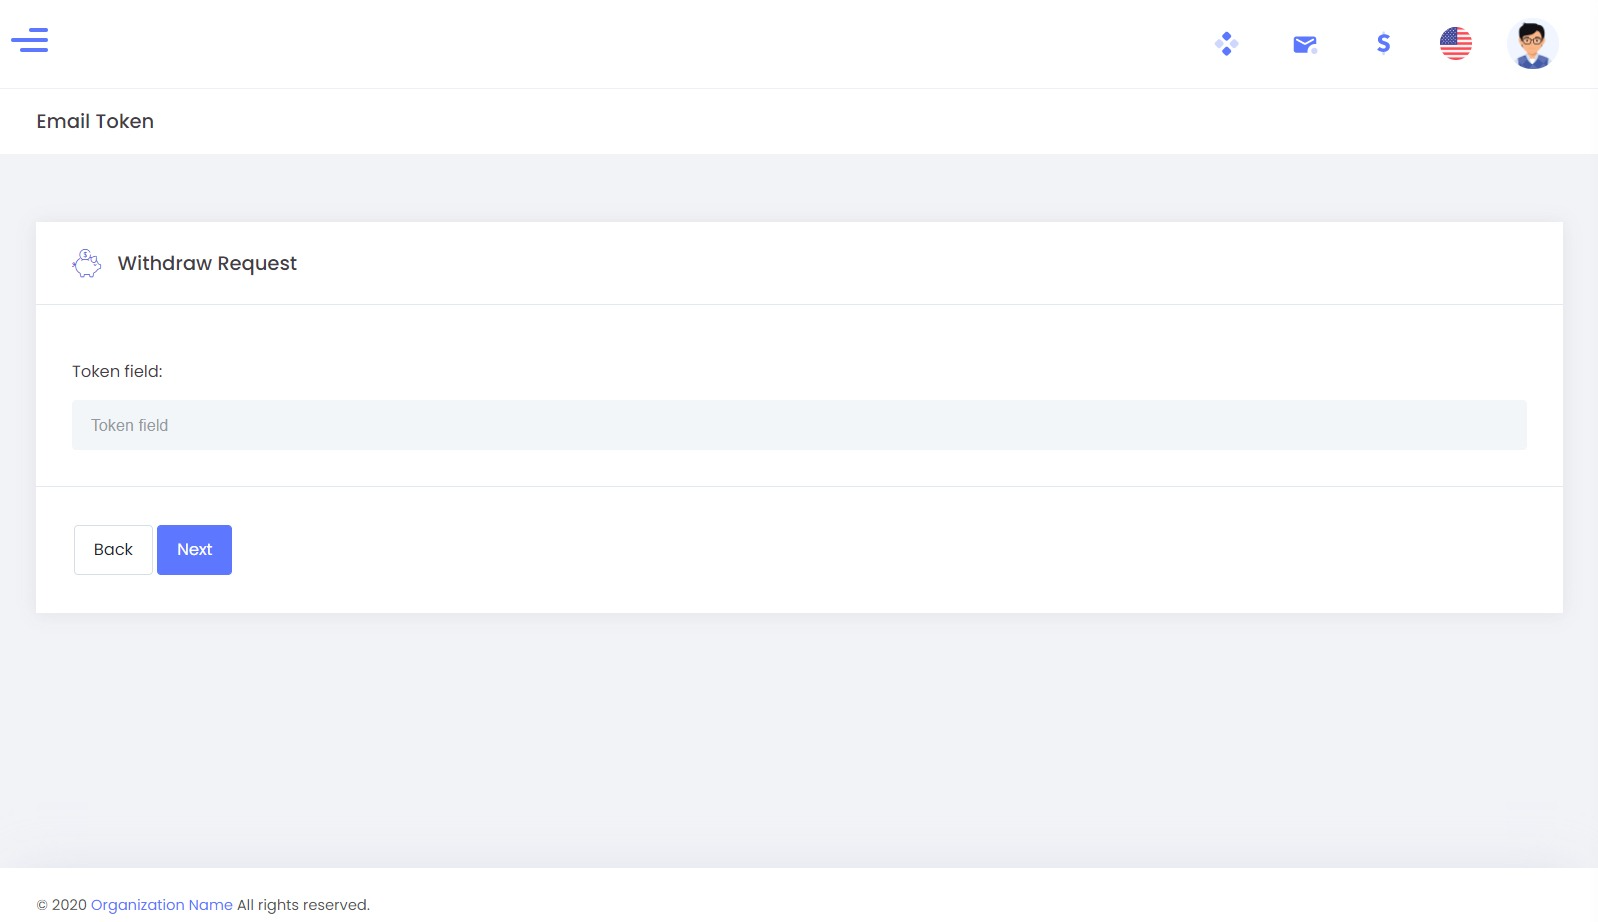
Here we have to choose a withdrawal request. Suppose if we choose the email token then a mail will be sent to the corresponding user's mail id. We have to enter the token which we received in the mail. After you enter the token number then your request for payout is done successfully.
If you enable two-factor authentication, it will show a scan QR code. If you scan the QR code using Google Authenticator, you will receive a token number on your mobile device. If you type the token number then you have successfully enabled two-factor authentication. Kindly refer to the link for more details.
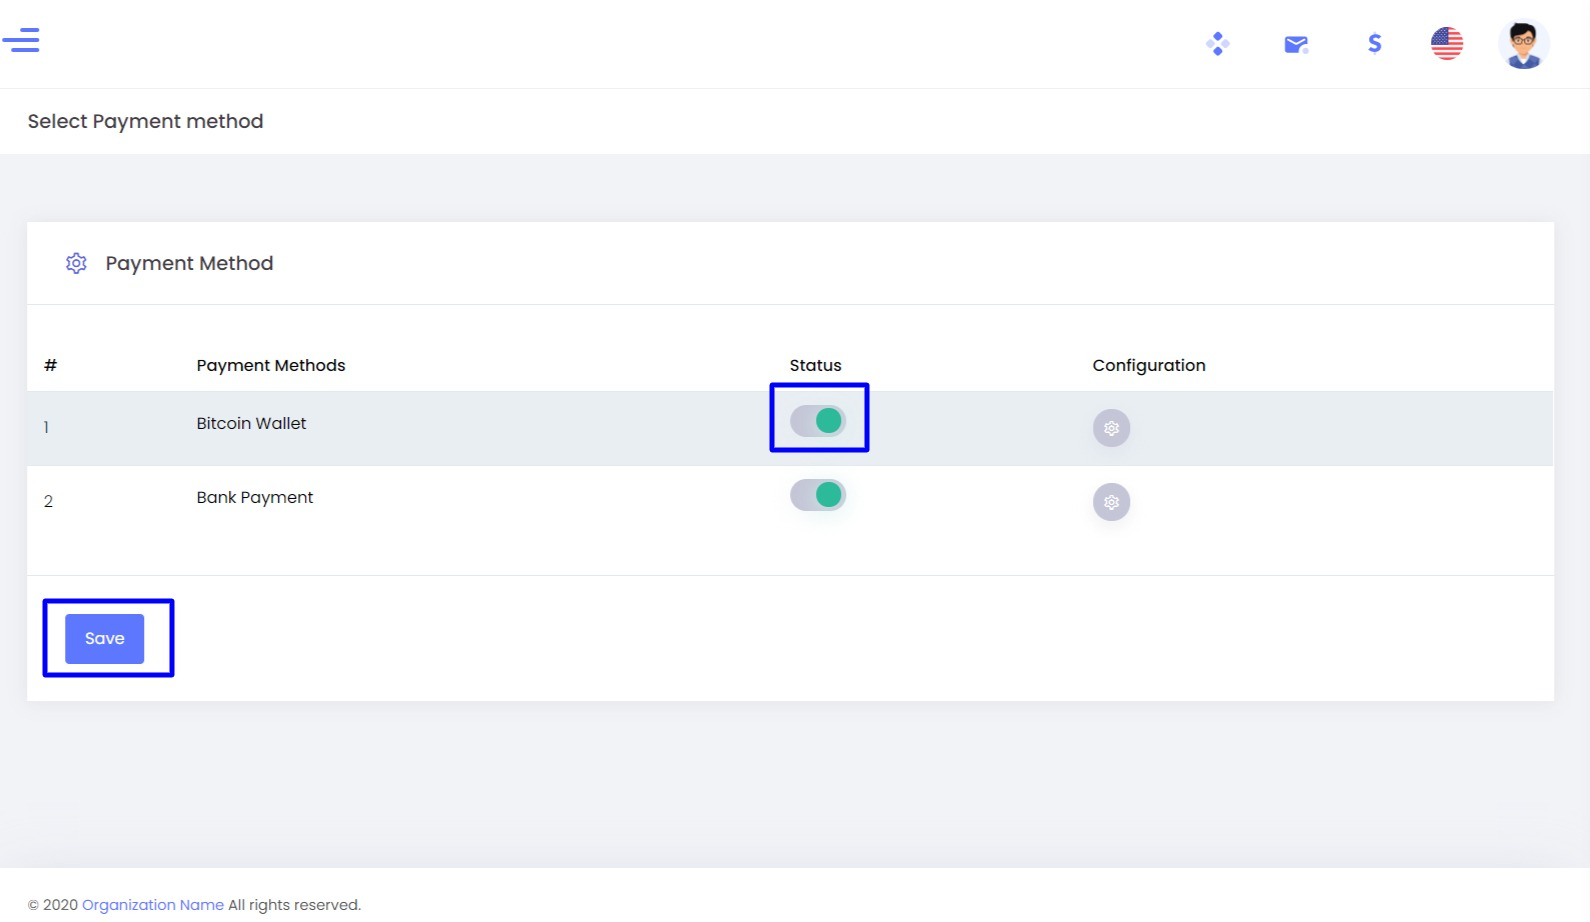
Payout Preferences
In this section, you can set the payout which is required for our requirement. We can provide one or more payouts depending on our requirements. Depending upon the configurations that we have made we can select the payout.
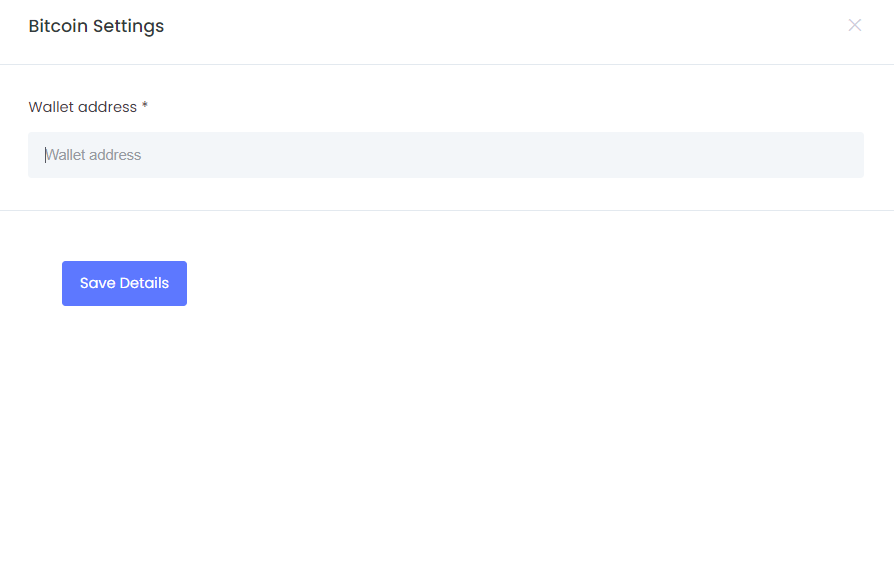
We can enable/disable this feature according to our wish. We can also enable one payout method one at a time or we can enable two payment methods also. If we enable the Bitcoin method then we have to provide the wallet address or if we enable the bank method we have to provide all the details like Account Number, Name, IFSC code, etc. Once if we provide the details then if we save then we don't need to provide it every time.
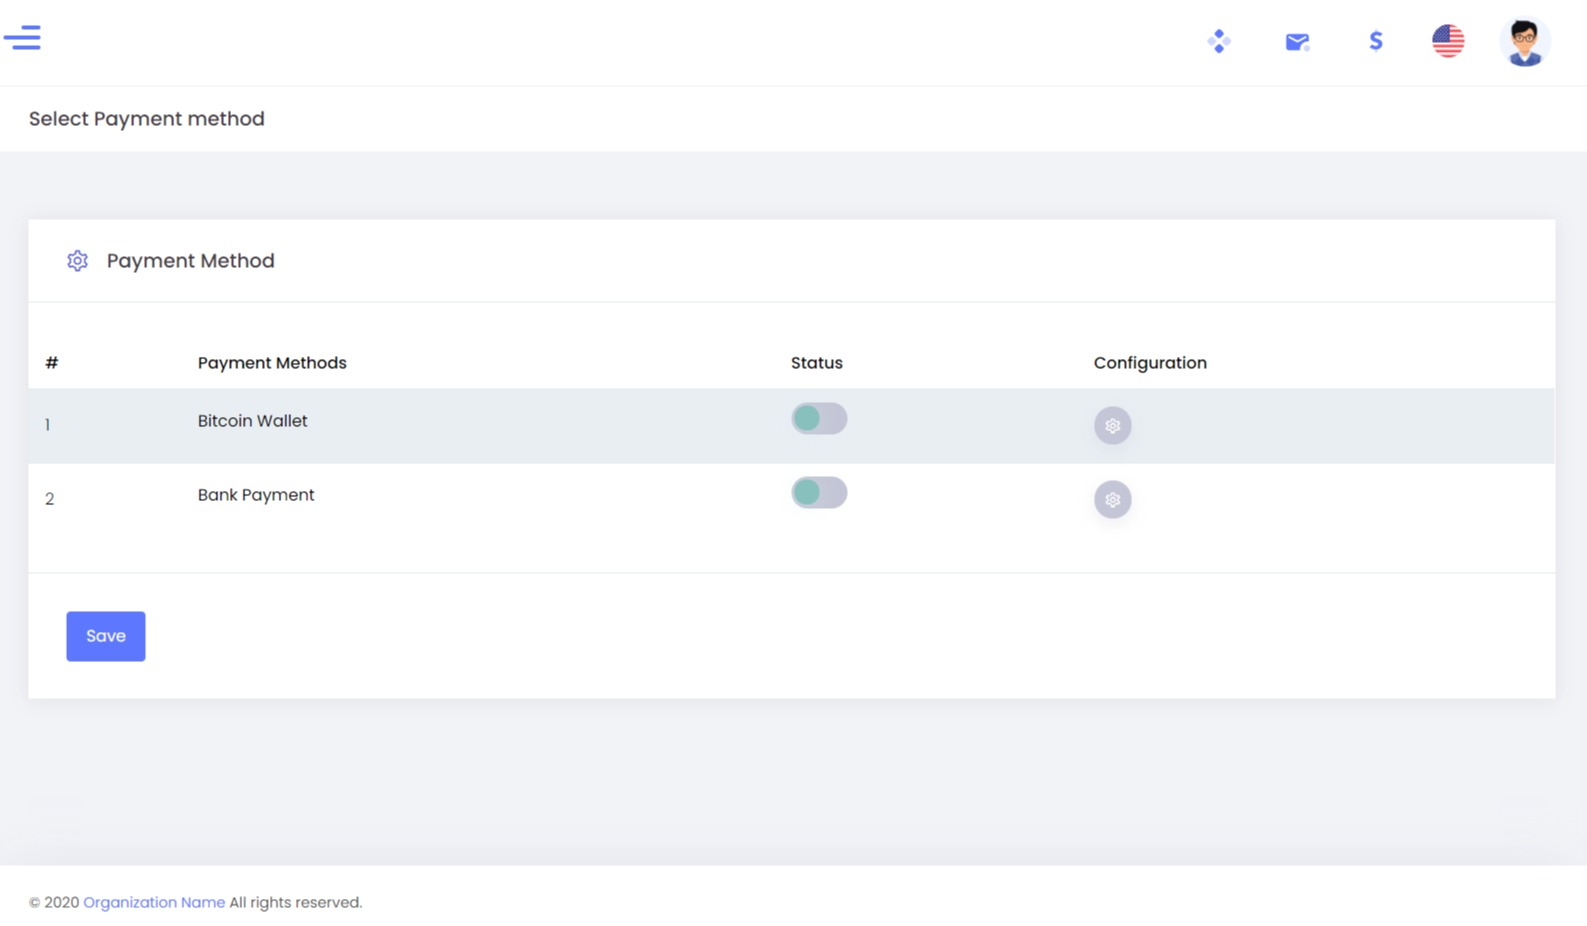
If we enable the status then we have to save it first.
If we select the Bitcoin wallet then we have to provide the wallet address.
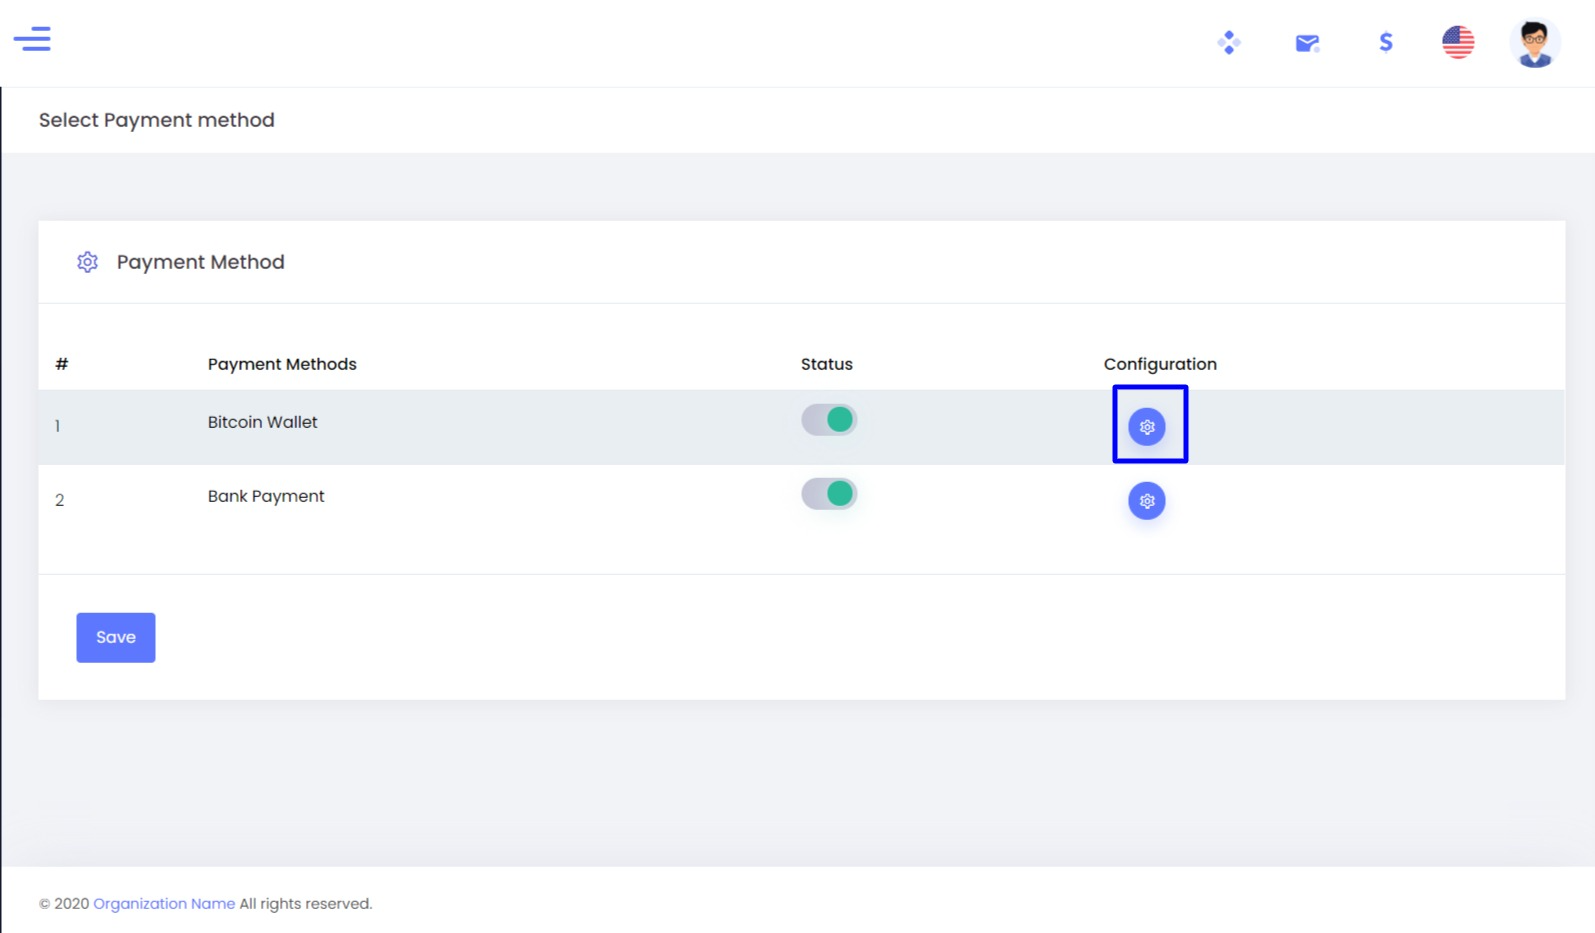
If we select the Bank Payment then we have to provide the First Name, Account Number, and IFSC code. We have to provide all the details.

By completing this process we have successfully implemented the Payout preferences in our system.
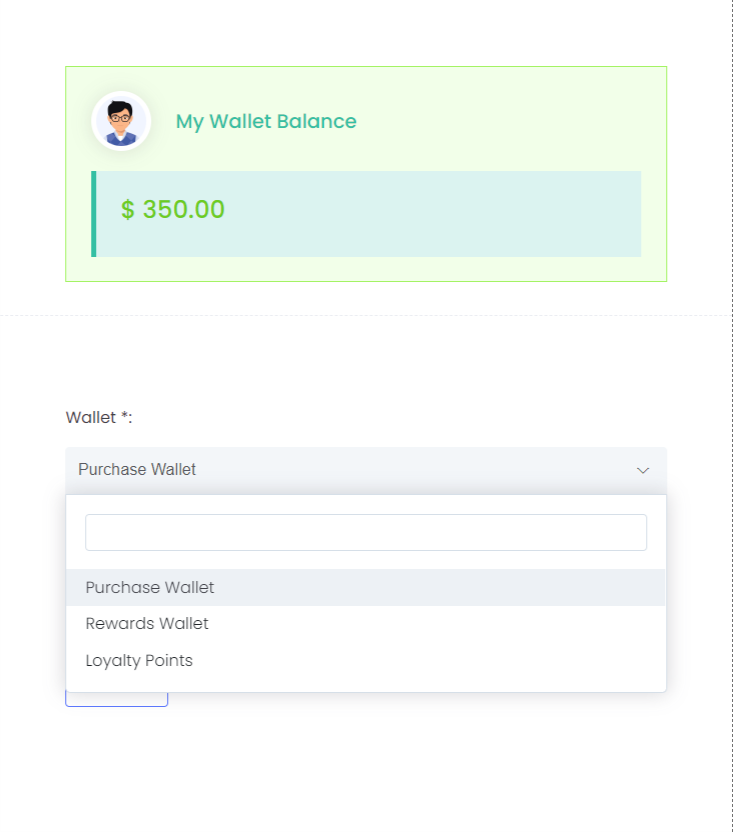
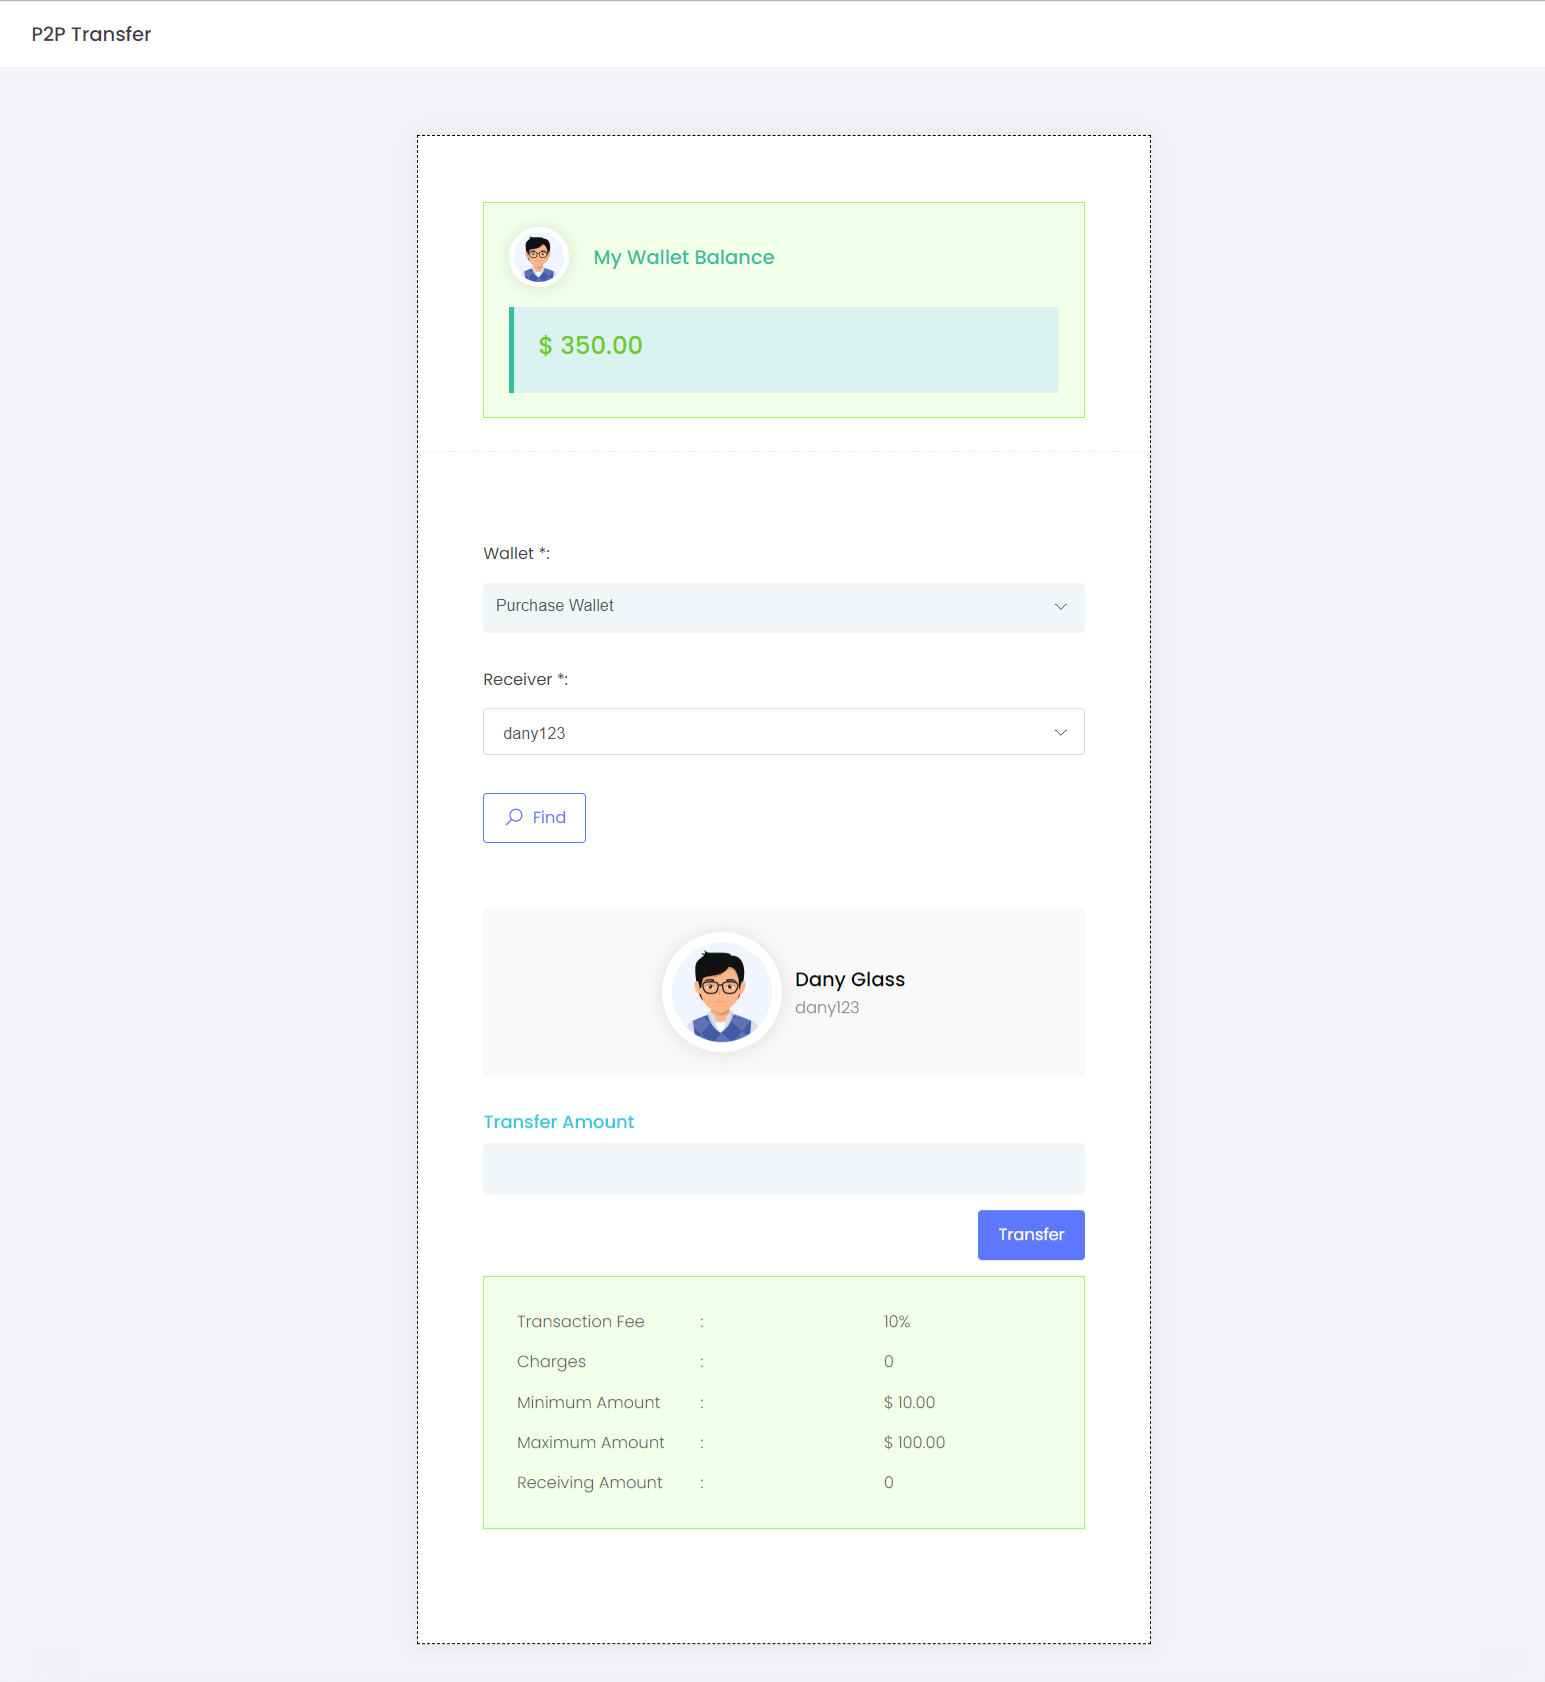
P2P Transfer (Peer to Peer Transfer)
We can transfer the amount from one person to another person in our network. For eg: If we choose a commission wallet from the sender side to transfer the amount then the amount will be credited to the commission wallet of the receiver.
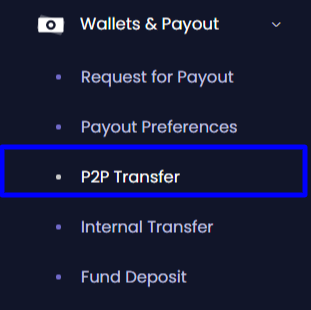
Step:1
We have to choose the wallet to transfer the amount.
Whatever wallets that have been configured by Admin will show here.
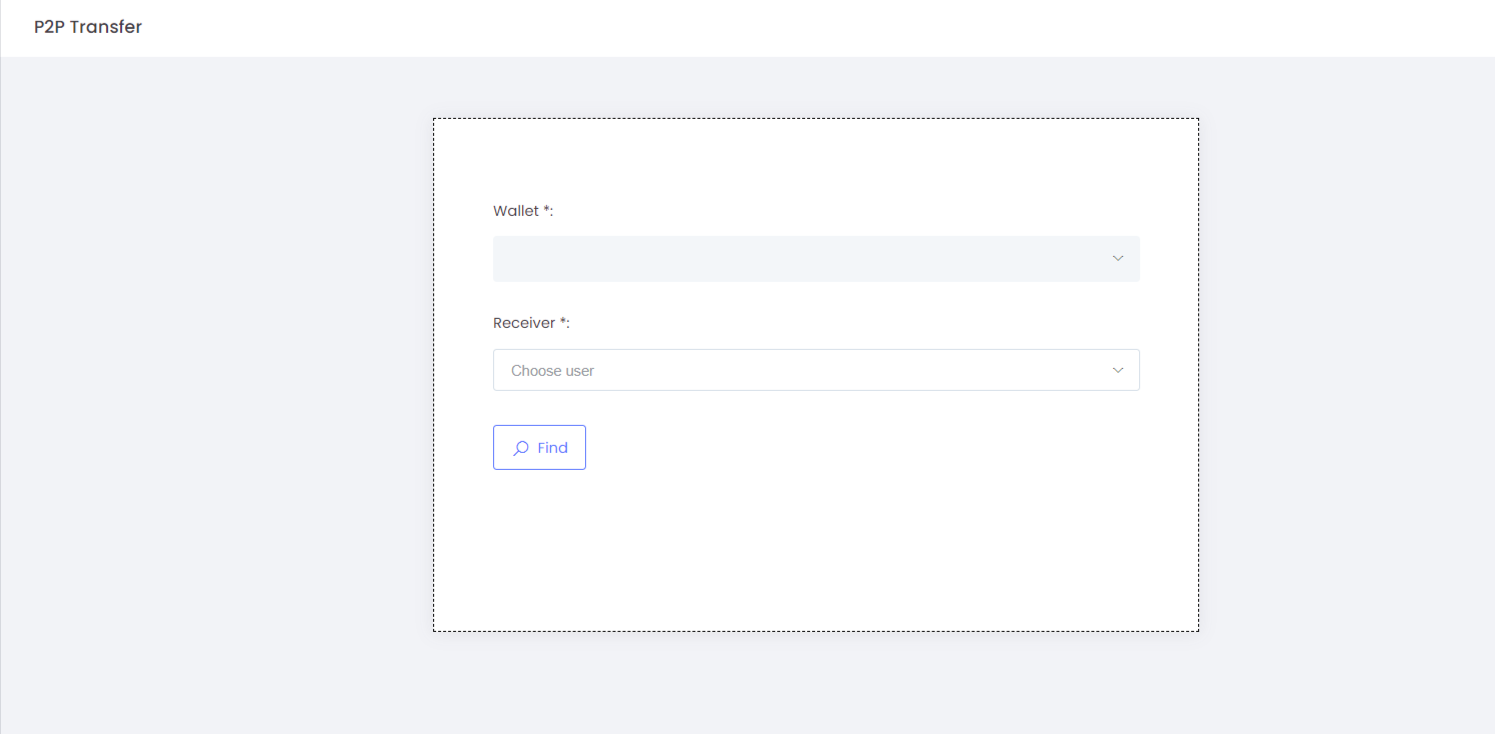
For Eg: If we choose the Purchase Wallet then, It will show the current wallet balance.
Step: 2
Step:3
We have to choose the Receiver (username) from our genealogy tree/within the network. We need to find the user name and we can give the desired transfer amount to that user.
We can able to view the username and the user's details.
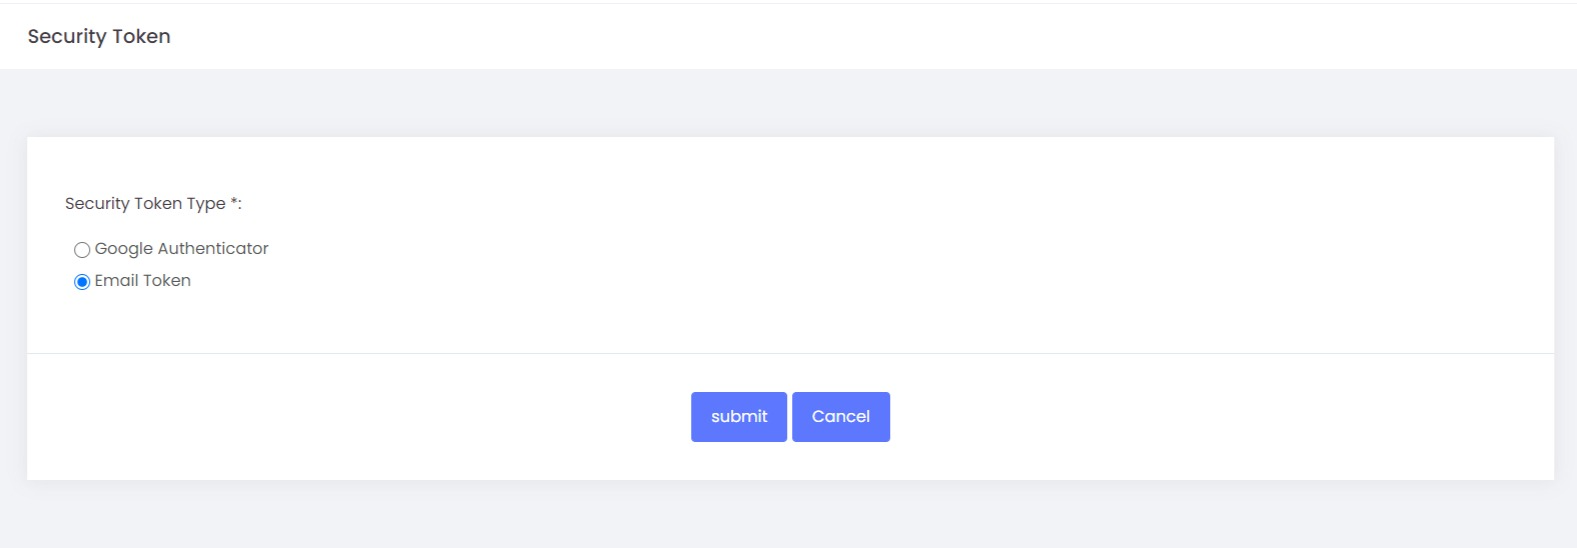
Step:4

Here we have to choose a withdrawal request. Suppose if we choose the email token then a mail will be sent to the corresponding user's mail id. We have to enter the token which we received in the mail. After you enter the token number then your peer to peer is done successfully.
If you enable two-factor authentication, it will show a scan QR code. If you scan the QR code using Google Authenticator, you will receive a token number on your mobile device. Kindly refer to the link for more details.
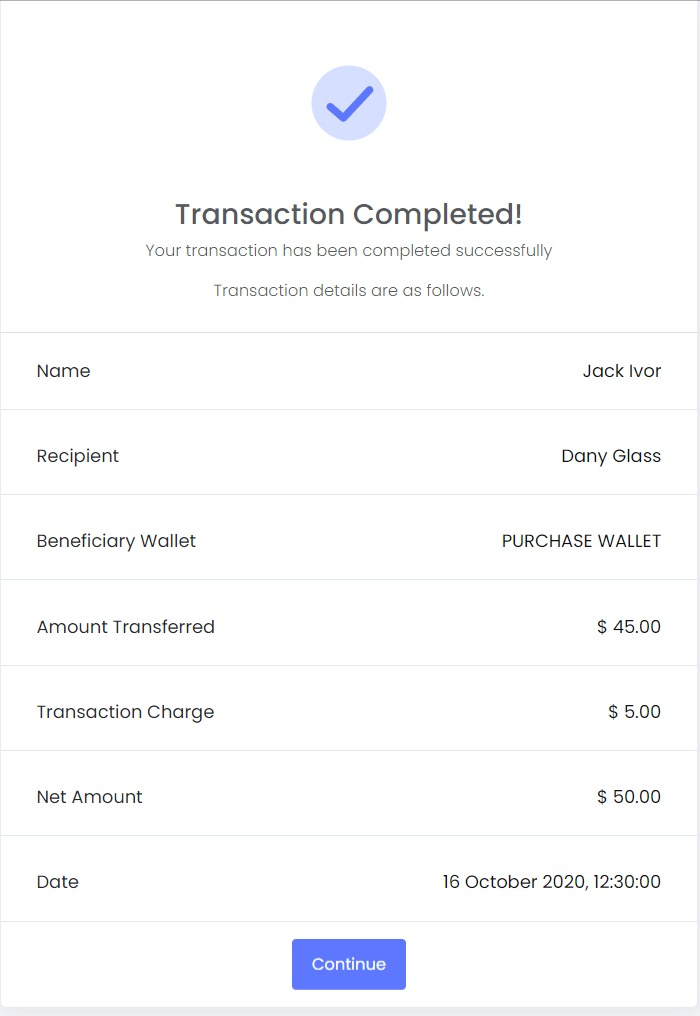
Step:5
Step:6
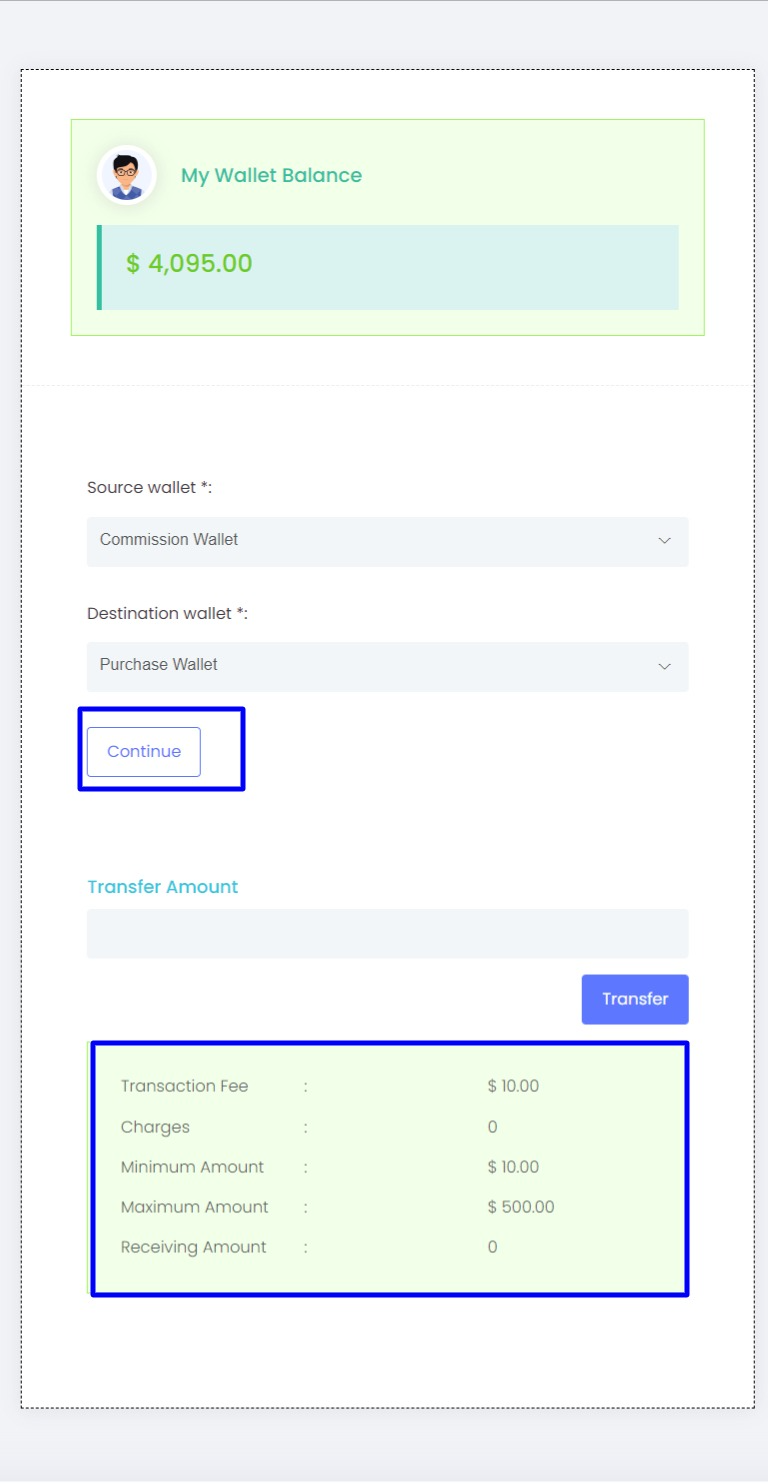
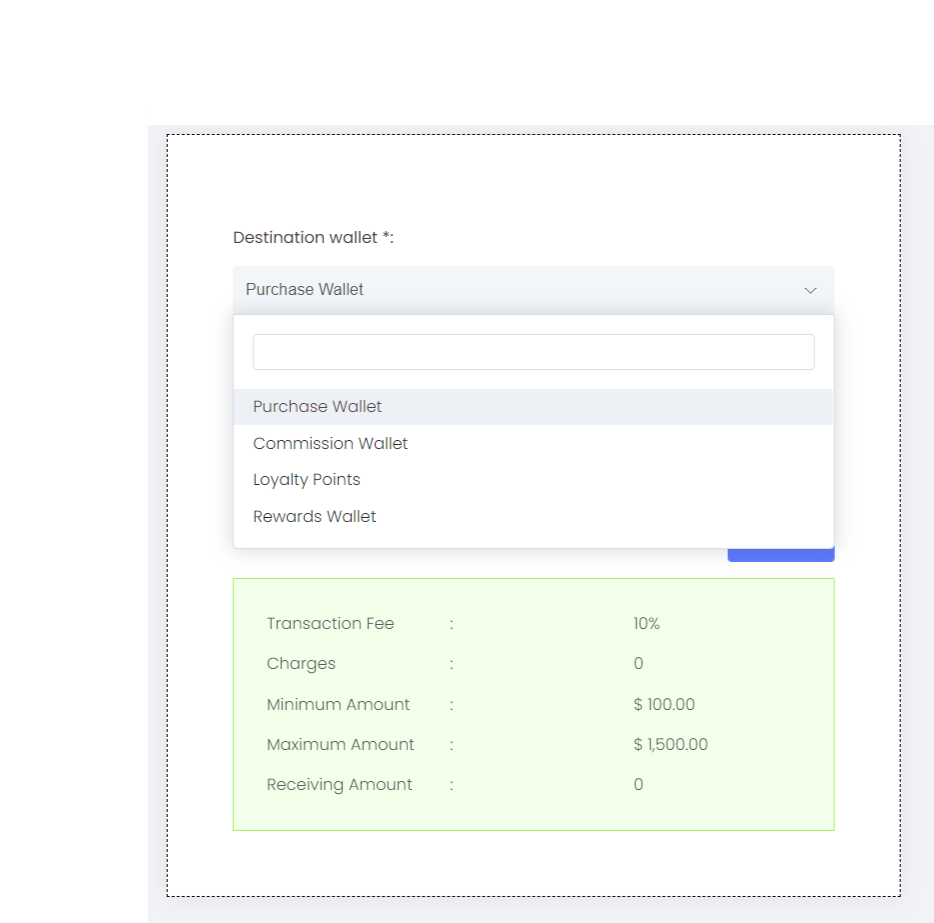
Internal Transfer
Internal wallet transfer means we can transfer the amount from one wallet to another wallet (particular user). Here we have the option to choose the wallets according to our wish, and here we can also set the transfer charge for each transaction made by the users. If we enable the wallet transfer here, the internal transactions will happen.

Step:1
Select the Source Wallet and Destination Wallet.
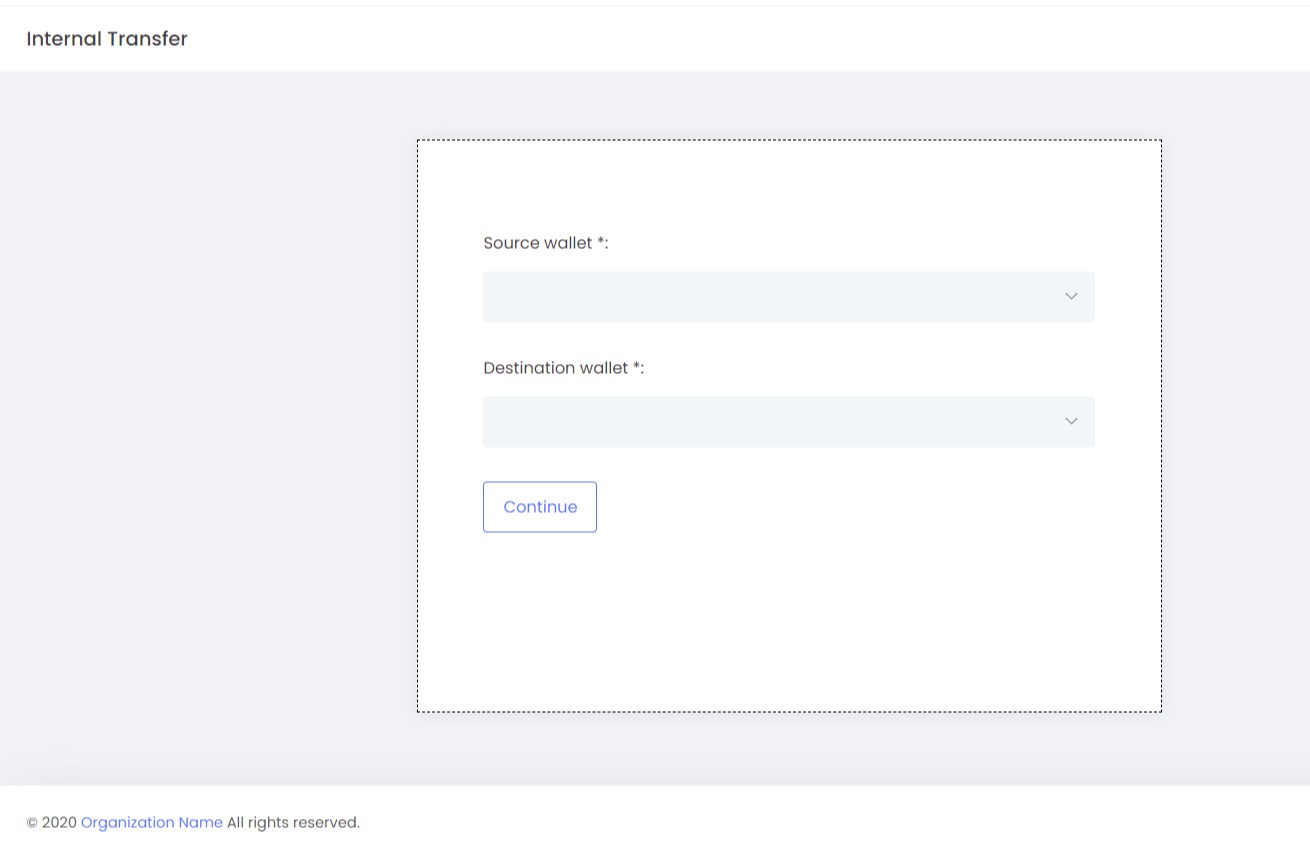
Step:2
It shows the wallet balance of the Source Wallet.

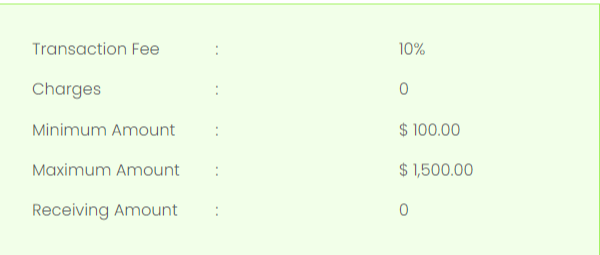
Step:3
If we provide the transfer amount then we can see a transaction fee, charges for the transactions.
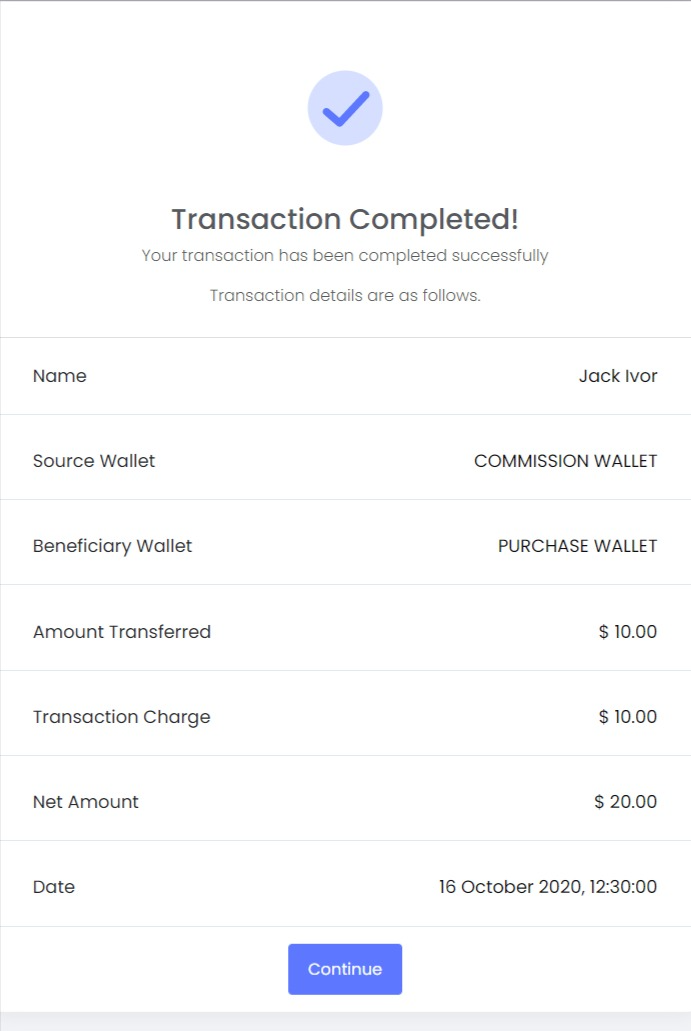
Step: 4
Here we have to choose a transfer request. Suppose if we choose the email token then a mail will be sent to the corresponding user's mail id. We have to enter the token which we received in the mail. After you enter the token number then your request for payout is done successfully.
If you enable two-factor authentication, it will show a scan QR code. If you scan the QR code using Google Authenticator, you will receive a token number on your mobile device. If you type the token number then you have successfully enabled two-factor authentication. Kindly refer to the link for more details.
Step:5
Internal wallet transfer is successful.
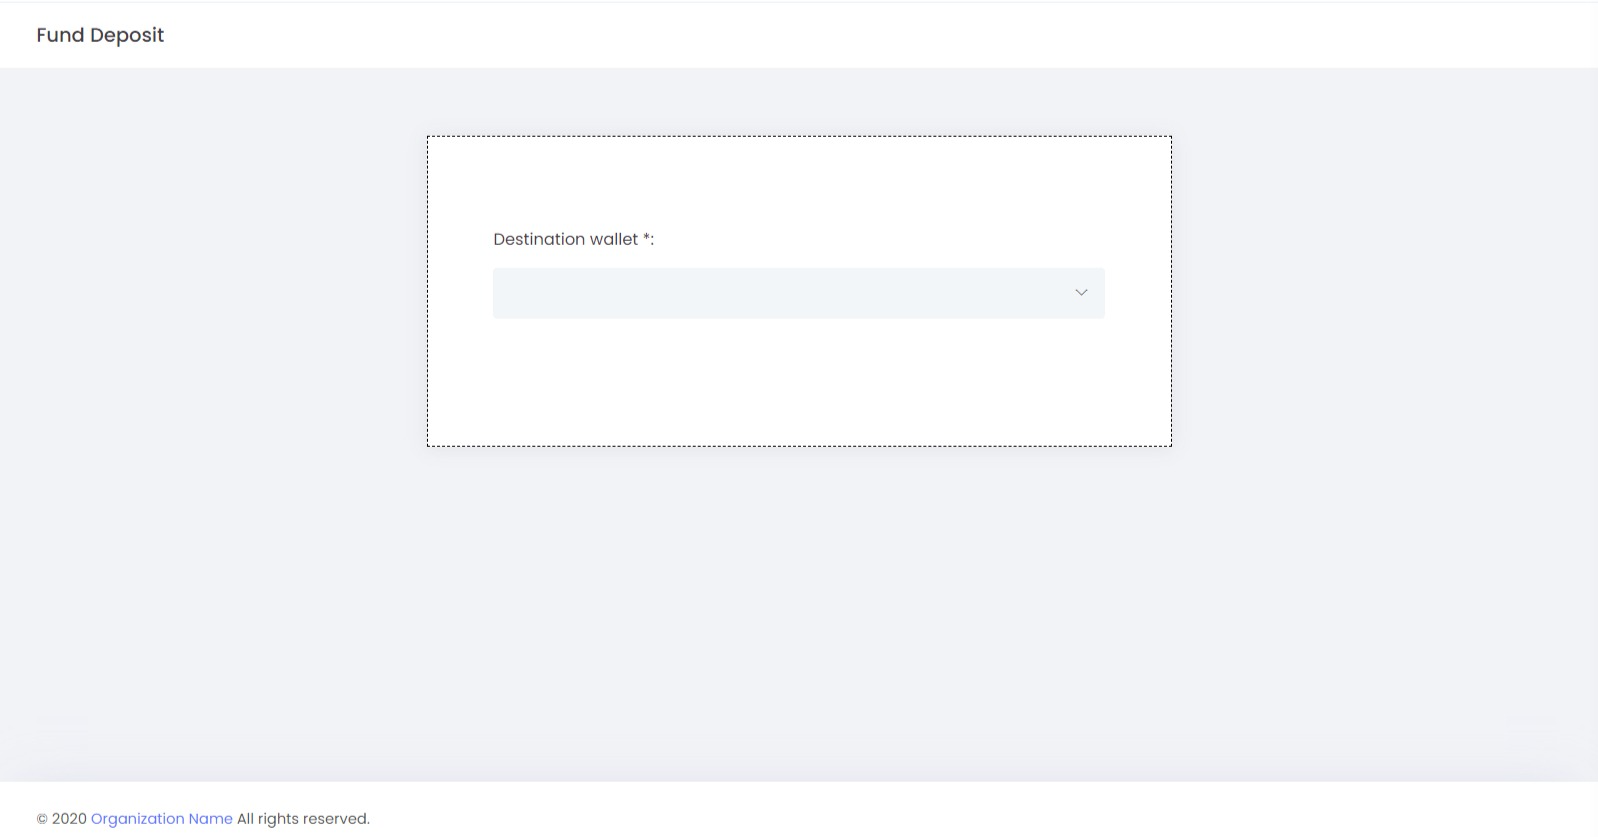
Fund deposit
With this option, we can deposit the amount in the Desired Wallet.
Step 1 :
Here we have to choose the Destination Wallet. We have to choose the wallet to transfer the amount. Whatever wallets that have been configured by Admin will show here.
Step: 2
Provide the amount to transfer in the wallet.
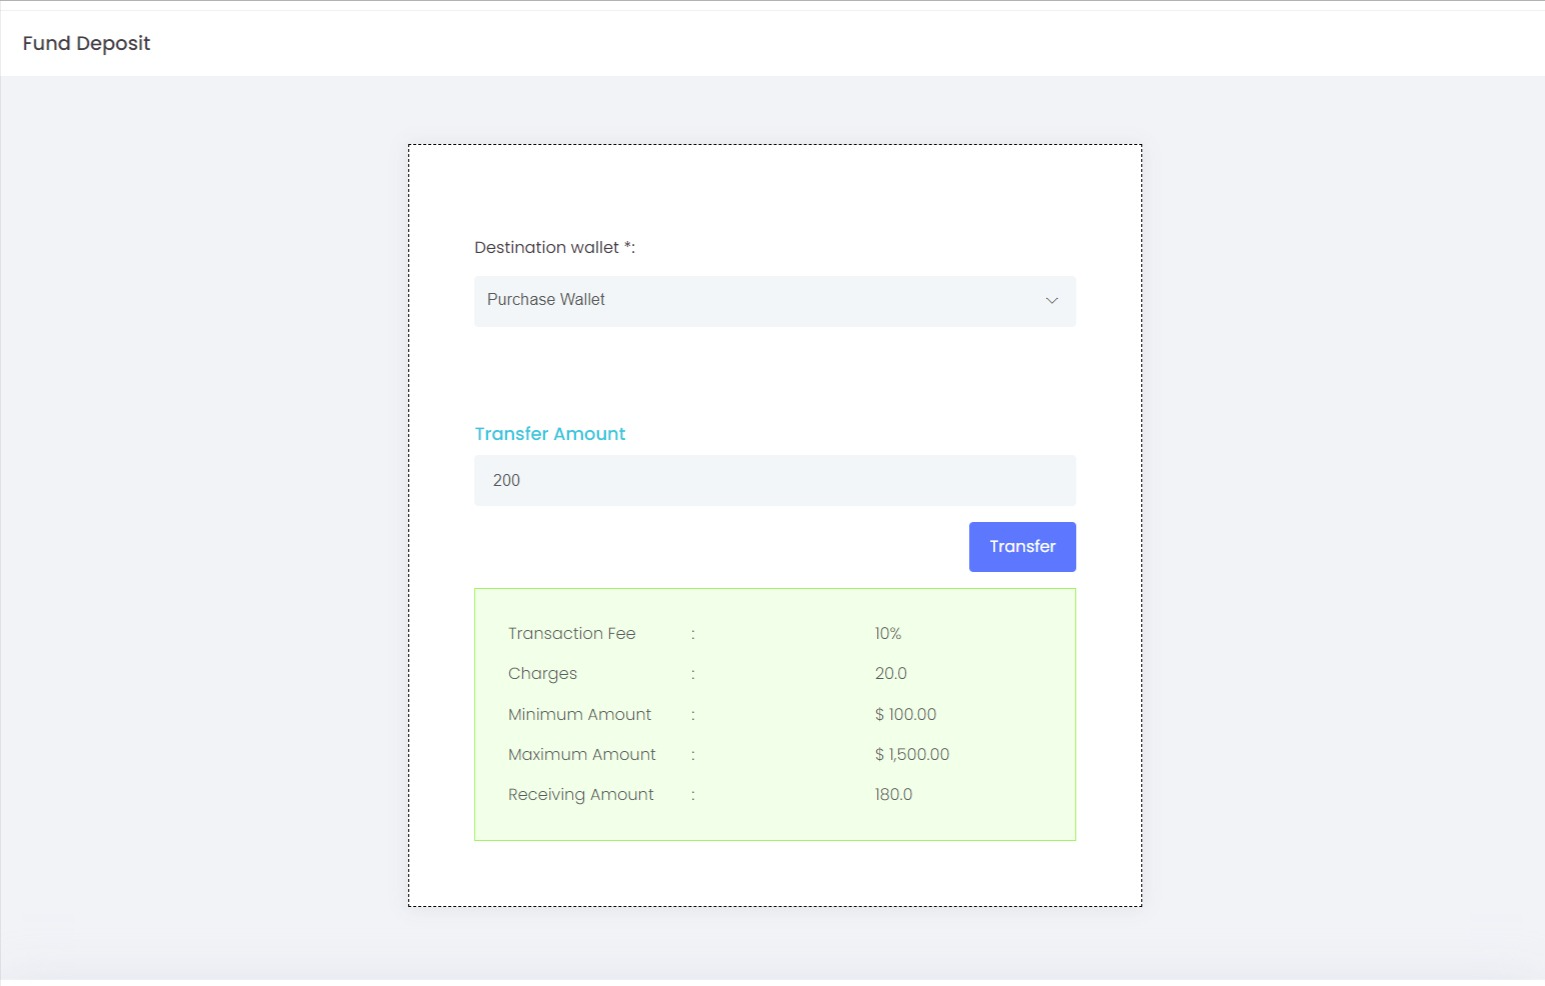
Here we have to choose a withdrawal request. Suppose if we choose the email token then a mail will be sent to the corresponding user's mail id. We have to enter the token which we received in the mail. After you enter the token number then your request for payout is done successfully.
If you enable two-factor authentication, it will show a scan QR code. If you scan the QR code using Google Authenticator, you will receive a token number on your mobile device. If you type the token number then you have successfully enabled two-factor authentication. Kindly refer to the link for more details.
Step:3
Here we have provided to edit the billing address, and also to add a new address, etc.
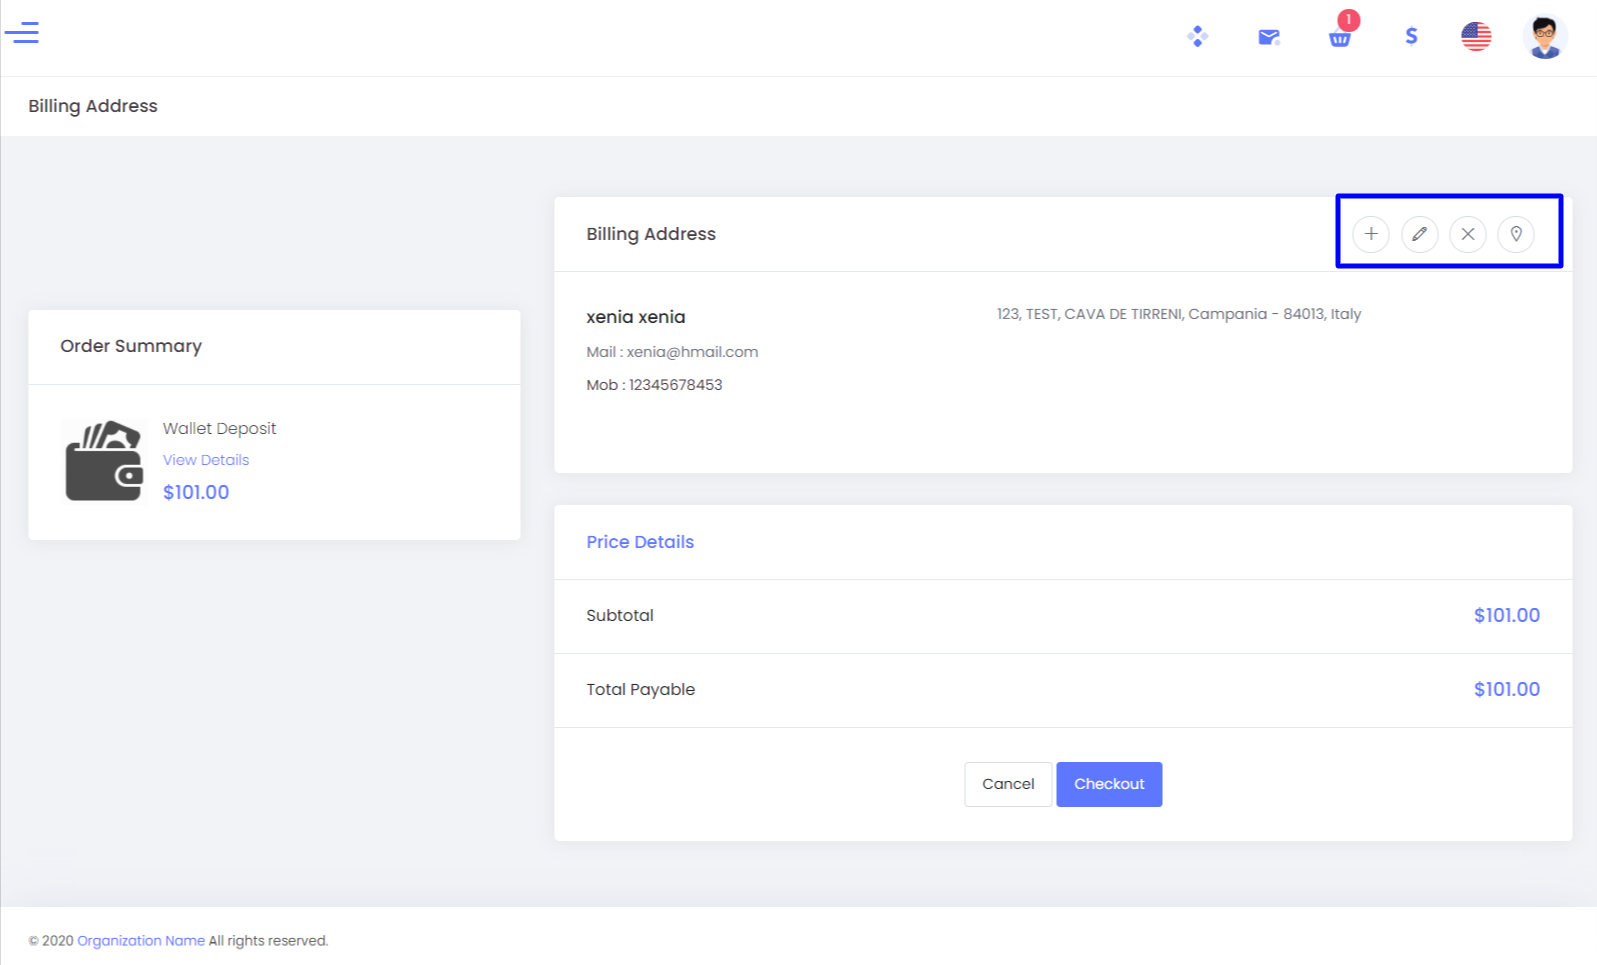
Step:4
We have successfully completed the fund deposit.
Prepaid Coupons
Here in this option, we are converting the amount into prepaid coupon codes so that we can purchase with that. The users will be provided with prepaid coupon codes (instead of amount ), where the users are able to purchase with the prepaid coupon codes.
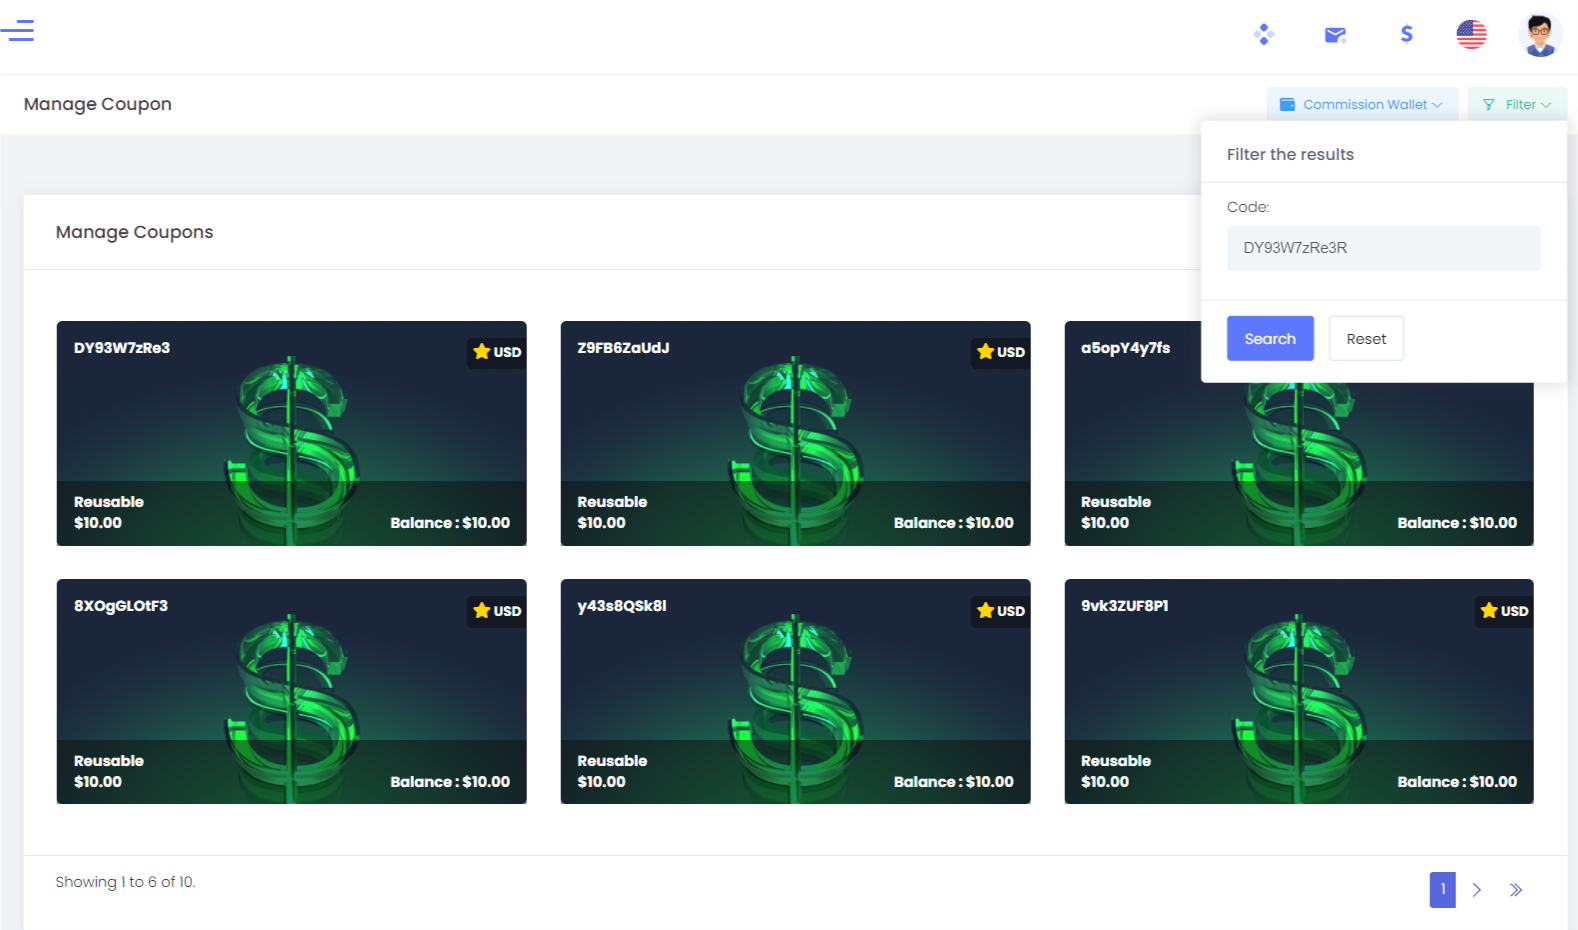
Active Coupons
In this option, we are able to view the active coupons that have been generated within the system.
Here we have provided options to view the coupons of different wallets and also filter to reach the coupon with the code that is generated.
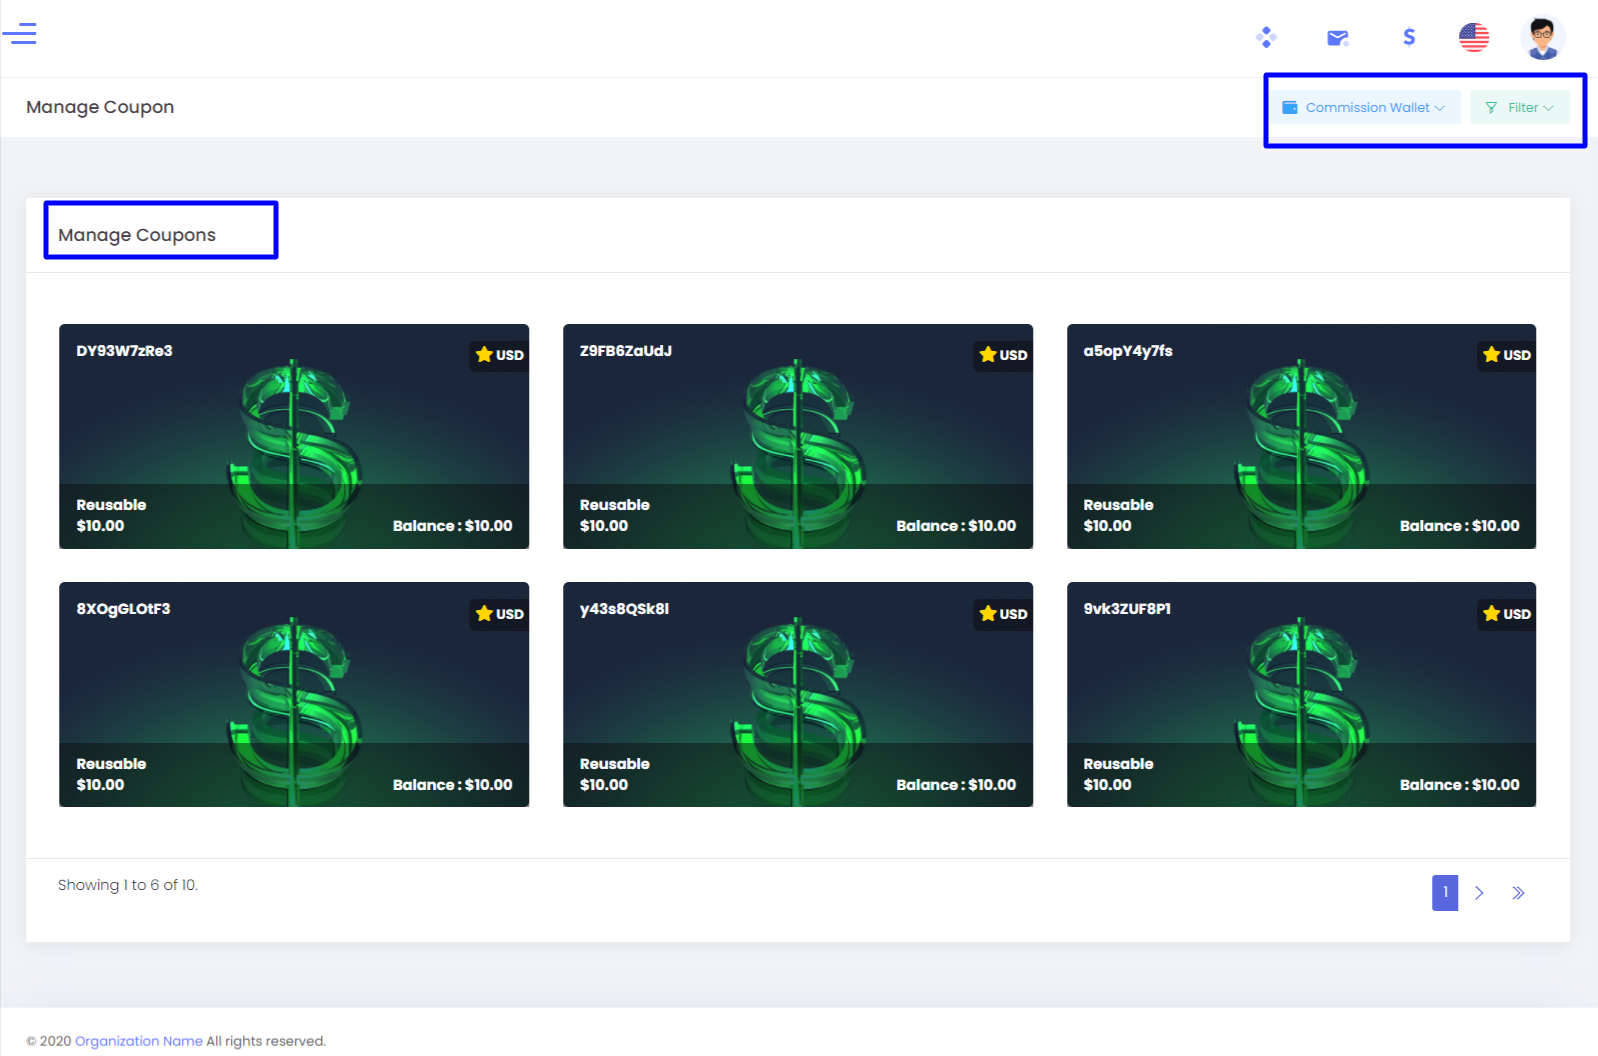
We can provide different currencies for different wallets.
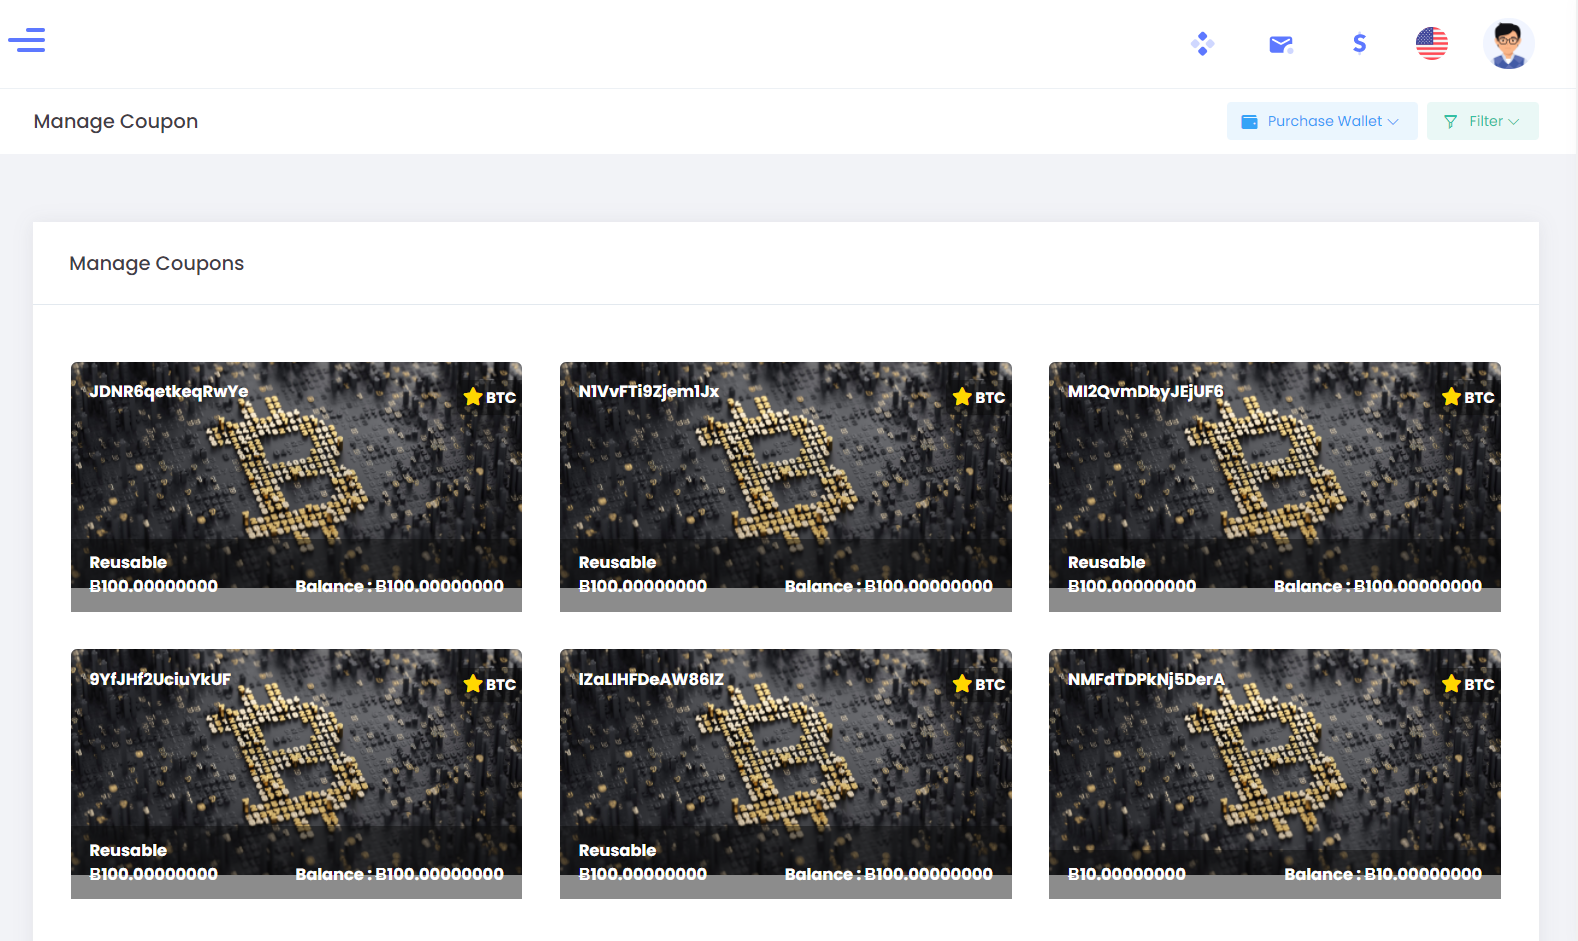
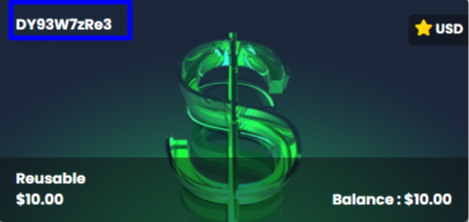
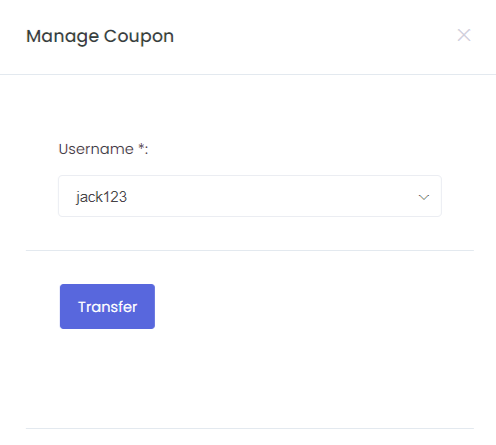
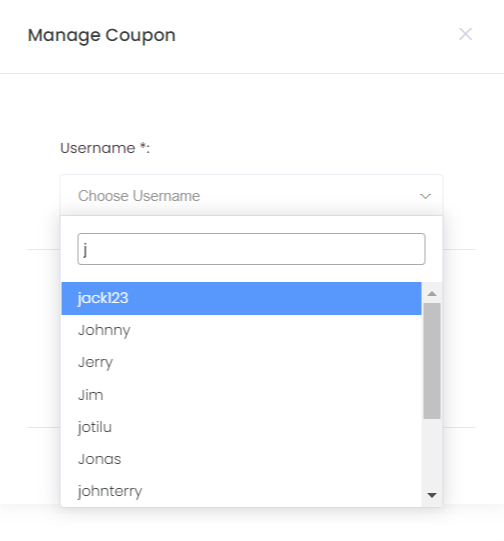
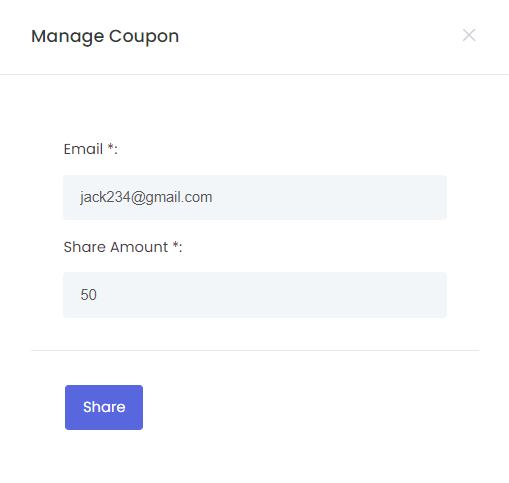
Active coupons have three options; Copy, Transfer, and Share
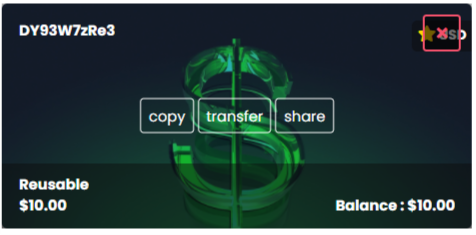
Copy: We can copy the code of the coupon and we can paste the code for purchasing. The Code of the coupon is highlighted.
Transfer: With this option, we can transfer the coupons to the users within the system. Once the coupon is transferred then it will not be shown in that particular wallet.
Share: We can share the coupons by providing the email id and also the amount that has to be shared.
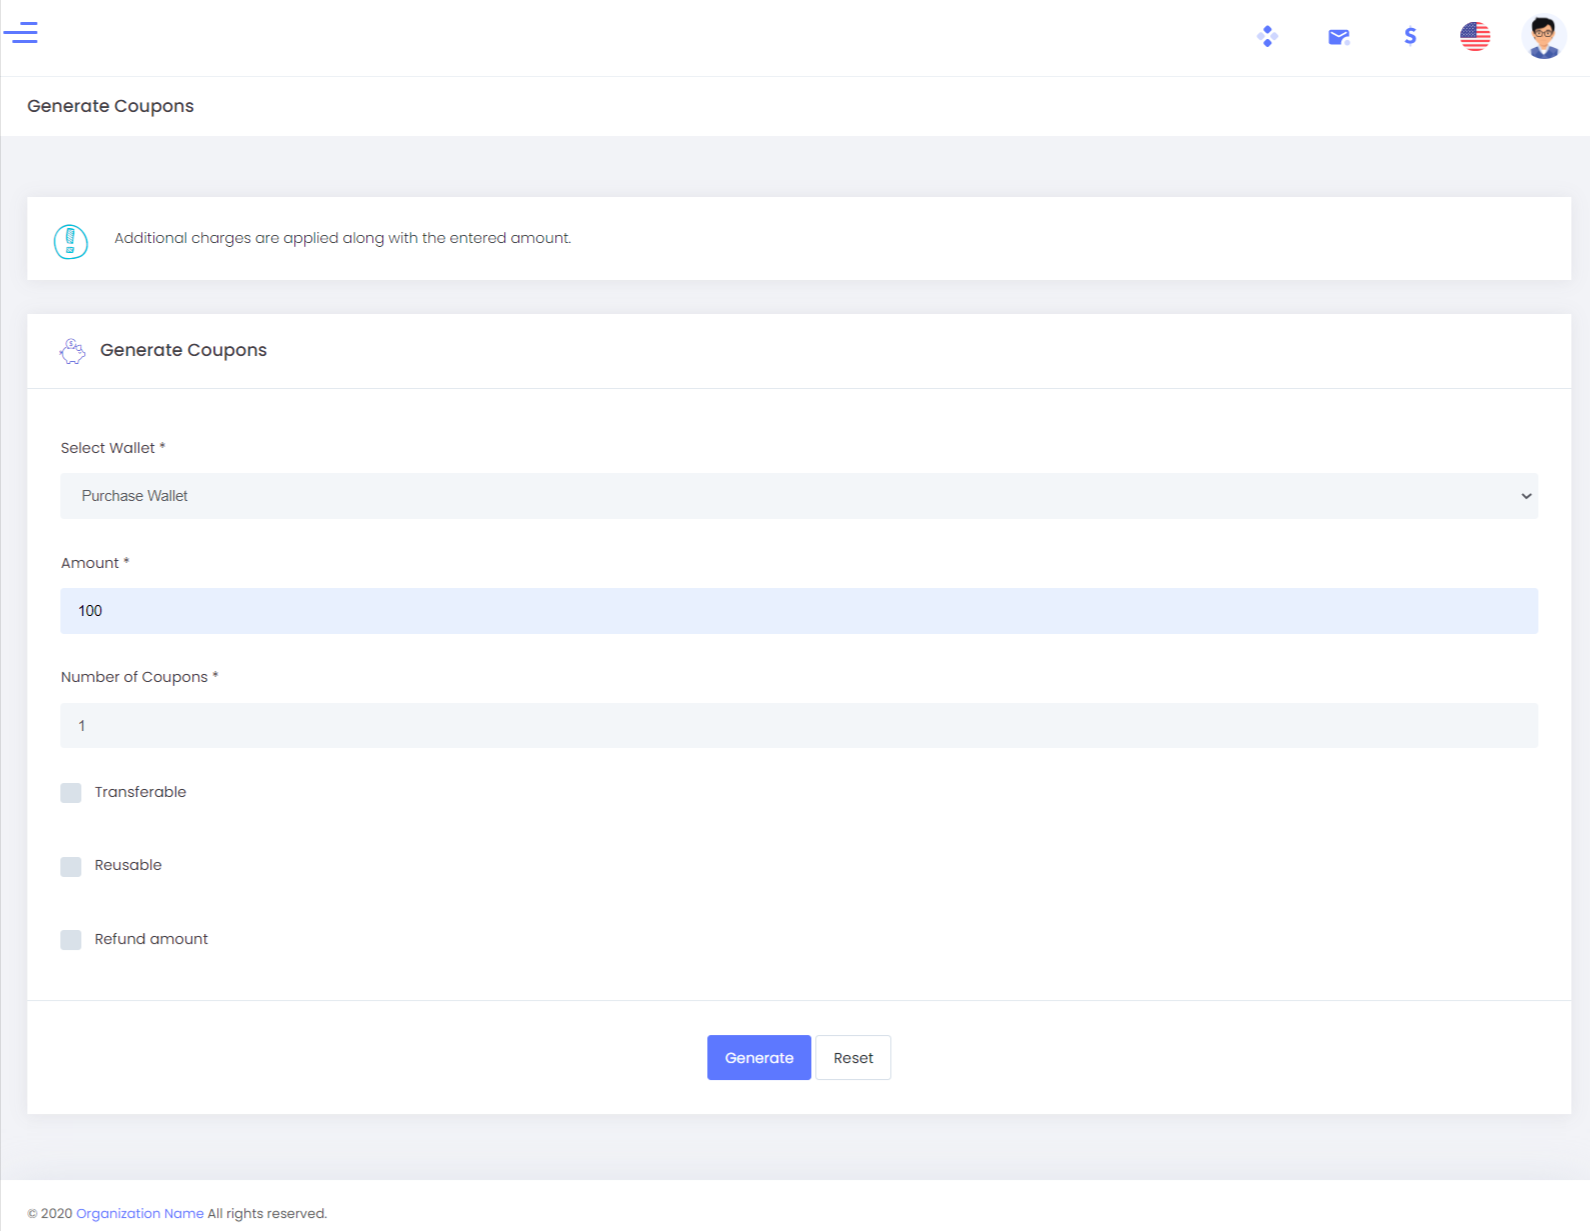
Generate Coupons
With this option, we can be able to select the wallets to generate the coupons. We can generate coupons for different wallets. We can use coupons for purchasing within the system.
Our system is designed to use coupons in an easy way. Our coupons are Transferable, Reusable, and can be Refundable also. Let's discuss each option
Select Wallet: We can select the wallet to create the coupon.
Amount: How much amount should be provided to create the coupon.
Number of coupons: How munch coupons should be provided for the users and also for the admin.
Transferable: With this option, we can transfer the coupons to the users within the system.
Reusable: If we enable this option, coupons can be reusable ie For Eg: If a user has a coupon for 100$ then if he purchased for 20$ with that coupon then he can reuse the coupon for the next purchase.
Refund amount: This option is available only for the Admin side. When a user is generating a coupon and suppose he deletes the coupon then the Admin will decide whether the user should get the refund amount when the user deletes the coupon.
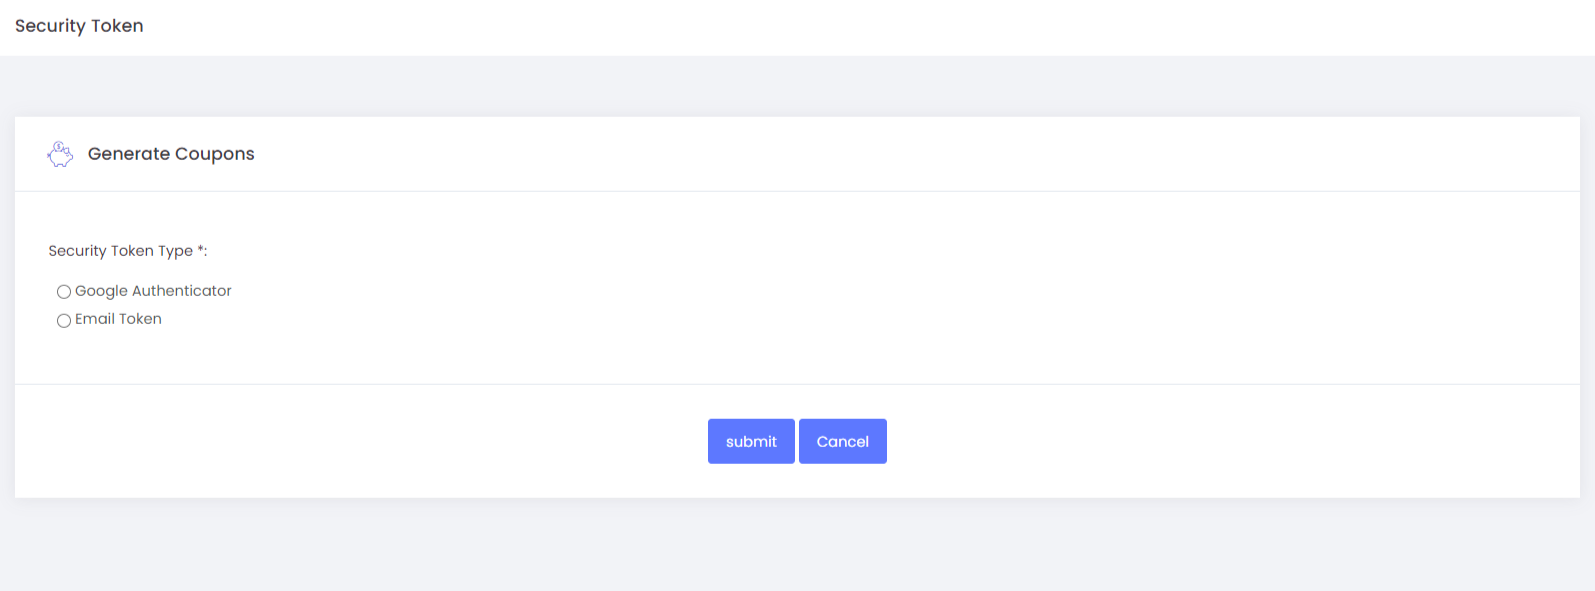
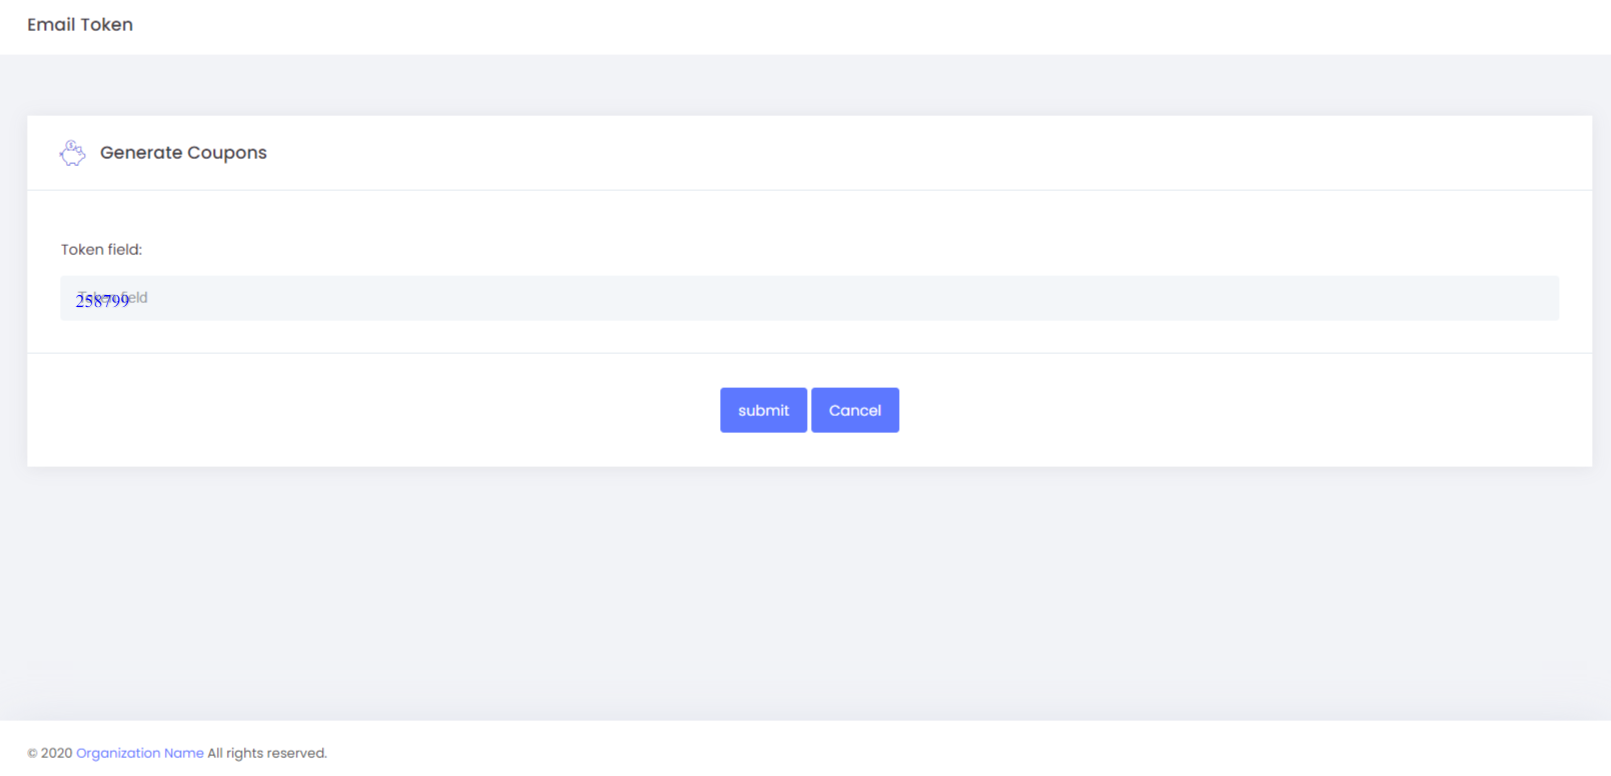
Once we generate coupons then it will redirect to the Security token page then here we have to choose an Email token or Google Authenticator.
Kindly refer to the link for more details.
We have to provide the token number.
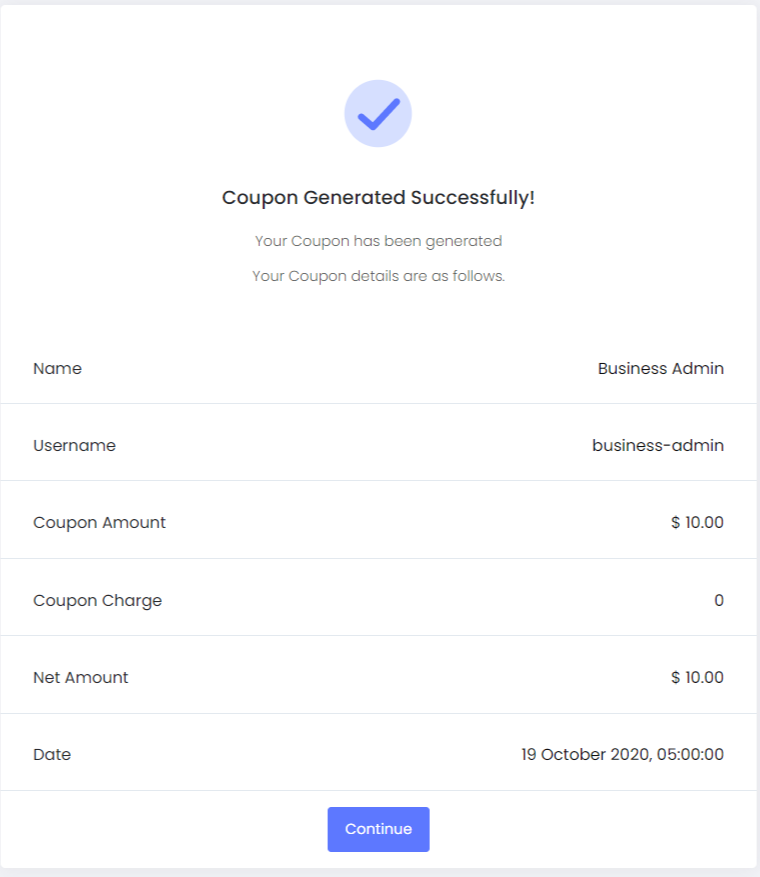
We have generated the coupon successfully.
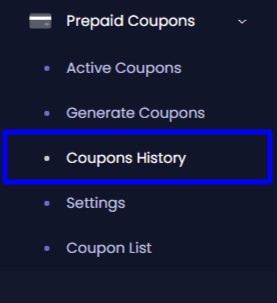
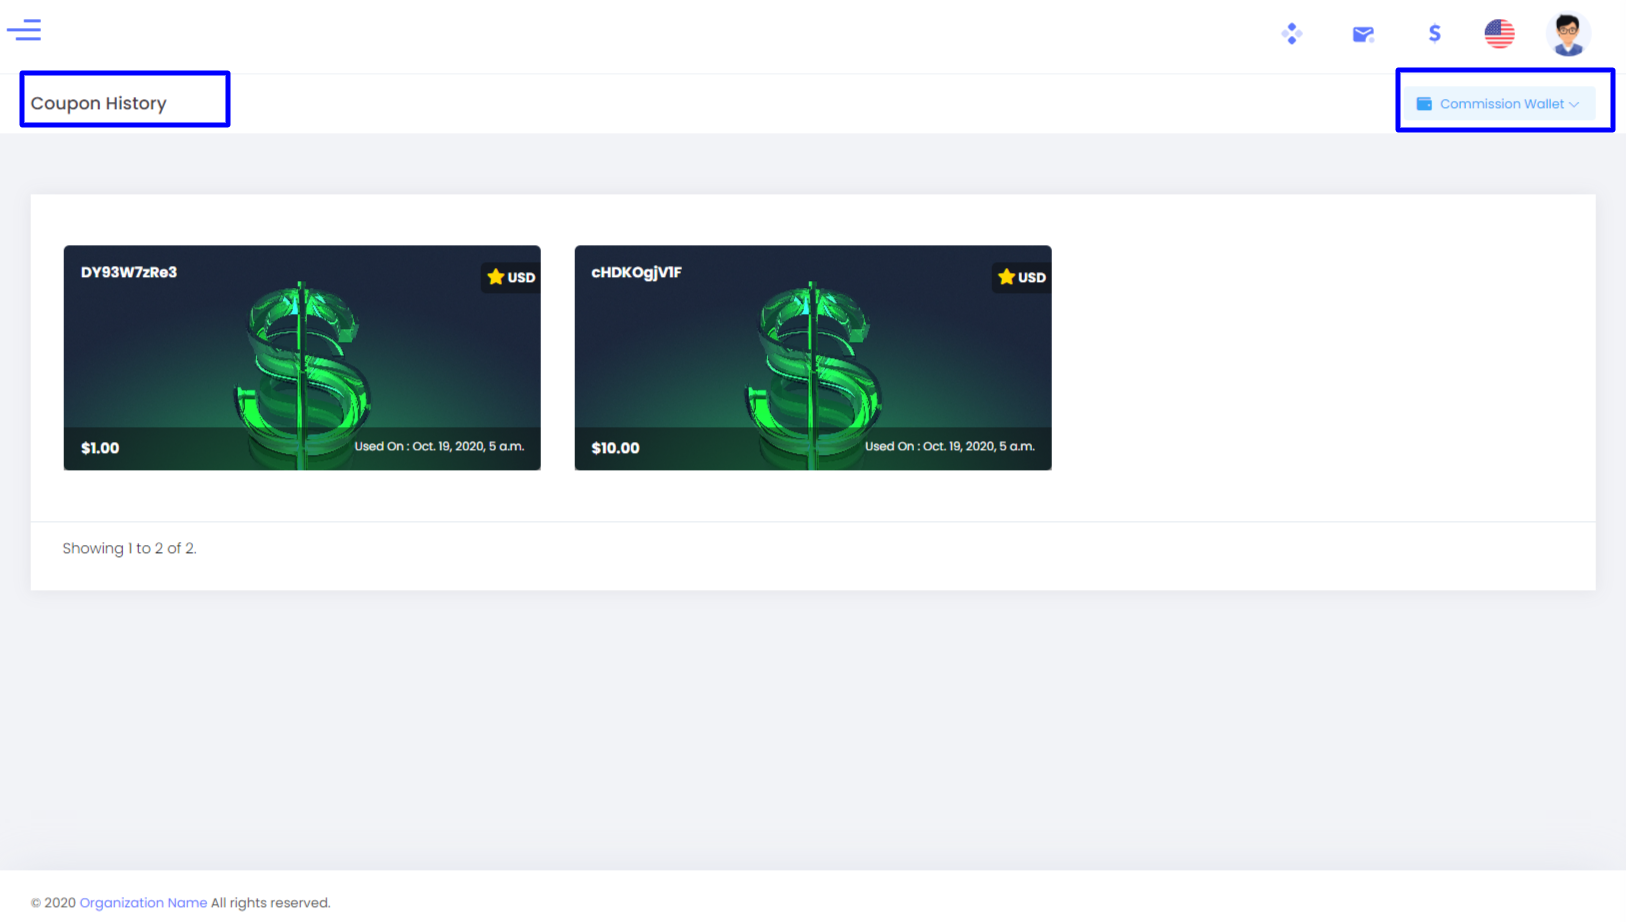
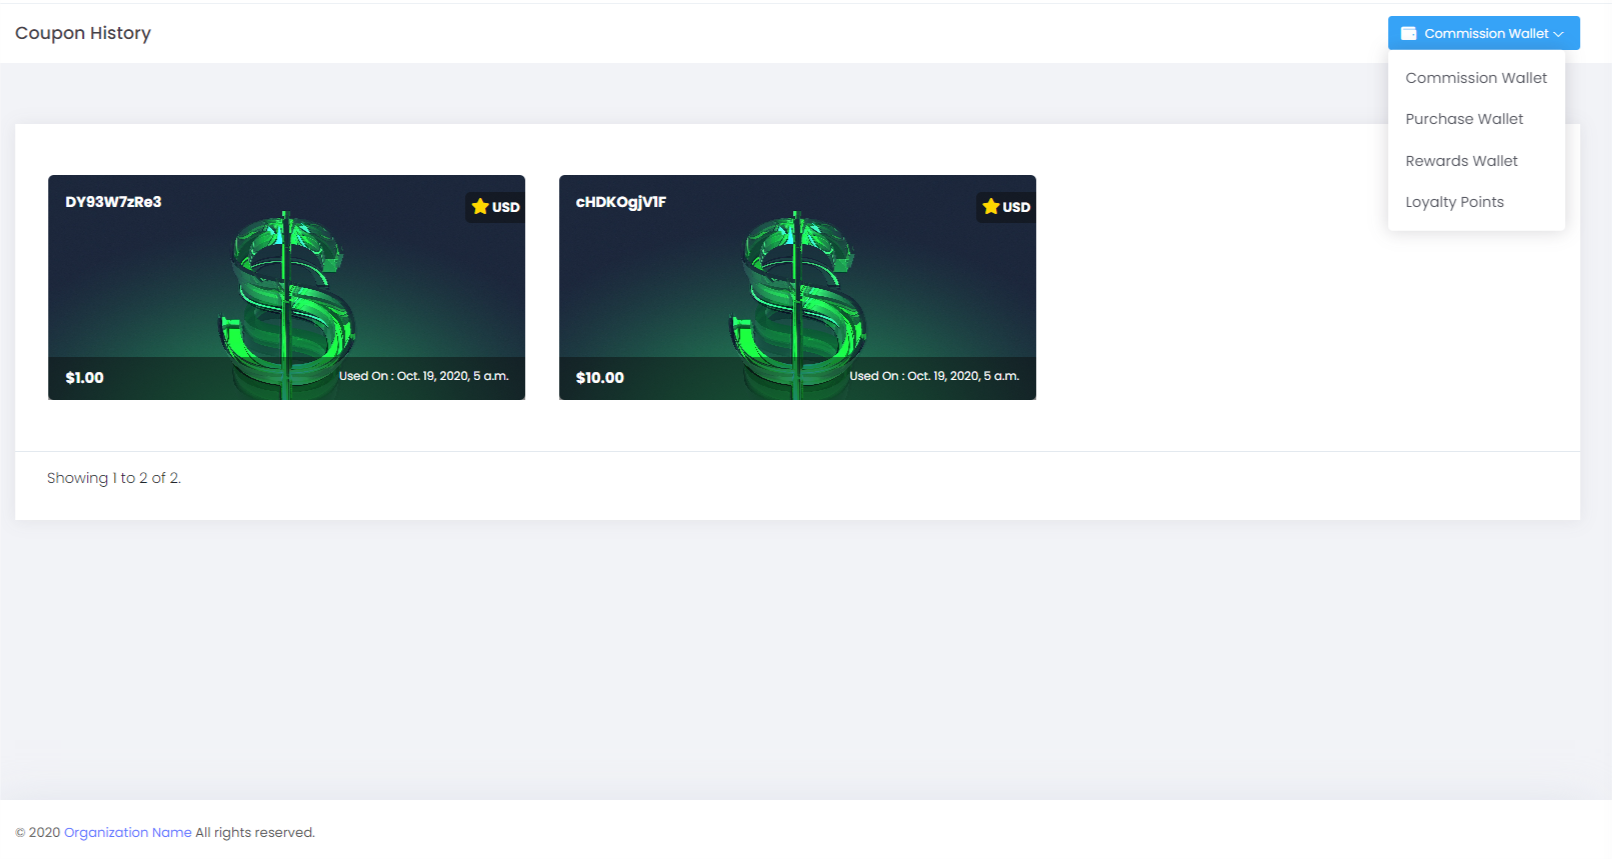
Coupon History
In this option, we can able to view the full history of the used coupons that we have generated within the system. In this option, we can able to view the used coupons of different wallets.
Settings in Prepaid Coupons
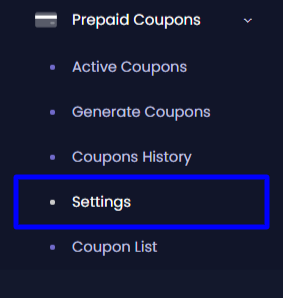
With this option, we can do the settings of the different wallets of the prepaid coupons as per the requirement. Here we have provided 4 types of wallets, in these 4 types of wallets, we can configure the settings as per the requirement. We can set different types of settings in each wallet.
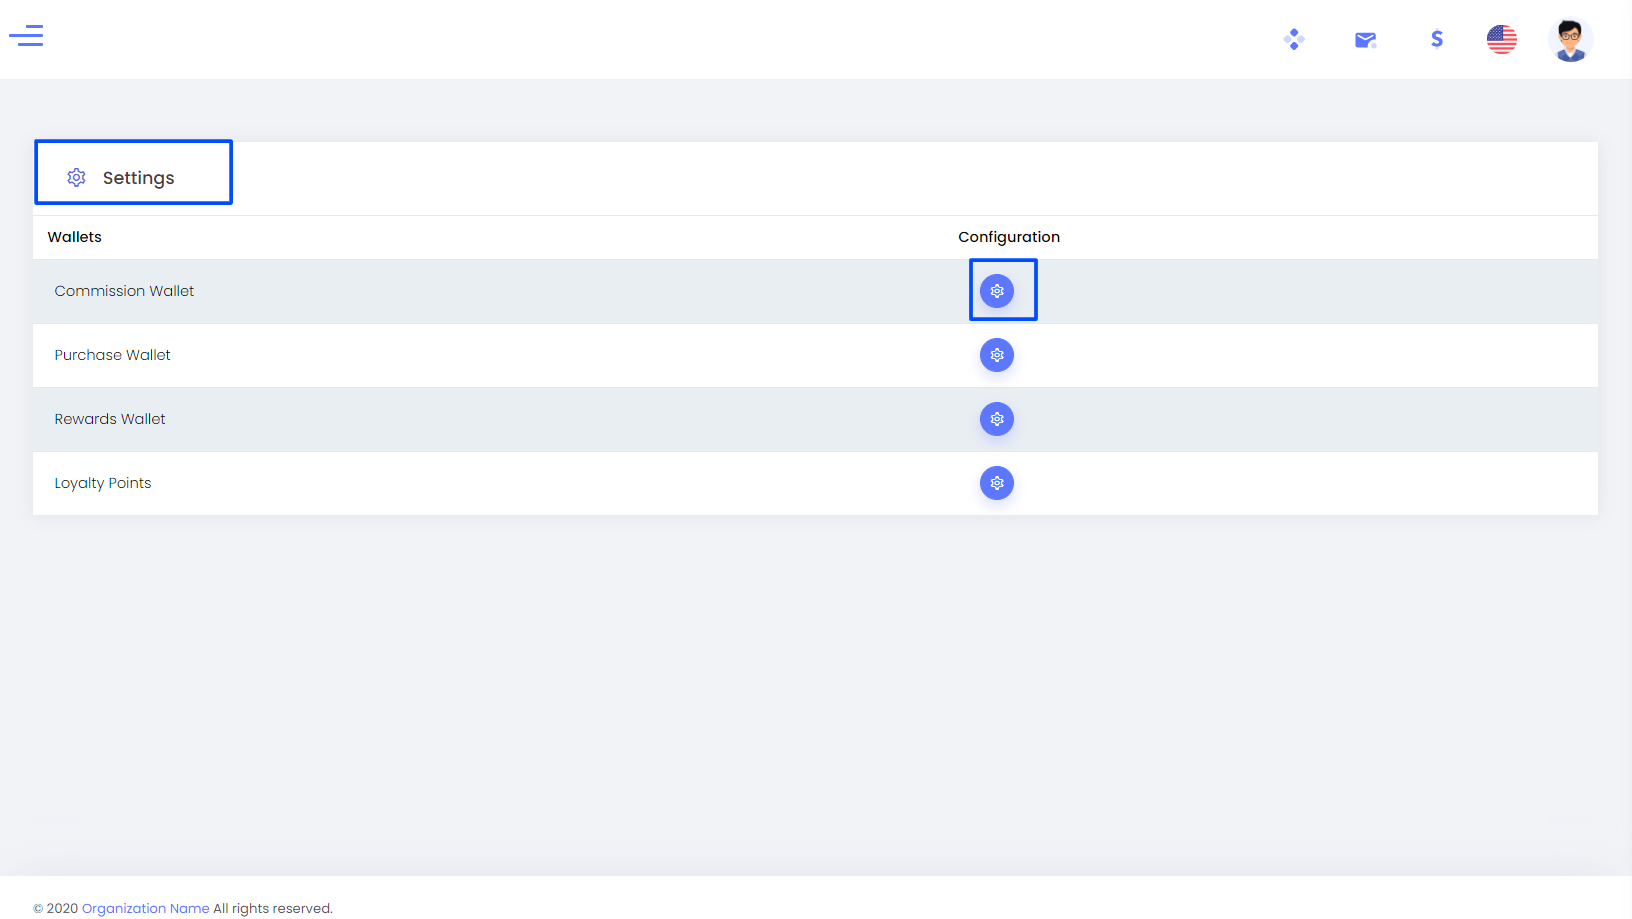
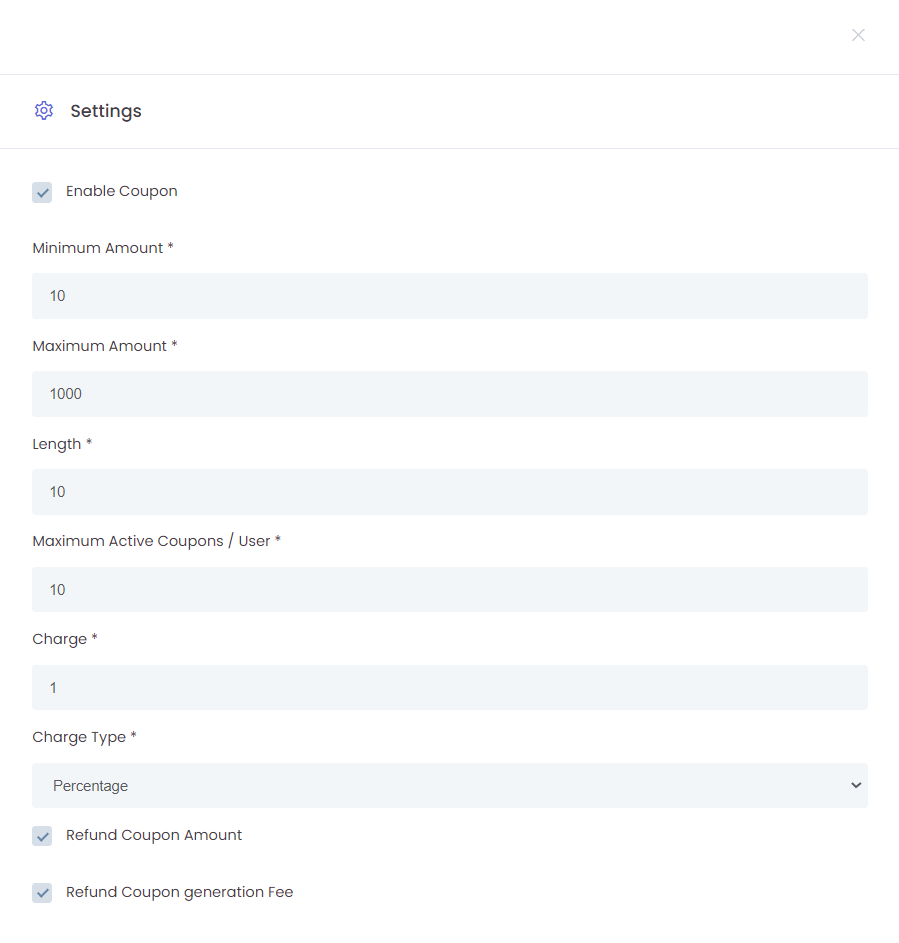

Admin can enable/disable this feature according to their requirement. We have to provide the details of the following.
Minimum Amount: Minimum Amount of coupon.
Maximum Amount: Maximum Amount of coupon.
Length: With this option, we can set how much our coupon length should be.
Maximum Active Coupons/User: How much Maximum Active Coupons should be provided for the users.
Charge: With this option, we can set how much charge of the coupon.
Charge type: We can choose the charge type as a percentage or price.
Refund coupon amount: We can able to refund the coupon amount in the wallets if we don't use the coupon. That amount will be credited to the wallets. Suppose for Eg: If we have a coupon for 500$ and we did a purchase for 450$, then the balance of 50$ we can refund in the wallets.
Refund coupon generation fee: if we enable this, the user can get the transfer charge amount. If we disable this then, Admin will get the transfer charge amount.
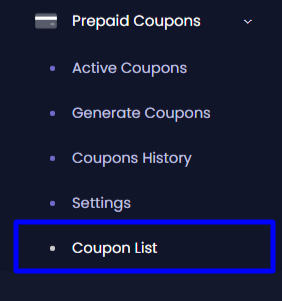
Coupon List
In this option, we are able to view the entire coupon that is created within the system. We have provided separate views for different wallets.
We have provided different sections like
Current Owner: The current owner of the coupon.
Created by: Who generated the coupon.
Coupon: The coupon code will be displayed.
Amount: It shows the amount of the generated coupon.
Balance: It shows the balance amount of the generated coupon.
Status: The status of the generated coupons.
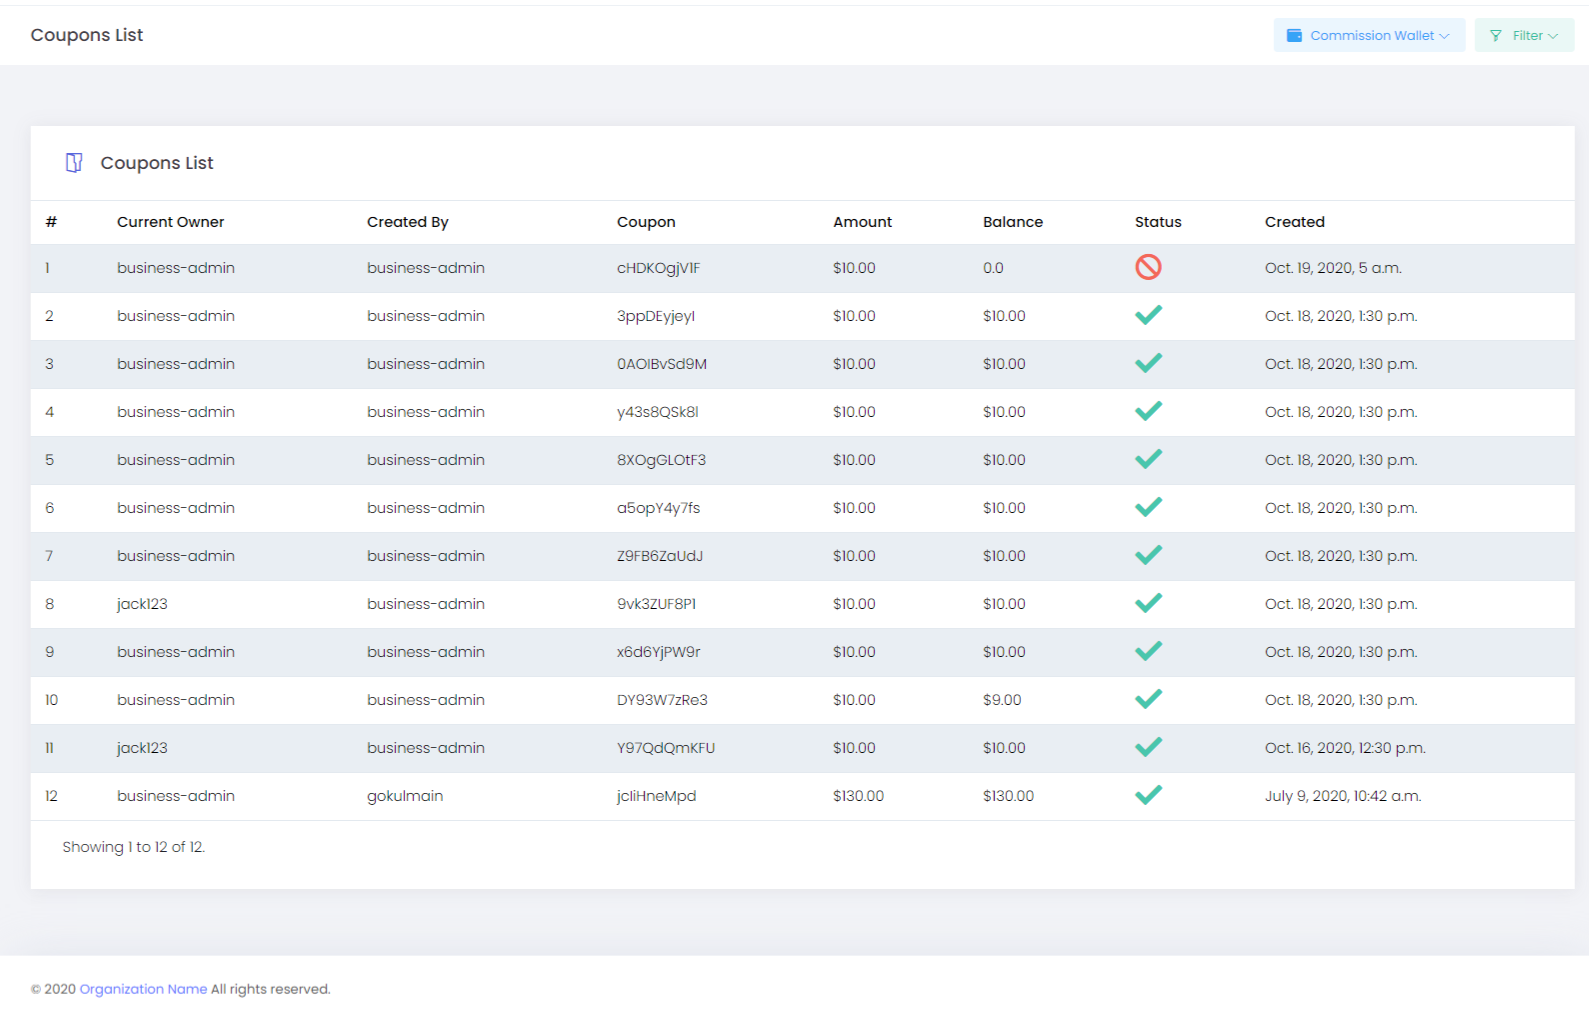
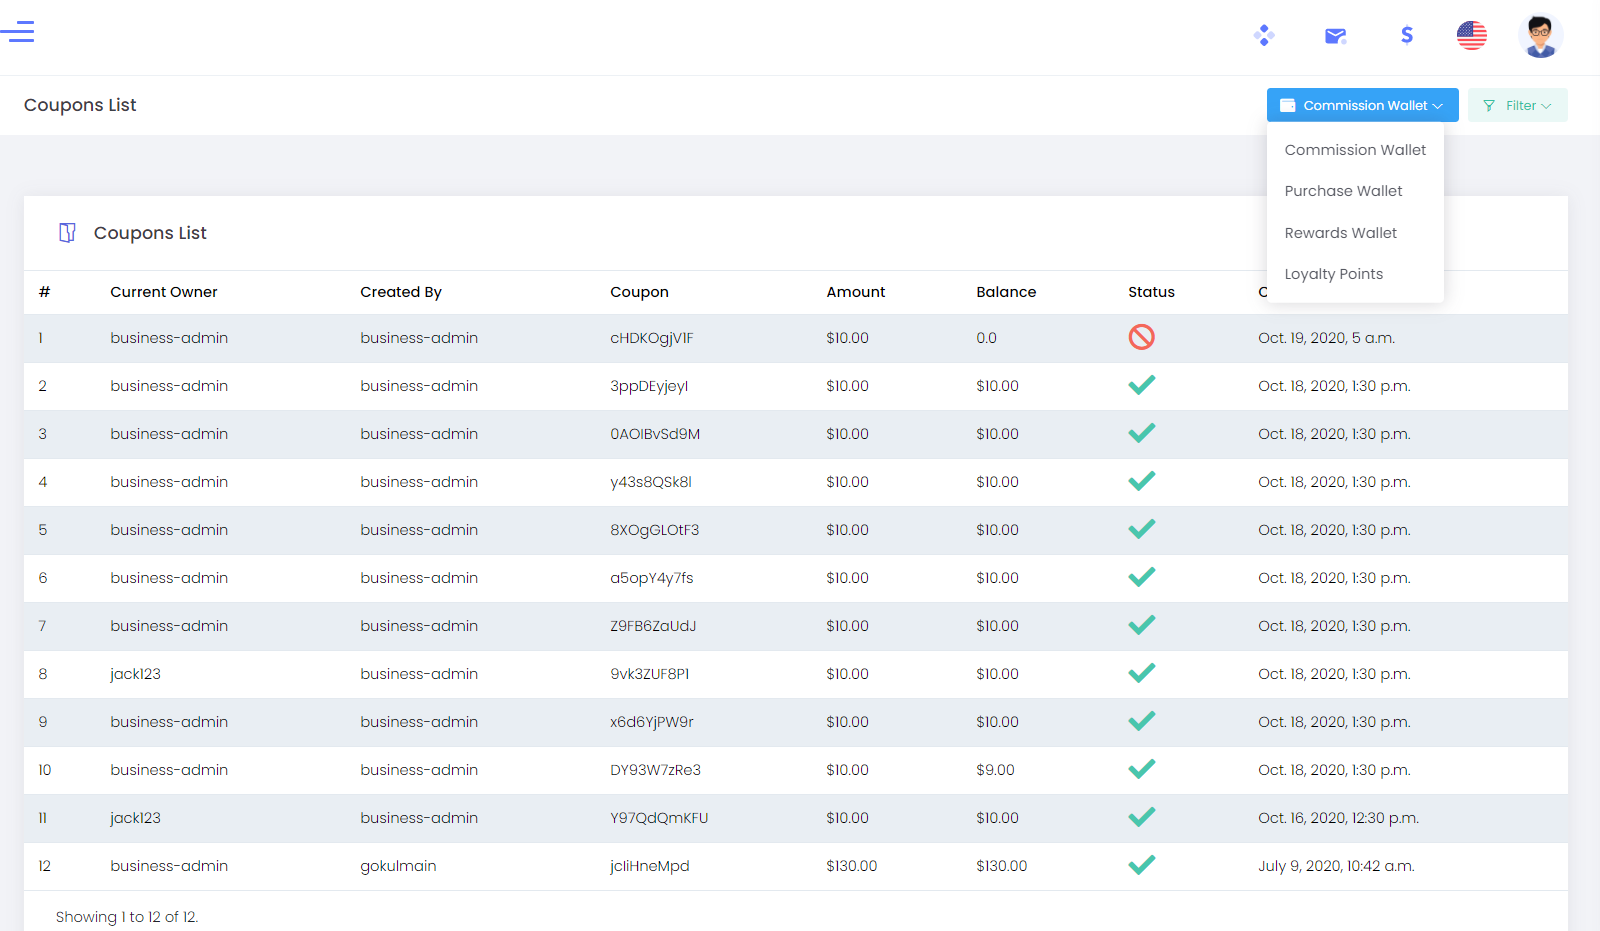
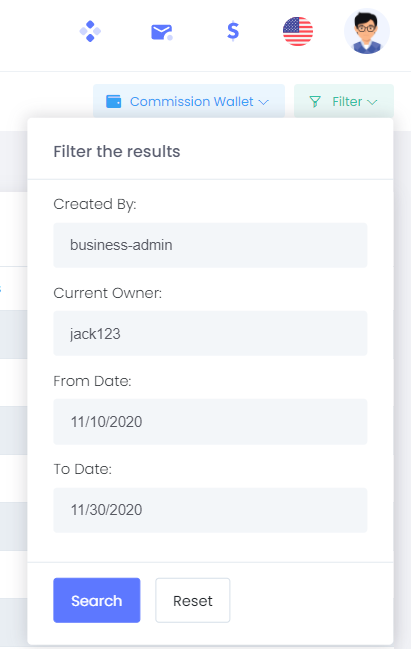
Filter: The filter option helps you to reach the exact member details you are looking for by submitting the current owner and created by and also by from date-to-date.