Epixel MLM Software - Back-office Administration
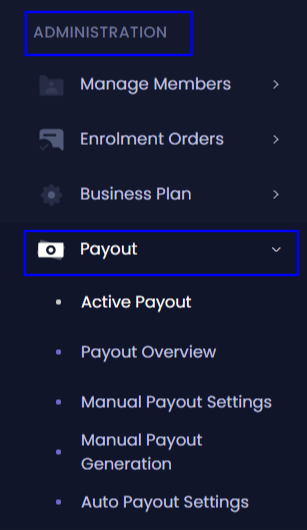
Administration
Administration
Administration
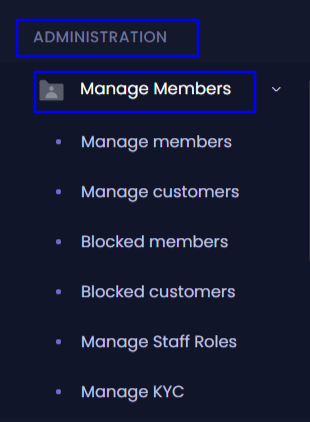
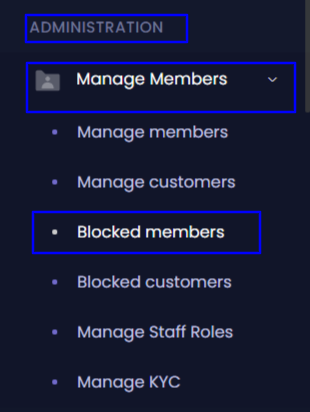
Manage Members
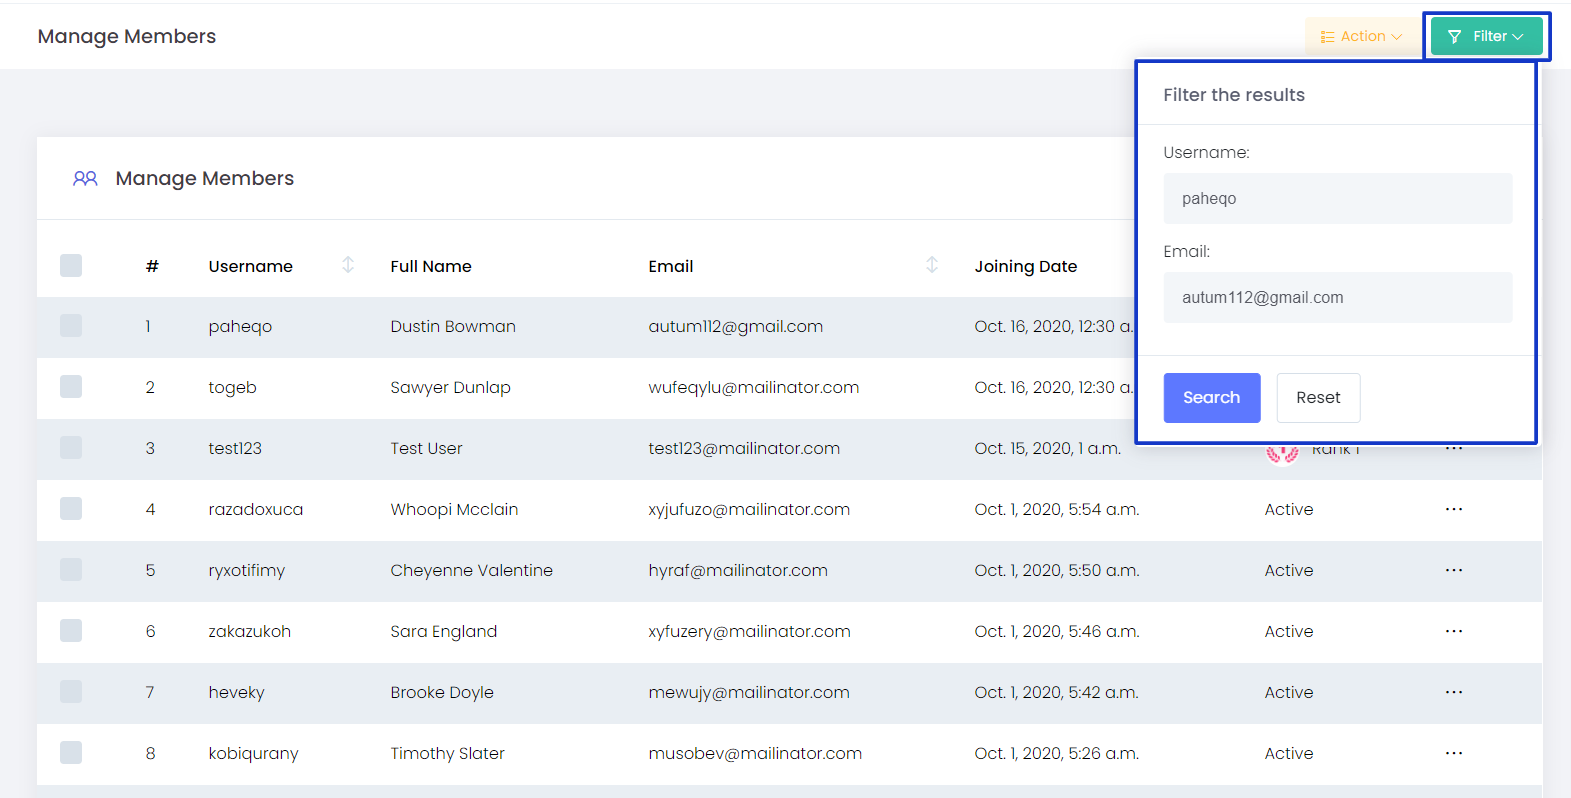
Admin can manage his Members and Customer details from this option
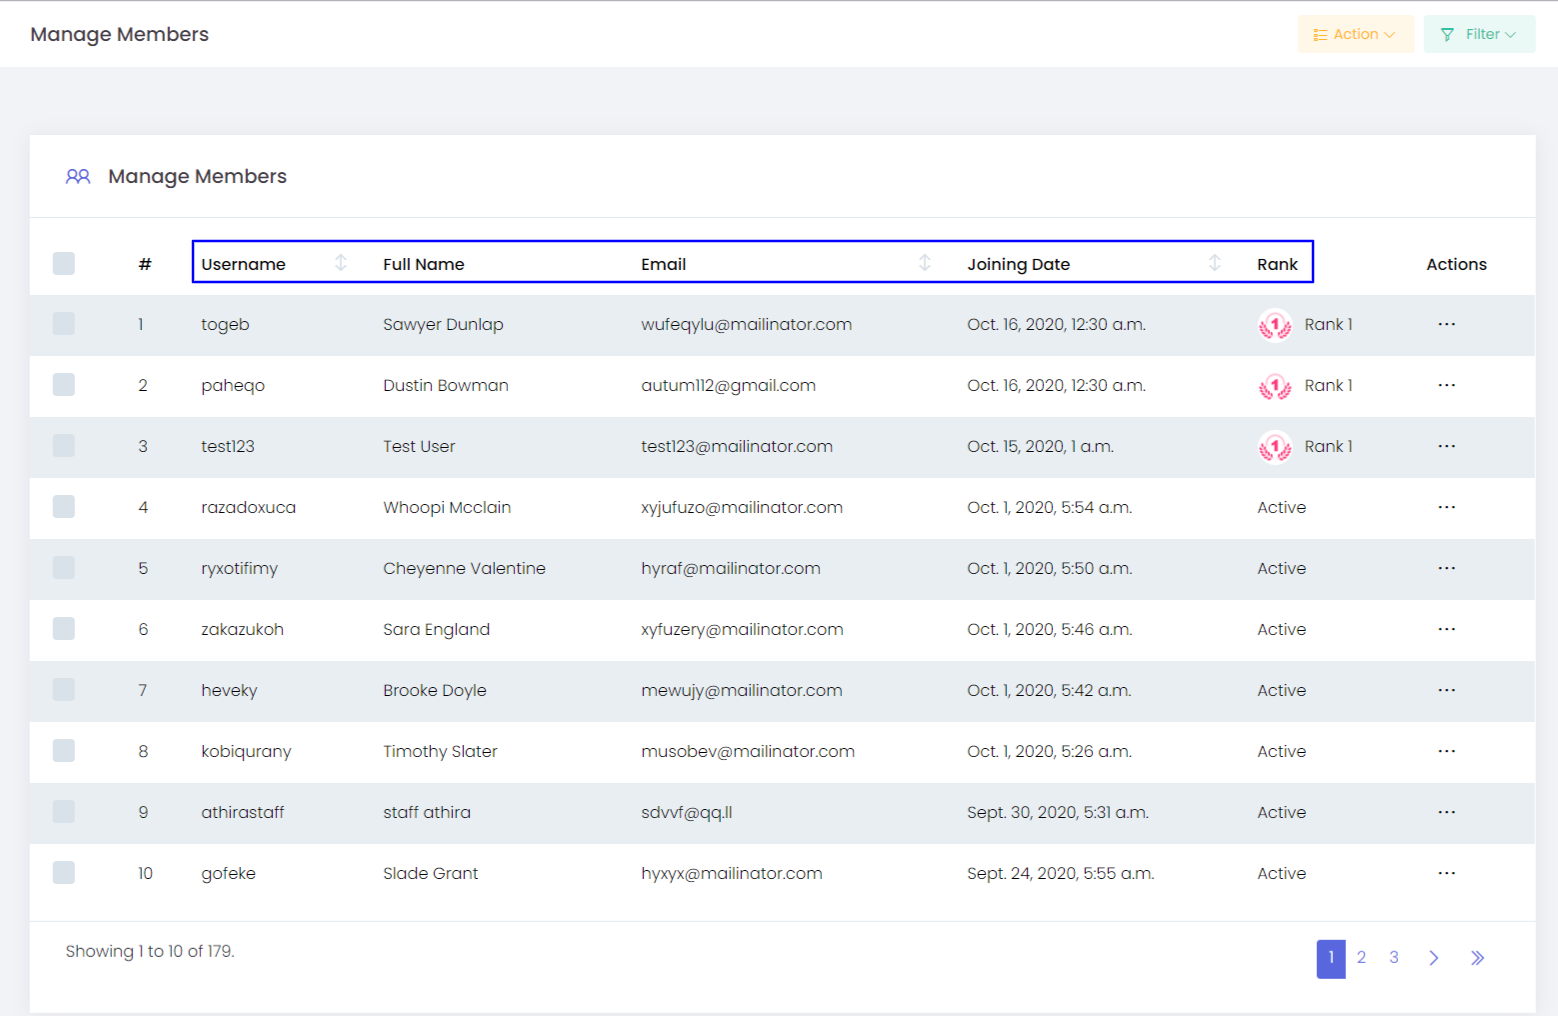
Admin can view the list of the members and the following details in the system.
- Username - Username of the team member which was given while registration
- Full name - Full name of the team member which was given during registration
- Email - The email address of the team member
- Joining Date - The date at which the user joined the system
- Rank - The current rank of each user
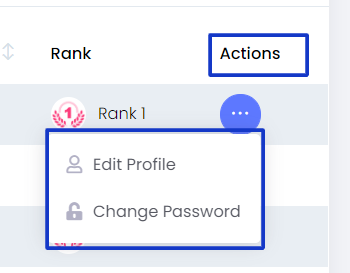
Actions
Edit Profile - Admin can use this option to edit the user details. Admin can edit the fields like Username, First name, Last name, Email address, Phone number, Country of each user.
Change Password - Admin can reset the password of users from this option.
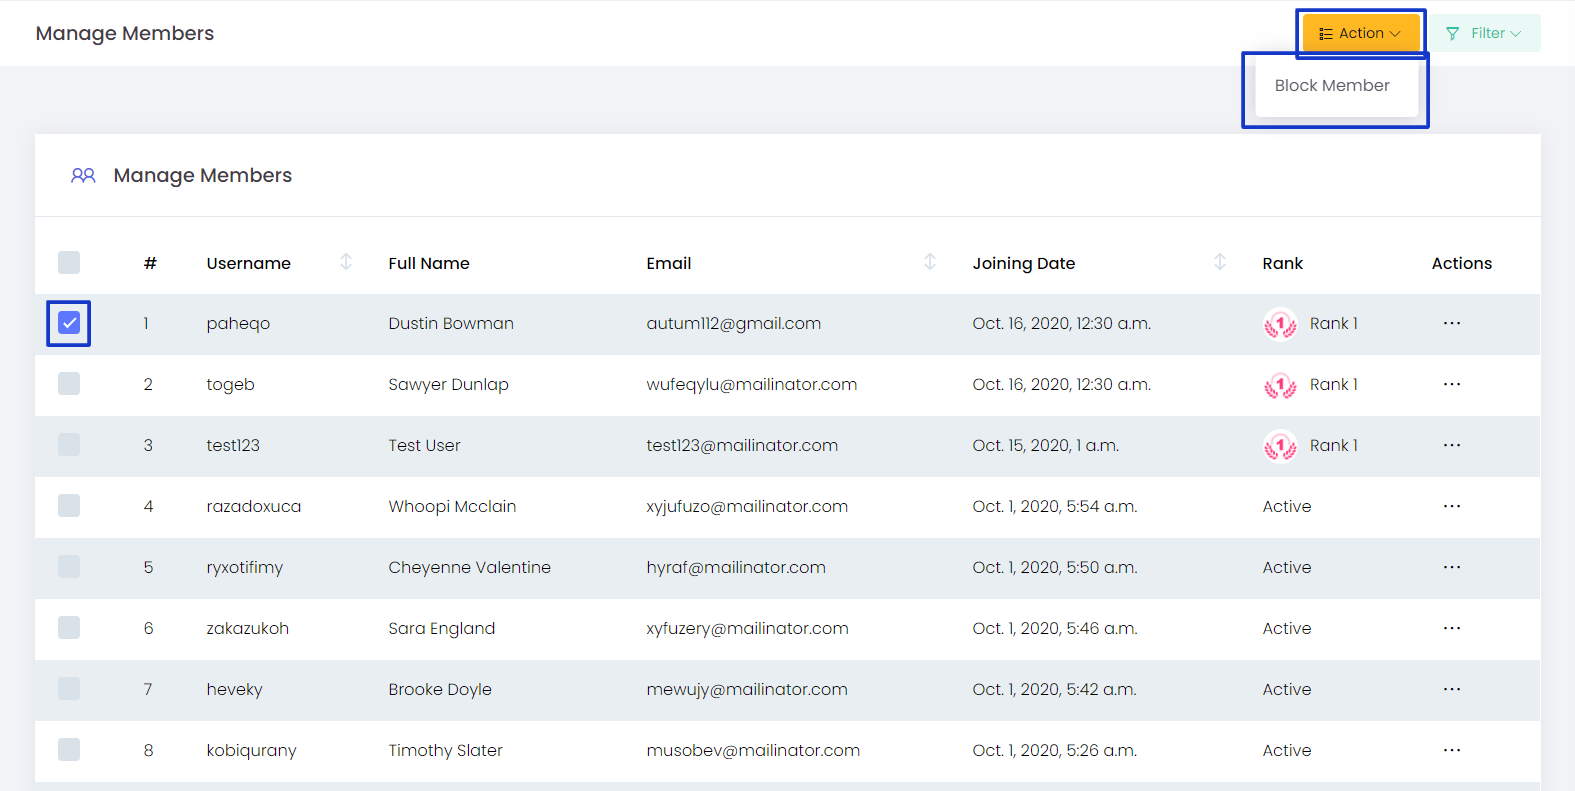
Actions
Block Member - If the admin would like to block any member account, he can block the members by selecting the members using the check box and clicking on the Block Member from the Action.
Filter
Filter option help you to reach the exact member details you are looking for by submitting the username and email address
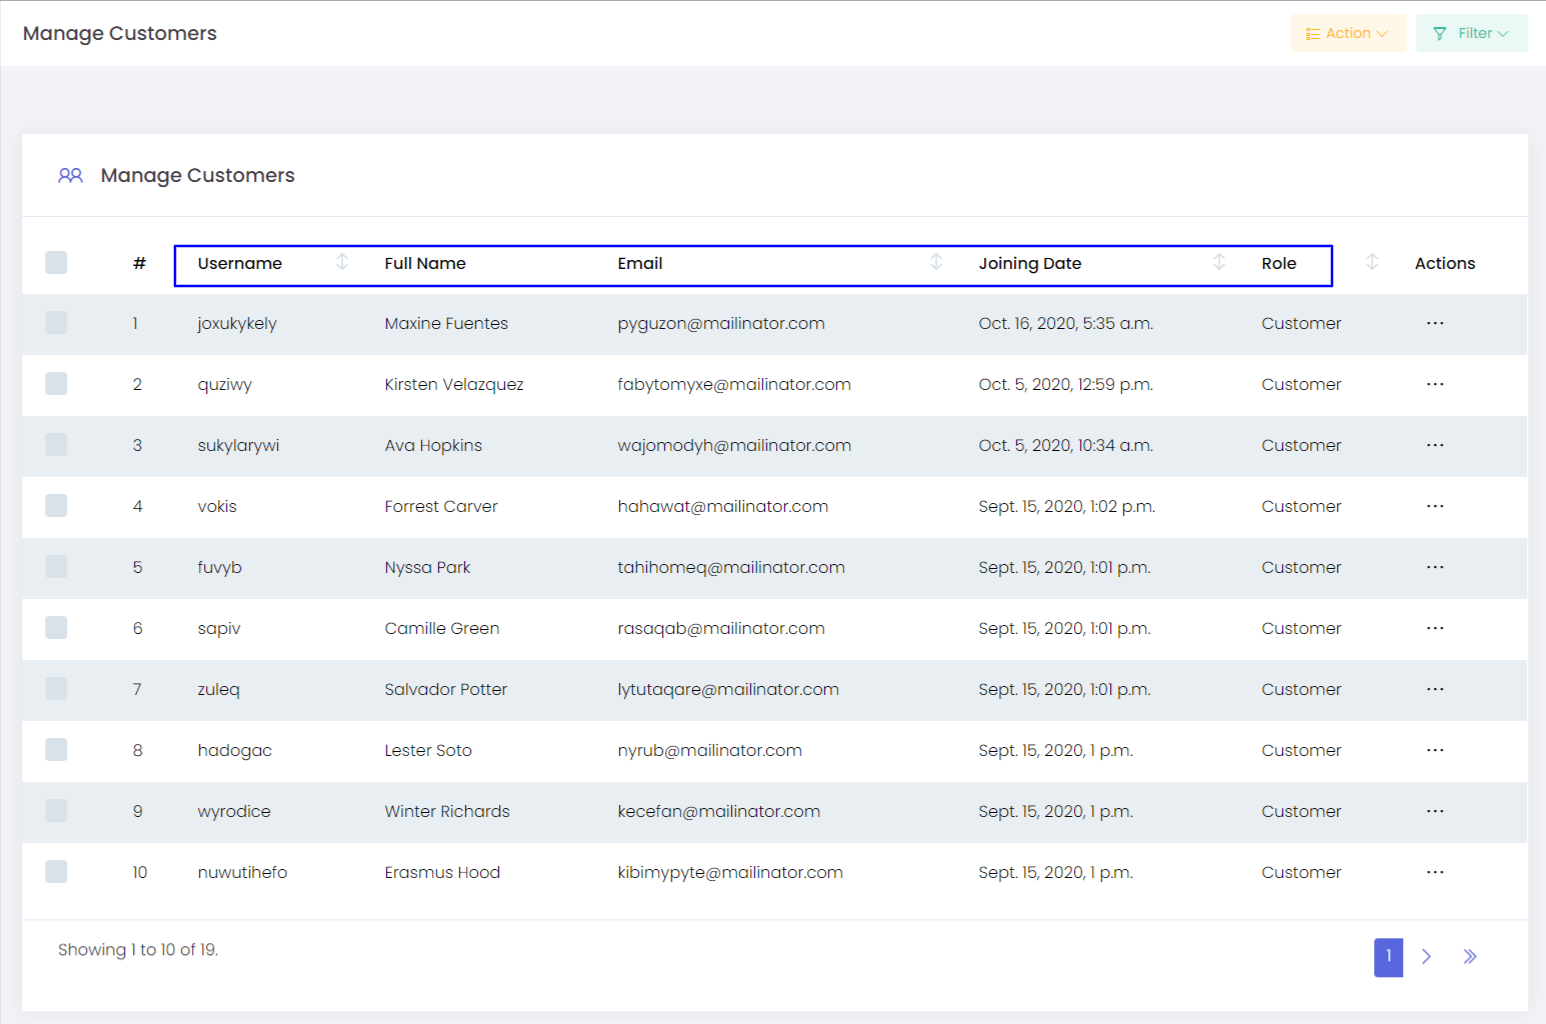
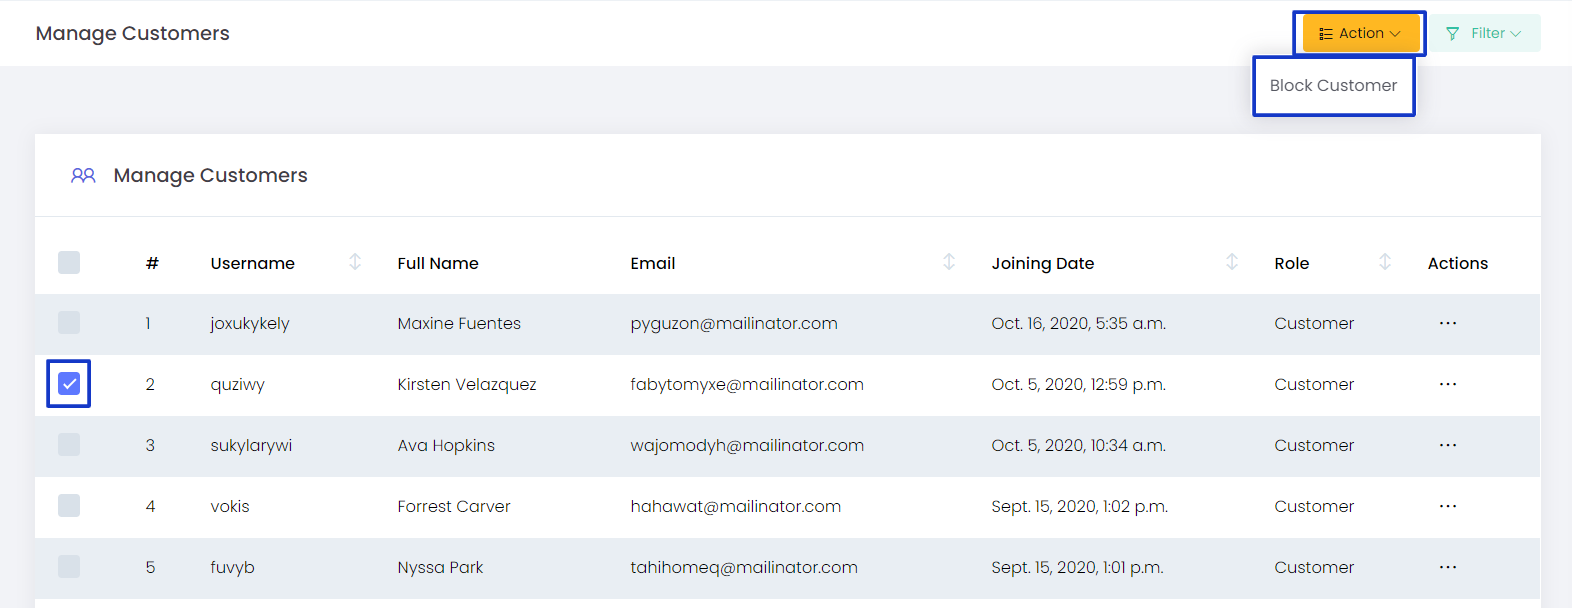
Manage Customers
Admin can view and manage the Customer details.
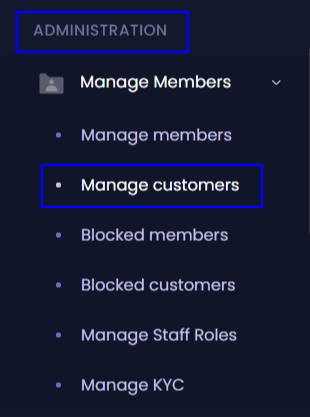
The following details are available.
- Username - Username of the customer which was given while registration
- Full name - Full name of the customer which was given during registration
- Email - The email address of the customer
- Joining Date - The date at which the Customer joined the system
- Role - If there are multiple roles and accesses for the customers (like the Premium customer, VIP Customer, etc). The current role of each customer is viewed.
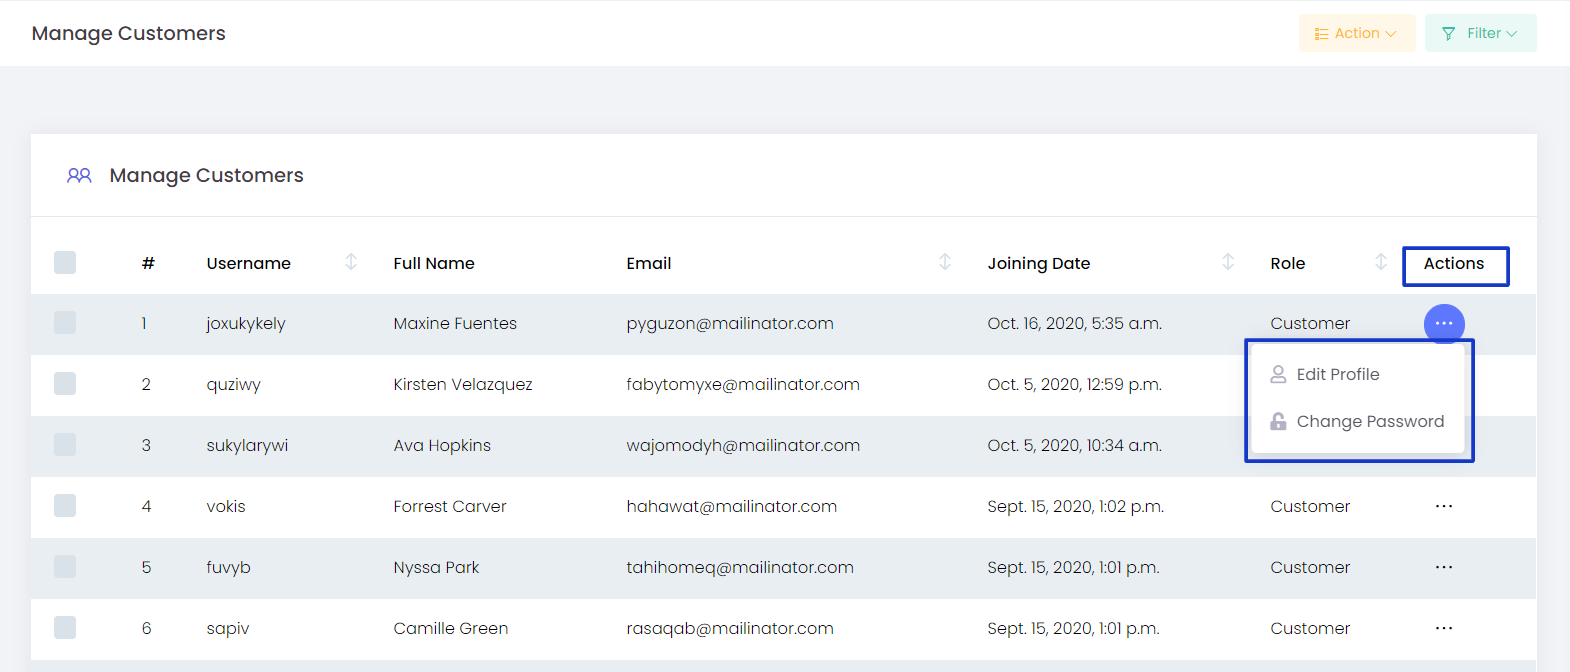
Actions
- Edit Profile - Admin can use this option to edit the user details. Admin can edit the fields like Username, First name, Last name, Email address, Phone number, Country of each customer.
- Change Password - Admin can reset the password of users from this option.
Action
- Block Customer - If the admin would like to block any customer account, he can block the members by selecting the members using the check box and clicking on the Block Member from the Action.
Filter
Filter option help you to reach the exact member details you are looking for by submitting the username and email address

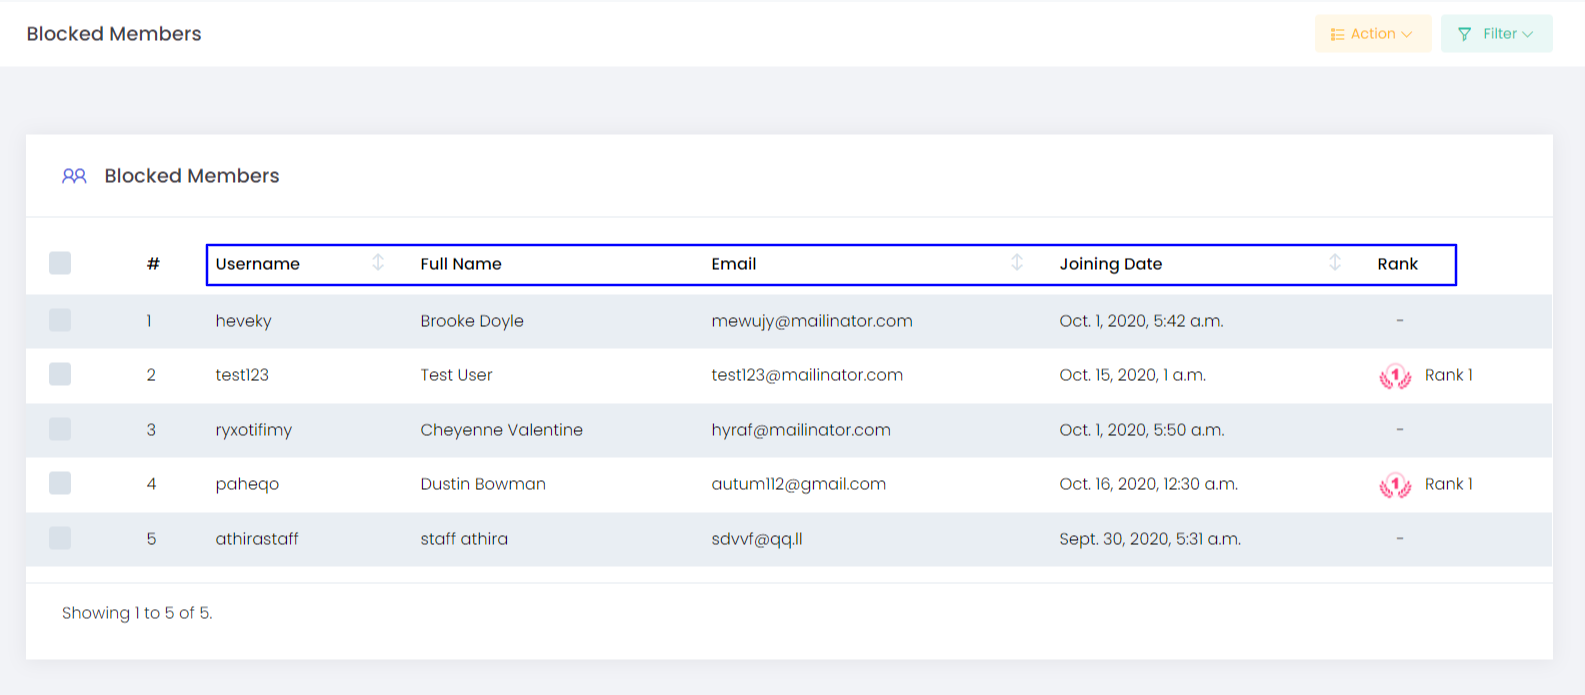
Blocked members
If any of the users have not met any mandatory criteria to exist in the system (like the renewal of the packages) or if the admin found any malpractices from any of the member's Admin can block those accounts.
Admin could get the list of those blocked Member details from this option.
Following are the details included for each blocked member, and in some fields there are options to view the fields in ascending and descending order. Admin can view the list of members by going from one page to another
Username - Username of the team member which was given while registration
Full name - Full name of the team member which was given during registration
Email - The email address of the team member
Joining Date - The date at which the user joined the system
Rank - The current rank of each user
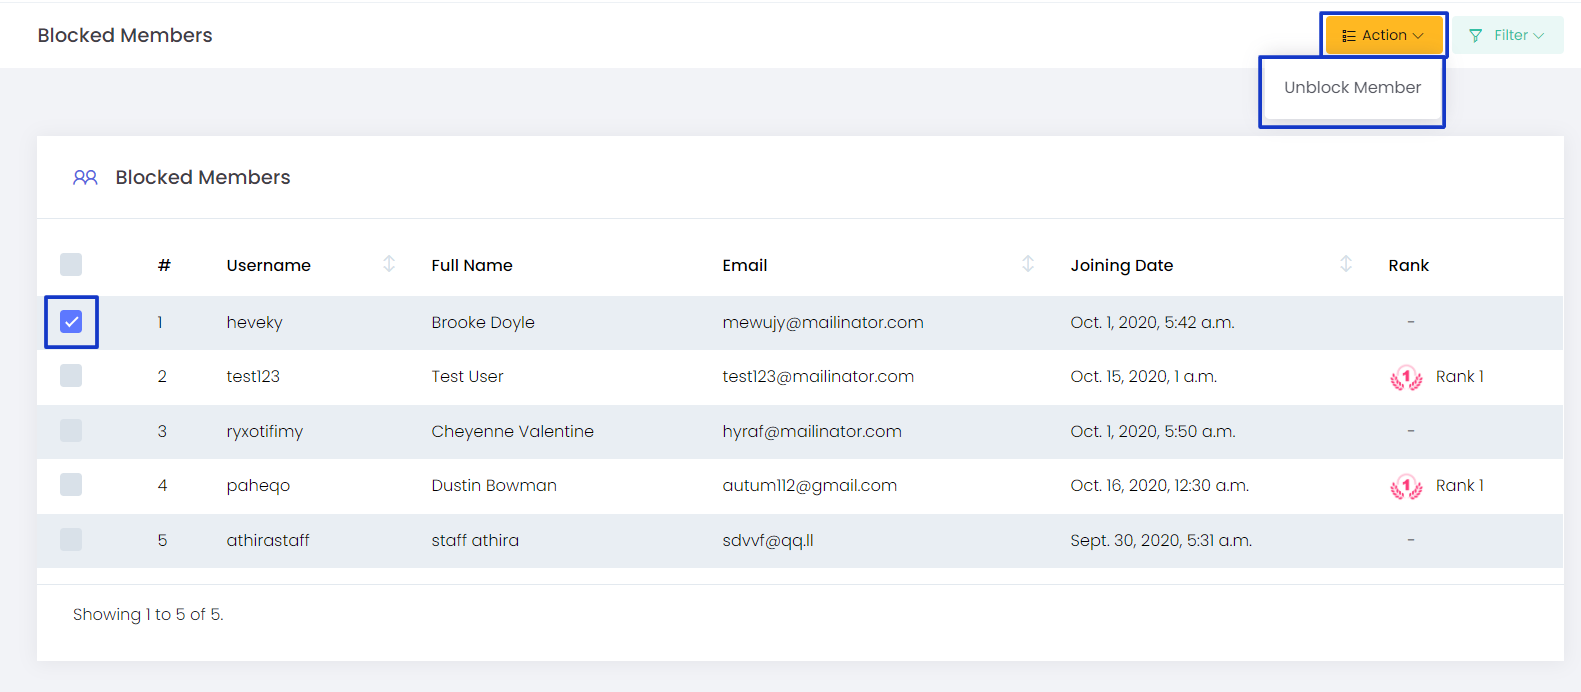
Action
Unblock Member - If the admin would like to unblock any of the blocked member accounts, the admin can unblock the members by using the check box and clicking on the Unblock Member from the Action.
Filter
Filter option help you to reach the exact member details you are looking for by submitting the username and email address

Blocked Customers
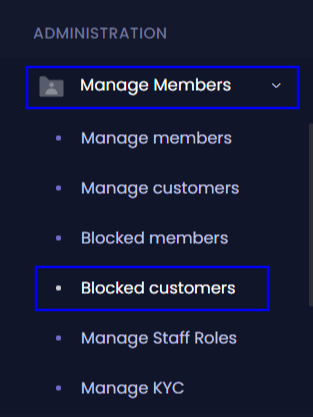
Admin can block the customer account if any of the customers have not met any mandatory criteria to exist in the system. Admin can block those customer accounts.
Admin can find the list of those blocked customer details from this option.
The following are the details included for each blocked customer, and in some fields, there are options to view the fields in ascending and descending order. Admin can view the list of customers by going from one page to another.
Username - Username of the customer which was given while registration
Full name - Full name of the customer which was given during registration
Email - The email address of the customer
Joining Date - The date at which the Customer joined the system
Role - If there are multiple roles and accesses for the customers (like the Premium customer, VIP Customer, etc). The current role of each customer is viewed.

Action
Unblock Customer - If the admin would like to unblock any of the blocked member accounts, the admin can unblock the members by using the check box and clicking on the Unblock Member from the Action.
Filter
Filter option help you to reach the exact member details you are looking for by submitting the username and email address
This option is used to assign department based roles to certain specific Members (Like Finance Admin, Support Staff, Restricted Member, Business Staff, etc.) and restrict their area of functioning and visibility only to certain features of the system without showing the entire features or information irrelevant to them.
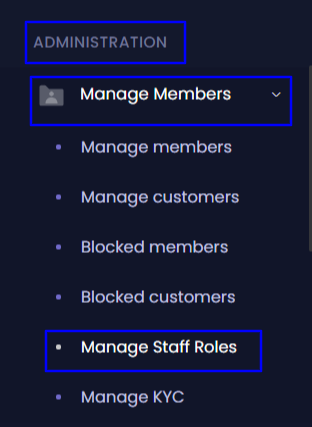
How can Admin Add a New Staff Role?
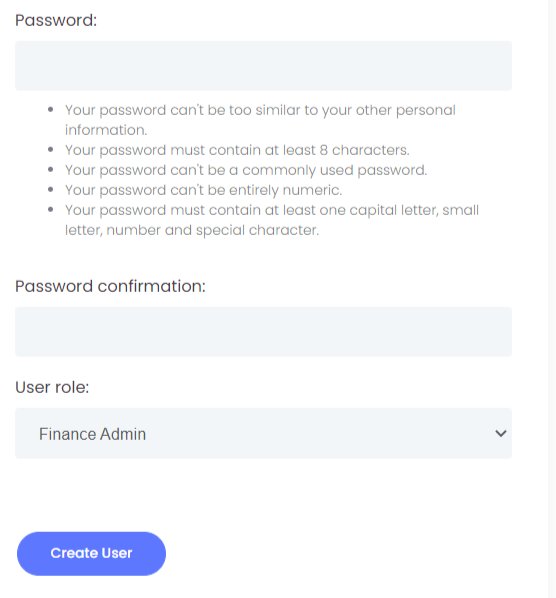
Admin can add a new staff role via the Add New Staff option and filling in the fields and assigning the required role for that member.

The user in the system are Finance Admin, Support Staff, Business Staff, Restricted Member, and E-commerce Admin
Note: The roles and the features available for each staff could be changed depending upon the Project Requirement
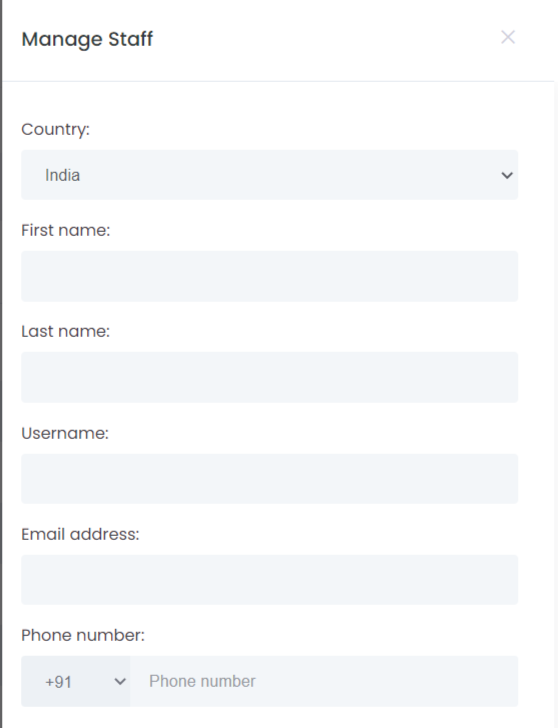
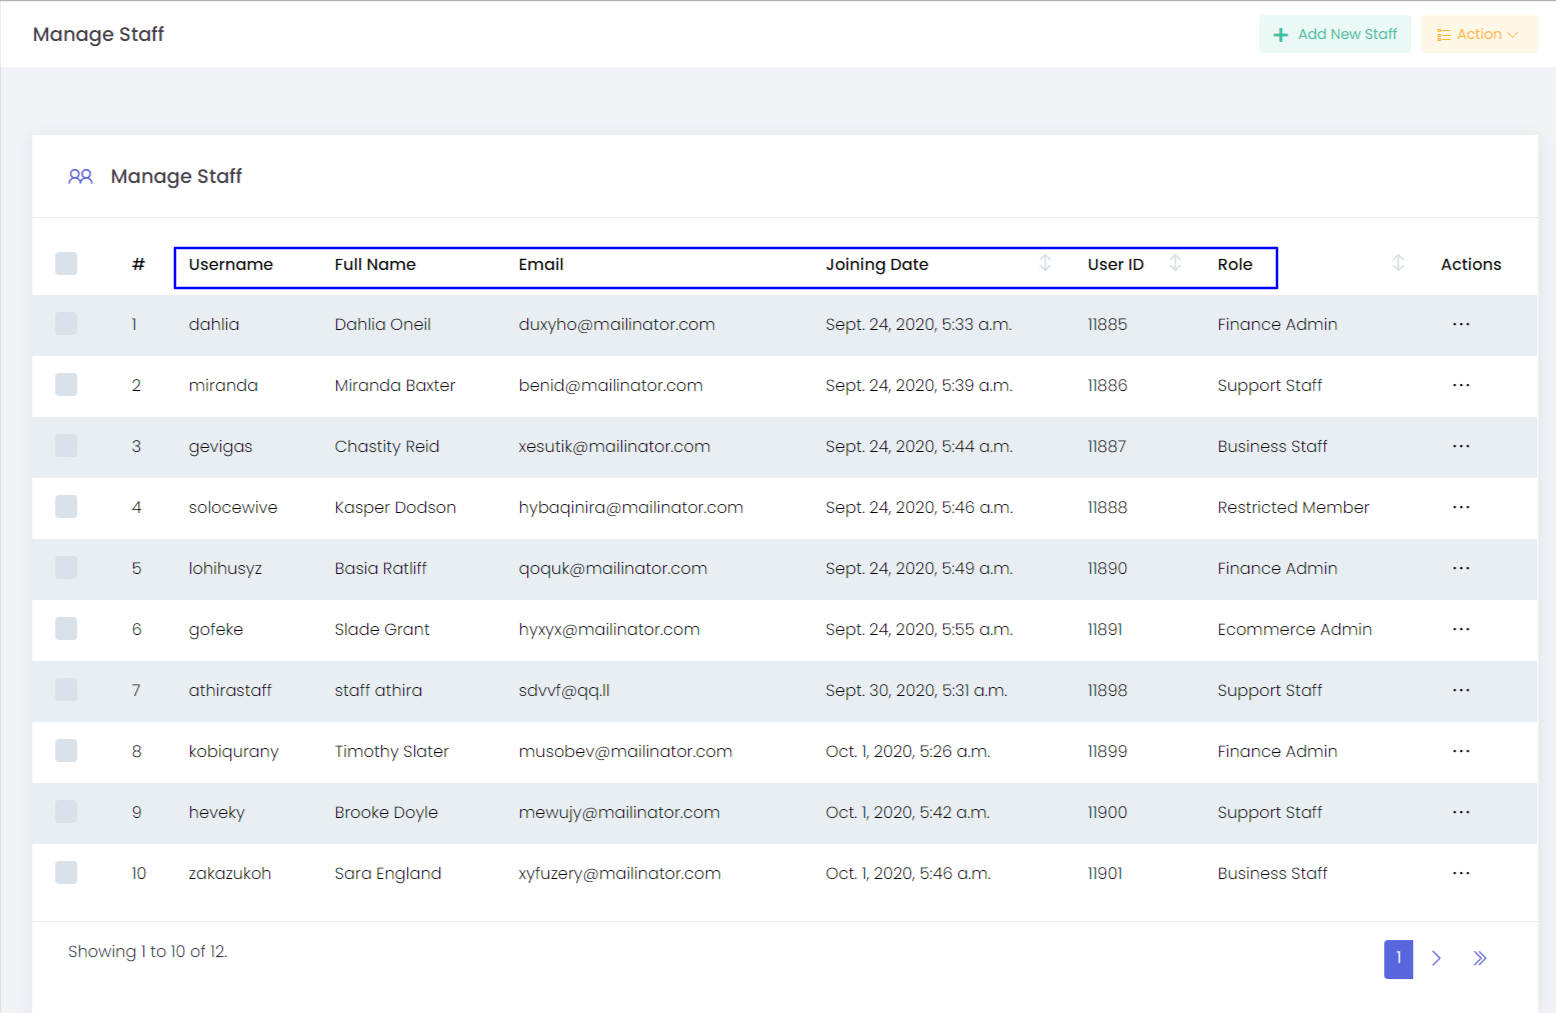
Manage Staff
Admin could view and manage the list of the members and the following details in the system.
- Username - Username of the team member which was given on adding the staff
- Full Name - Full Name of the team member which was given on adding the staff
- Email - The email address of the team member
- Joining Date - The date at which the member joined the system
- User ID - The user ID of that member
- Role - The role assigned to the Staff
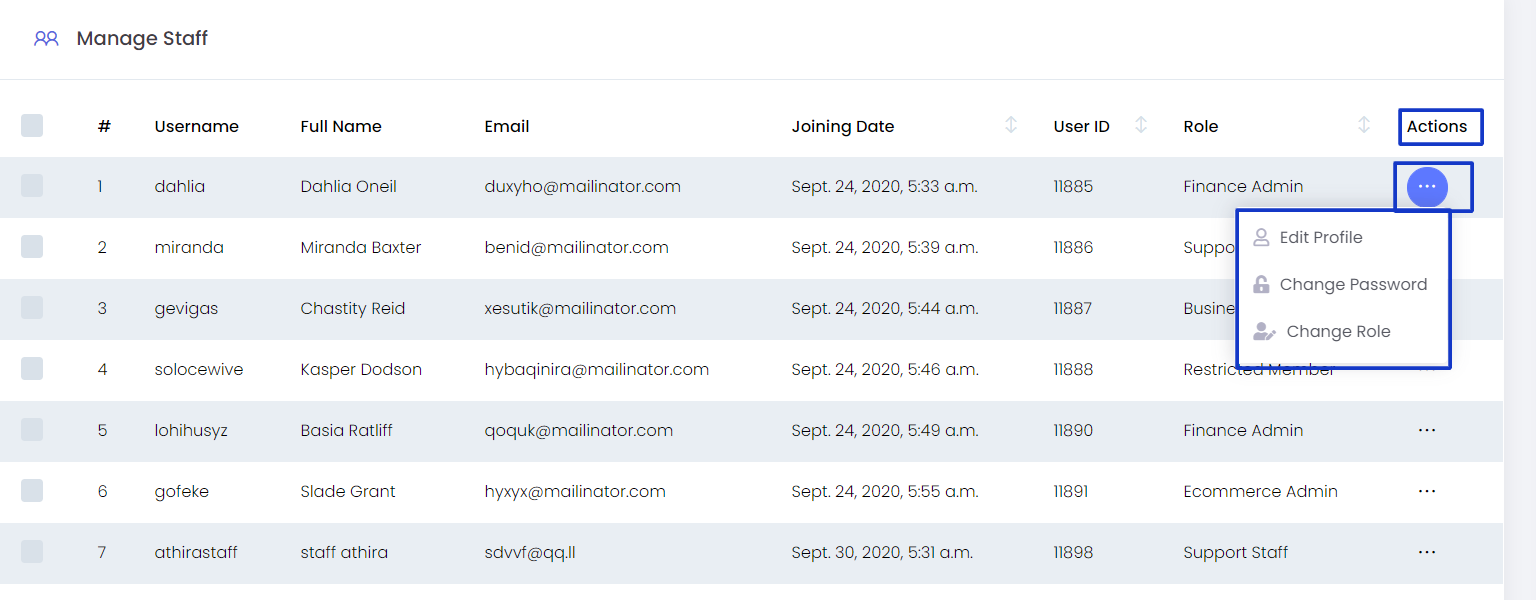
Actions
- Edit profile - Admin can edit the selected profile information of the members if required by clicking the edit profile option.
- Change password - Admin has an option to change the profile password of the members.
- Change Role - Admin can change the current role of the staff to any available roles as per the requirement
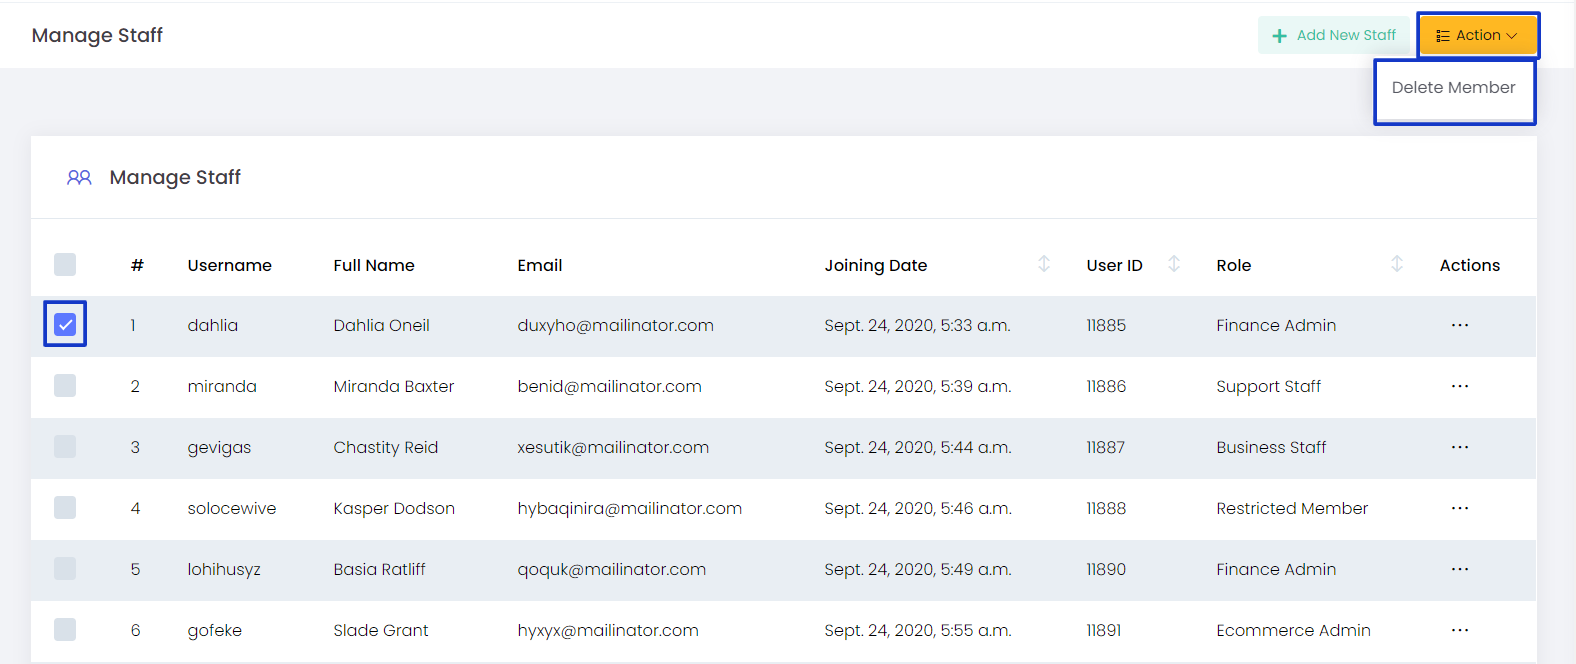
Action
- Delete Member - Admin can select the staff and delete the account as per requirement via Actions
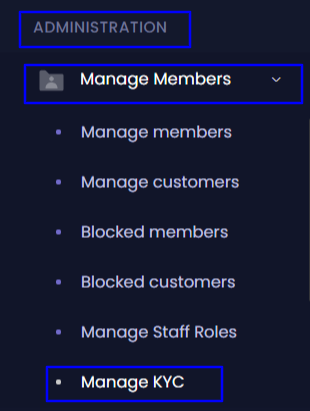
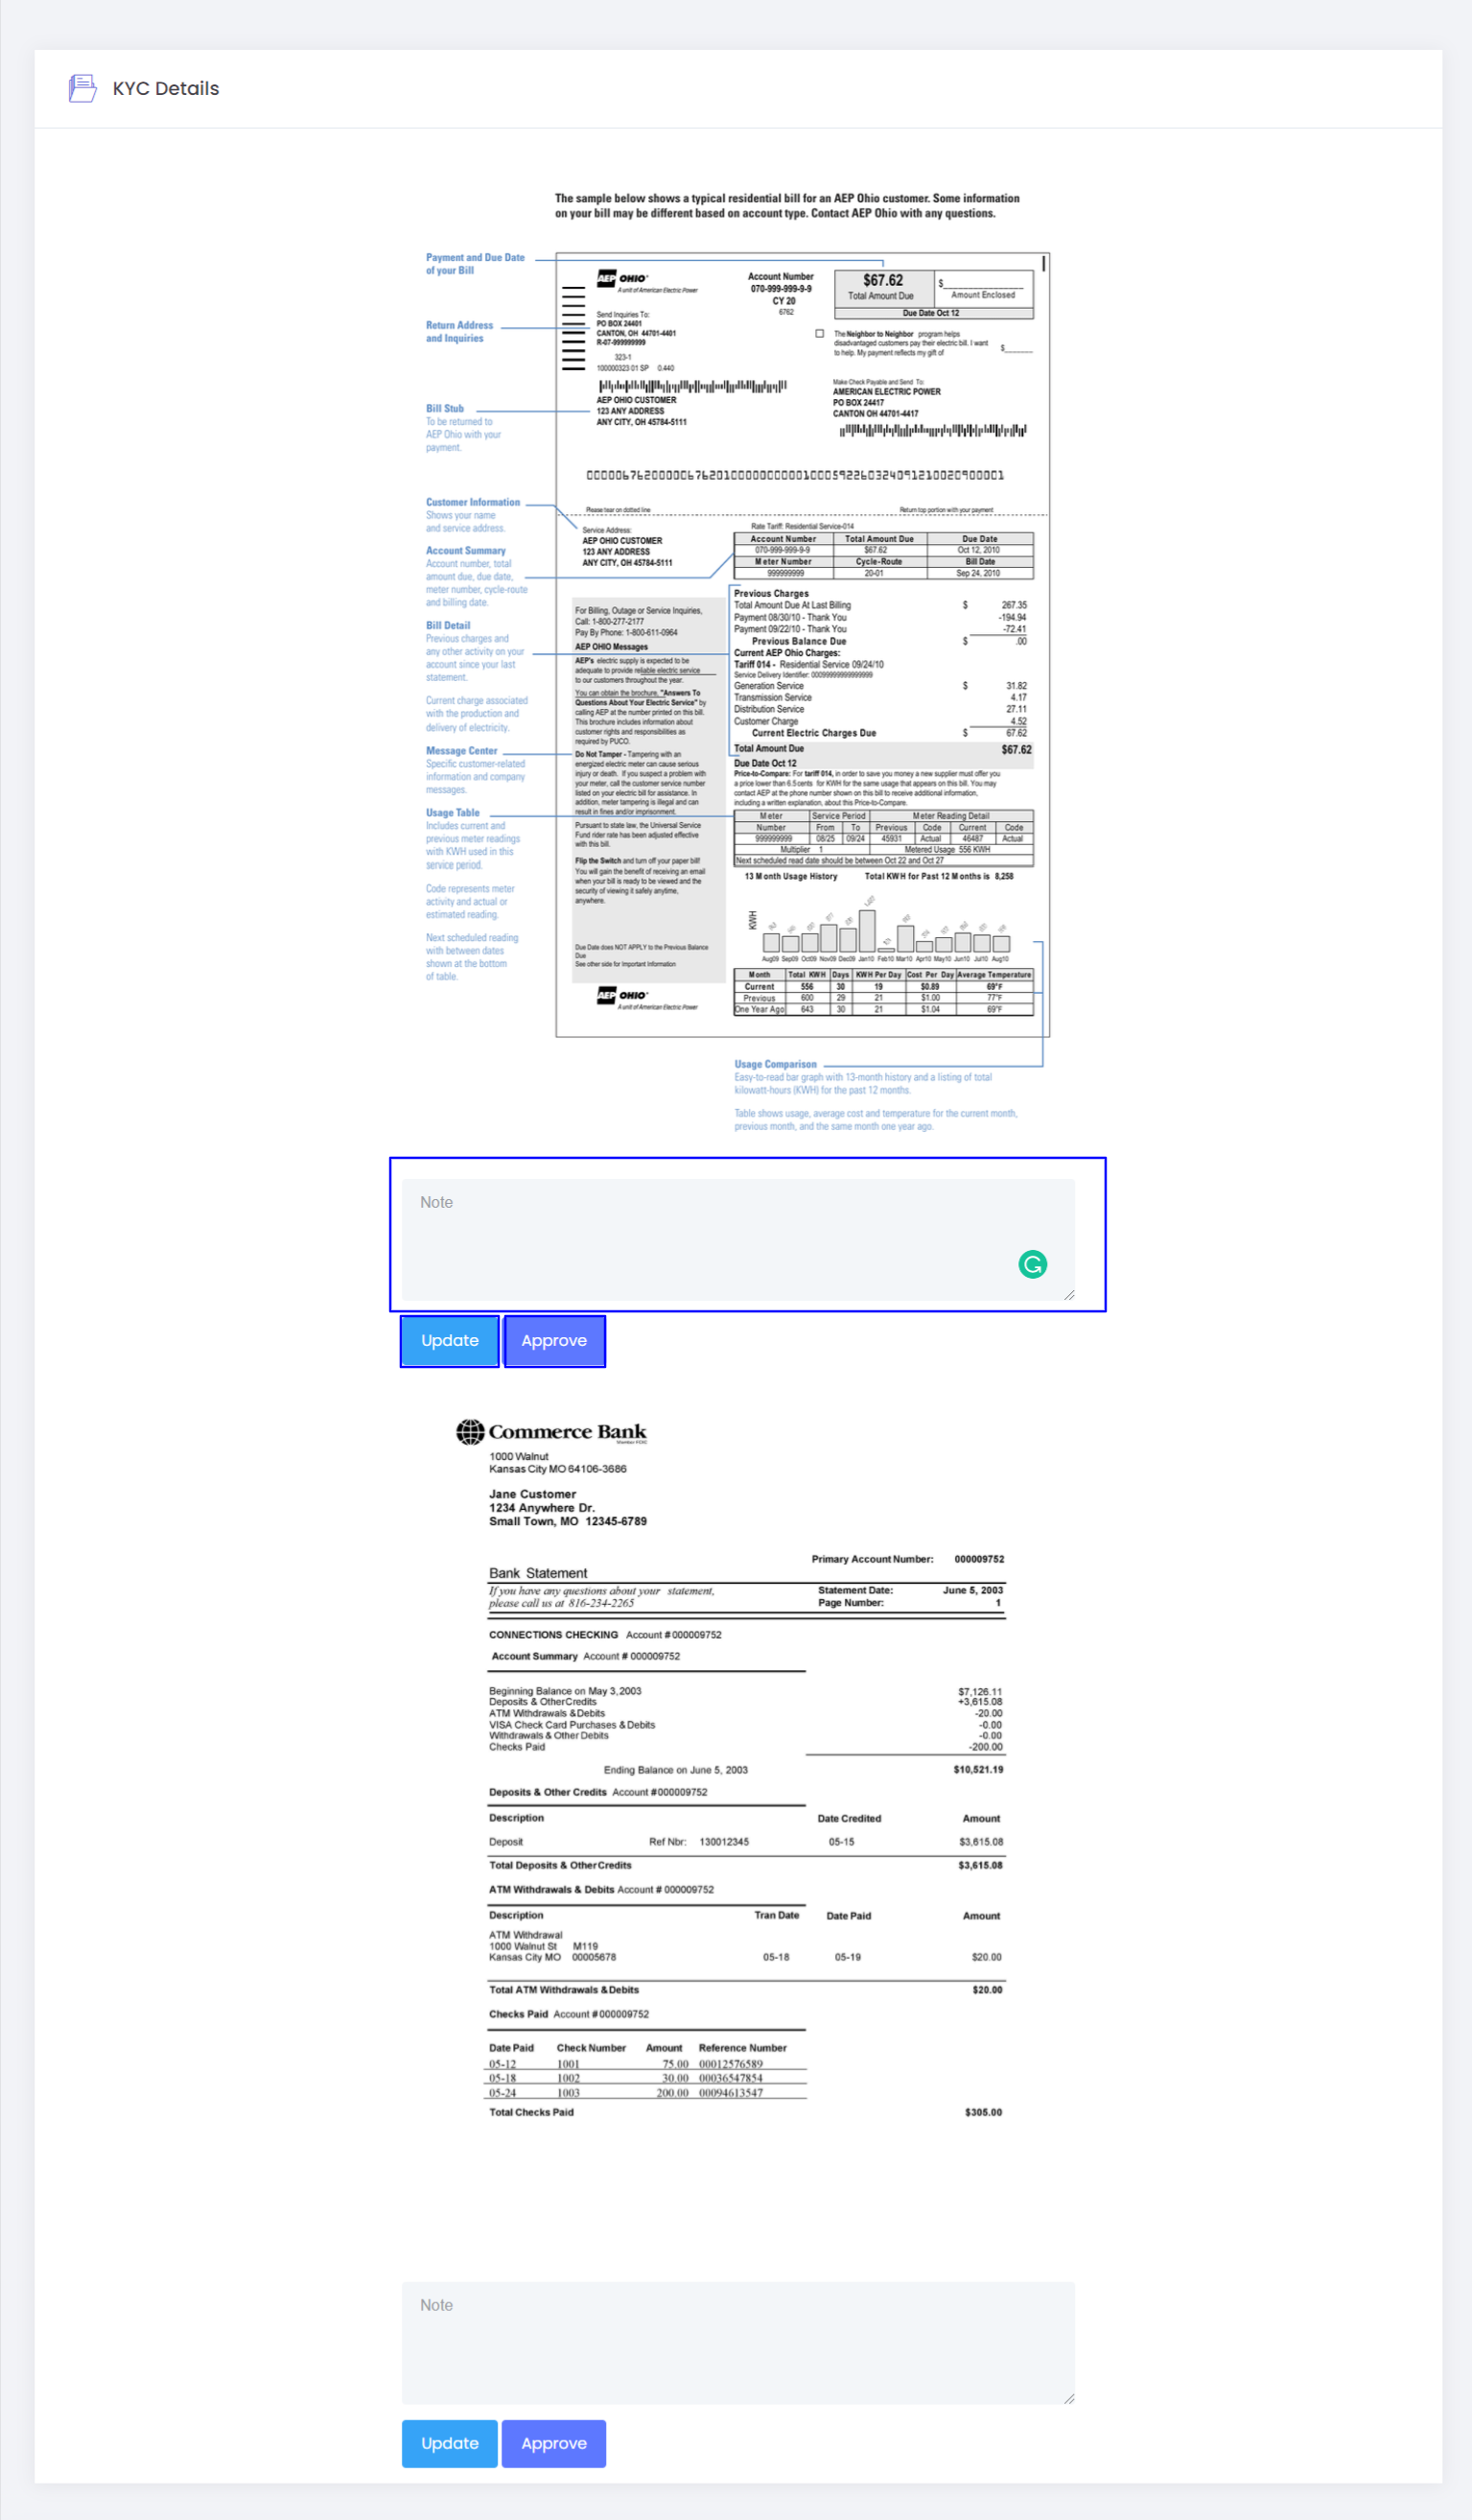
KYC (Know Your Customer )
Know Your Customer is the process of identifying and verifying the identity of the user when opening an account.
Users have the option to upload their KYC files in the form of Documents(.PDF) and Images (.JPG, .PNG) with a maximum size of 8MB.
Note: The format and the size of the document to be uploaded could be changed as per client requirements.
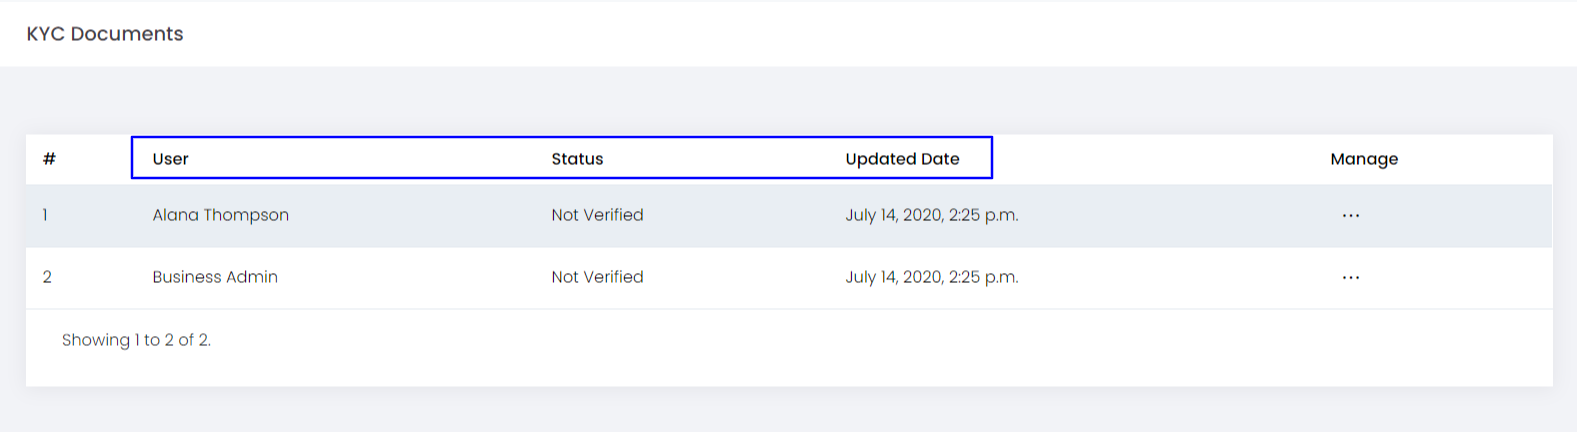
Once users upload the KYC documents, Admin has the option to manage the KYC documents.
- User – The full name of the user who has uploaded the KYC
- Status – The status of the uploaded document
- Updated Date – The date at which the KYC document was uploaded by the user
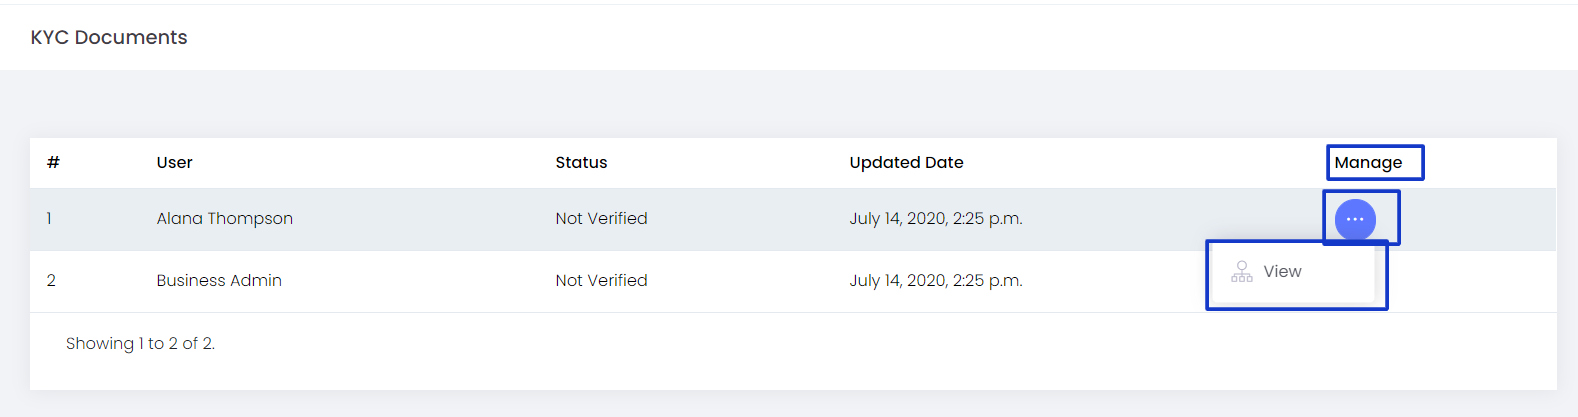
Manage:
View: Admin can Approve or Reject the uploaded KYC documents from this option. There is also an option to upload the comments.
The details of the Enrolment orders, upgrade orders, etc. made by users could be tracked form this option
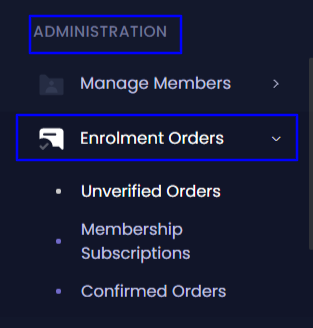
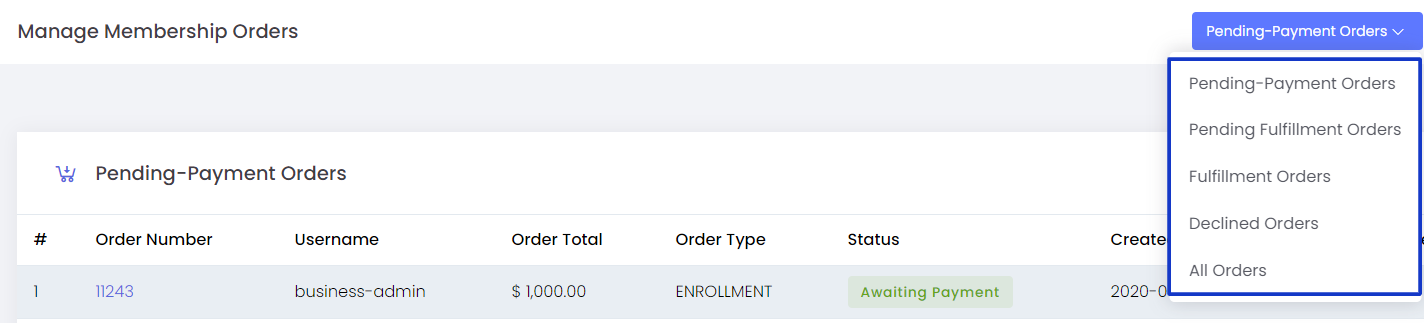
Unverified Orders - Admin can find the details of the uncompleted orders

Different categories that come under Unverified orders are:
Pending- Payment Orders
Pending Fulfillment Orders
Fulfillment Orders
Declined Orders
All Orders
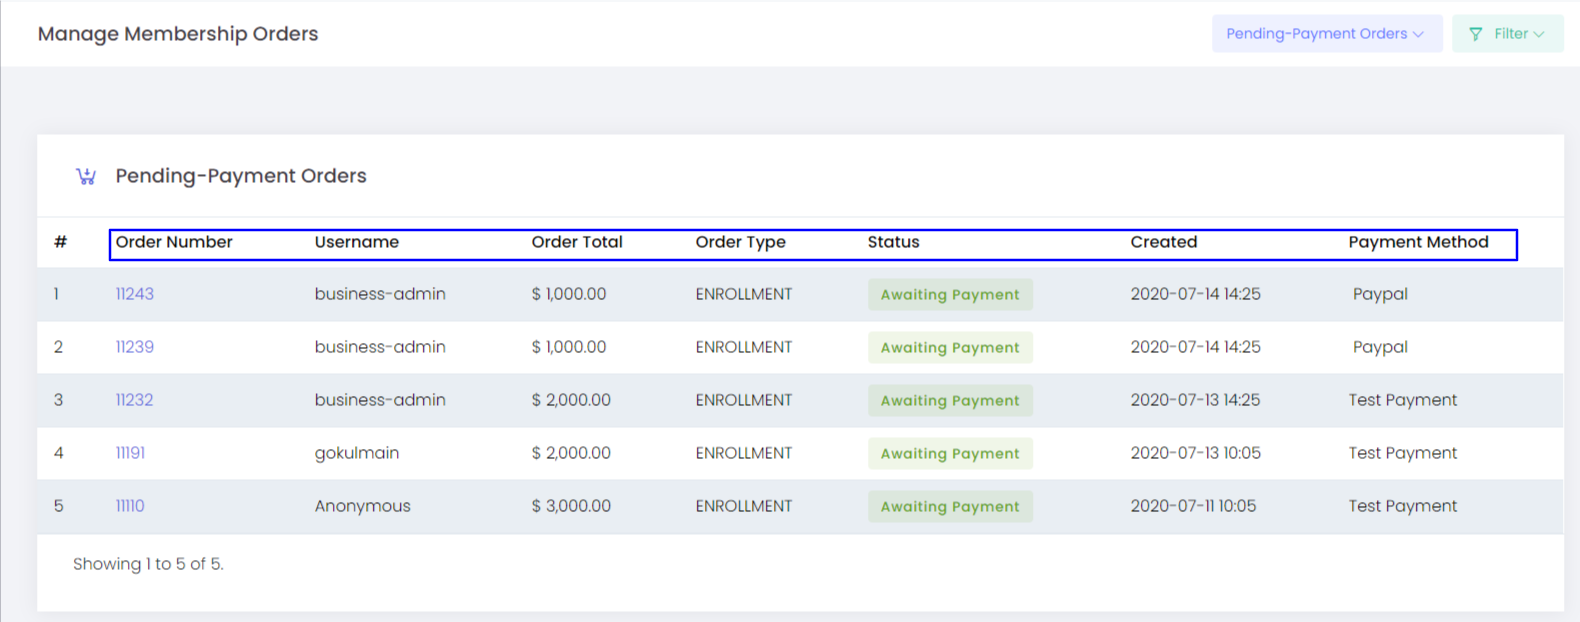
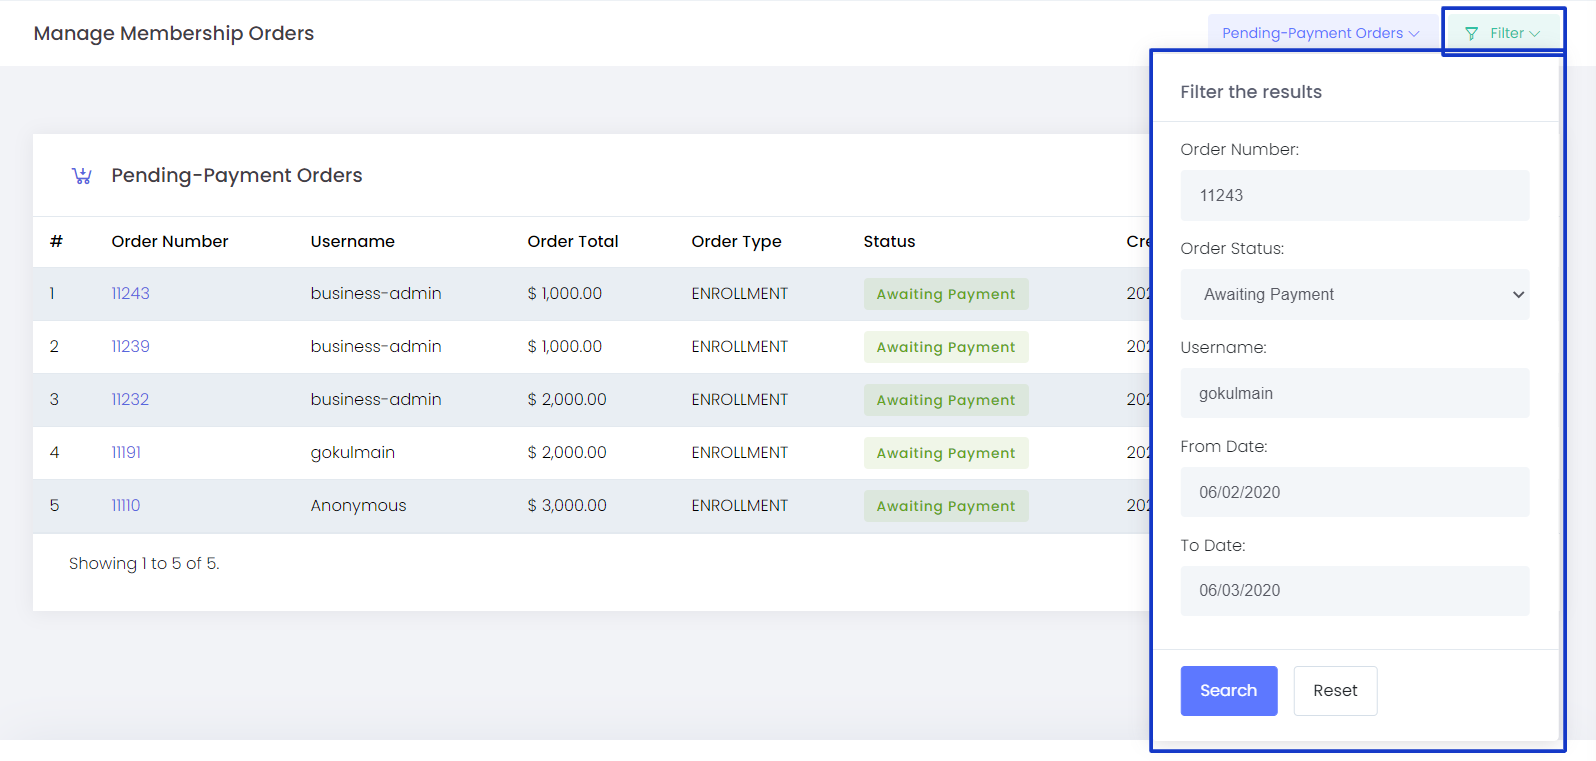
Pending- Payment Orders
When a user completes all the other steps other than the payment during the enrolment or package upgrade, etc. Those orders would be in the status of Awaiting Payment. These orders could be tracked here.
The details included are:
- Order Number - The tracking ID/ number of the order
- Username - Username of the member who created the order.
- Order Total - The total amount for each order
- Order Type - The type of the order, whether it is an Enrolment order or it is a package upgrade etc.
- Status - The current payment status
- Created On - The Date and Time at which the order was created
- Payment Method - The payment gateway used for making the payment of the order
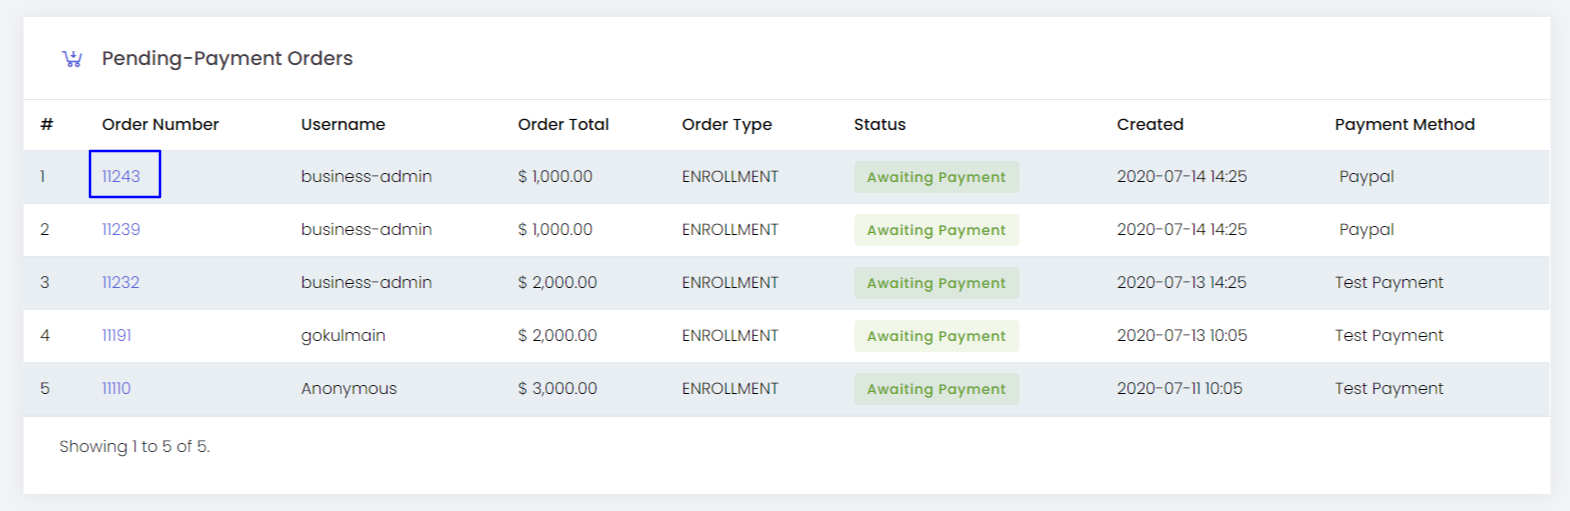
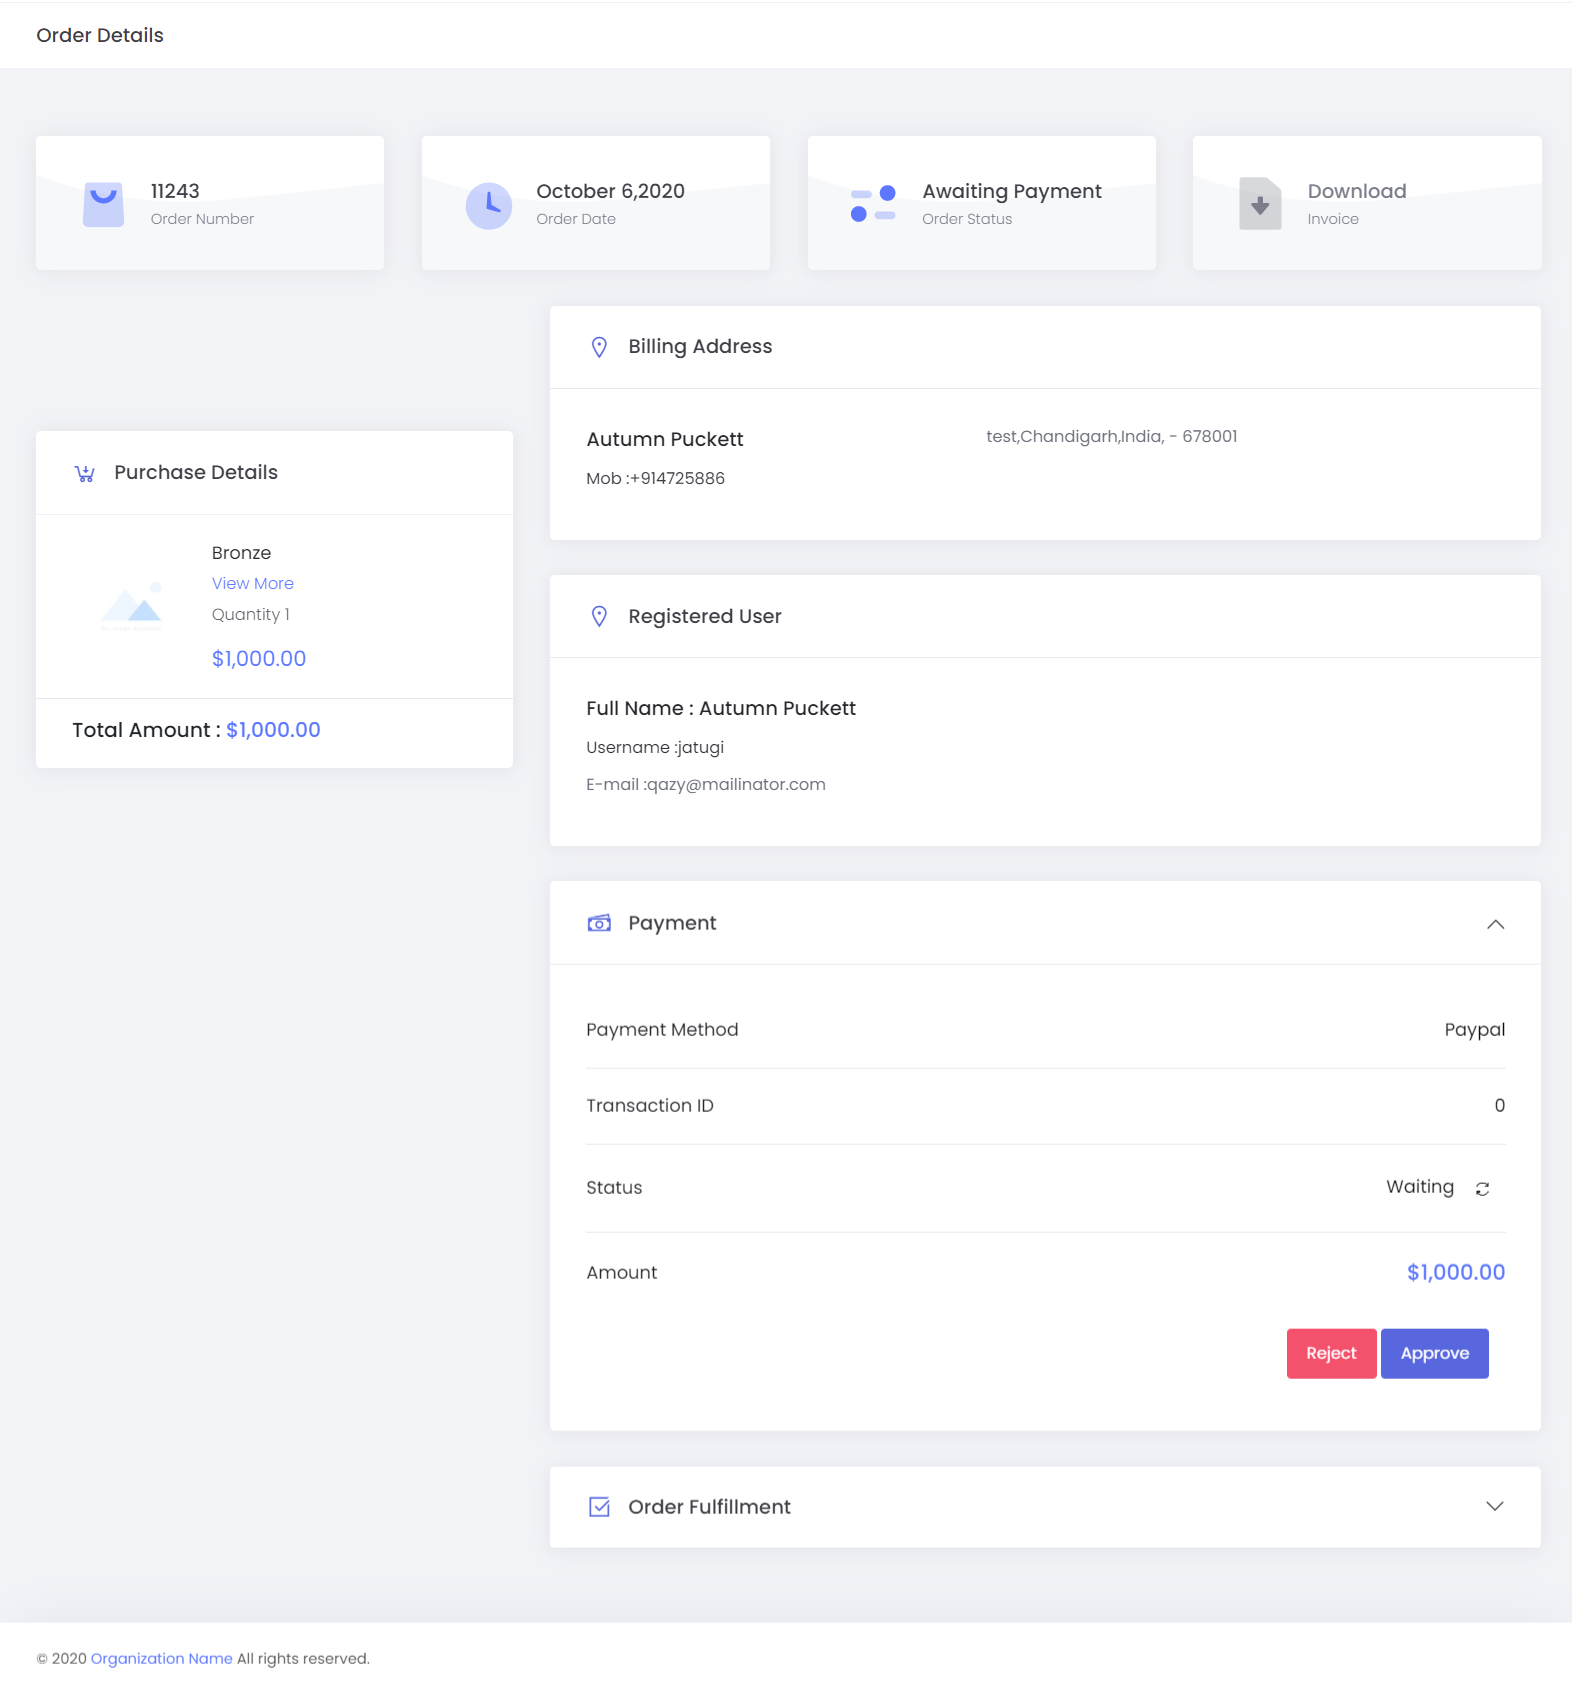
On clicking the order number Admin will get a detailed view of the Order Details (Redirect to Order Details page), where the admin can approve or reject the payment.
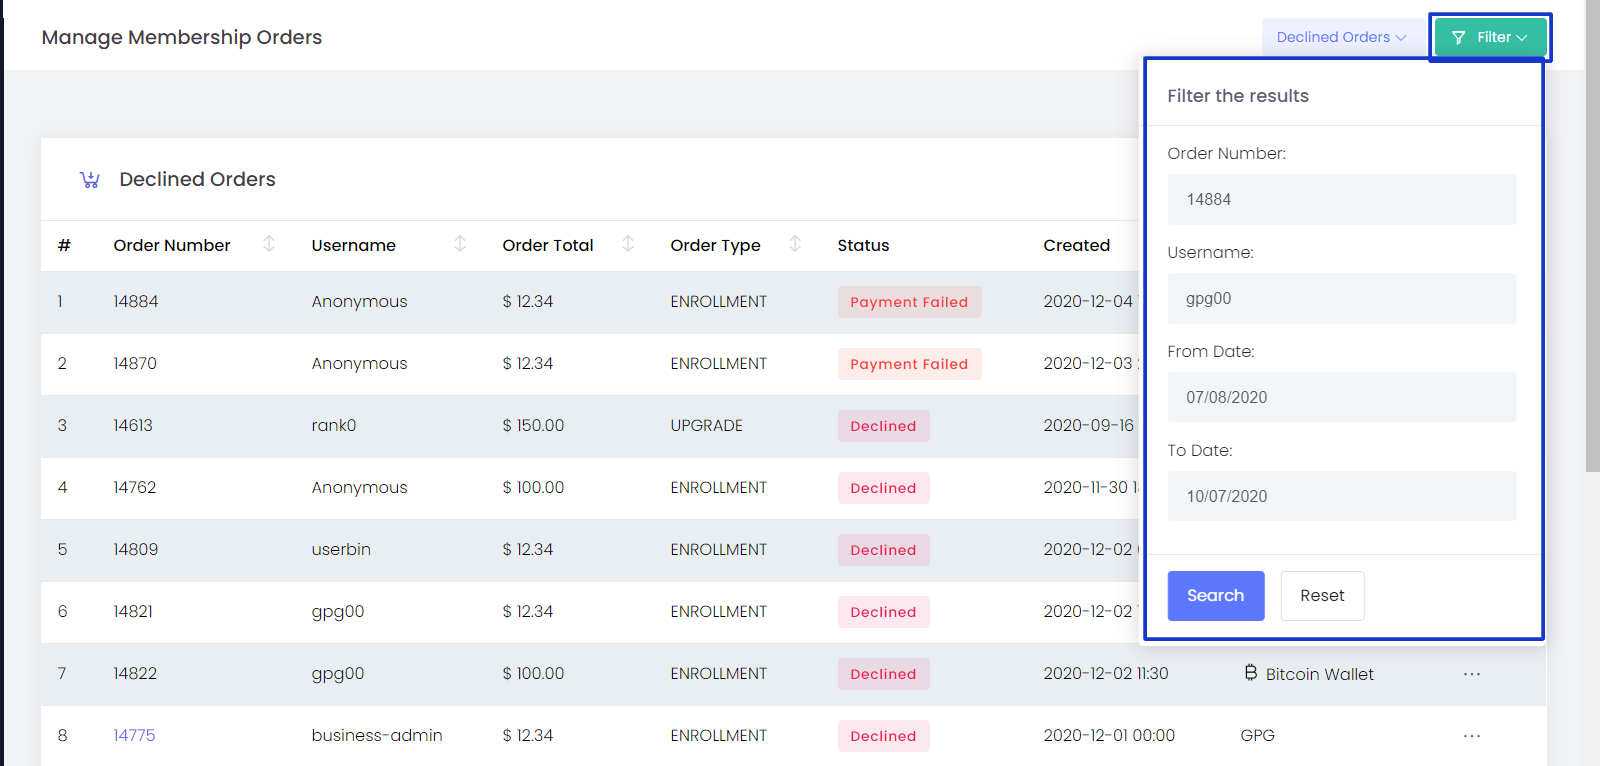
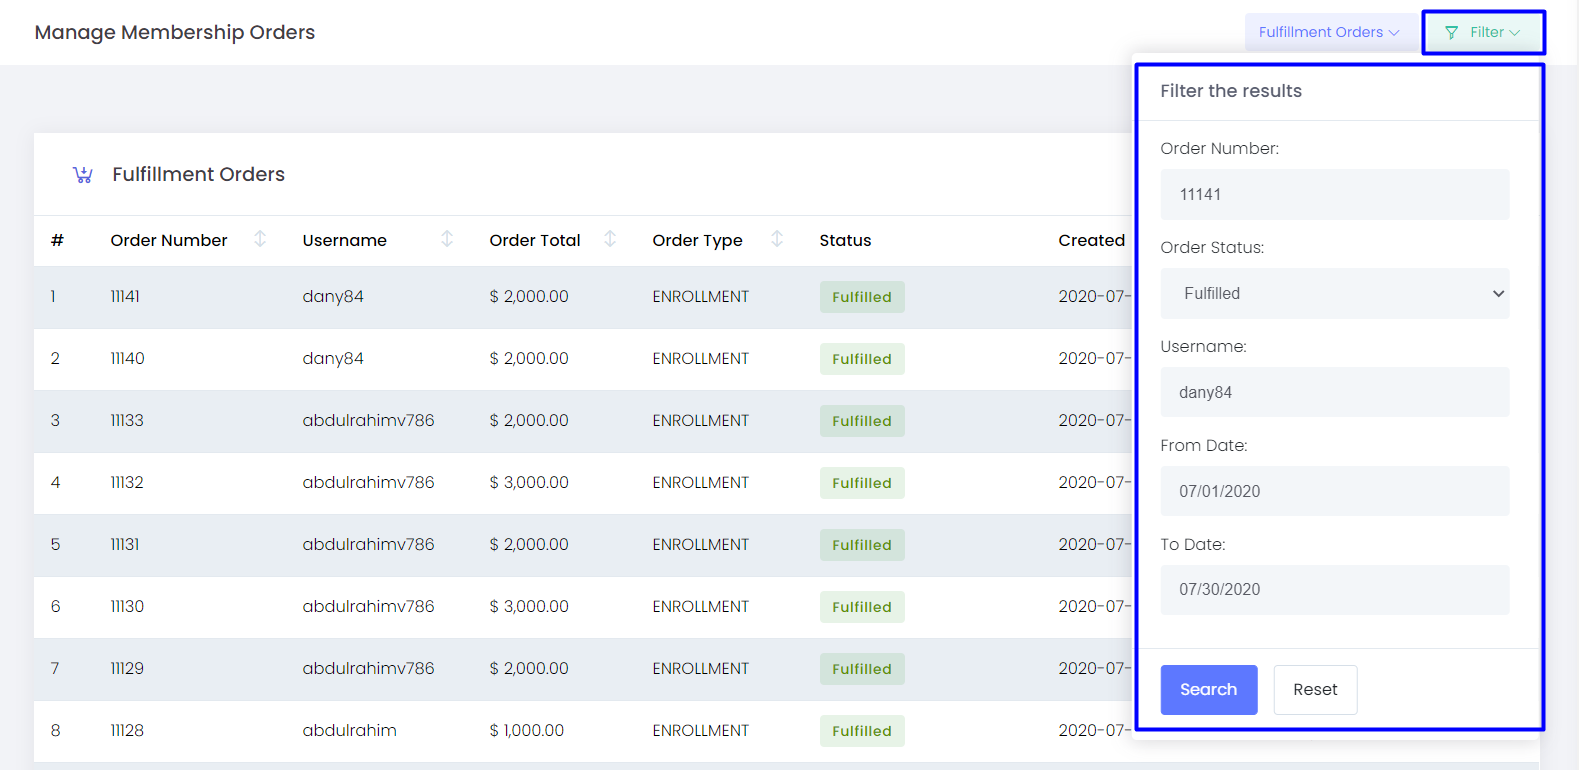
Filter
Filter option help you to reach the exact order details you are looking for by submitting the Order number, Order Status, Username, From Date, and To Date
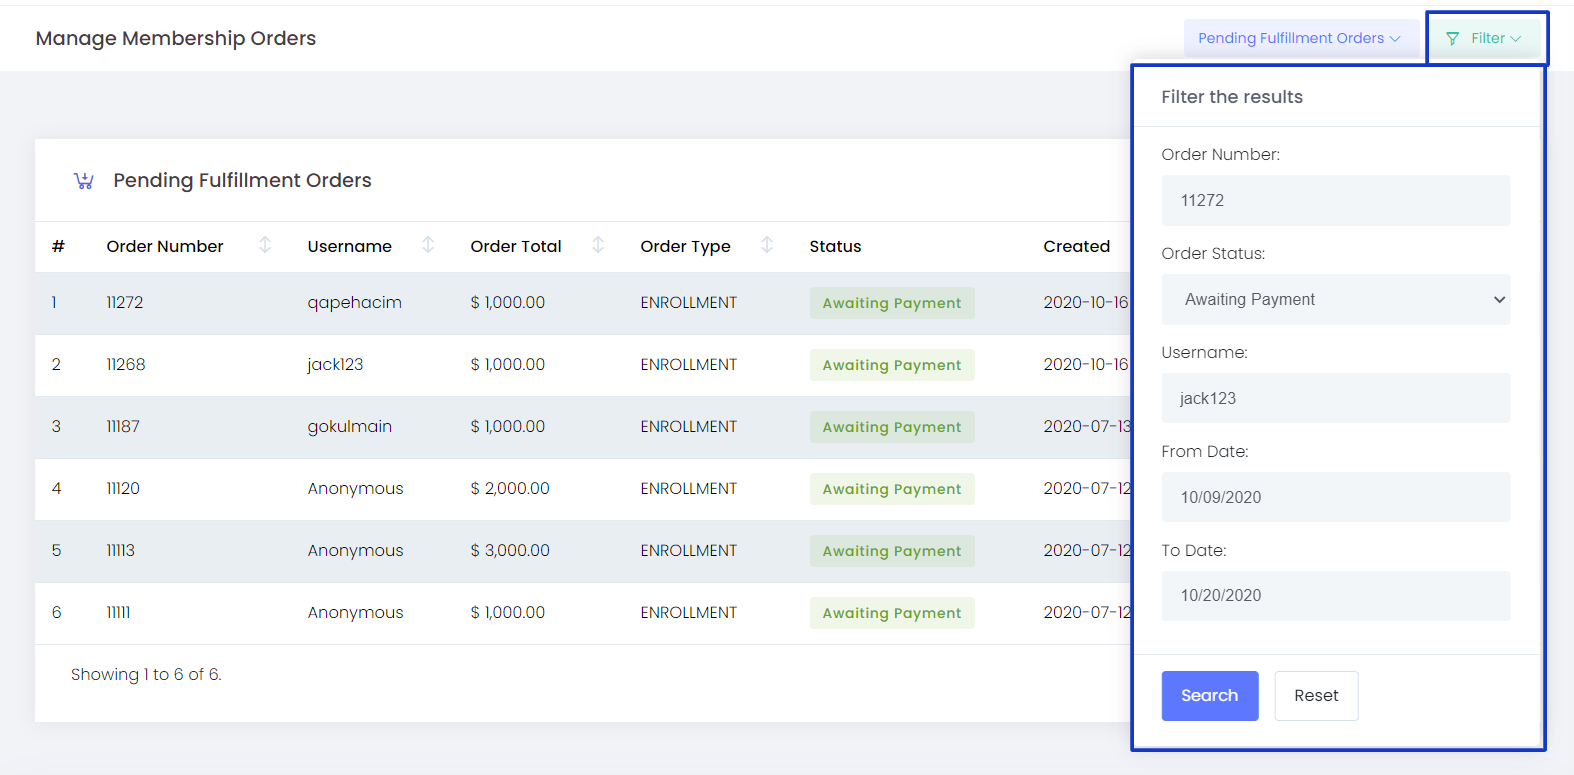
Pending Fulfillment Orders
This shows the list of incomplete payments using the Test Payment method.
The details included are:
- Order Number - The tracking ID/ number of the order
- Username - Username of the member who created the order.
- Order Total - The total amount for each order
- Order Type - The type of the order, whether it is an Enrolment order or it is a package upgrade etc.
- Status - The current payment status
- Created On - The Date and Time at which the order was created
- Payment Method - The payment gateway used for making the payment of the order
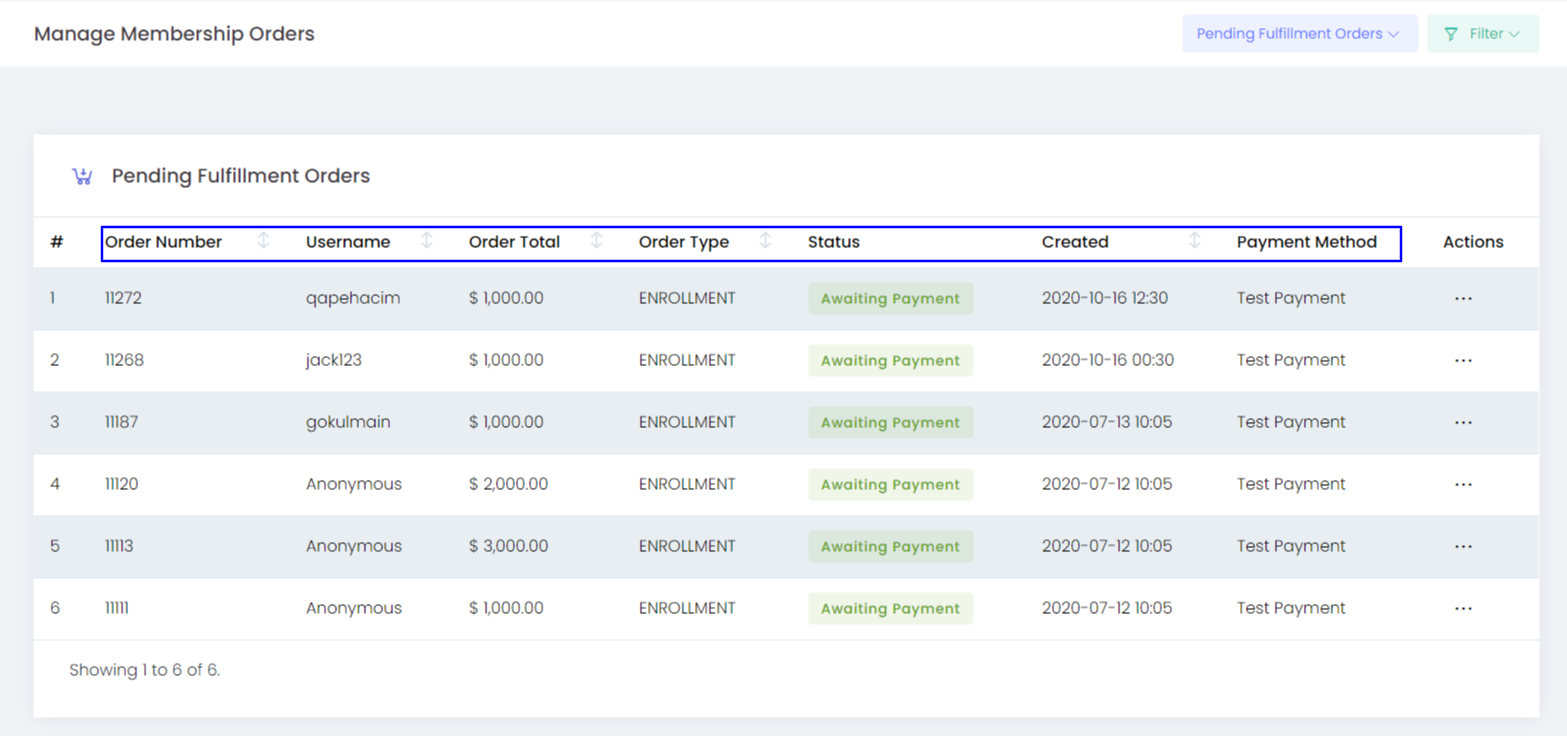
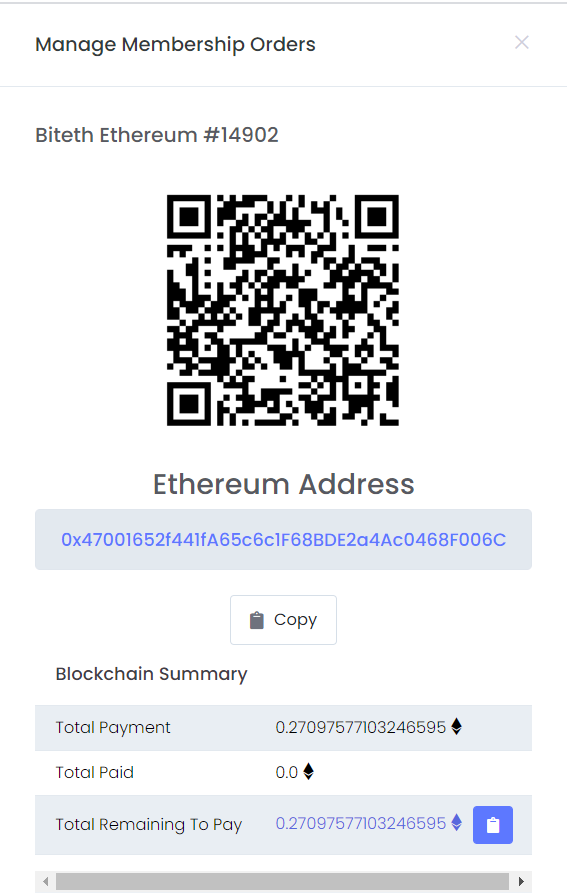
Actions
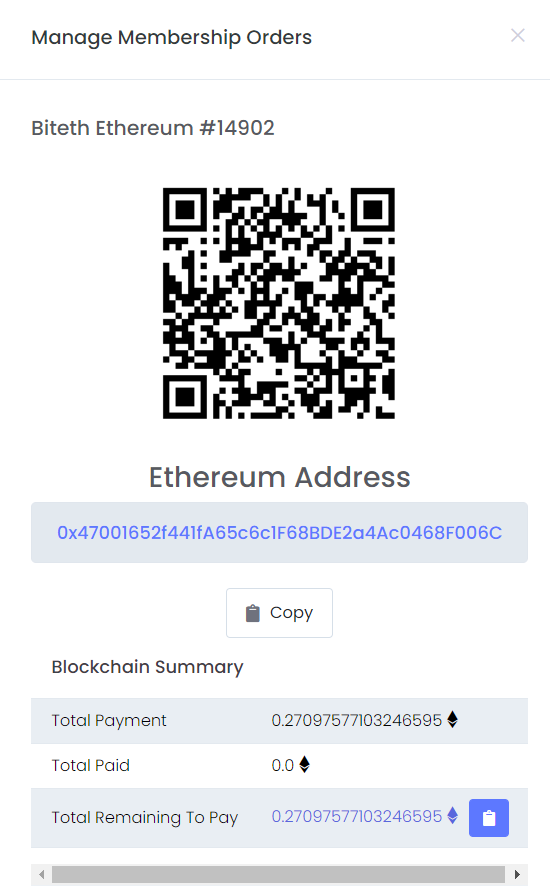
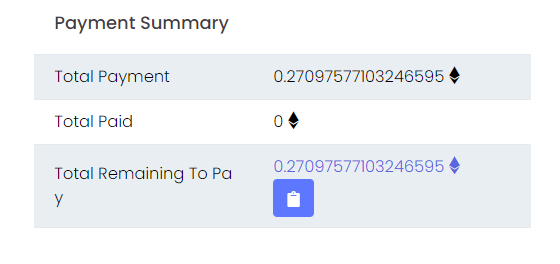
This option provides you with the payment details.
Filter
Filter option help you to reach the exact order details you are looking for by submitting the Order number, Order Status, Username, From Date, and To Date
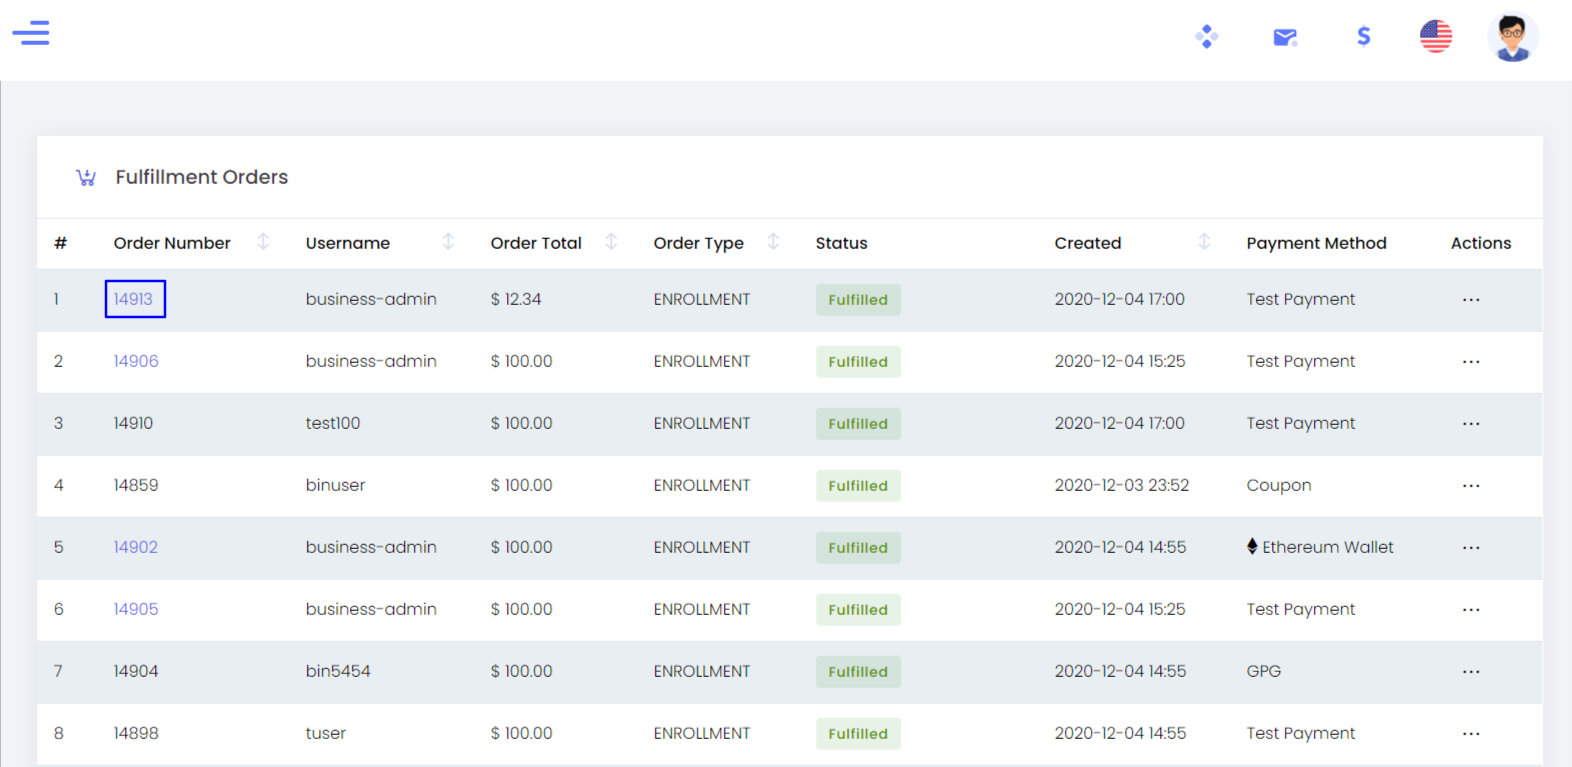
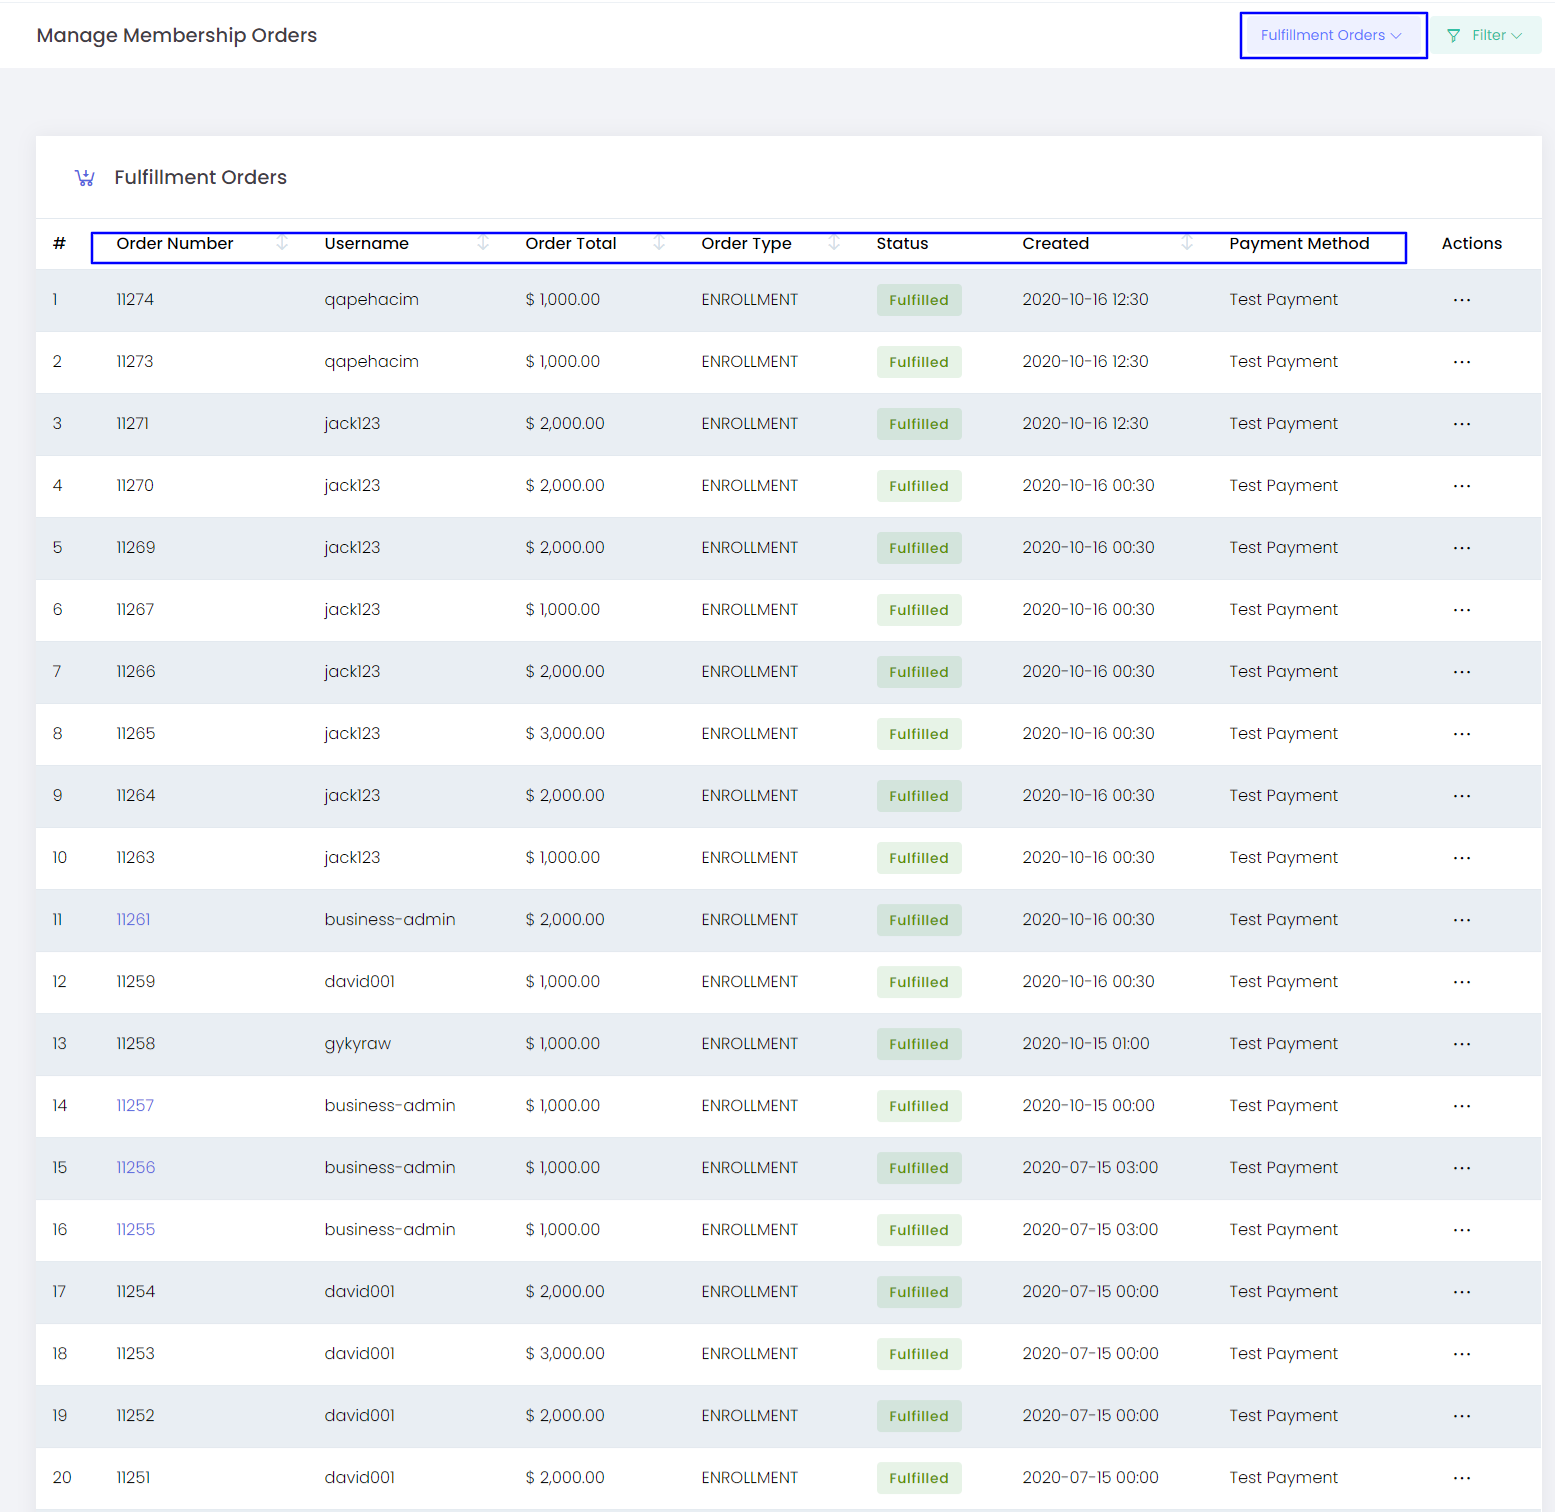
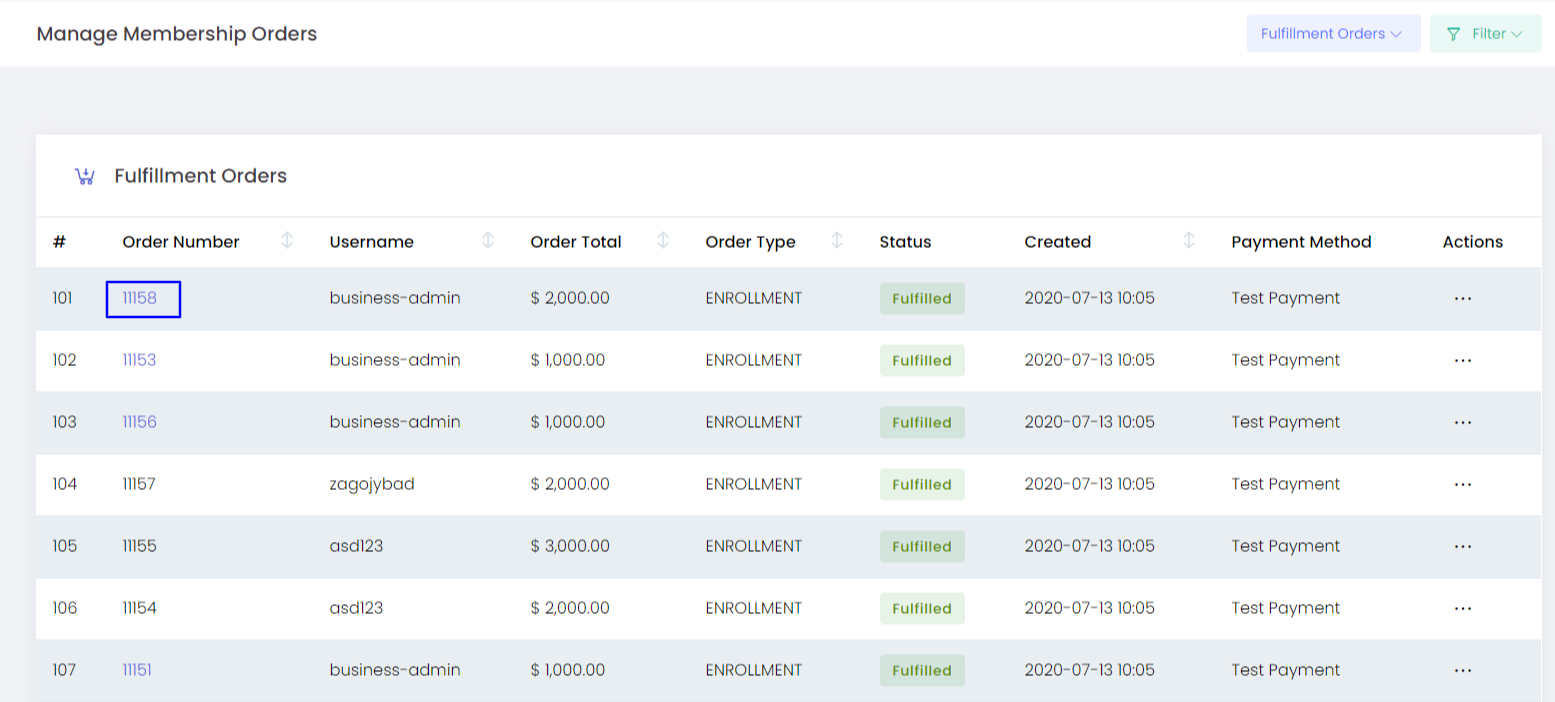
Fulfillment Orders
This shows the list of the completed orders.
The details included are:
- Order Number - The tracking ID/ number of the order
- Username - Username of the member who created the order.
- Order Total - The total amount for each order
- Order Type - The type of the order, whether it is an Enrolment order or it is a package upgrade etc.
- Status - The current payment status
- Created On - The Date and Time at which the order was created
- Payment Method - The payment gateway used for making the payment of the order
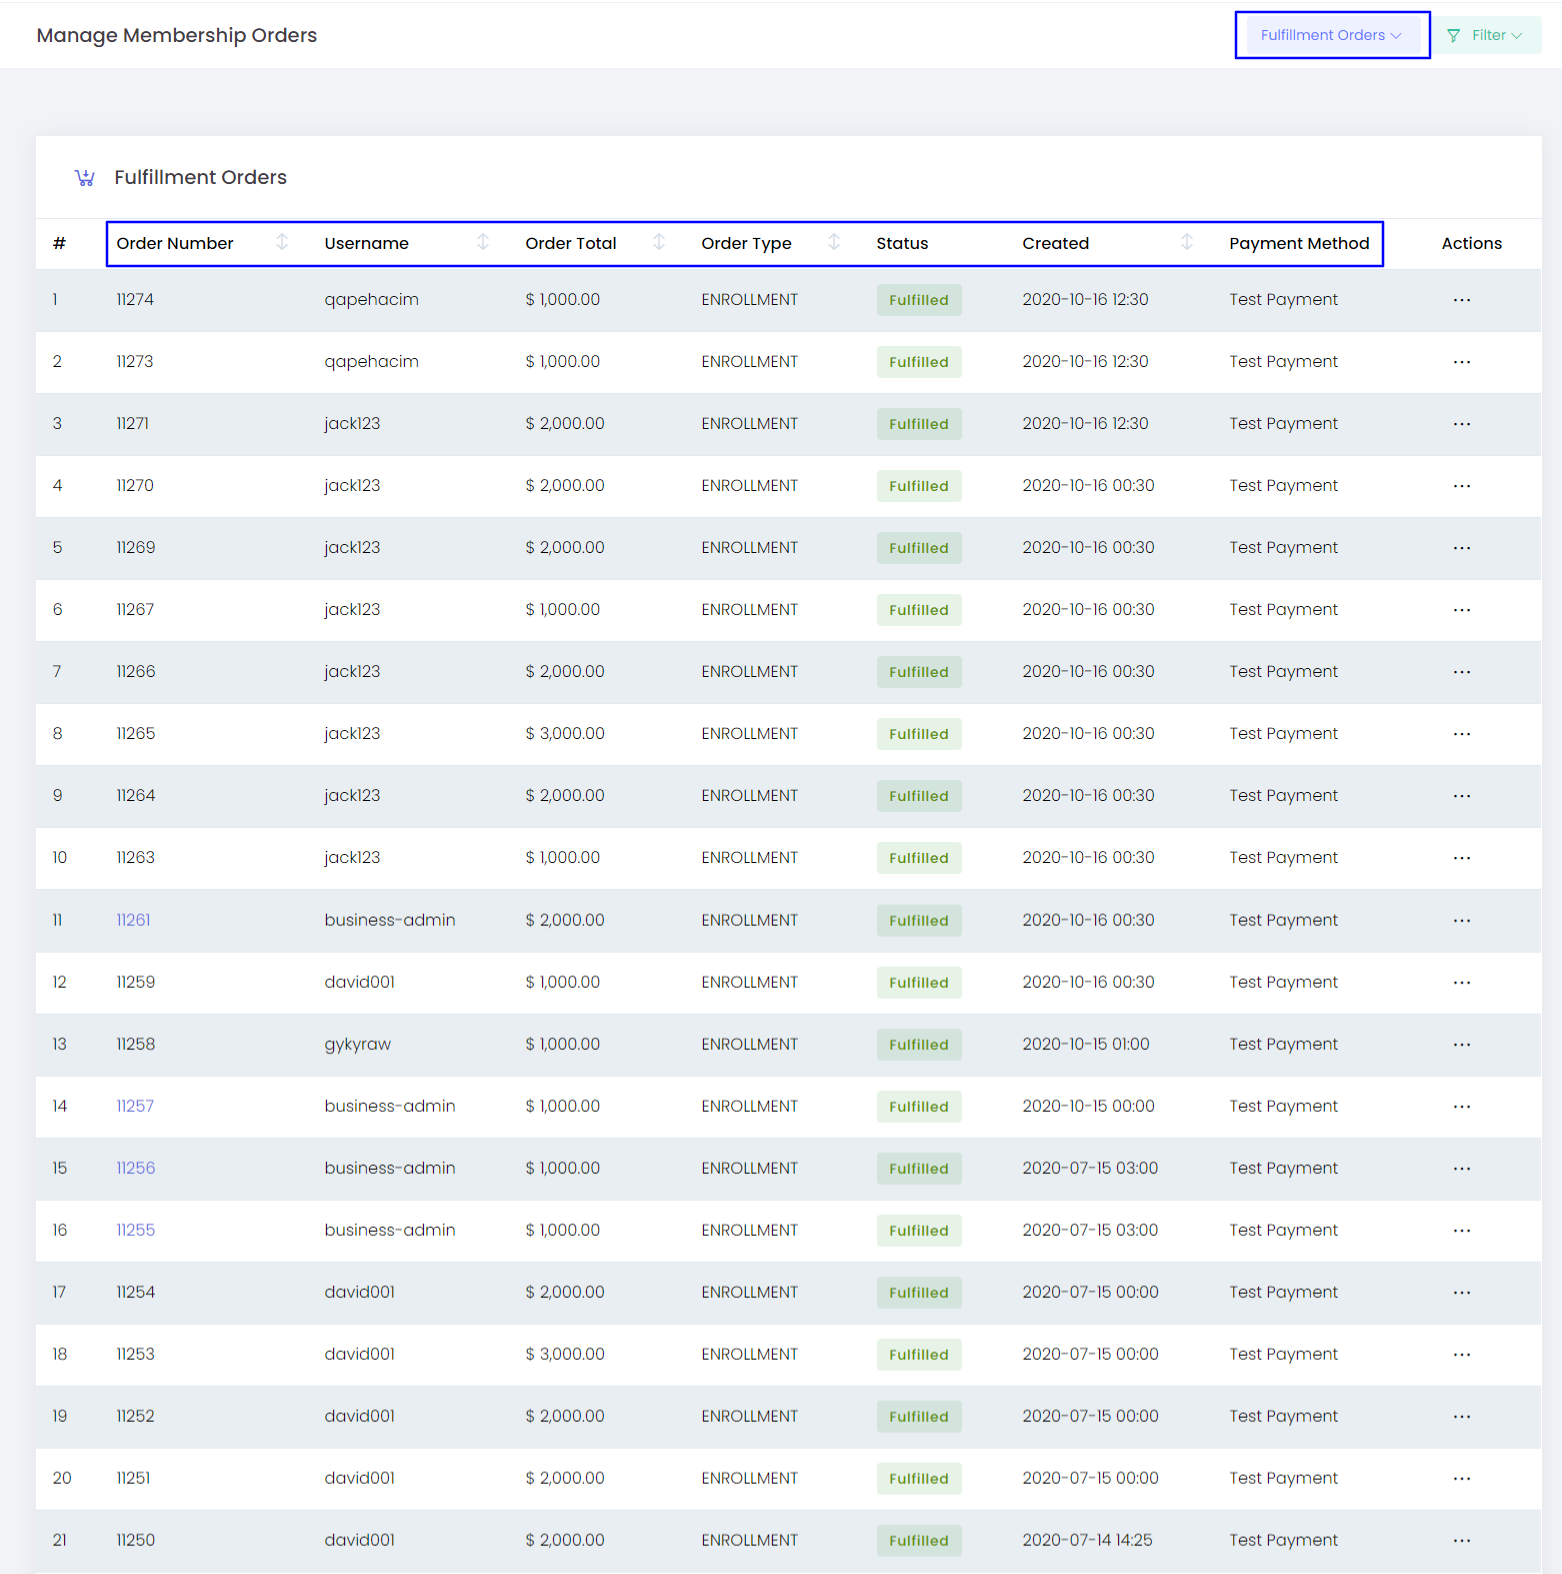
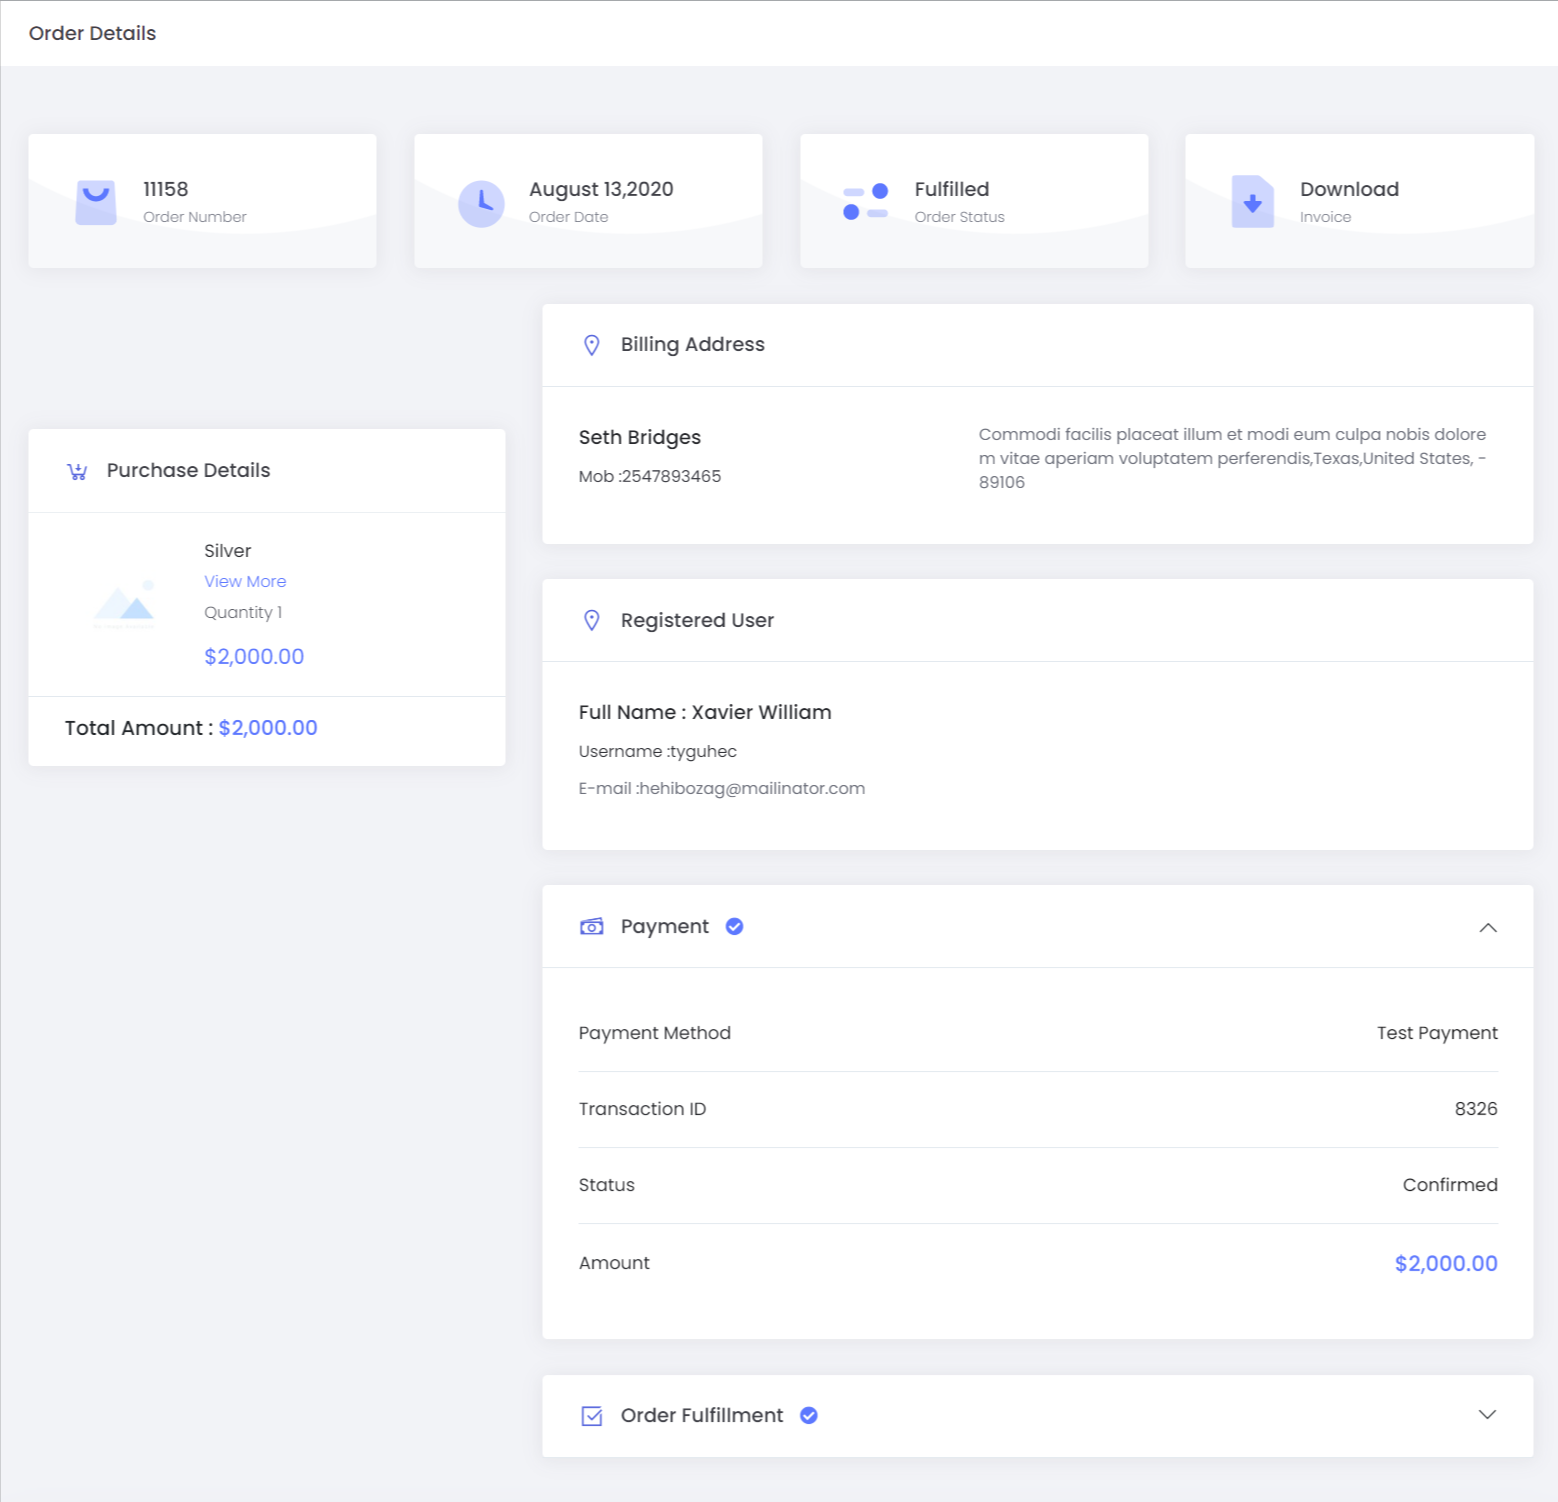
On clicking the order number Admin will get a detailed view of the Fulfilled Orders (Redirect to Order Details page)
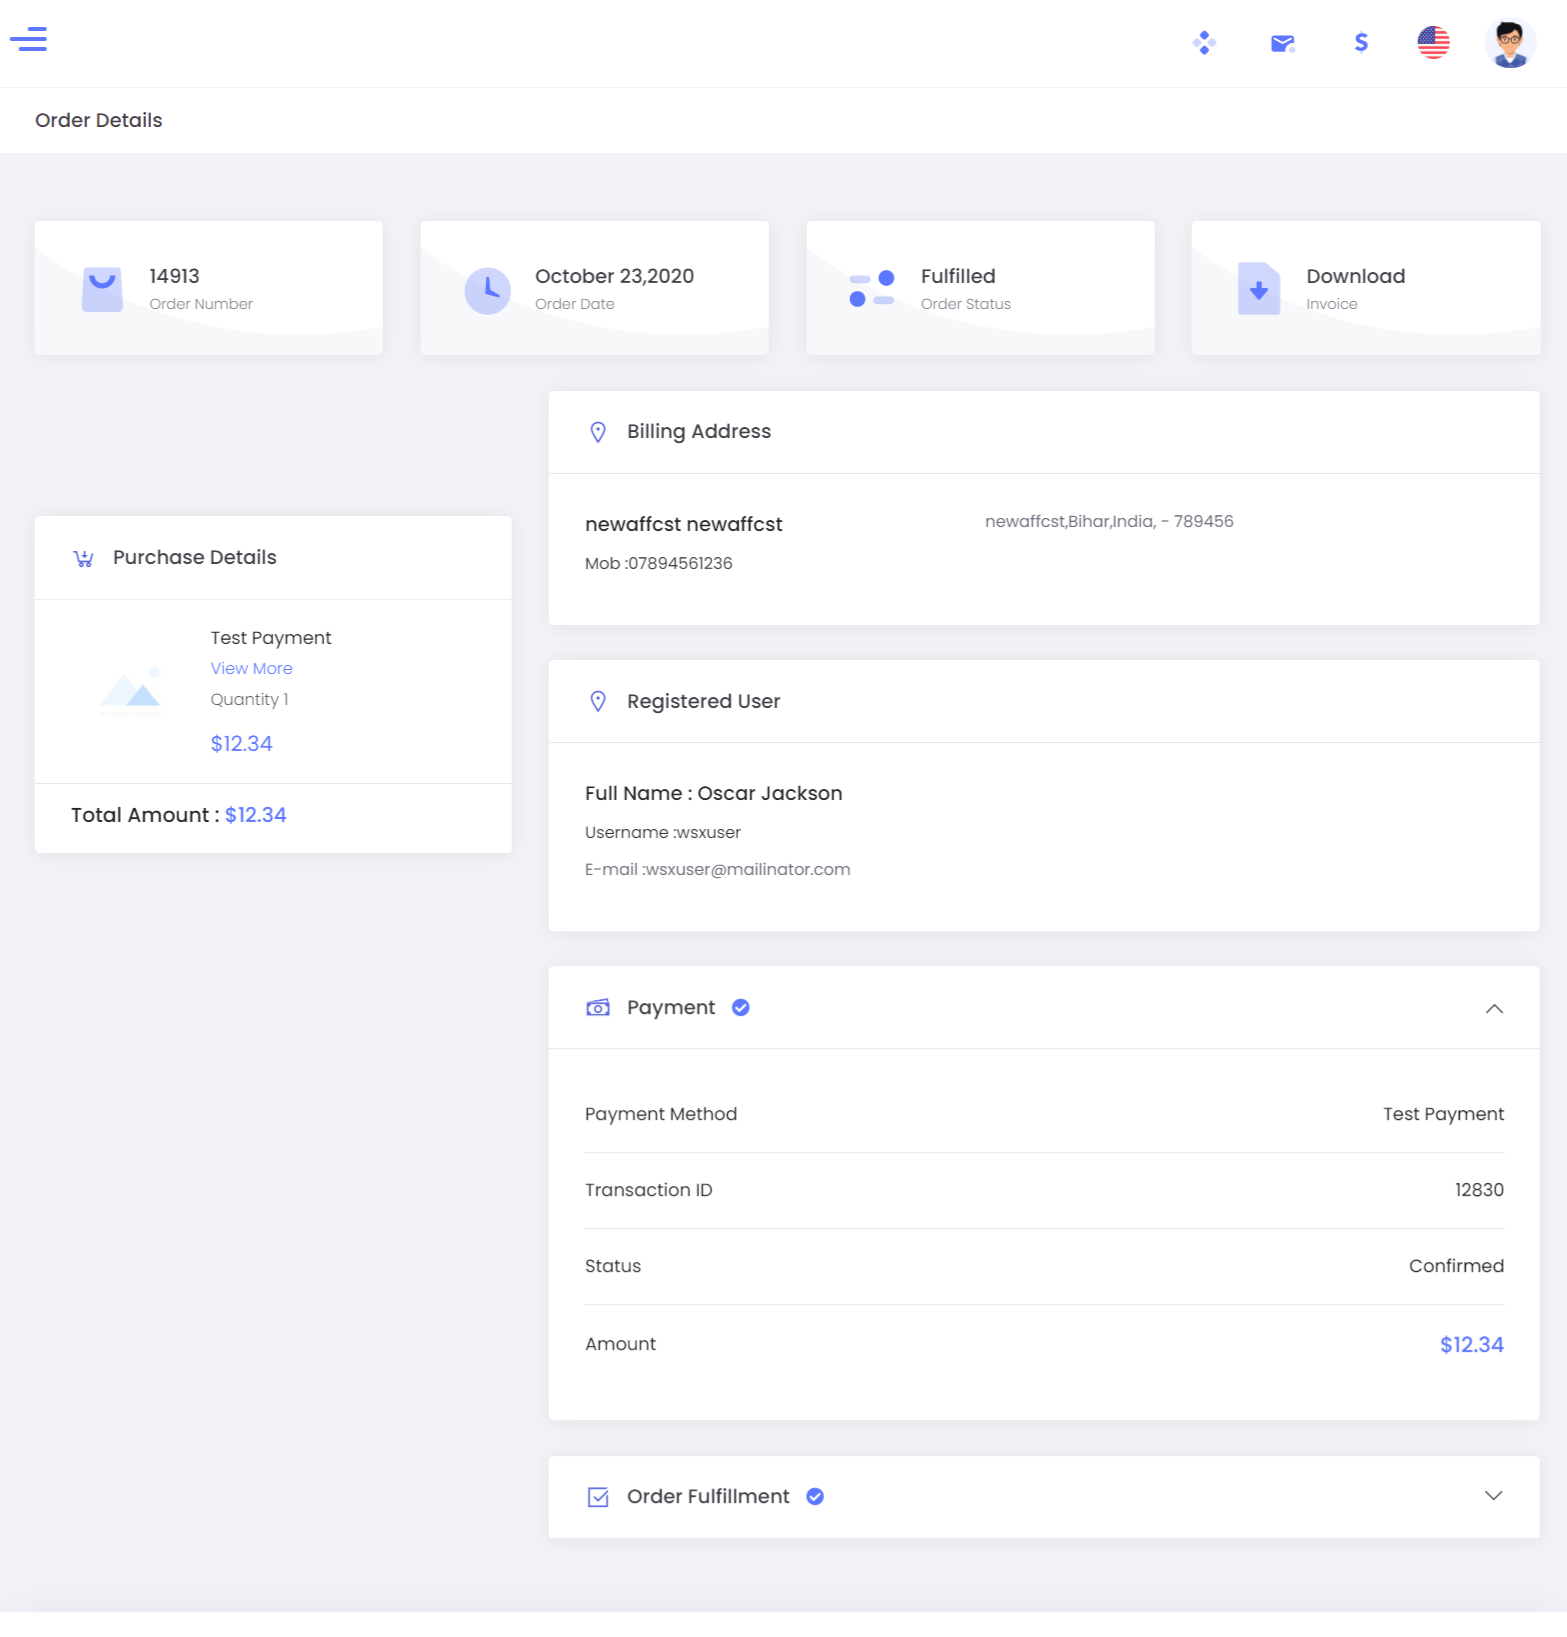
Actions
This option provides you with the payment and payment gateway details.

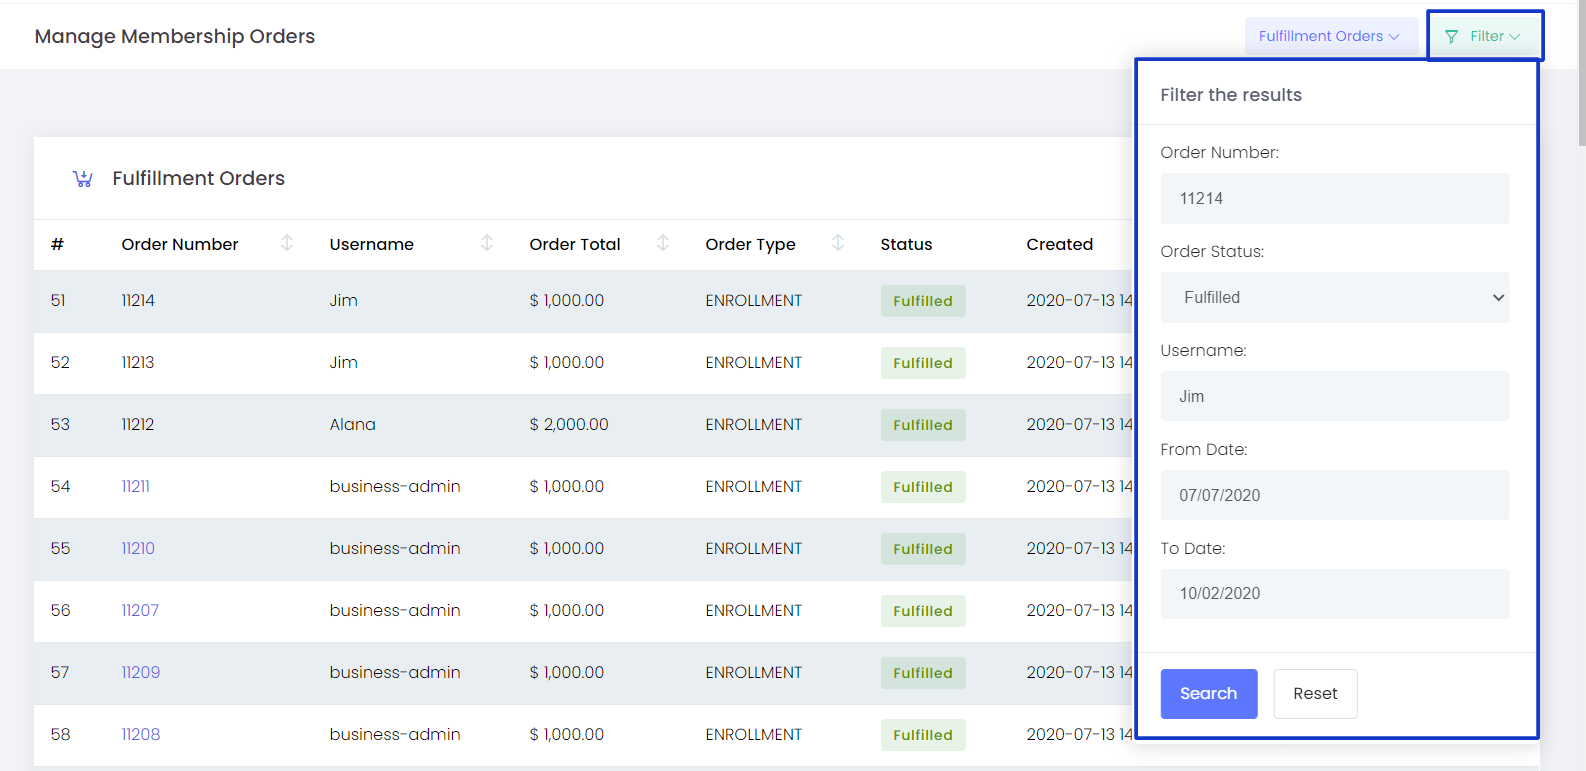
Filter
Filter option help you to reach the exact order details you are looking for by submitting the Order number, Order Status, Username, From Date, and To Date
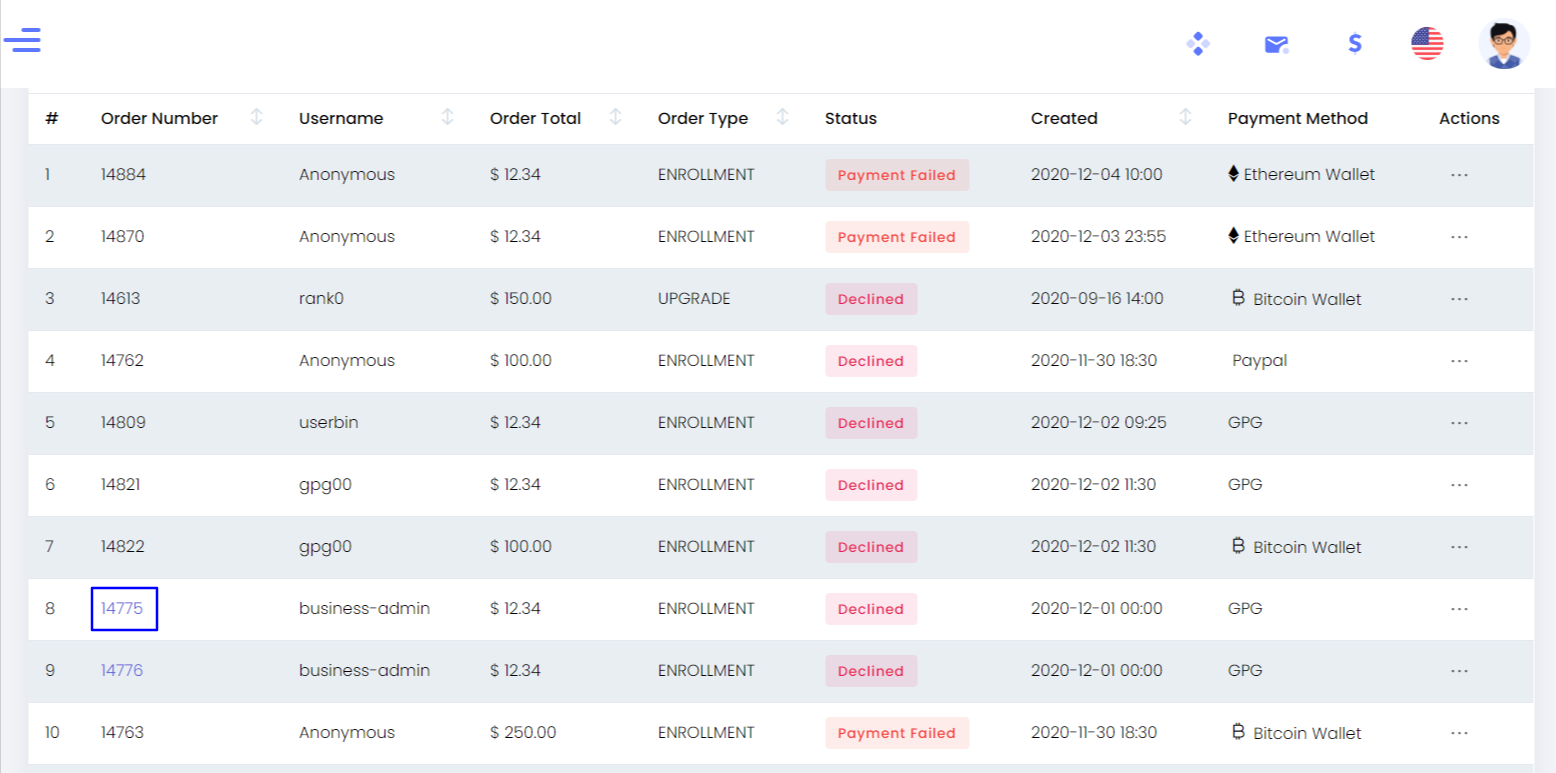
Declined Orders
The orders that have got failed due to failed payments or the orders that have been declined by the Admin.

The details included are:
- Order Number - The tracking ID/ number of the order
- Username - Username of the member who created the order.
- Order Total - The total amount for each order
- Order Type - The type of the order, whether it is an Enrolment order or it is a package upgrade etc.
- Status - The current payment status
- Created On - The Date and Time at which the order was created
- Payment Method - The payment gateway used for making the payment of the order
On clicking the order number Admin will get a detailed view of the Declined Order (Redirect to Order Details page)
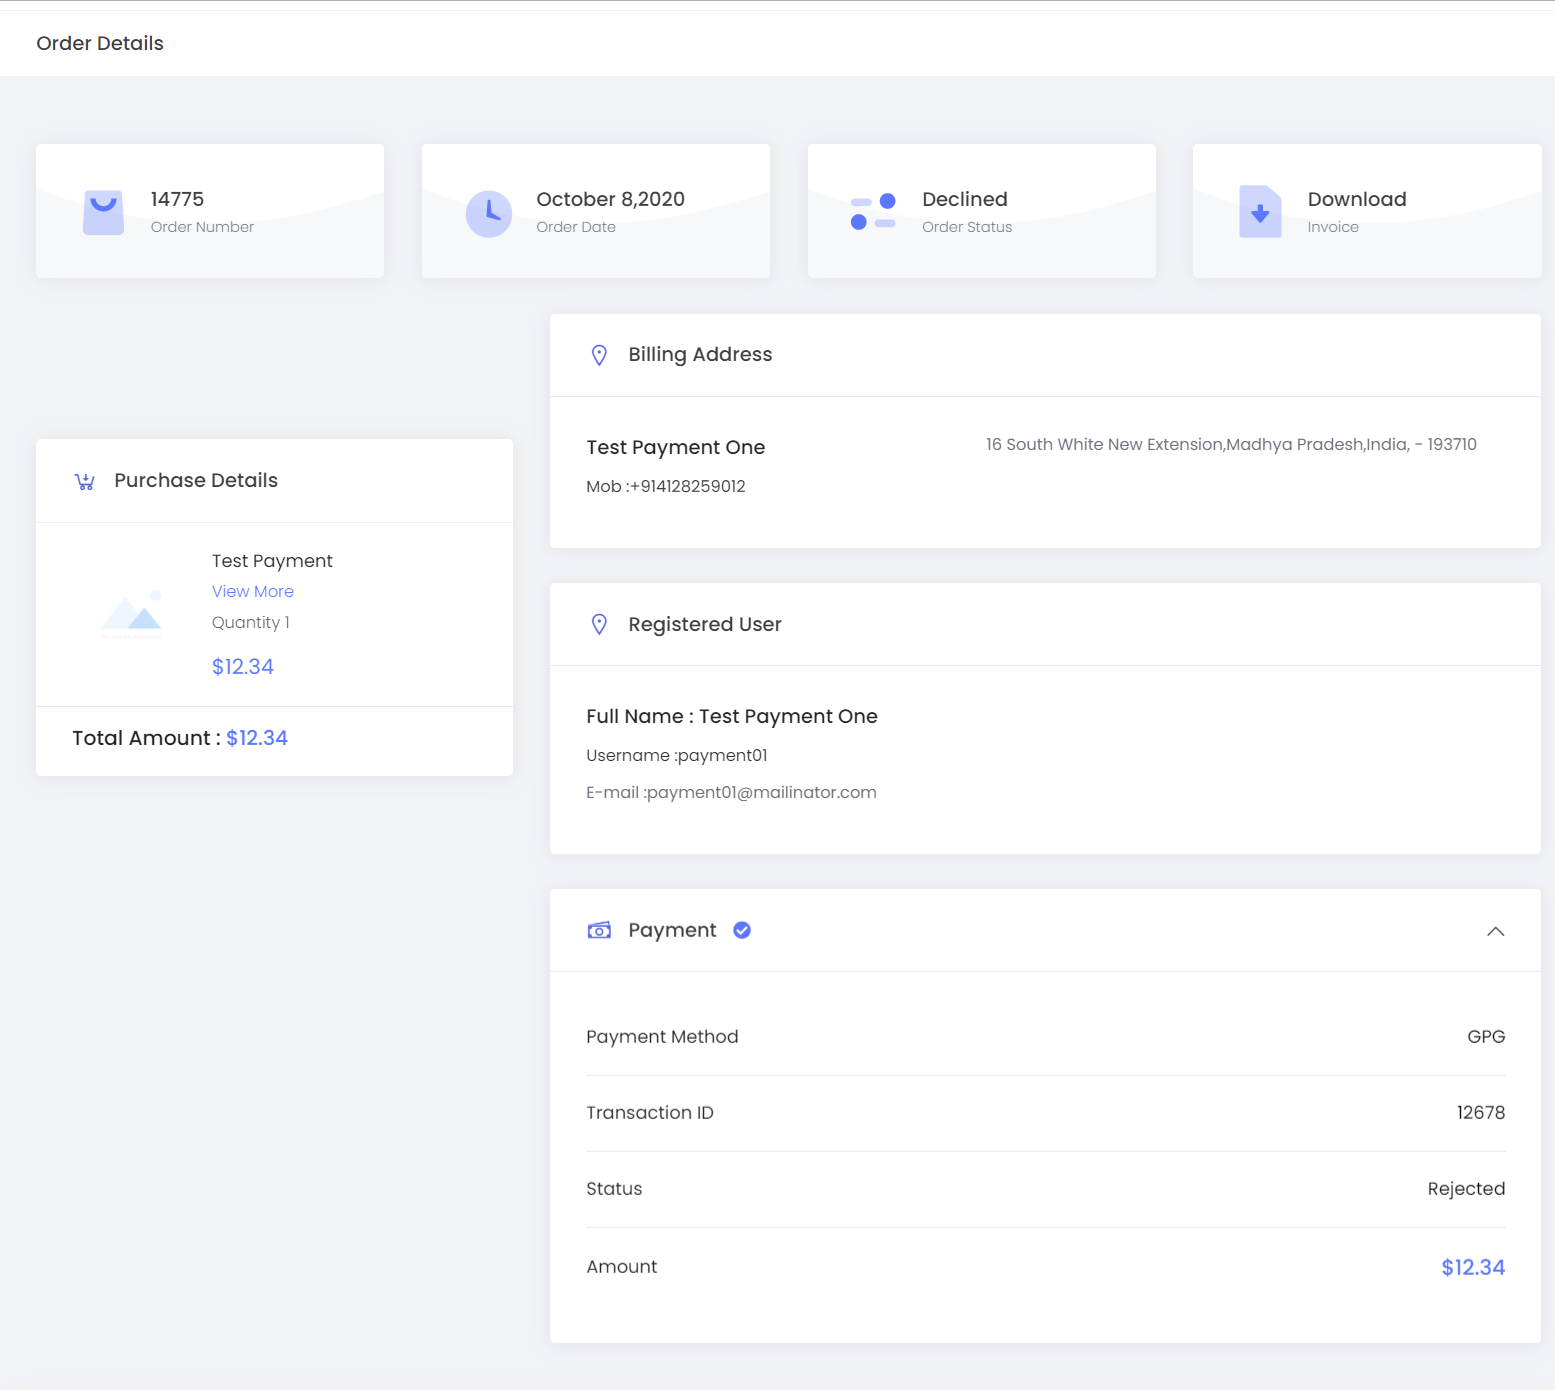
Filter
Filter option help you to reach the exact order details you are looking for by submitting the Order number, Order Status, Username, From Date, and To Date
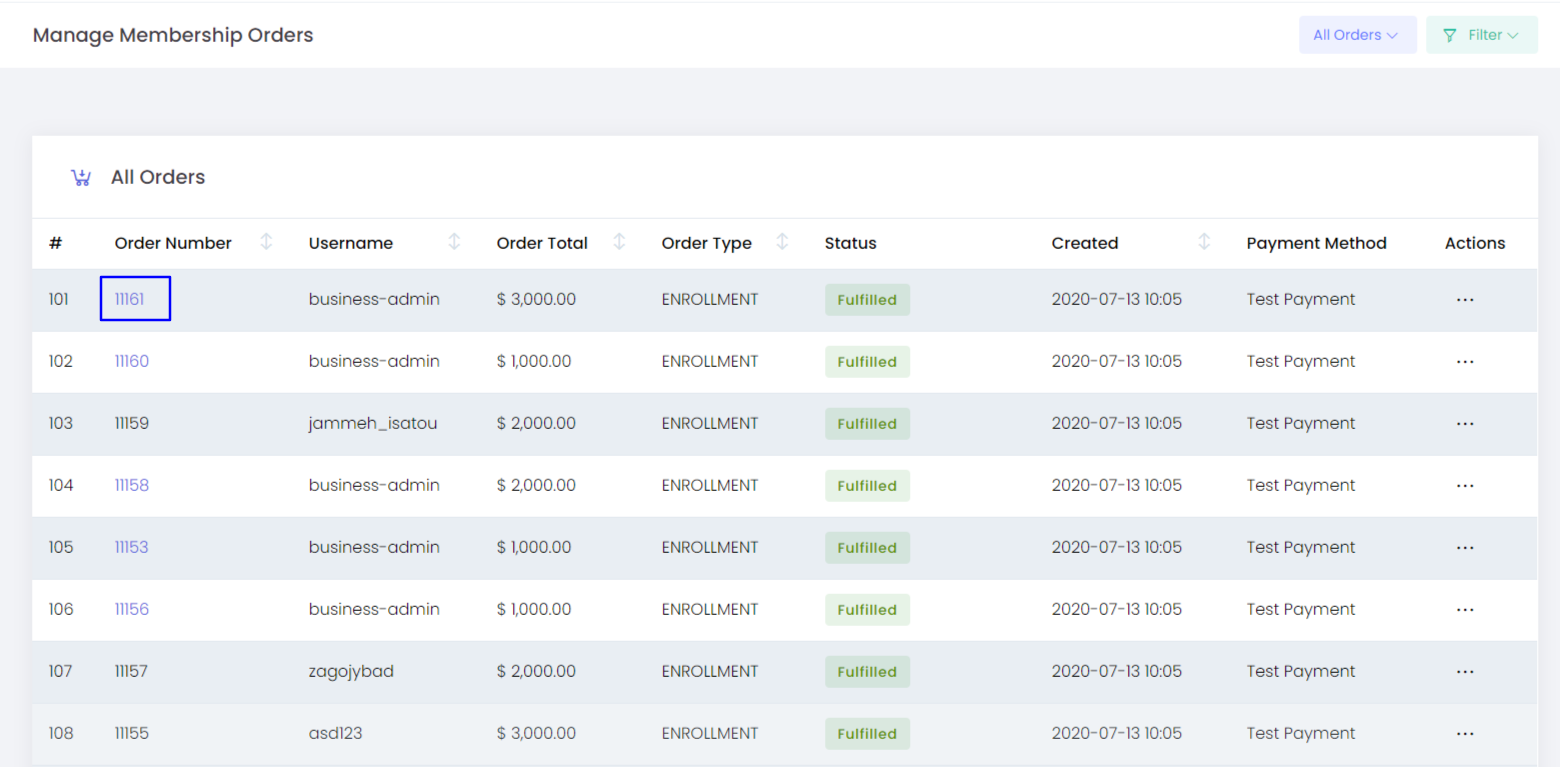
All Orders
Here you get the summary of all the Enrolment orders.
The details included are:
- Order Number - The tracking ID/ number of the order
- Username - Username of the member who created the order.
- Order Total - The total amount for each order
- Order Type - The type of the order, whether it is an Enrolment order or it is a package upgrade etc.
- Status - The current payment status
- Created On - The Date and Time at which the order was created
- Payment Method - The payment gateway used for making the payment of the order
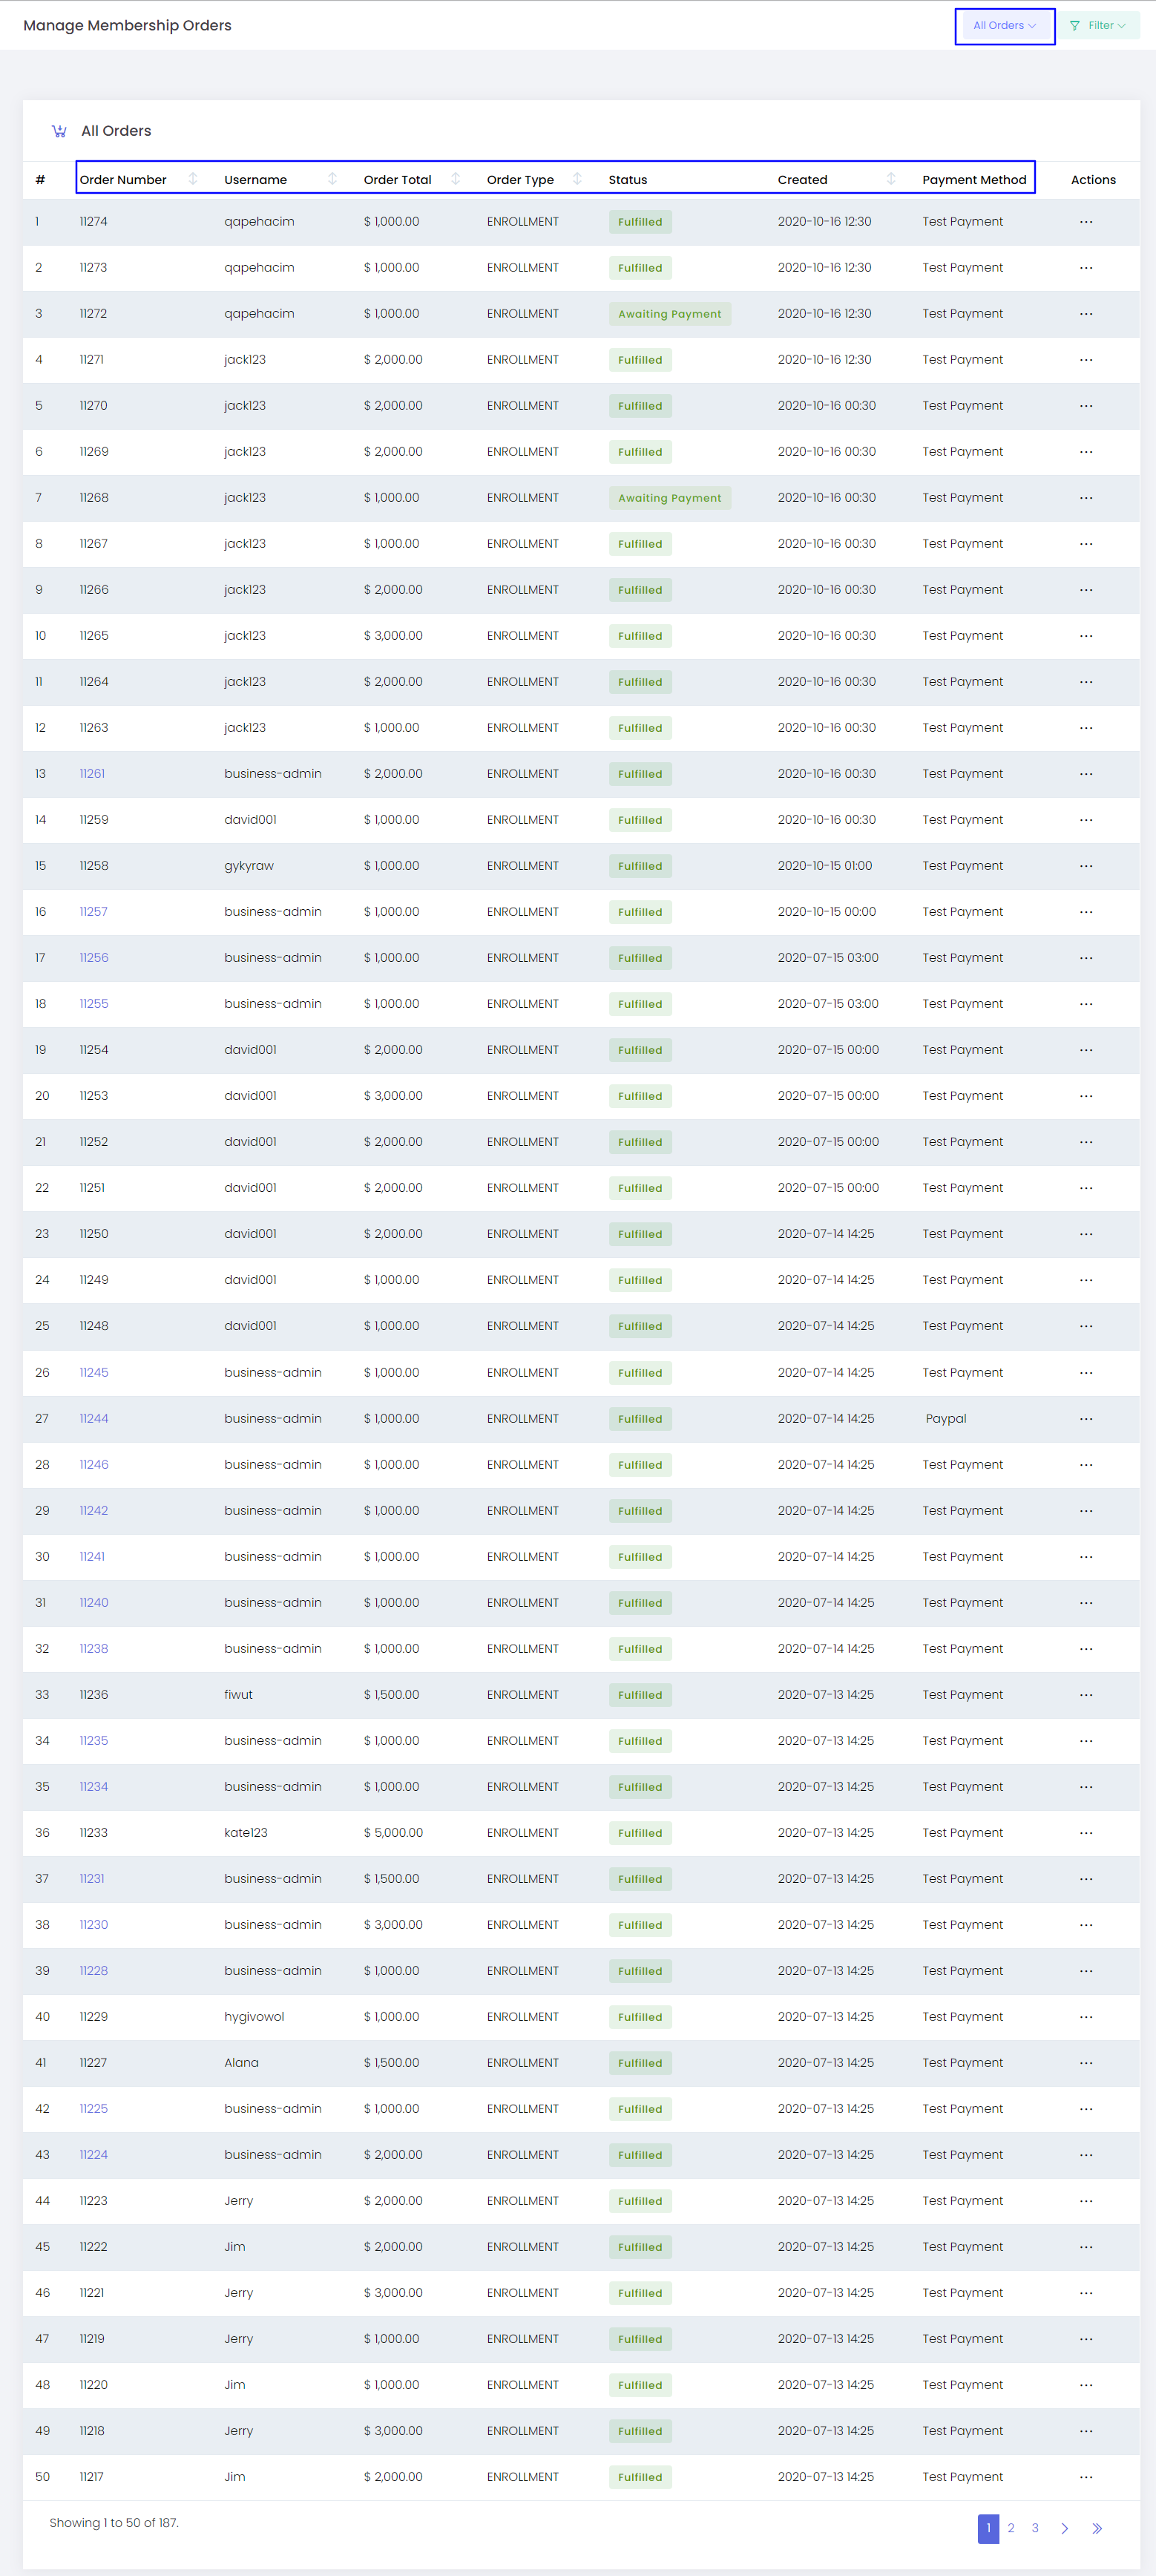
On clicking the order number Admin will get a detailed view of the Particular Order (Redirect to Order Details page)

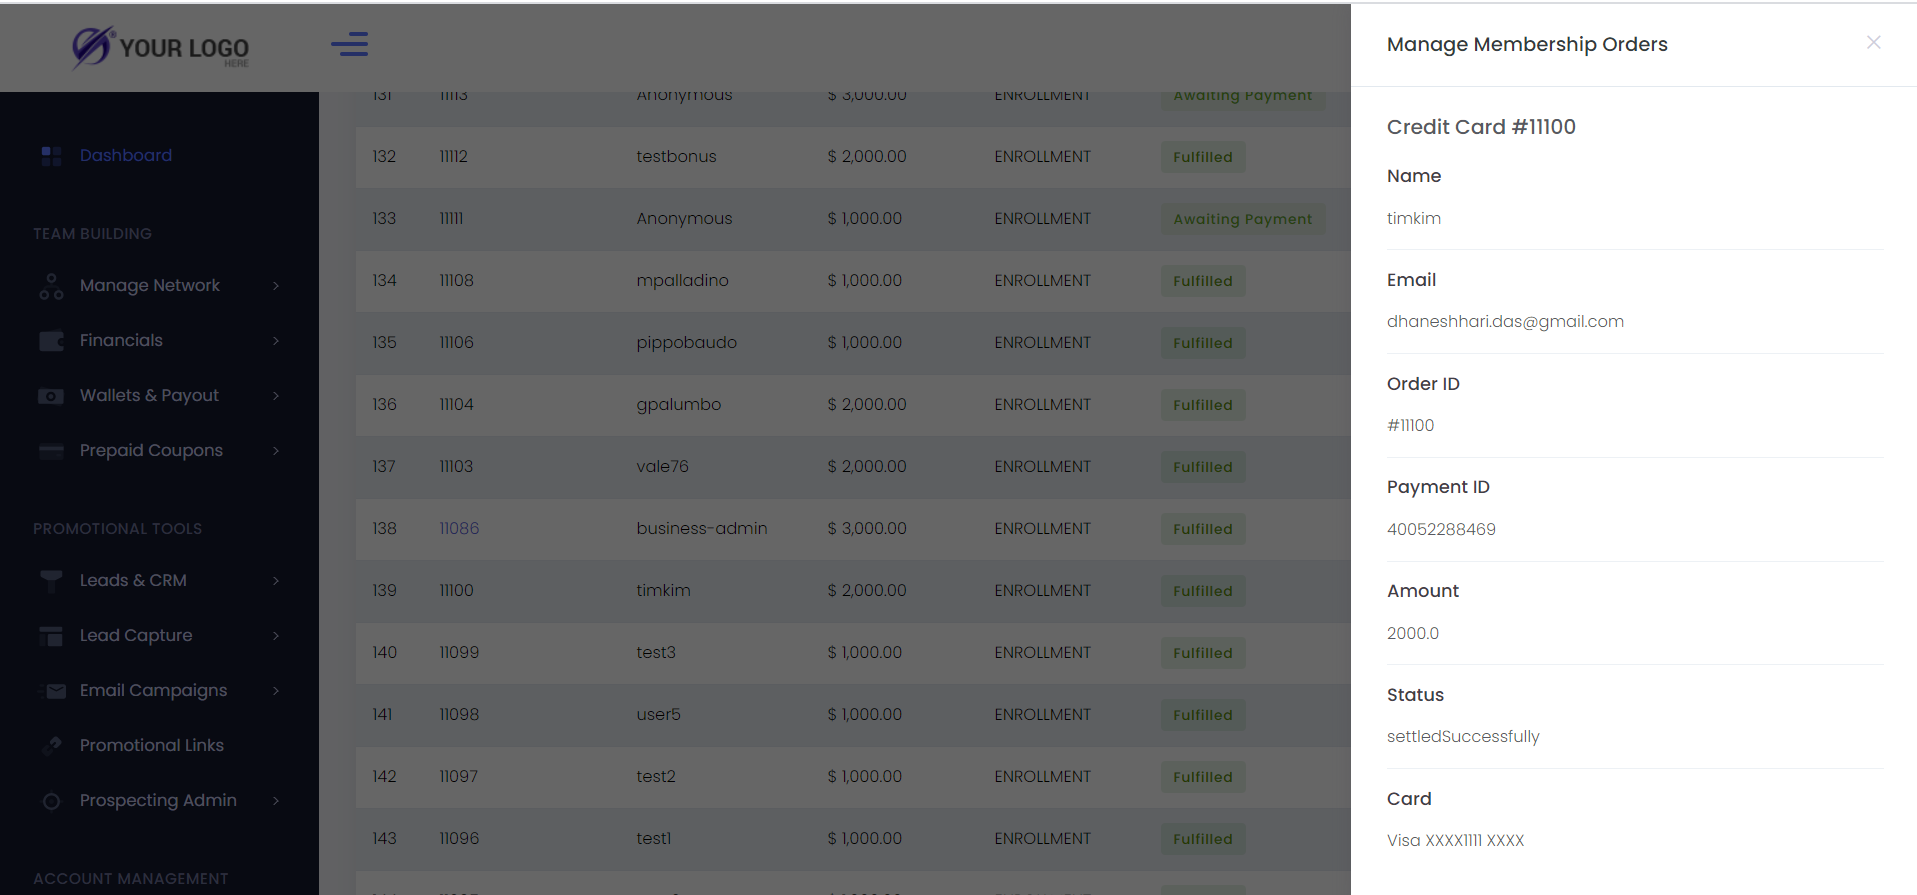
Actions
This option provides you with the payment and payment gateway details.
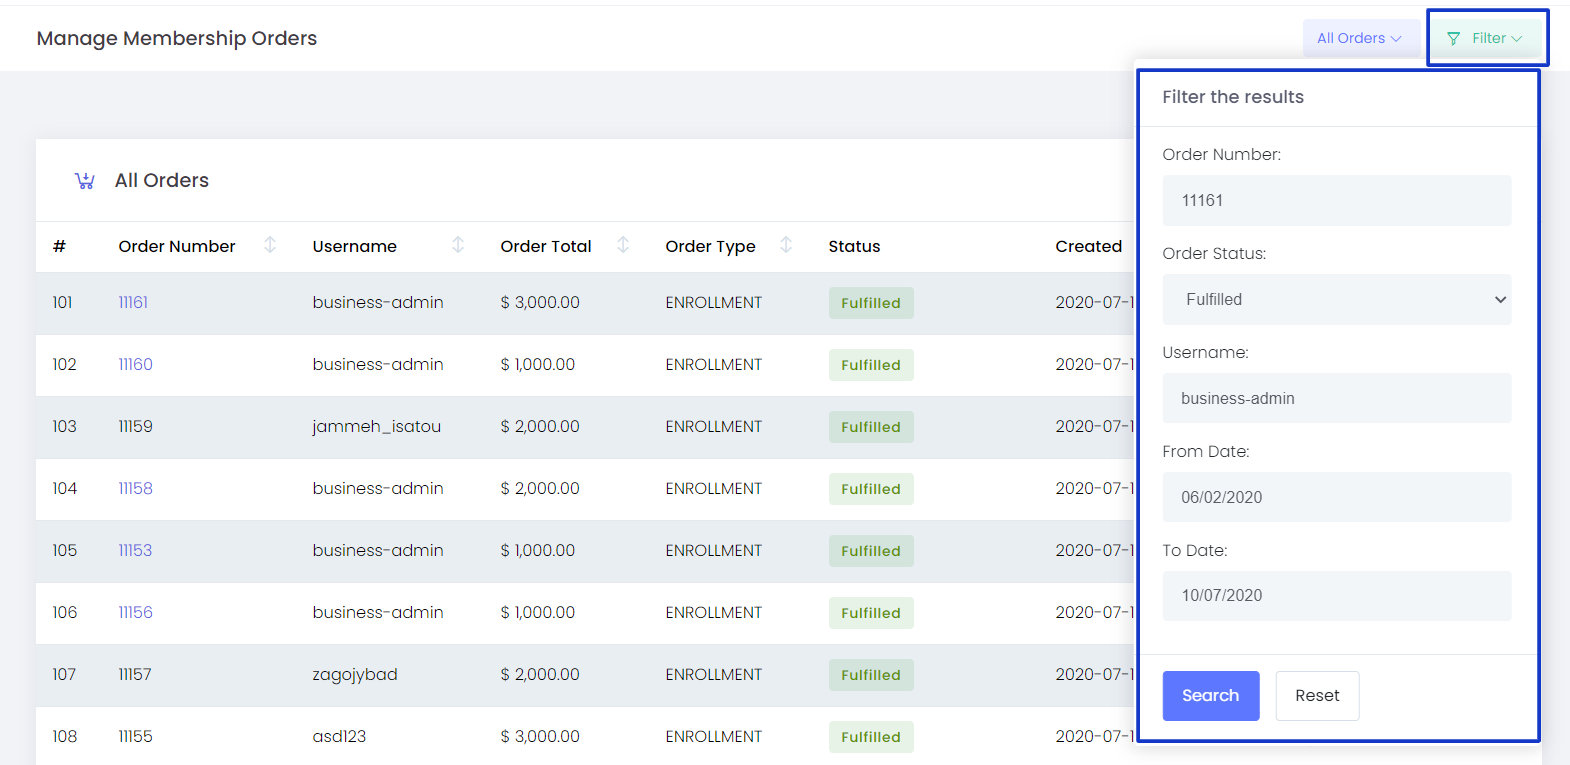
Filter
Filter option help you to reach the exact order details you are looking for by submitting the Order number, Order Status, Username, From Date, and To Date

Admin can enable the subscriptions from this option.

Subscription Payment
You can set the required payment gateway from this option.
Fulfillment Orders
This shows the list of the completed orders.
The details included are:
- Order Number - The tracking ID/ number of the order
- Username - Username of the member who created the order.
- Order Total - The total amount for each order
- Order Type - The type of the order, whether it is an Enrolment order or it is a package upgrade etc.
- Status - The current payment status
- Created On - The Date and Time at which the order was created
- Payment Method - The payment gateway used for making the payment of the order
On clicking the order number Admin will get a detailed view of the Fulfilled Orders (Redirect to Order Details page)
Actions
This option provides you with the payment details.

Filter
Filter option help you to reach the exact member details you are looking for by submitting the Order number, Order Status, Username, From Date, and To Date
Business Plan
This section helps you customize your entire business plan. You can add, delete, or modify your own enrollment packages and configure bonuses, rank rules, and commissions.
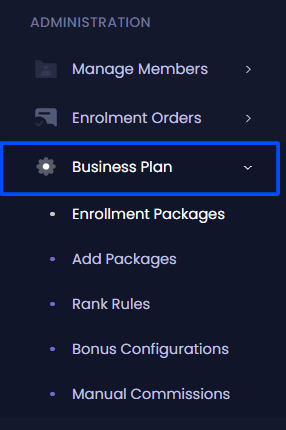
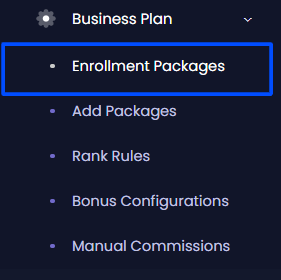
Enrollment Packages
-
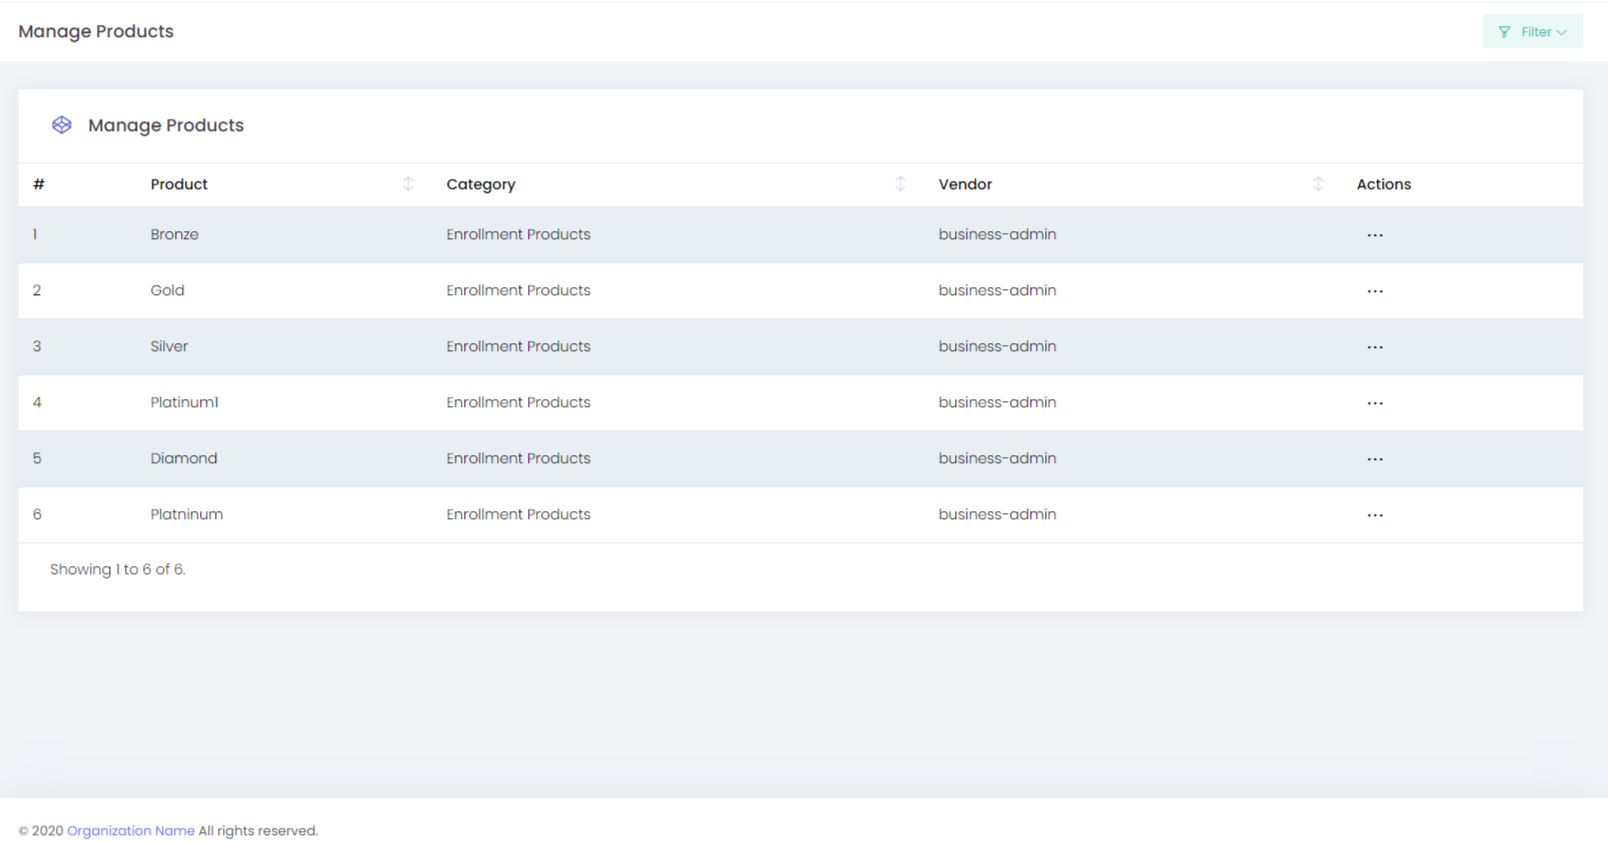
Admin can view the list of enrollment packages available and can take proper actions as per requirement like edit, delete, and a quick link to add images.
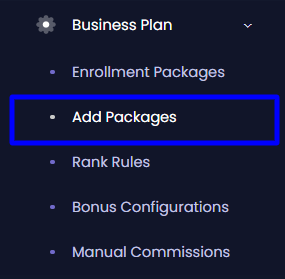
Add package
Admin can add a new enrollment package from his back office as per companies requirement.
How can admin add an enrollment package?
Admin needs to provide all the mandatory information of the enrollment package.
Basic -
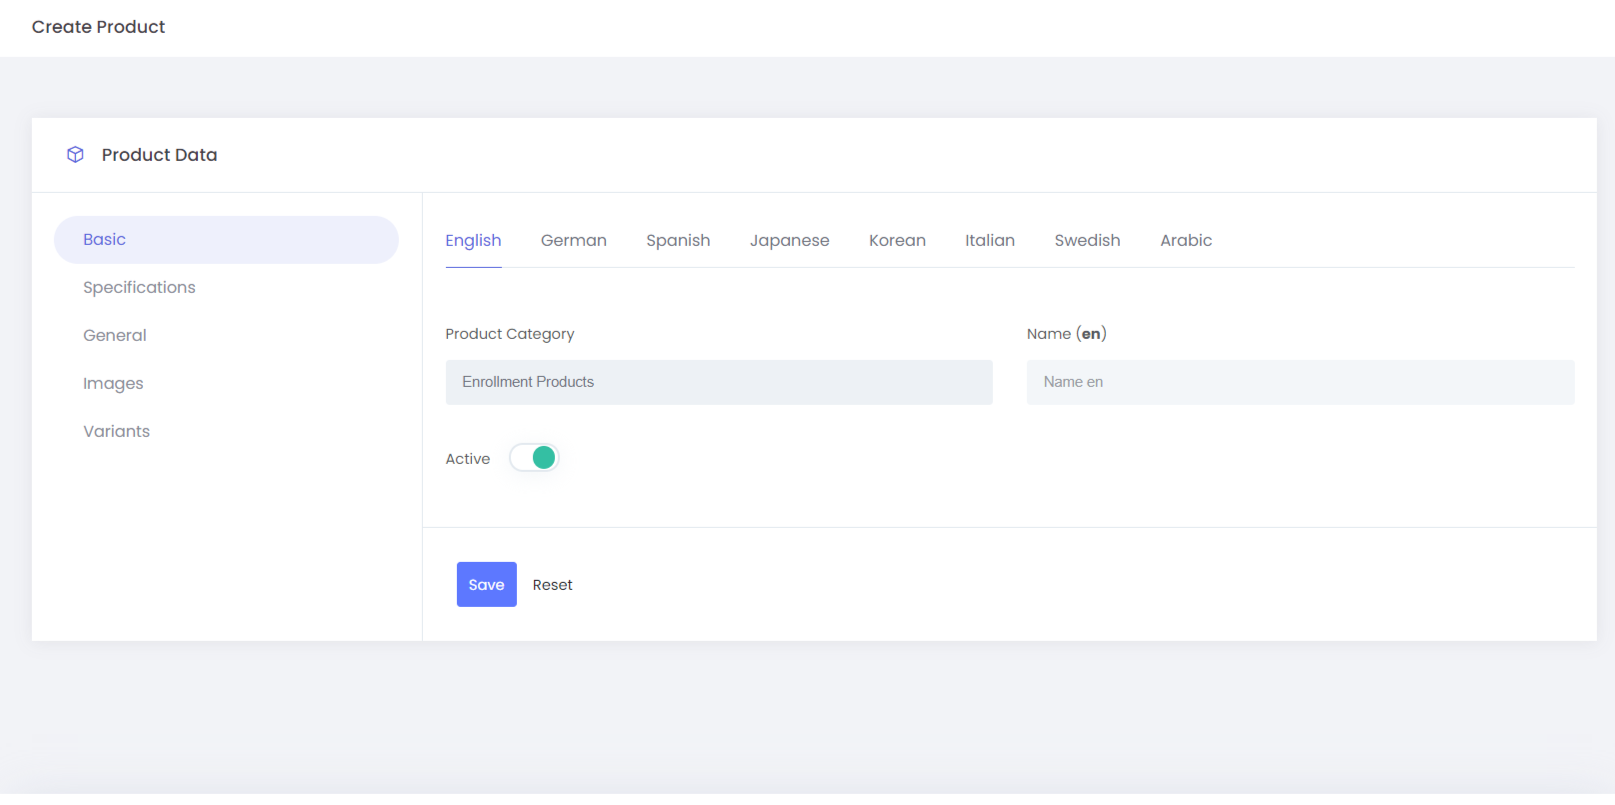
Admin can submit the product category and name in available multiple languages.Admin can also choose to enable or disable the active status of the package.
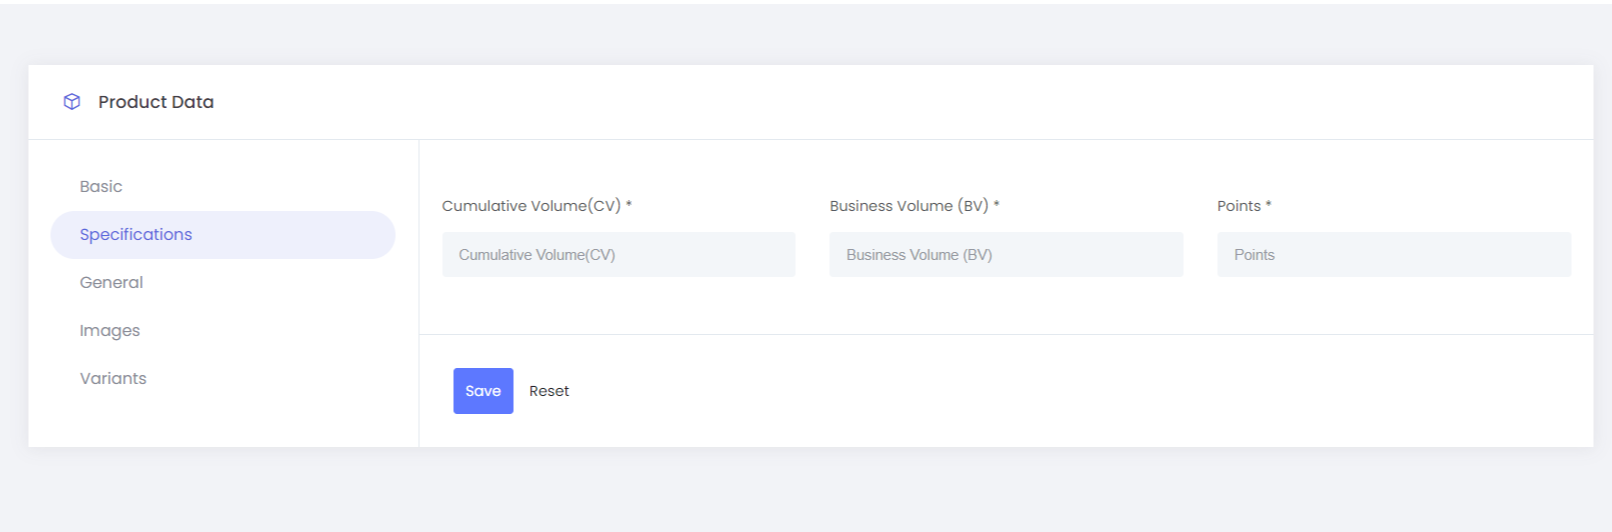
Specifications -
Admin can set the specifications of the enrollment package like the Commission volume ,business volume as well as any p
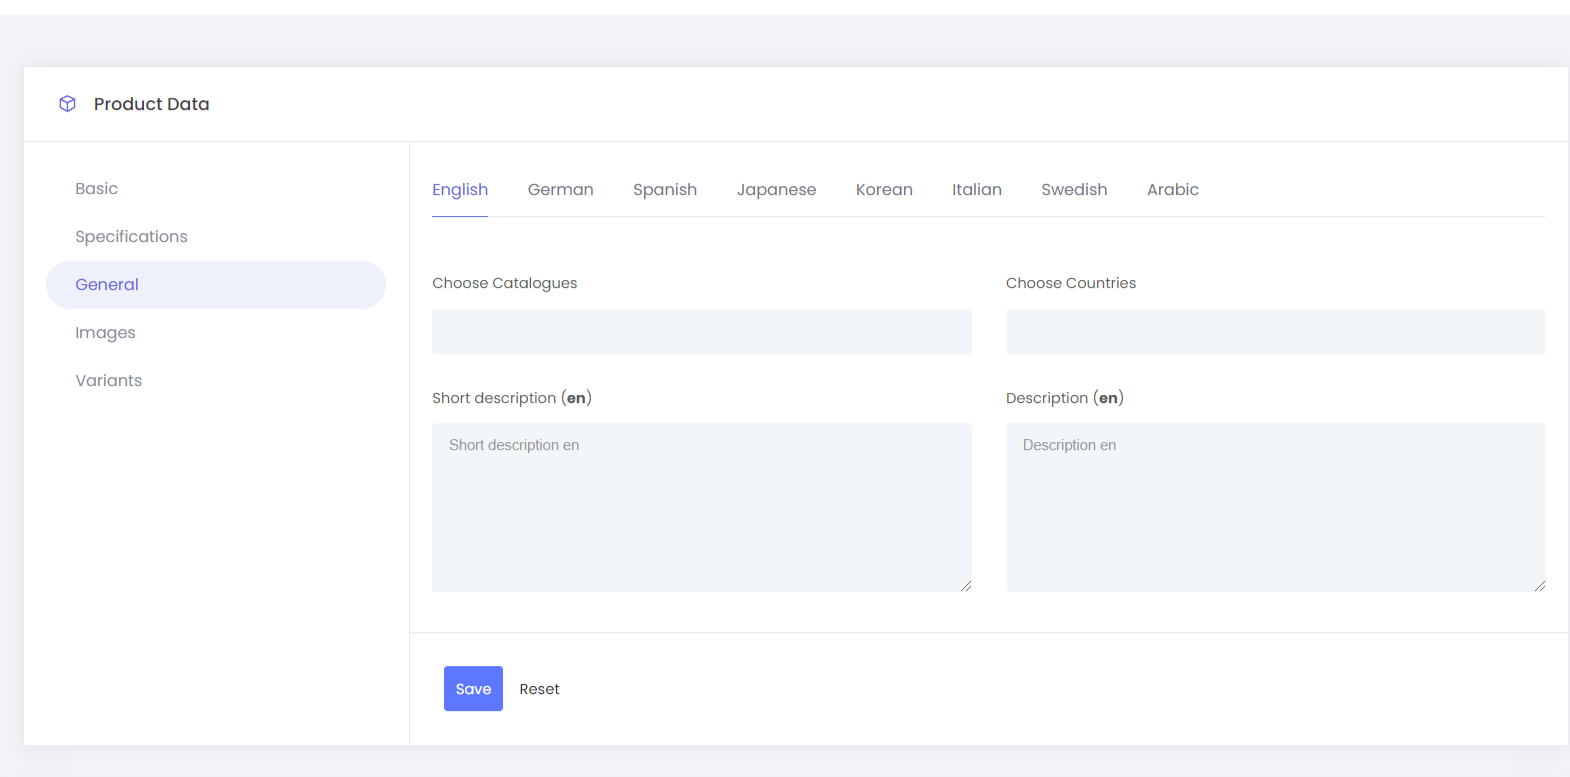
General
Admin can set some general details of the enrollment package like Choose Catalogues,Choose Countries,admin can give a short descriptions well as set a long description
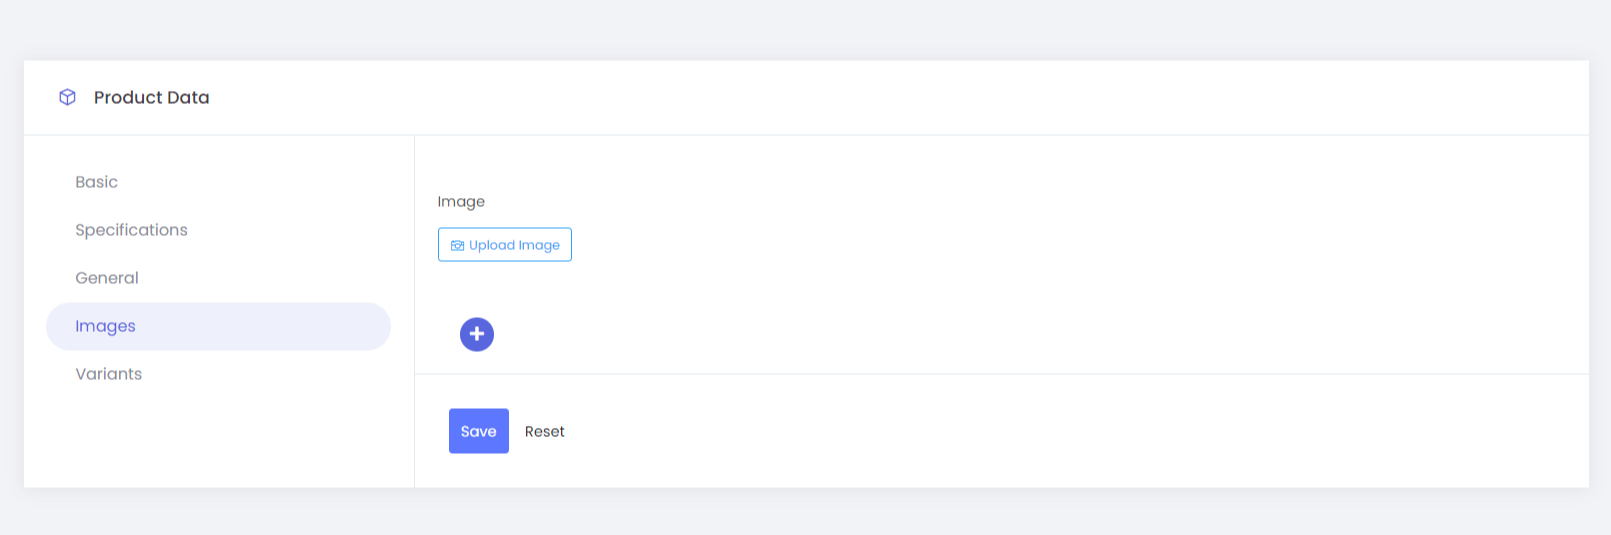
Images
Admin can upload the package image to be displayed from his back office. Image specification should be above 600* 600
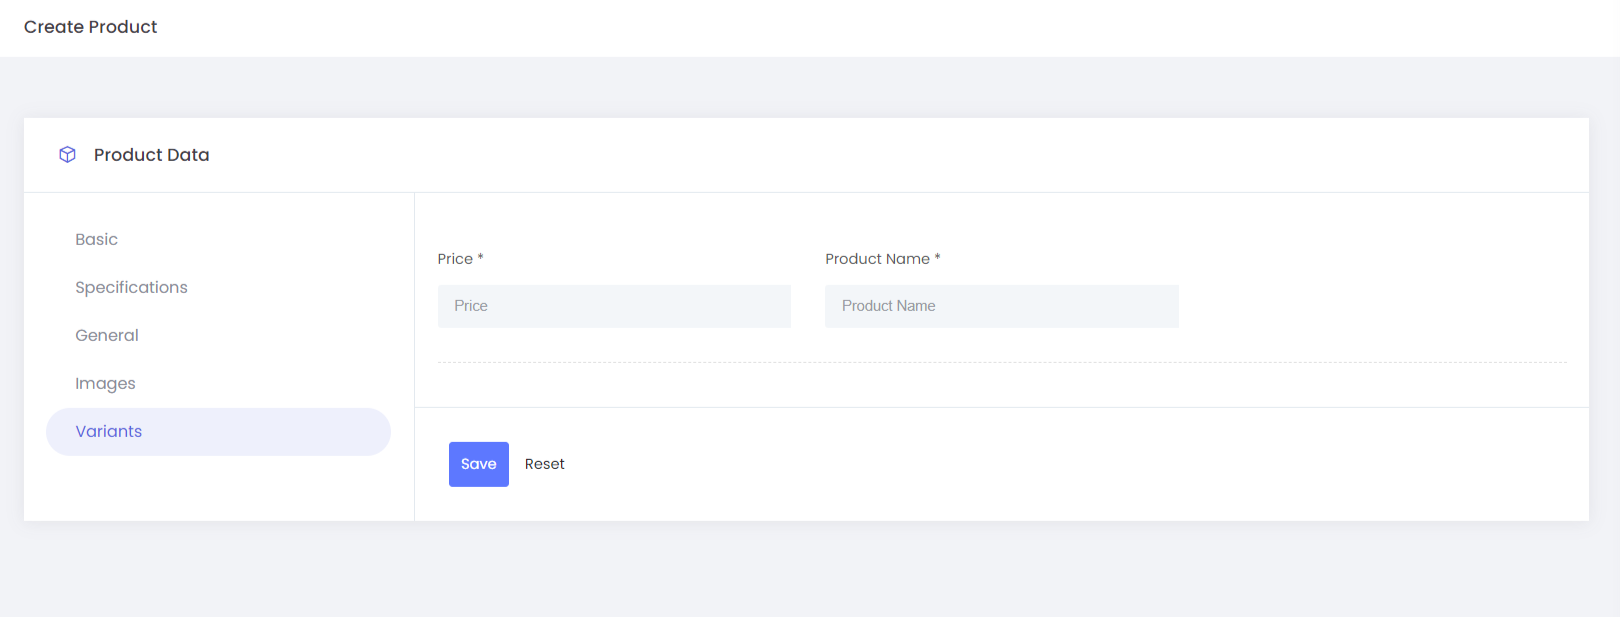
Variants
Admin can set the variant price and name to displayed .
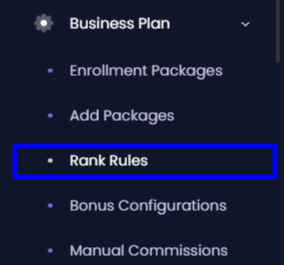
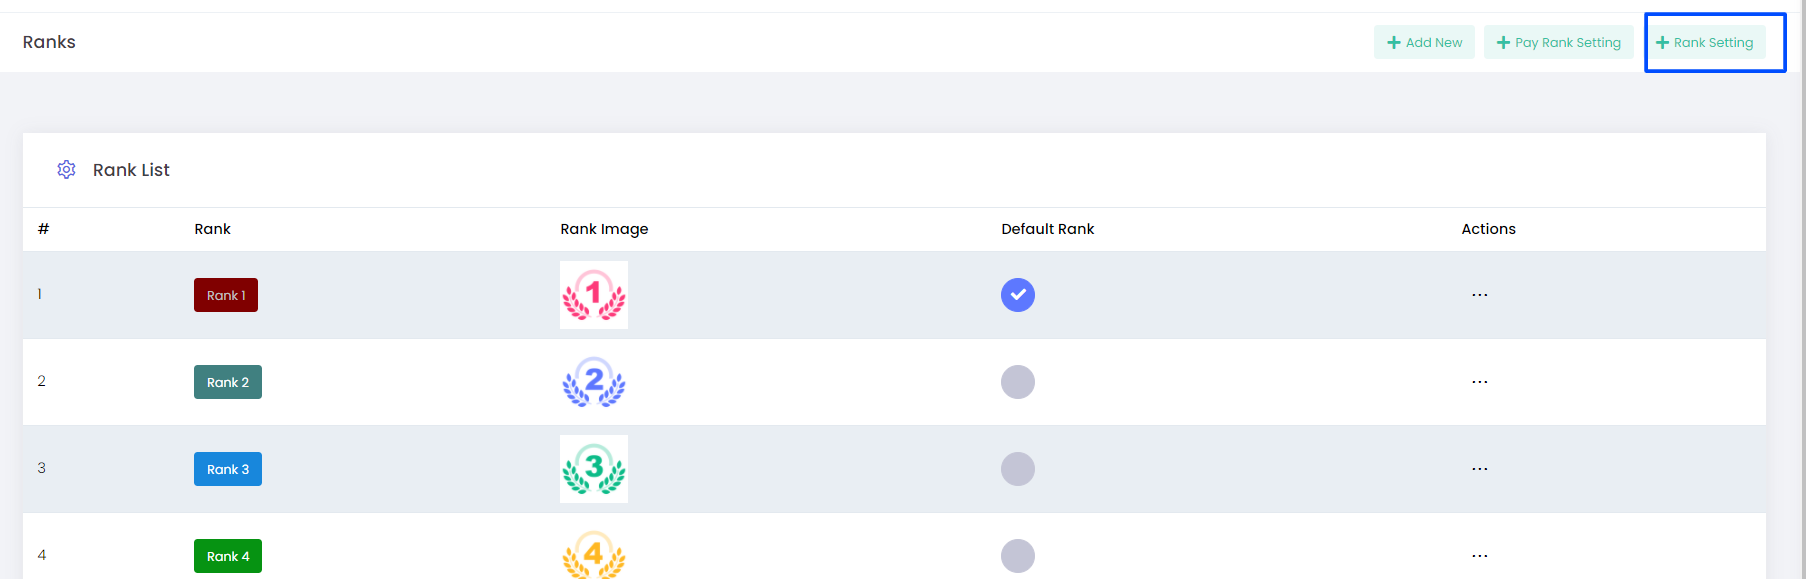
Rank Rules: With this option, we can set the rules of the ranks as per companies requirement.
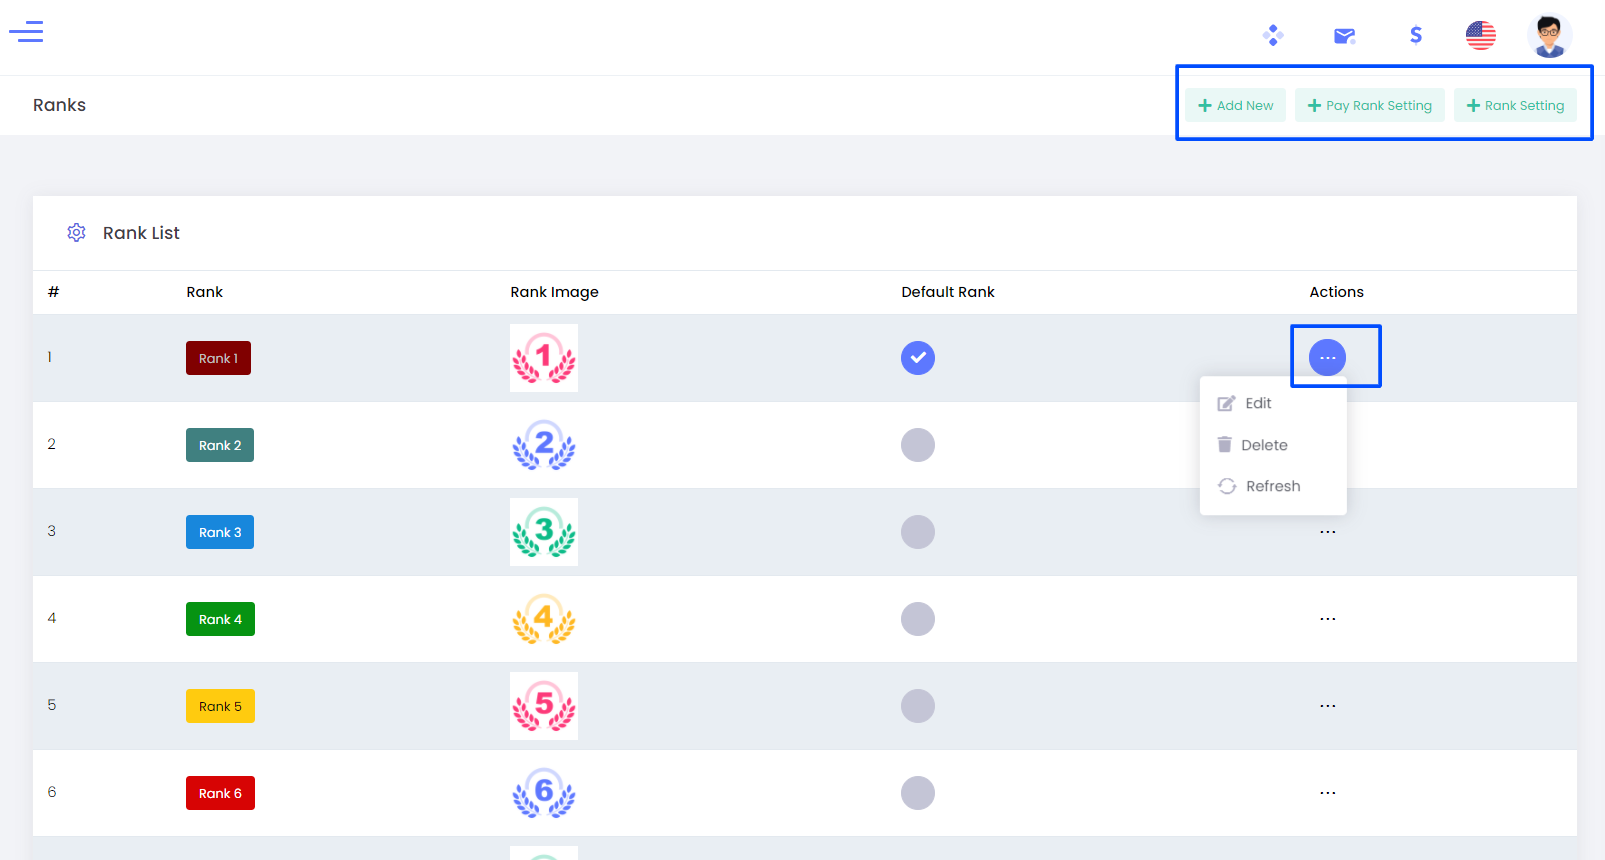
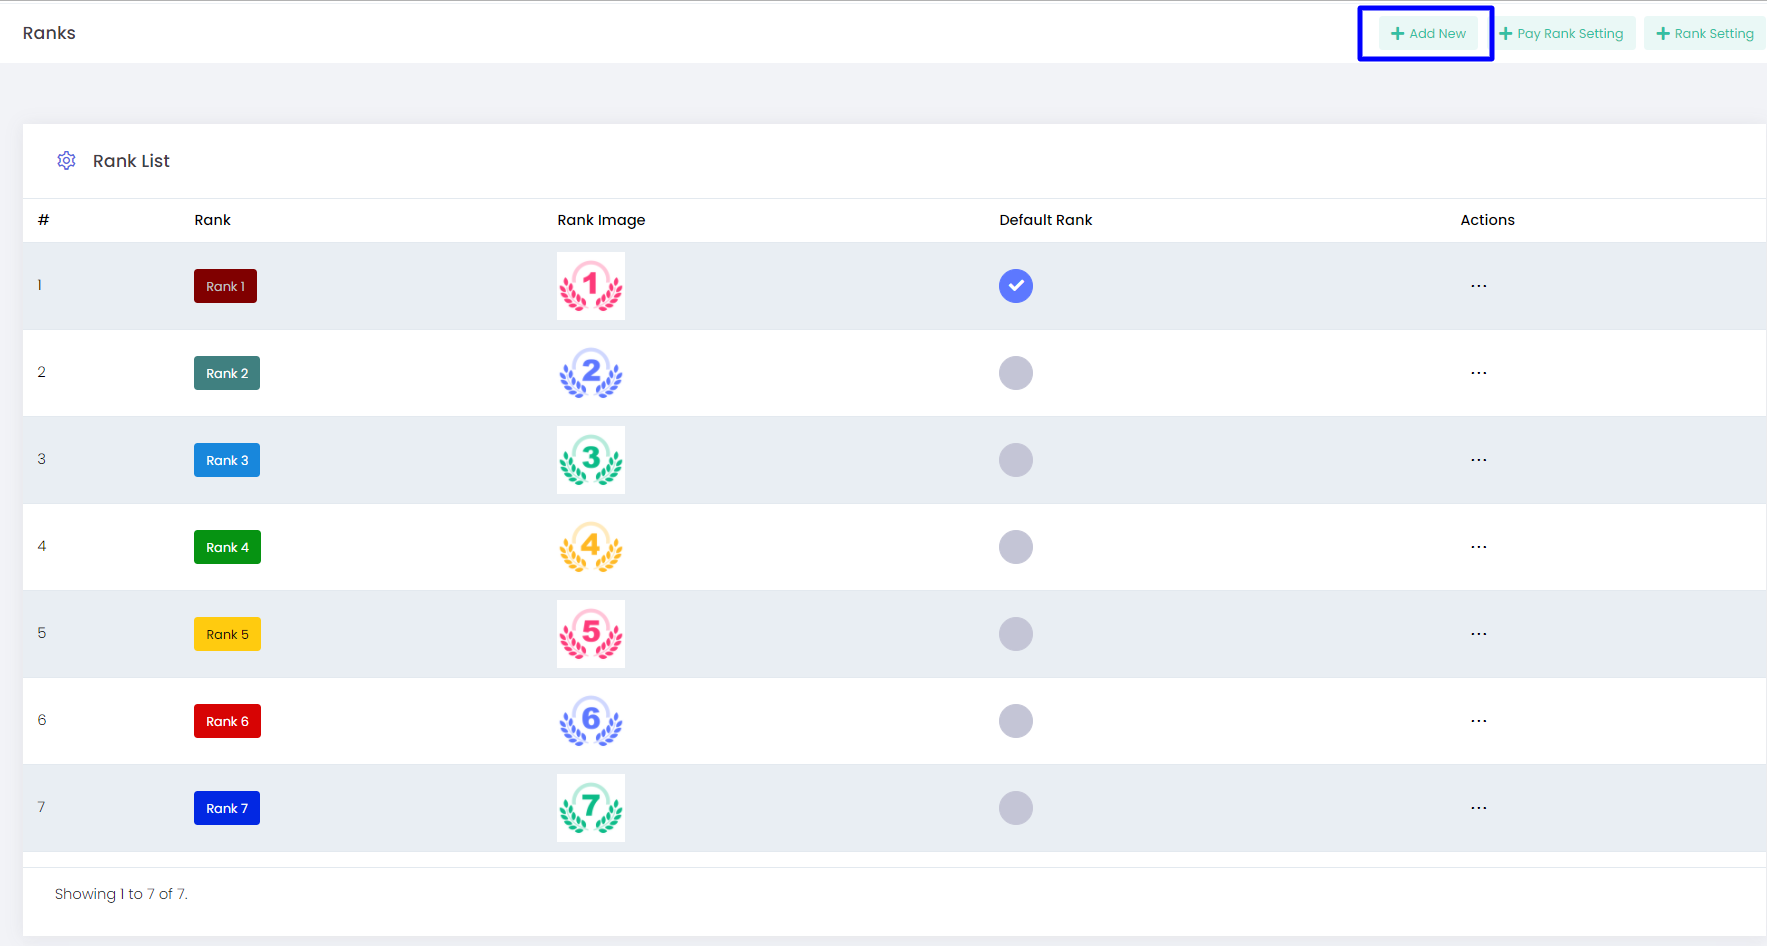
Admin can view the list of ranks already added as per companies requirement. Admin can also select the default rank from the available ranks.
Actions - edit ,delete,refresh
Edit: Admin can configure the desired rank settings for the user.
Delete: Admin can delete the configured rank.
Refresh: The configured settings of the rank can be refreshed.
Step :1
How to add a new rank?
Admin can add new rank by clicking the "Add New" option, the admin needs to provide the following details as per the requirement of the plan.
Rank title- Here we can give a title name for rank.
Upload rank image - We can upload an image for rank and the image specification should be 600 * 600 above.
Background colour - We can give background colour.
Foreground colour - We can give foreground colour.
Select the previous rank for sorting.
Admin can set the rank rules as per the requirement from his back office itself.
Admin can add multiple rank rules for a single rank as well as sub-rules in each rank rules can be set.
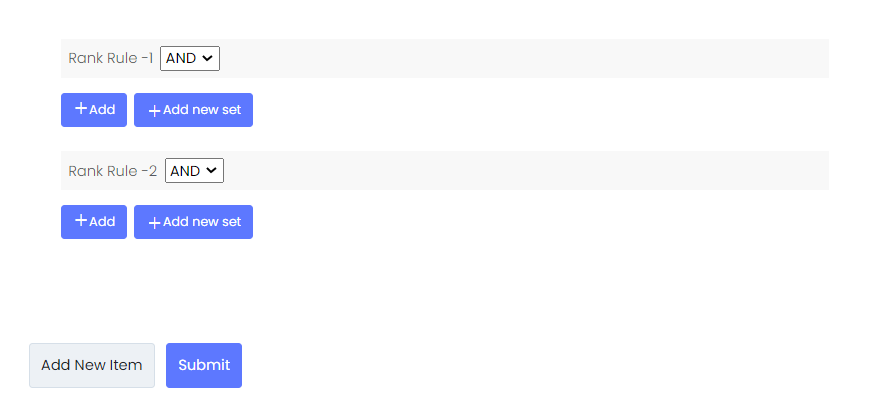
Step: 2

Rank rule
Admin can choose AND option in a rank rule if all the conditions need to be met or Admin can choose OR option in a rank rule if any one of the conditions needs to be met.
Step :3


Admin can add different criteria for the rules by clicking the plus button,There are different categories of criteria predefined in the selection box the admin can choose the one required and provide the value for the criteria.Following are the criteria
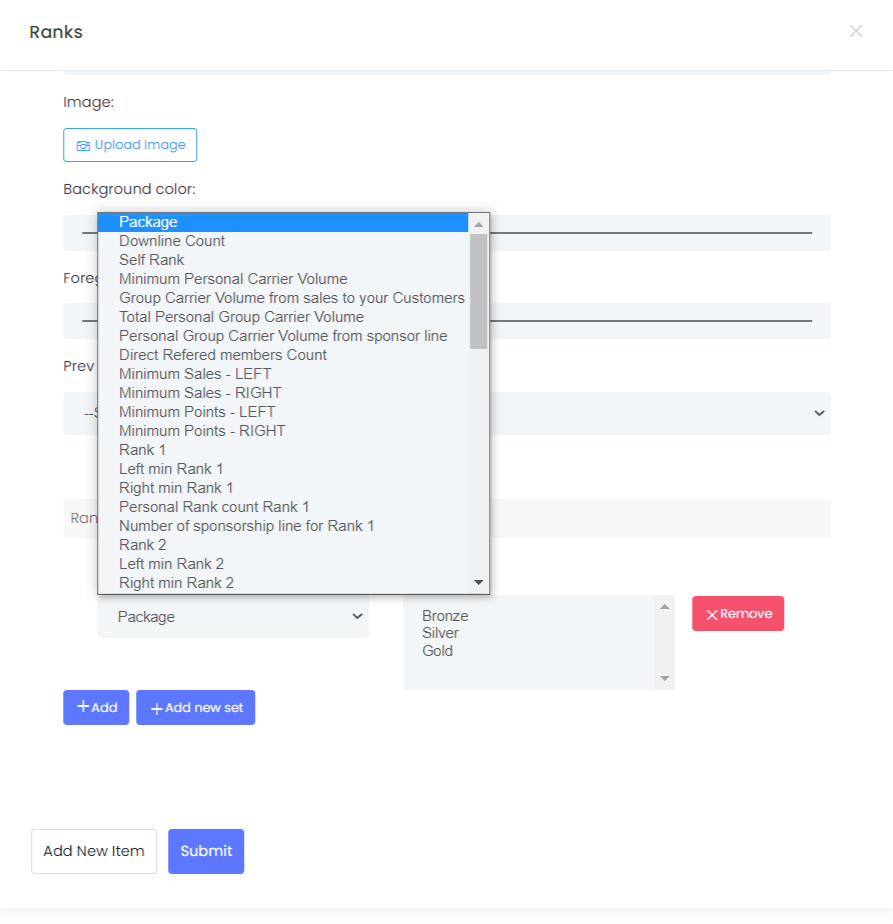
- Package – User should have the configured package to achieve the rank
- Downline Count – User should have the configured number of team downline count to achieve the rank
- Self Rank – User should have this configured rank to achieve the next higher ranks
- Minimum Personal Carrier Volume – User should have the configured Carrier Volume from personal sales to achieve the rank
- Group Carrier Volume from sales to your Customers – Users must have the configured carrier volume from the sales of directly referred customers to achieve the rank
- Total Personal Group Carrier Volume – Users must have the configured carrier volume from their own referred members to achieve the rank
- Personal Group Carrier Volume from sponsor line – Users must have the configured carrier volume from the referred members in the sponsor line to achieve the rank
- Direct Referred members Count – Users must have the configured directly referred members count to achieve the rank
- Minimum Sales – LEFT – Users must have the configured minimum sales form the downlines in the Left leg
- Minimum Sales – RIGHT – Users must have the configured minimum sales form the downlines in the Right leg
- Minimum Points – LEFT – Users must have the configured minimum points obtained from the downlines in the Left leg
- Minimum Points – RIGHT – Users must have the configured minimum points obtained from the downlines in the Right leg
- Member[rank] – Users must have the configured number of downlines with a particularly achieved rank (Member is a rank)
- Left min Member – Users must have the configured number of users/ downlines with Member Rank (or a Particular Rank) on the Left leg of the tree
- Right min Member – Users must have the configured number of users/ downlines with Member Rank (or a Particular Rank) on the Right leg of the tree
- Personal Rank count Member – Users must have the configured number of personally reffered users with Member Rank (a Particular Rank)
- Minimum Bronze [package name ] count – Users must have the configured number of memebrs atleast who have purshased Bronze package (particlular package).
Step : 4
Admin can add sub rules under each rank rule and opt for AND/OR option by adding a new set under each rank rule via a plus button that says ”Add new set”.

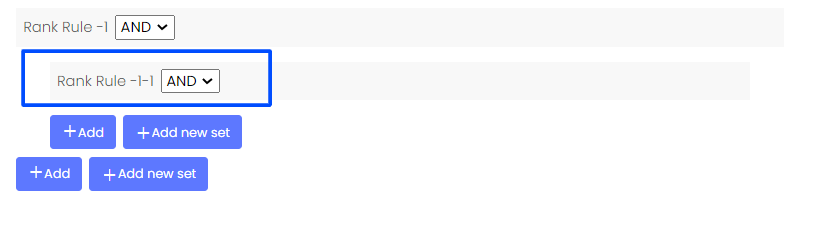
Step : 5
Admin can add a new rule by clicking on the plus button that says “Add new item”. All the main rules need to be met to achieve the rank.
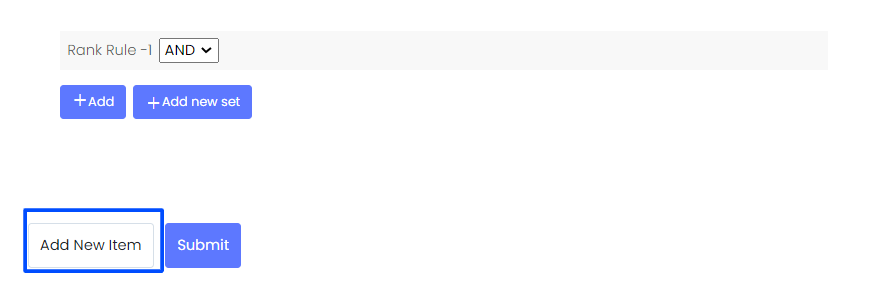
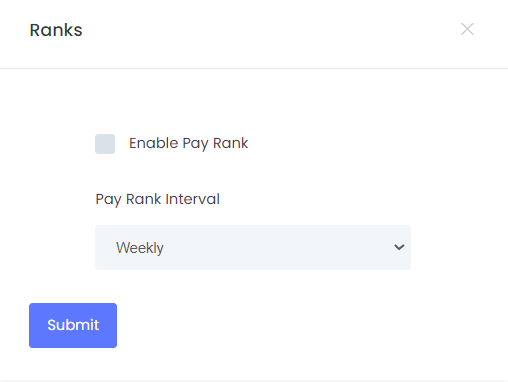
How to enable/disable pay rank setting?
Admin can enable or disable the pay rank and configure the requirements by clicking the plus button that says “Paid rank settings”.
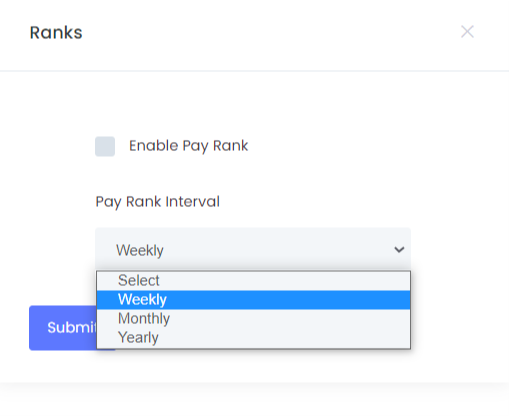
Enable Pay rank.
Pay rank interval.
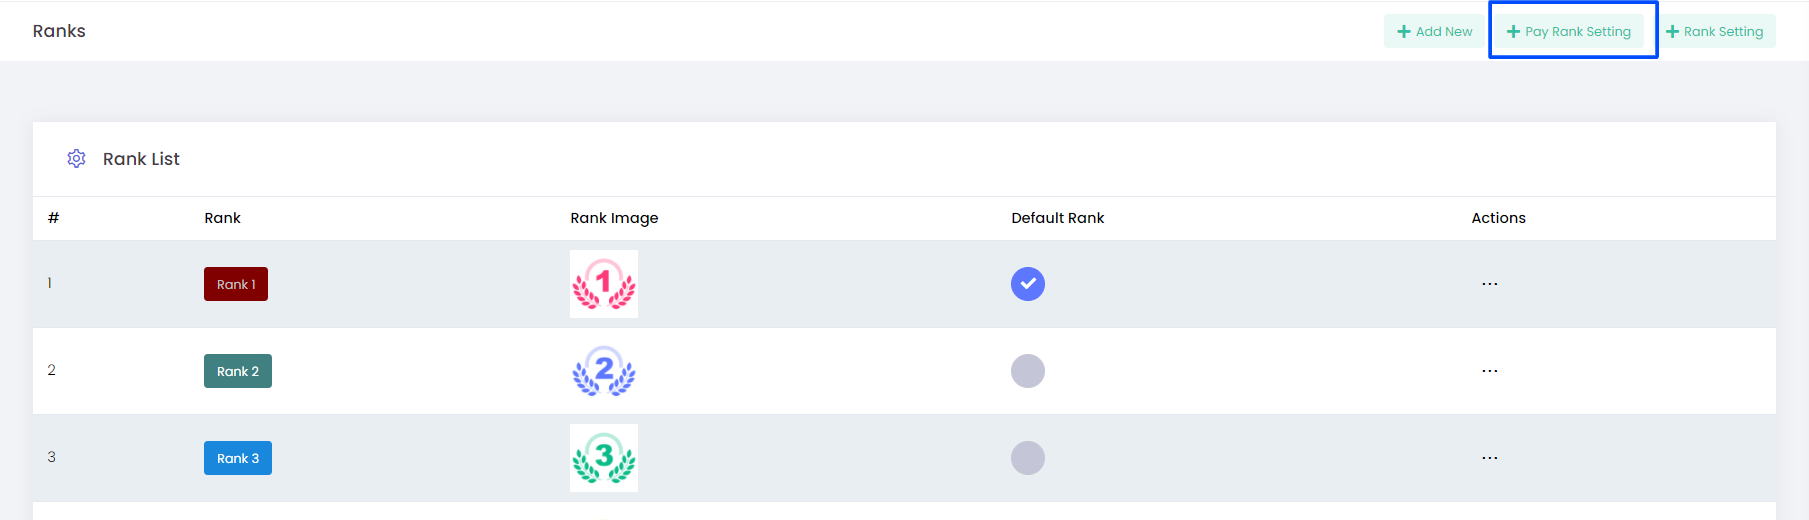
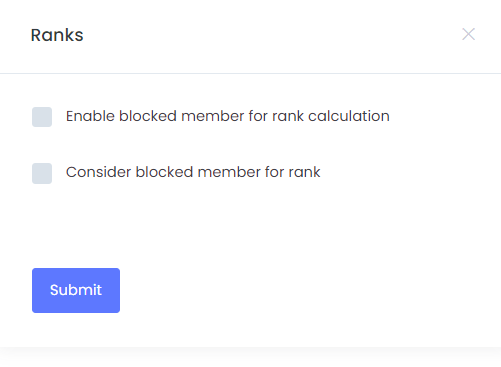
We have new option called Rank Settings to consider blocked members
Bonus configurations
Bonuses/ Commission are the benefits received by the sponsor or distributor based on the performance or criteria they meet.
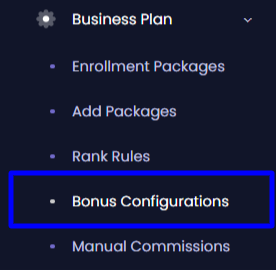
Admin can make the required configurations using the Bonus Configuration menu.
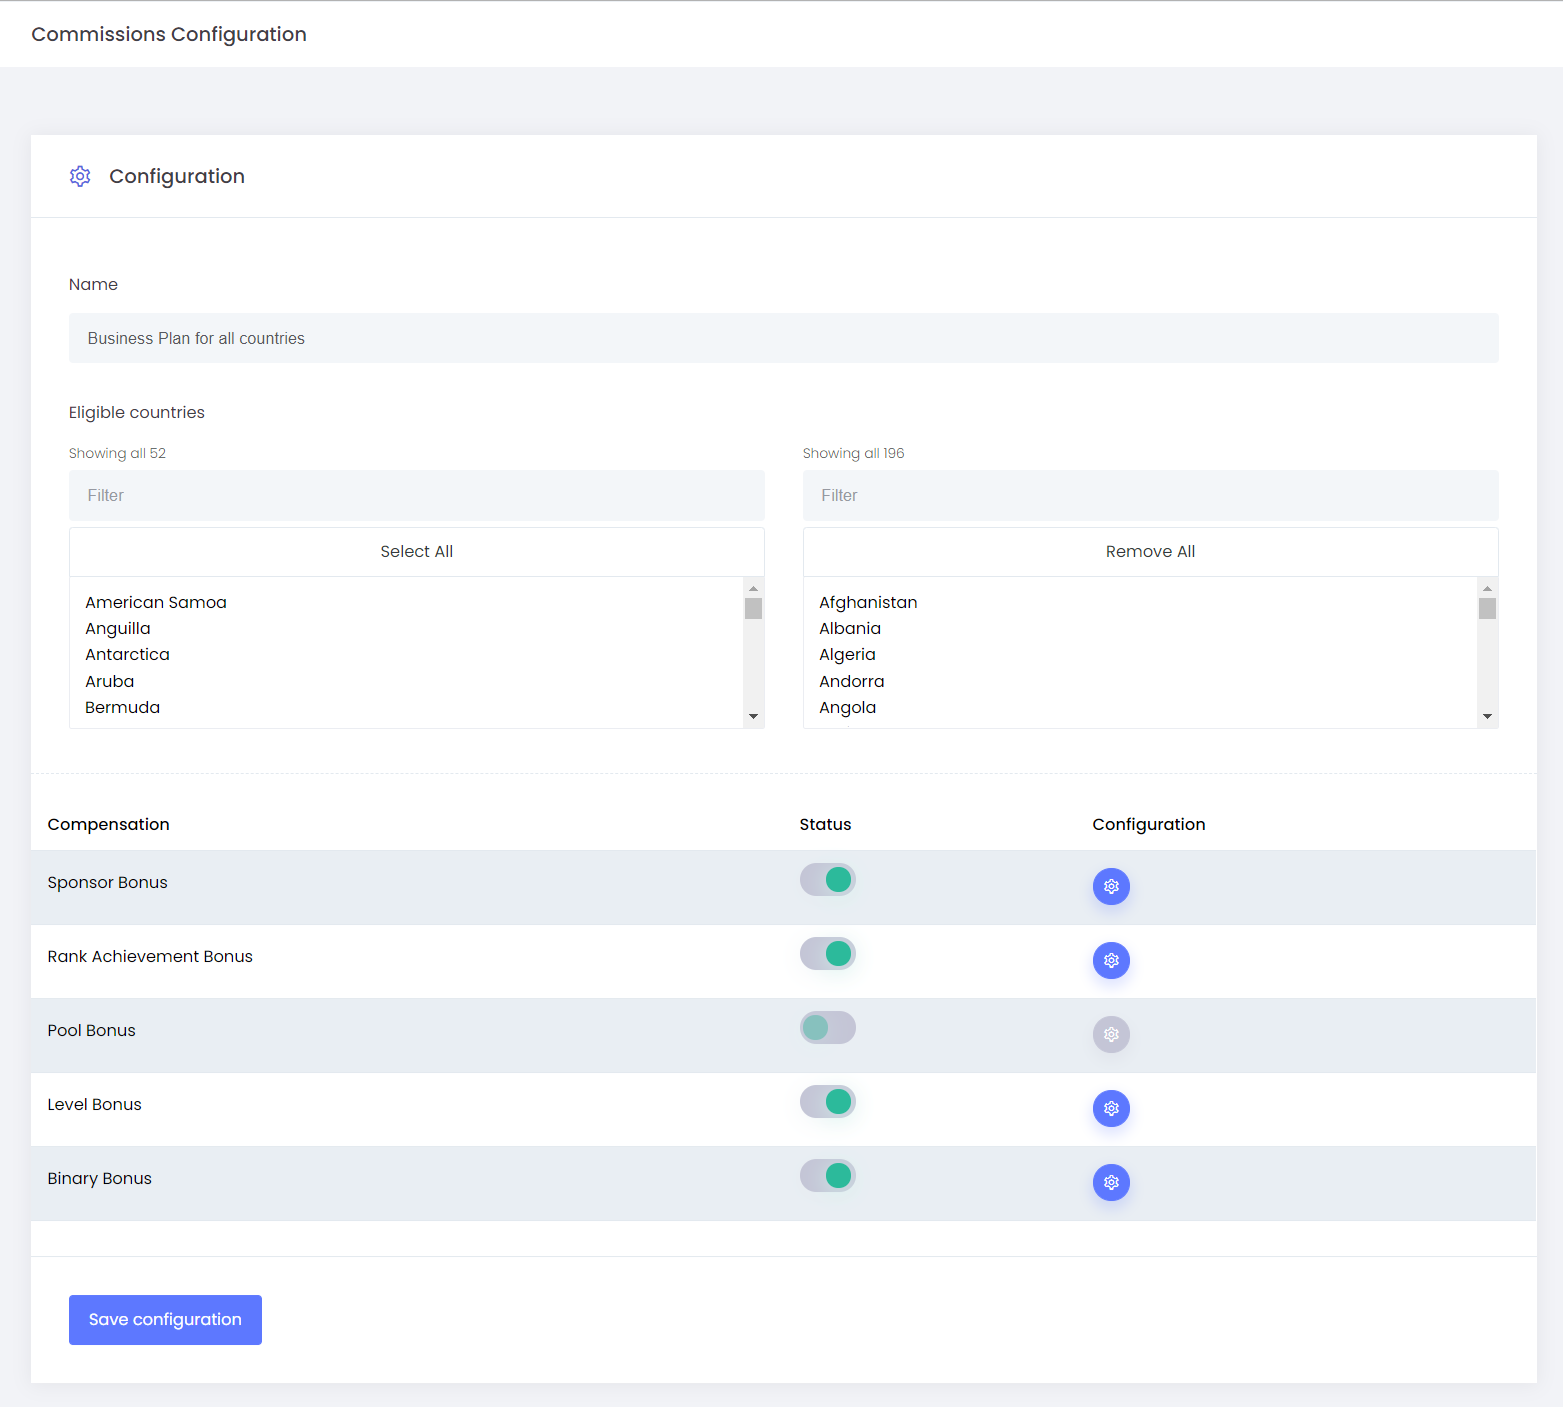
Commission Setting
- The required configurations for the commissions could be done from this page. We can enable/disable these features according to our requirements. We have a separate enable/disable option for each bonus.
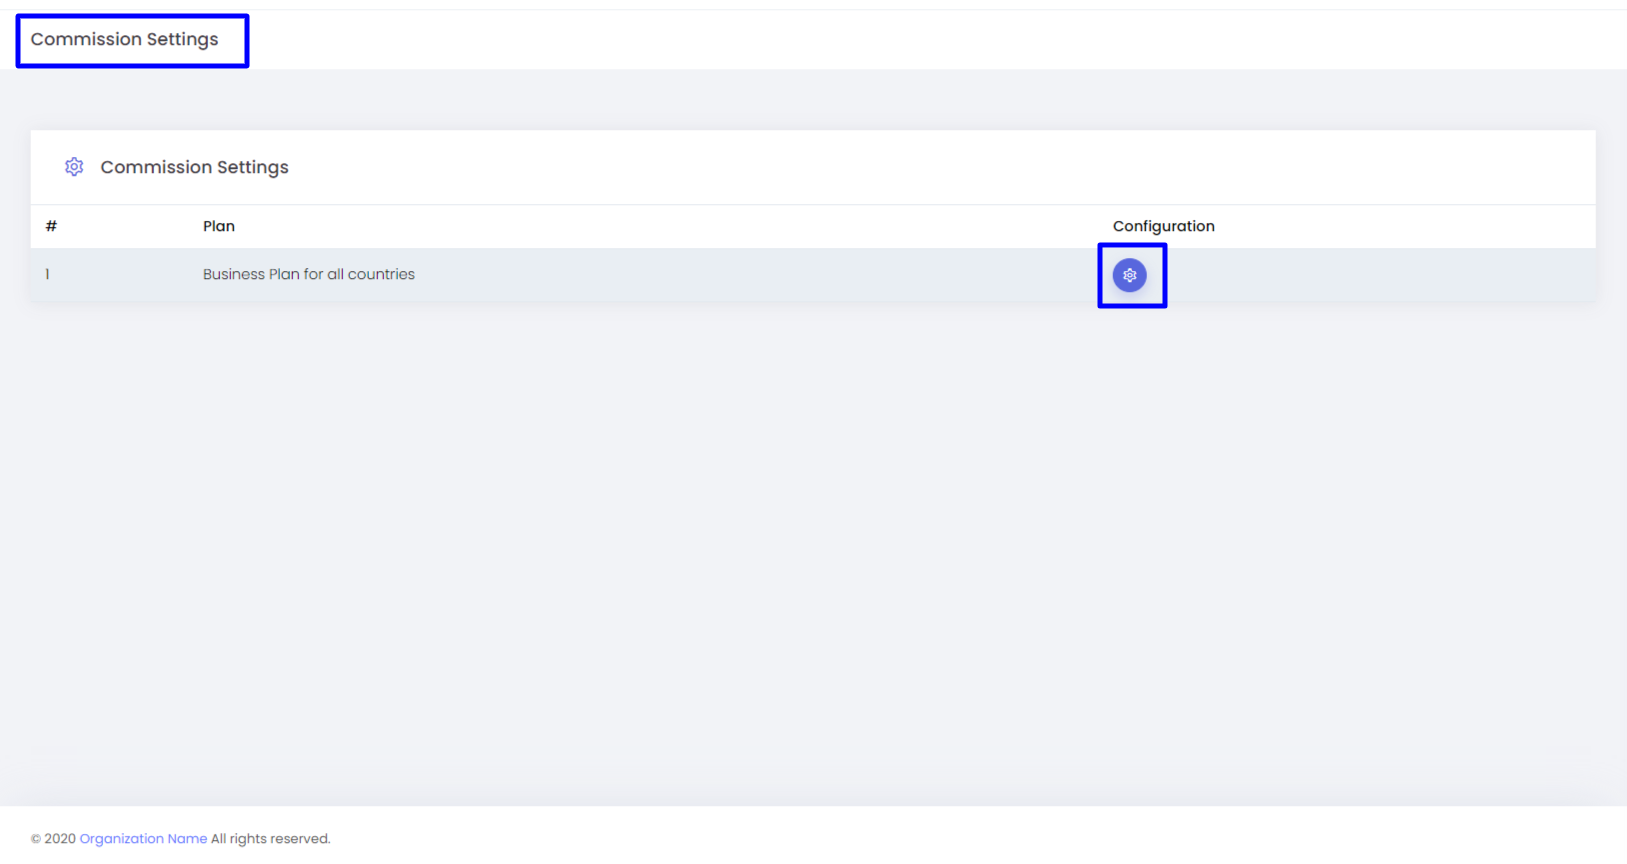
Configurations
- Name - The plan name
- Configuration - Settings option
- Plan name - Admin can set the Plan name as per requirement.
- Eligible countries - Geo zones[select boxes]
- Left box
- It shows the available countries from which the admin can choose the countries in which the plan will be applicable.
- Admin can click the country name and the selected country will be listed in the other box, also admin can choose to “select all” button.
- Second box
- This list shows the selected geo zones from the previous list.
- Admin can click the country name to remove the country that will be added back to the other box, also admin can choose to “remove all” button.
- Left box
- Compensation - The view for the available bonuses
- This shows the bonuses added to the plan.
- Sponsor Bonus - A bonus received for referring new members to the tree
- Rank Achievement Bonus - A bonus received once a distributor advances to higher ranks by achieving certain rank criteria set by the company.
- Pool Bonus - In the system, some amount will be deposited in an equal-shares pool, everyone who qualifies gets an equal share of the pool. In the proportional-shares pool, everyone who qualifies earns the proportion that their downline contributed to the overall value of the pool
- Binary bonus - Bonus paid to distributors based on the sales volume achieved by the weaker leg of the binary tree
- Level commissions - A commission received for filling new members to each level of the tree
- This shows the bonuses added to the plan.
- Status - This option helps to enable or disable the configured commission plan
- Configurations - The settings could be changed from this option.
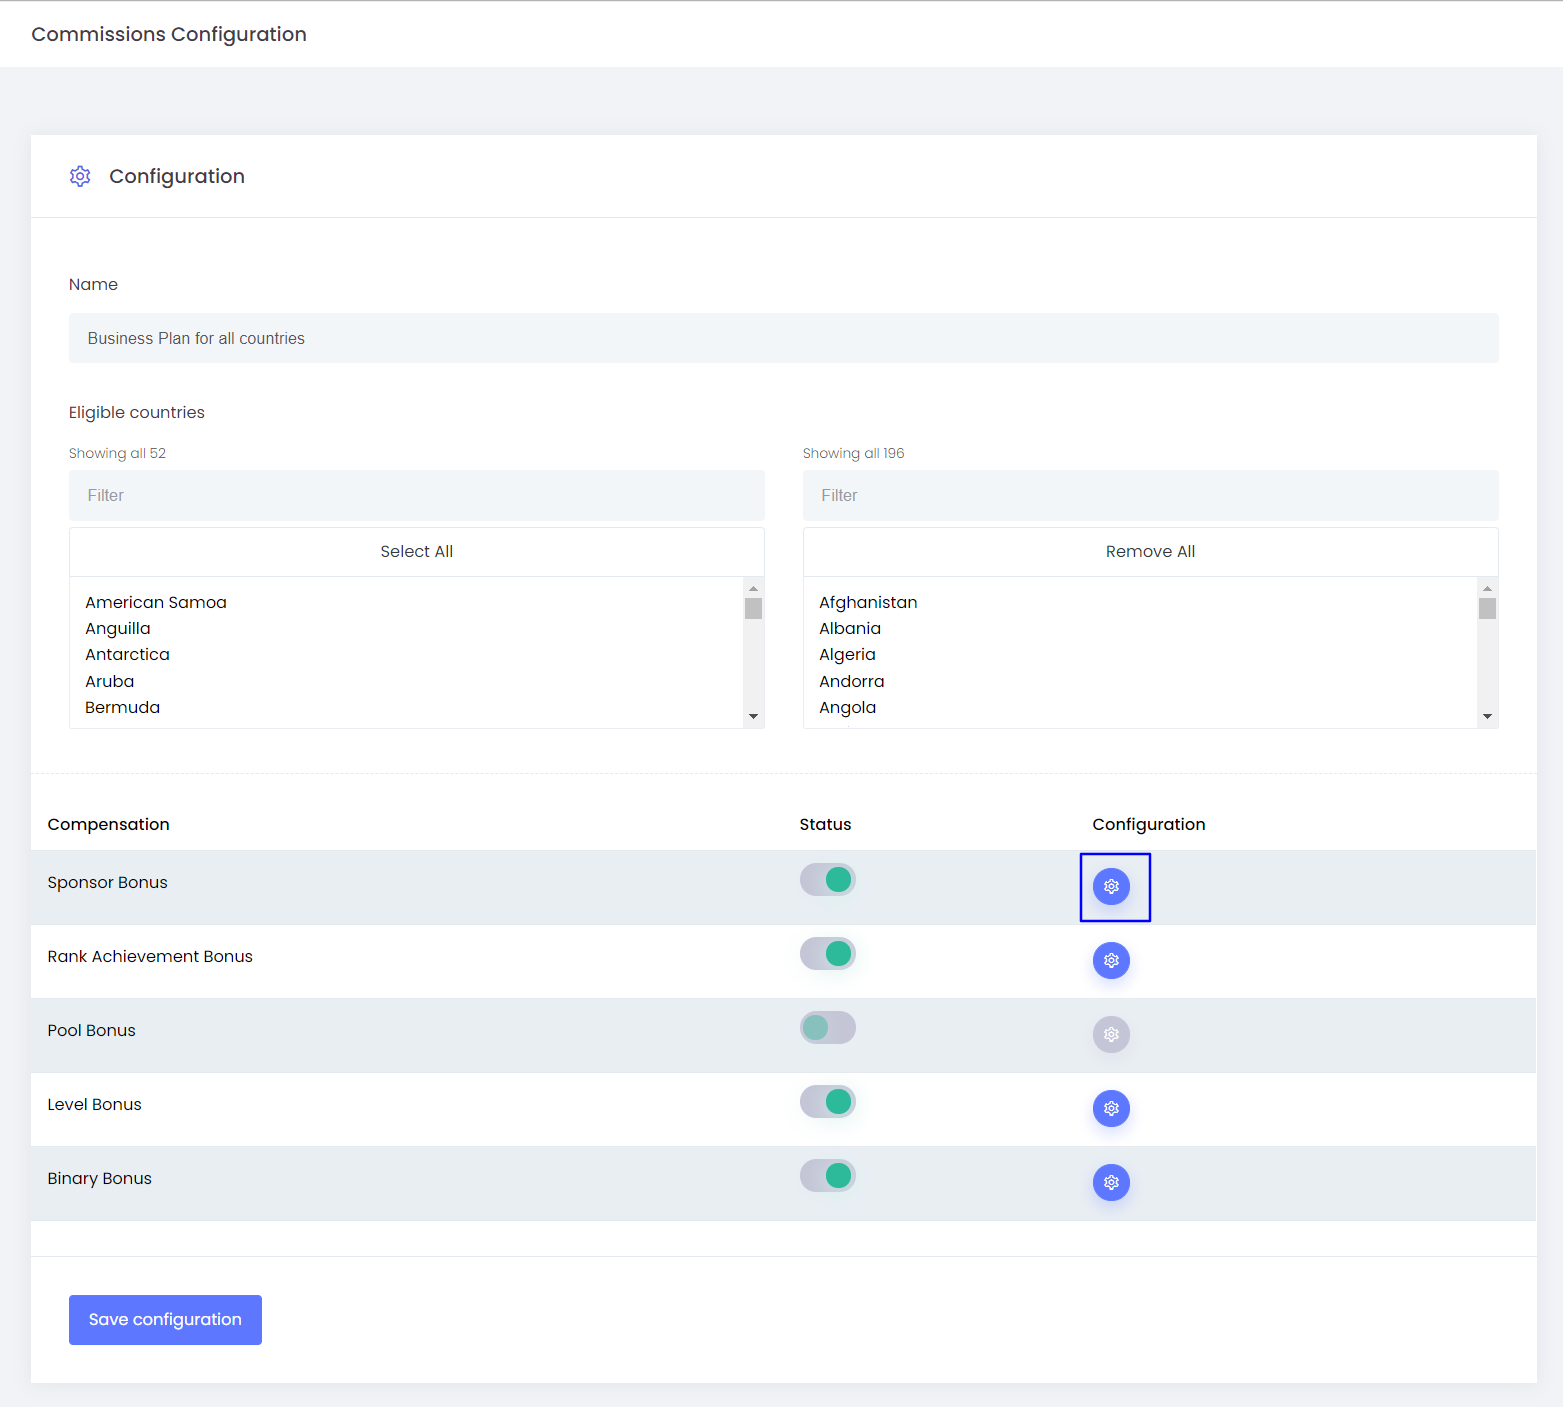
How to do the Bonus configuration?
- Select the configuration/ settings button of the required bonus
- Bonus Eligibility Criteria - The criteria need to be met for receiving the commissions could be configured from this option

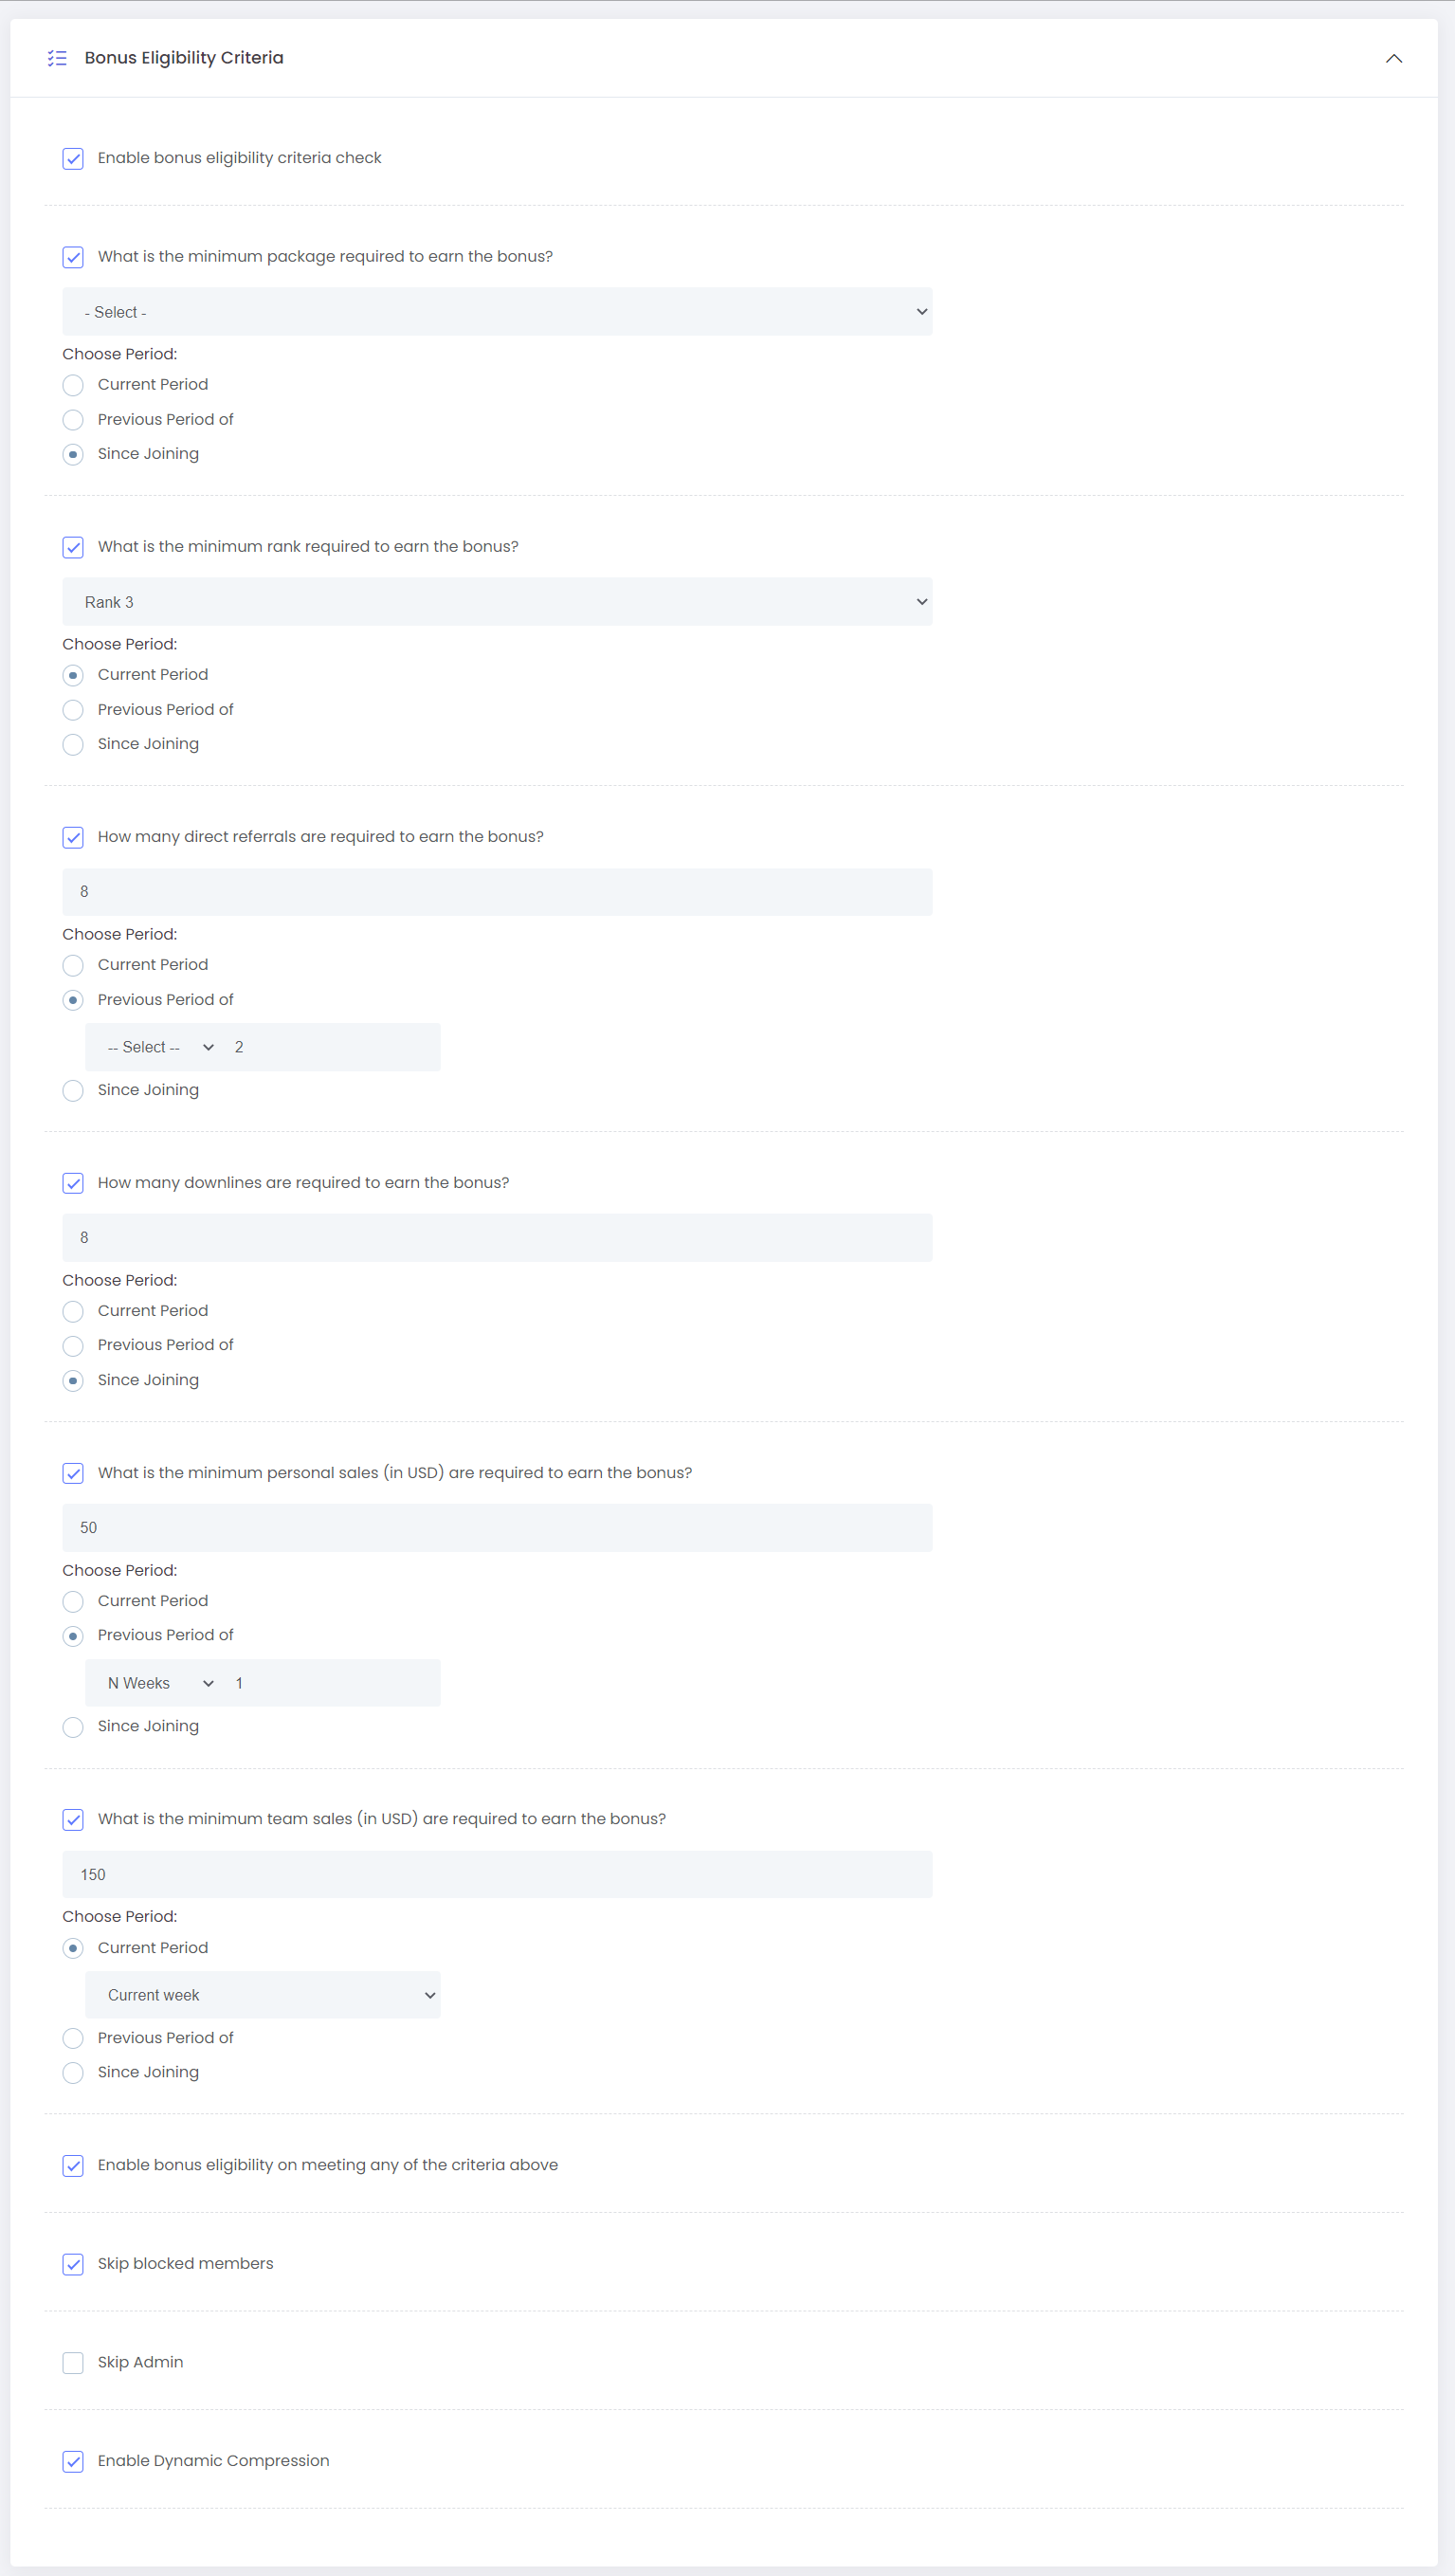
Bonus Eligibility Criteria
- Enable bonus eligibility criteria to check - Check this option to enable bonus eligibility criteria
- What is the minimum package required to earn the bonus?
- The available package will be listed in the select box, you can select the required one as the criteria for the commission
- Time period
- Current Package in Current period will be considered for the bonus if the current period is selected in the bonus cycle section
- Package in the previous period will be considered and you can also mention the period as well.
- Package active since joining will be considered if since joining
- What is the minimum rank required to earn the bonus?
- The bonus eligibility criteria Available ranks will be listed in the select box.
- Time period
- Current Rank in the Current period will be considered for the bonus if the current period is selected.
- Rank in the previous period will be considered and you can also mention the period as well.
- Rank active since joining will be considered if since joining
- How many downlines are required in the team to earn the bonus?
- Admin can set the minimum number of downlines required in the team to become eligible for the bonus.
- Time period
- The number of downlines active in the Current period will be considered for the bonus if the current period is selected.
- The number of downlines active in the previous period will be considered and you can also mention the period as well.
- The number of downlines active since joining will be considered if since joining
- How many direct referrals are required in the team to earn the bonus?
- Admin can set the minimum number of direct downlines required in the team to become eligible for the bonus.
- Time period
- The number of direct referrals active in the Current period will be considered for the bonus if the current period is selected in the bonus cycle section
- The number of direct referrals active in the previous period will be considered and you can also mention the period as well.
- The number of direct referrals active since joining will be considered if since joining
- What is the minimum personnel sales required to earn the bonus?
- Admin can set the minimum personnel sales required in the team to become eligible for the bonus.
- Time period
- Personnel sales acquired in the Current period will be considered for the bonus if the current period is selected in the bonus cycle section
- Personnel sales acquired in the previous period will be considered and you can also mention the period as well.
- Personnel sales acquired since joining will be considered if since joining
- What is the minimum team sales required to earn the bonus?
- Admin can set the minimum team sales required in the team to become eligible for the bonus.
- Time period
- Team sales acquired in the Current period will be considered for the bonus if the current period is selected in the bonus cycle section
- Team sales acquired in the previous period will be considered and you can also mention the period as well.
- Team sales acquired since joining will be considered if since joining
- Enable bonus eligibility on meeting any of the criteria above - Admin can enable this option if required so that the bonus will be earned on meeting any of the above eligibility criteria.
- Skip blocked members - Admin can enable this option so that the blocked members will not receive the bonuses
- Skip admin - On enabling this option, the admin will be excluded from the bonus payment and no bonus will be credited to the admin
- Enable dynamic compression - When admin enables dynamic compression it compresses out the unqualified distributors on that specific level and pays the desired level commission to their up line.
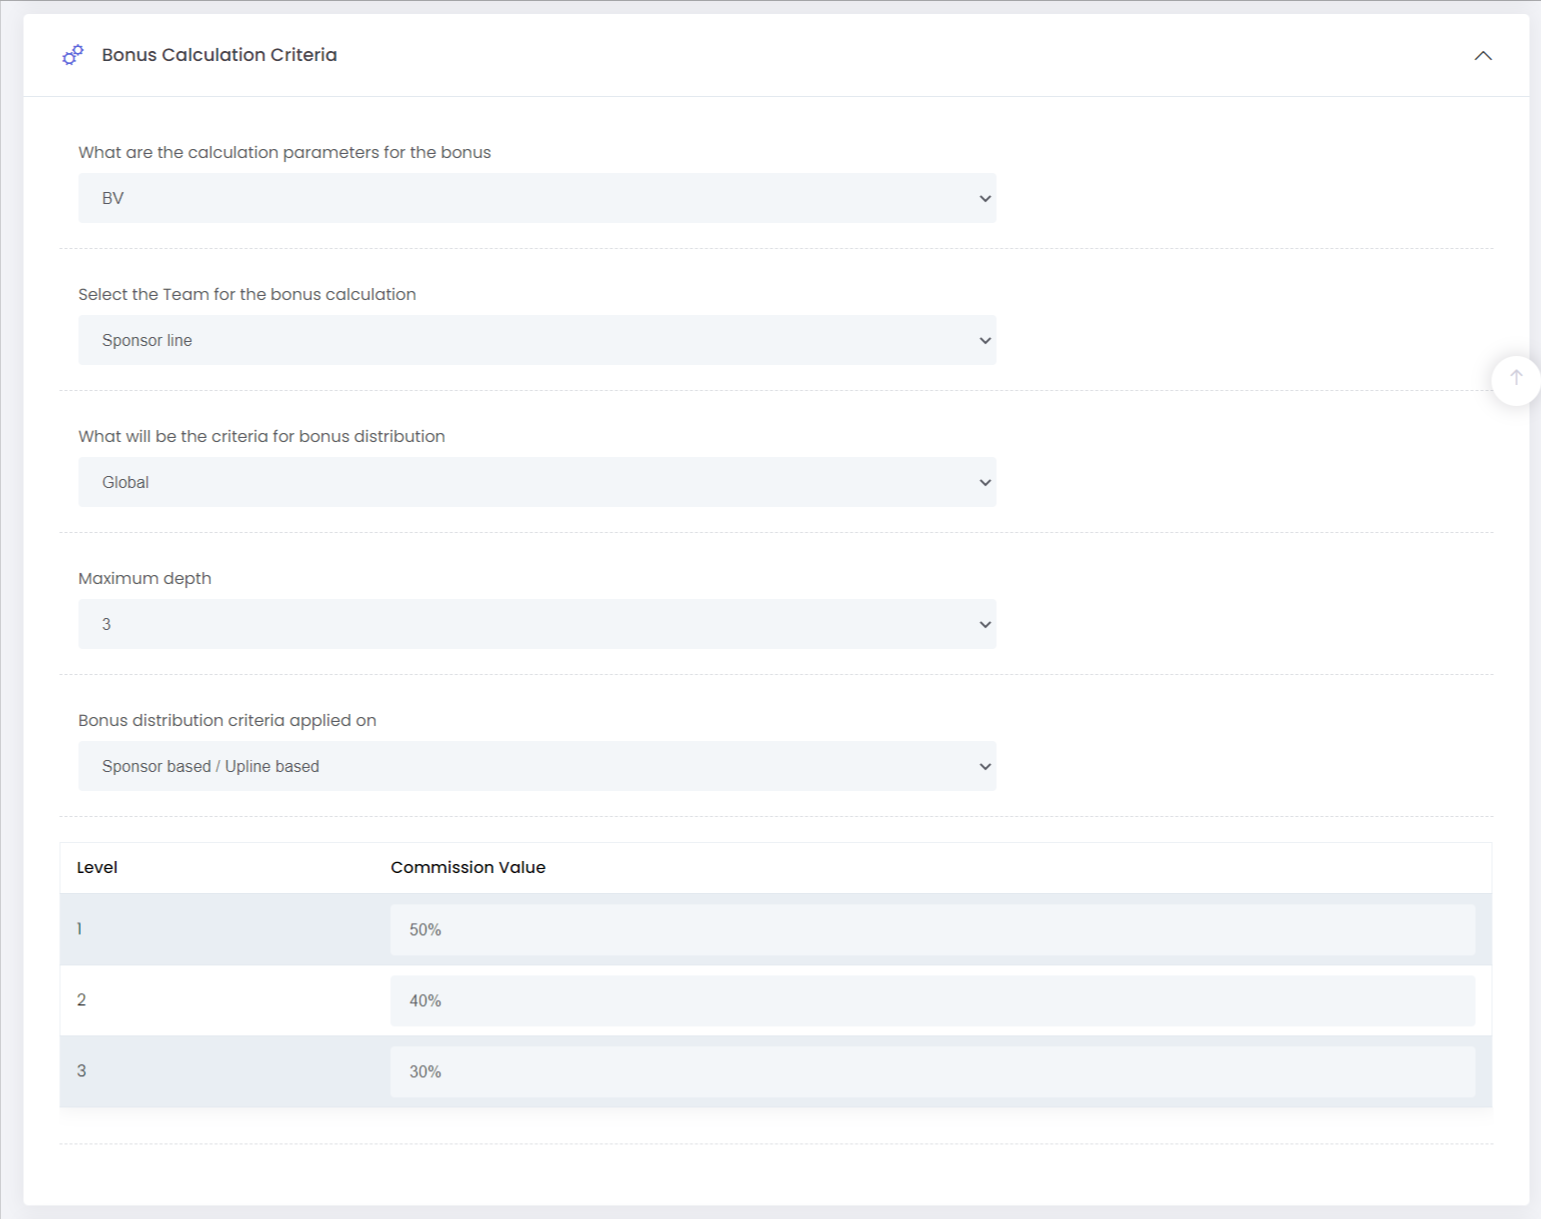
Bonus Calculation Criteria
Admin can configure the bonus calculation criteria using this option, the criteria included are:
- What are the calculation parameters for the bonus?
- Admin can select the parameters for bonus calculation as per requirement from the following available parameters.
- BV - Business volume
- CV - Career volume
- Points
- Sales
- Volume
- Admin can select the parameters for bonus calculation as per requirement from the following available parameters.
- Select the Team for the bonus calculation
- Admin can choose the team that to be considered for the bonus calculation
- Sponsor line
- Team line
- Entire organization
- Admin can choose the team that to be considered for the bonus calculation
- What will be the criteria for bonus distribution?
- With this option, we can configure on meeting what criteria a bonus could be given to the users
- Package - If we choose this option, then the criteria for the bonus distribution will be package based. The bonus configured based on the package will be credited to the users with that particular package and the configuration could be made from "Choose package/product categories to be considered"
- Rank - If we choose this option, then the criteria for the bonus distribution will be rank based. The bonuses configured based on the package will be credited to the users with that particular rank
- Direct referrals count - If we choose this option, then the criteria for the bonus distribution will be based on the direct referral count from the sponsor line or the downline
- Global - On configuring Global as the criteria for bonus distribution the configured Commission Value
- With this option, we can configure on meeting what criteria a bonus could be given to the users
- Maximum depth- With this option, we can select up to which level the bonus can be given.
- Bonus distribution criteria applied on - You can select whether the bonus is distributed based on the sponsor line based or downline based
- Sponsor based / Upline based
- New member-based / Downline
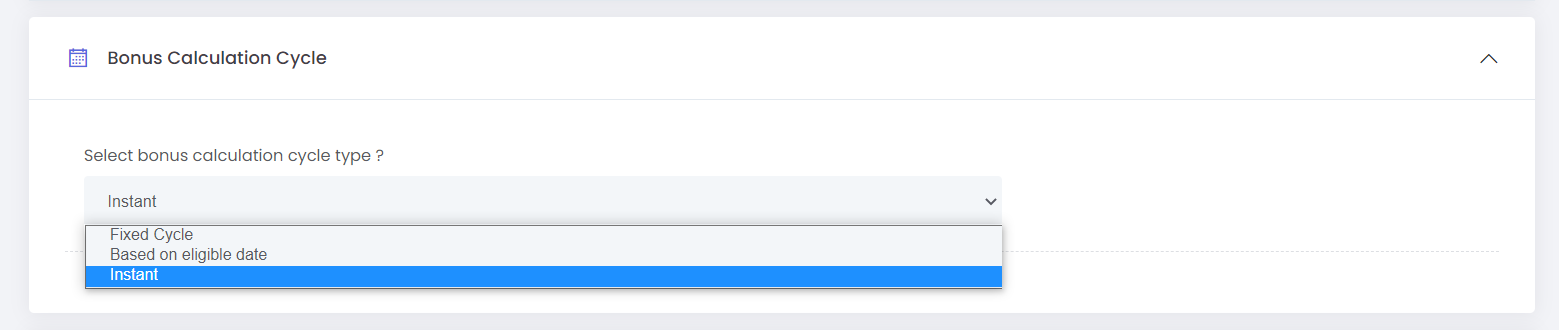
Bonus Calculation Cycle
Using this option admin could configure the bonus calculation time interval.
- Select the bonus calculation cycle type?
- With this option, we can set the bonus calculation period on three conditions such as,
- Fixed Cycle - On configuring to fixed cycle we can calculate the bonus on a fixed number of days. You can configure the number of days and the bonus will be calculated on that configuration.
- If the admin configures the Number of days to 5, then the bonus calculation will be done every 5 days.
- Based on the eligible date- Based on configuring the eligible date calculated date the bonus Based on the configured eligible date
- You can configure the number of days and the Days to be skipped
- Instant- On configuring this option the bonus will be calculated instantly.
- Fixed Cycle - On configuring to fixed cycle we can calculate the bonus on a fixed number of days. You can configure the number of days and the bonus will be calculated on that configuration.
- With this option, we can set the bonus calculation period on three conditions such as,
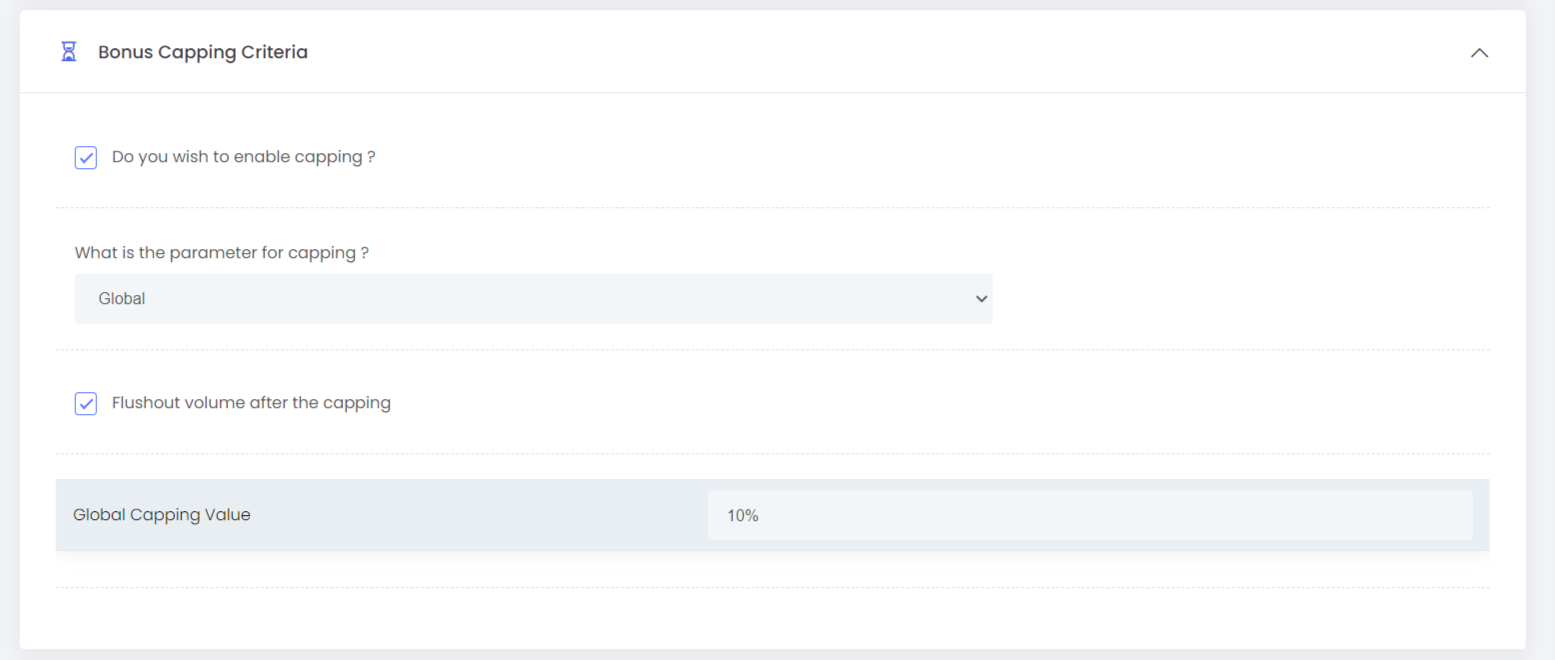
Bonus Capping Criteria
Capping/Limit is the maximum amount that a user can earn in a bonus period. Even if the calculated bonus amount is greater than the capping amount, the user will get the capping amount only, the remaining amount will be flushed out
- Do you wish to enable capping?
- If we check this option, the capping will be enabled for the commission calculation
- What is the parameter for capping?
- Package - The capping value could be configured differently for different packages and based on the configured amount the capping will be applied to the users who have the corresponding package.
- Eg: Consider there are different packages like Bronze, Silver, and Gold and if the capping amount for Bronze is 50 USD, Silver is 100 USD and Gold is 150 USD, after calculating the commission the user with the Bronze will be receiving 50 USD, Silver will be 100 USD and Gold will be 150 USD as the commission.
- Rank - Different capping value could be configured for each rank, the commission received will be based on the configured capping amount for the ranks the users hold.
- Eg: Consider the different ranks in the system to be Rank 1, Rank 2, and Rank 3 and the capping amount be 50 USD, 100 USD, and 150 USD. The users with Rank 1 will receive 50 USD, Rank 2 will receive 100 USD, and Rank 3 150 USD as commission
- Global - There will be an option to set a particular percentage as a capping value, so every member receives the commission based on the set percentage upon their earned commission
- Package - The capping value could be configured differently for different packages and based on the configured amount the capping will be applied to the users who have the corresponding package.
- Flush out volume after the capping
- If you enable this option, the amount more than the capping value will be flushed out or will not be considered further.
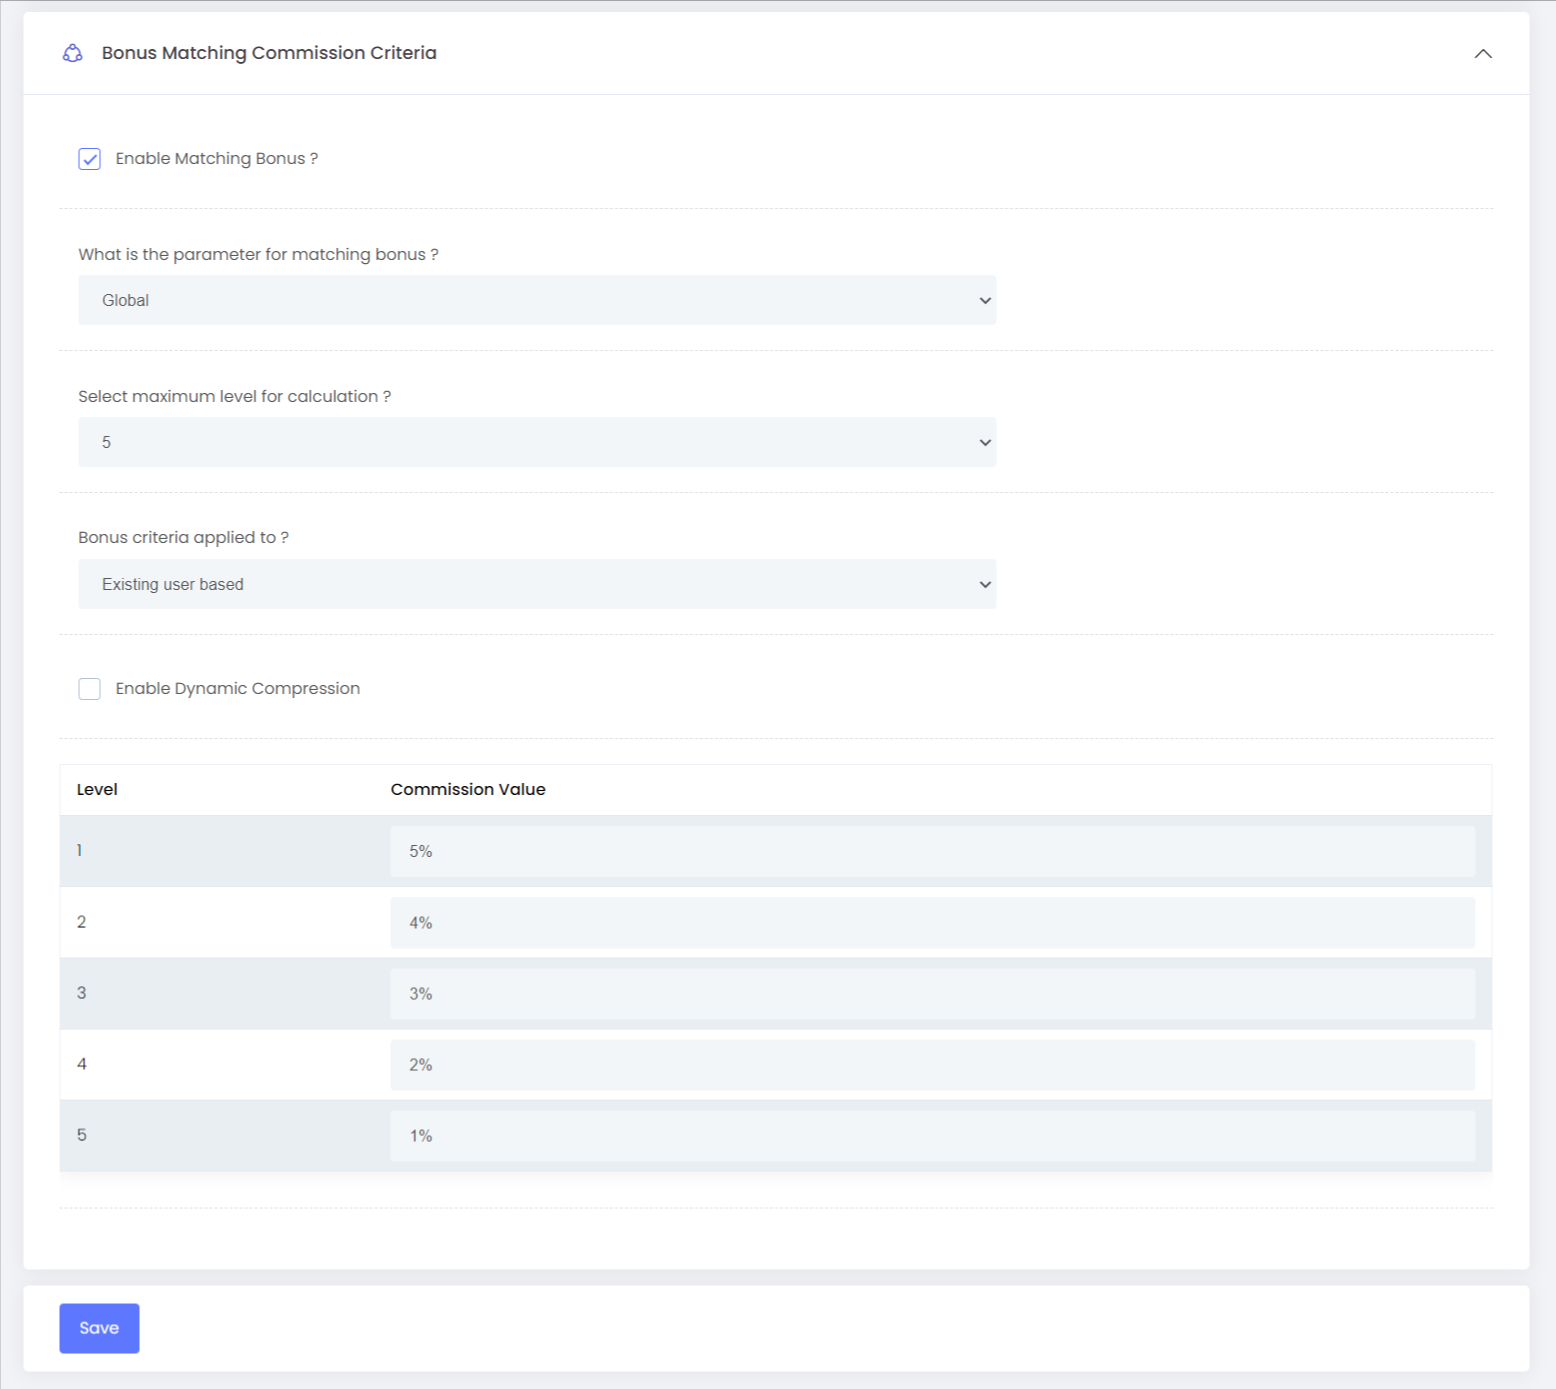
Bonus Matching Commission Criteria
In matching bonus, the upline members receive a percentage of bonus achieved by downline members
- Enable Matching Bonus?
- Check the box to enable the matching bonus.
- What is the parameter for matching bonuses?
- This option helps the admin to choose the parameter to be considered for the matching bonus
- Package
- Rank
- Package and Rank
- Package or Rank
- Direct Referrals Count
- Global
- This option helps the admin to choose the parameter to be considered for the matching bonus
- Select the maximum level for calculation?
- Using this option, you can choose up to which level deep the bonus can be given.
- Bonus criteria applied to?
- This option helps to choose the bonus criteria must be based on the:
- Existing users
- New members
- This option helps to choose the bonus criteria must be based on the:
- Enable Dynamic Compression
- When admin enables dynamic compression it compresses out the unqualified distributors on that specific level and pays the desired level commission to their up line.
Manual Commissions
Payout is the process of paying the amount corresponding to the commissions earned by the users to their real wallets like Hyperwallet, PayPal, Skrill, Cryptocurrency wallet, or Bank account. The commissions earned in the system are virtual money. Whenever the system processes the payout for this commission, users will get their commission as real money to their required real account.
There are two options for the payout process, either the user can request for withdrawal or the admin can release the payout
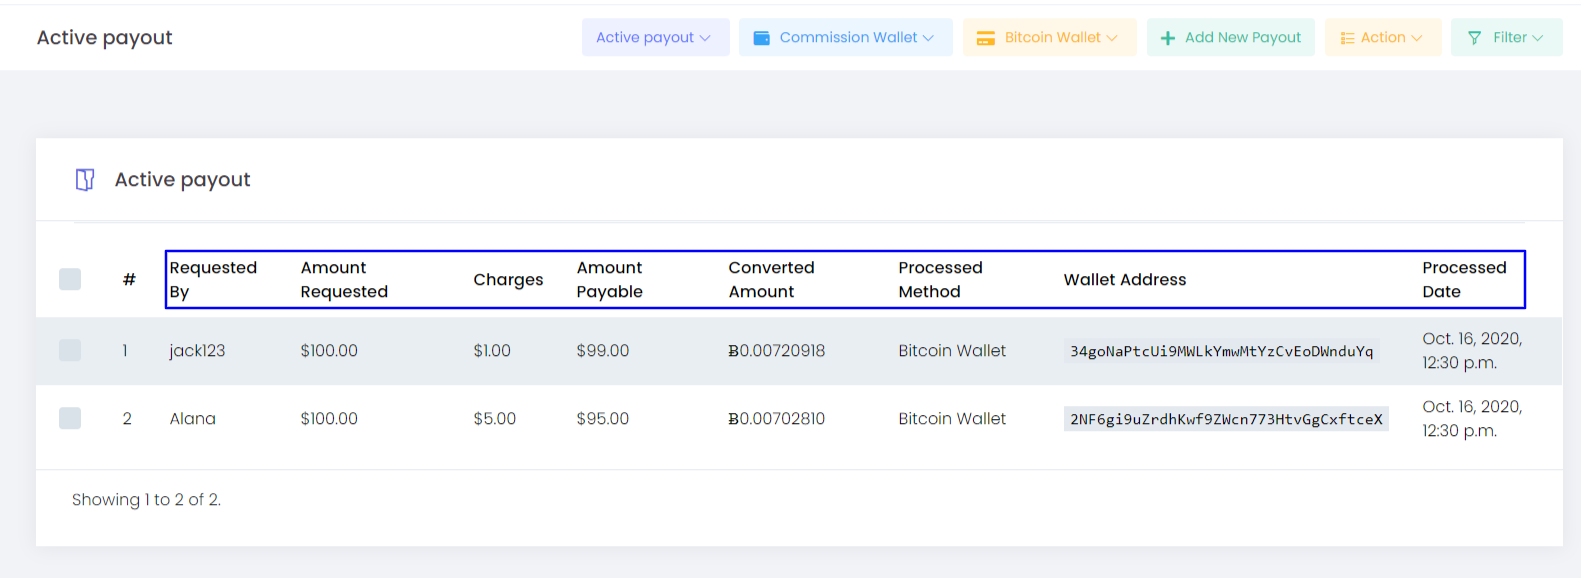
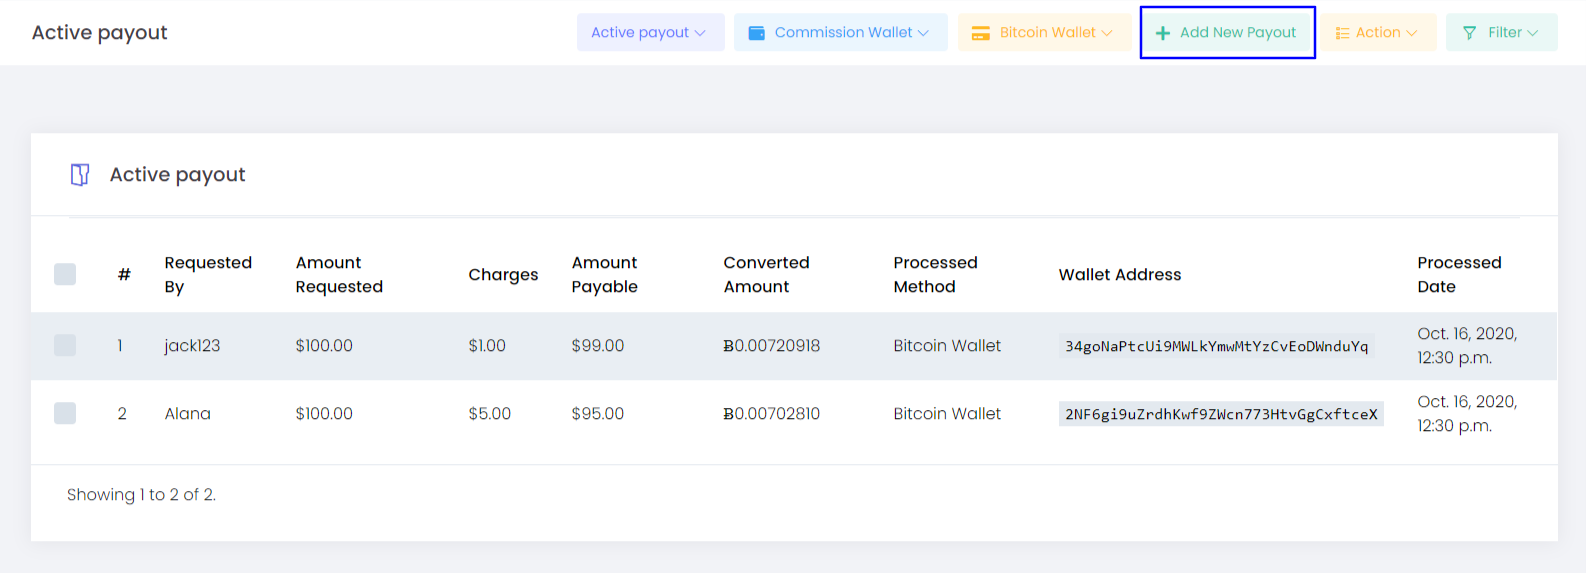
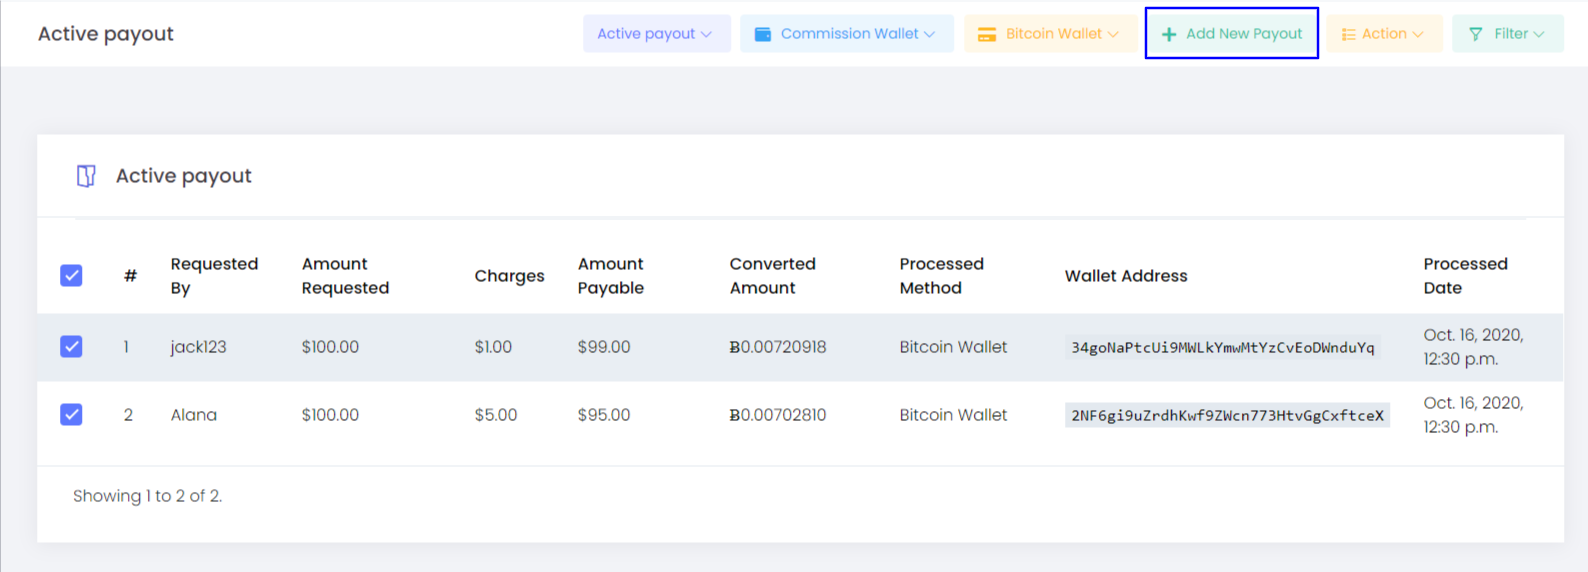
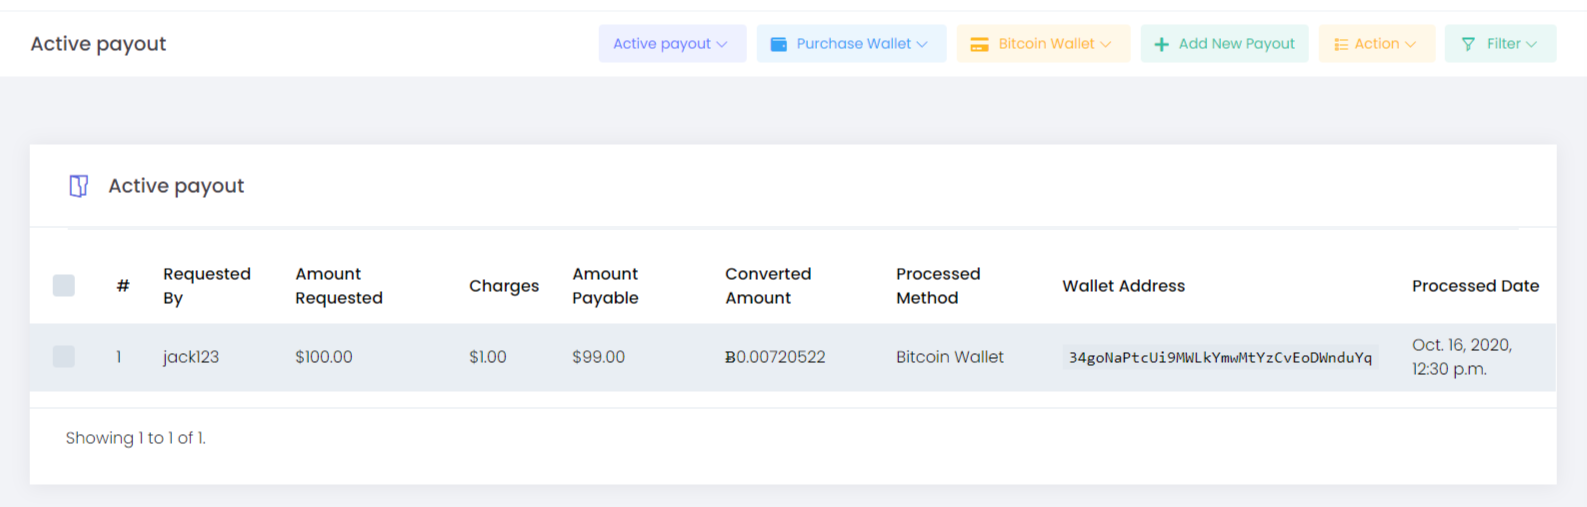
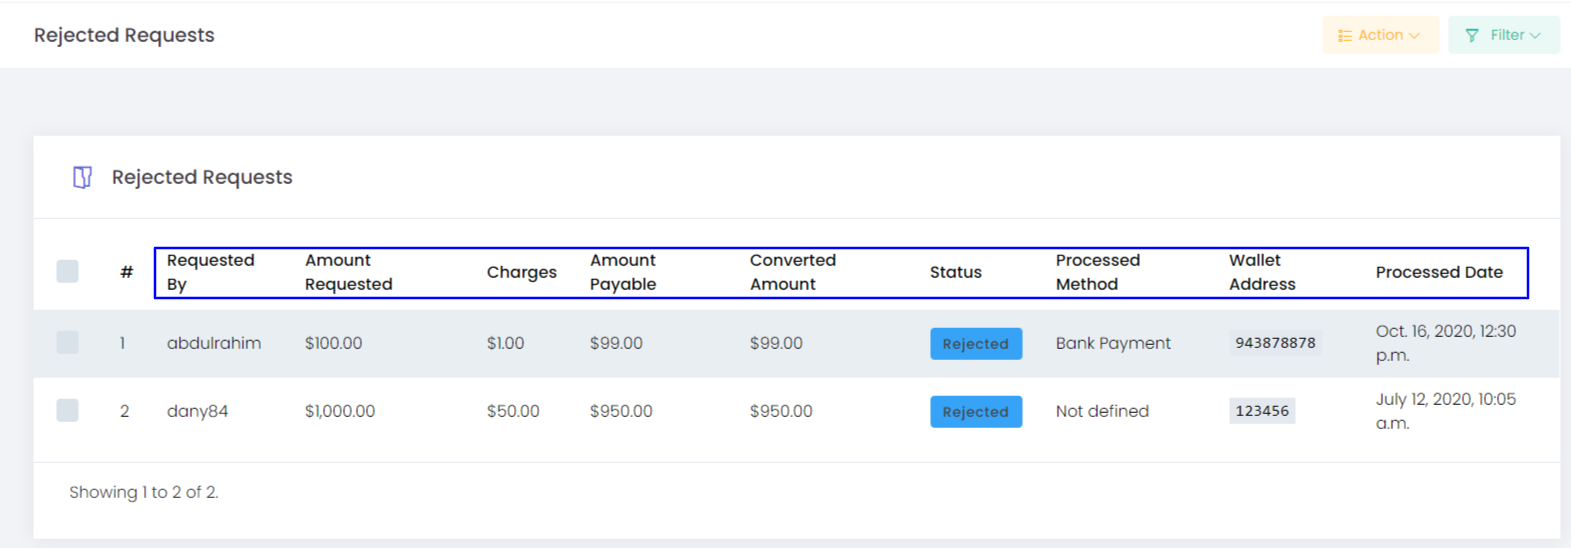
The request generated by the users for the payout process is available in this option, the admin can approve or reject the payments from this option.
- Requested By - The name of the user who has generated the payout request.
- Amount Requested - The amount requested for the withdrawal
- Charges - Charges involved for the withdrawal process
- Amount Payable - Amount paid to the users after excluding the withdrawal
- Converted Amount - The value converted from USD to the corresponding payment gateway (BTC)
- Processed Method - The payment gateway to which the payout is made (Here it is BTC)
- Wallet Address - The wallet address to which the payment is made
- Processed Date - The date at which the payment process is been initiated.
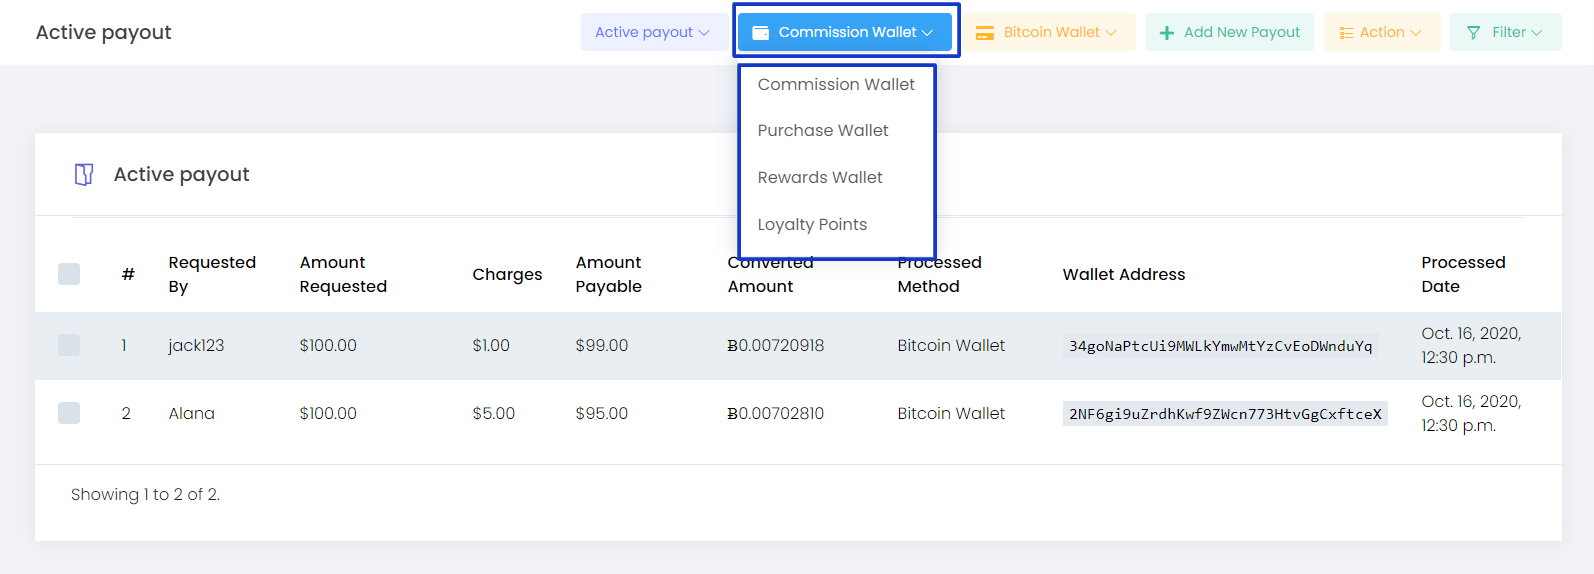
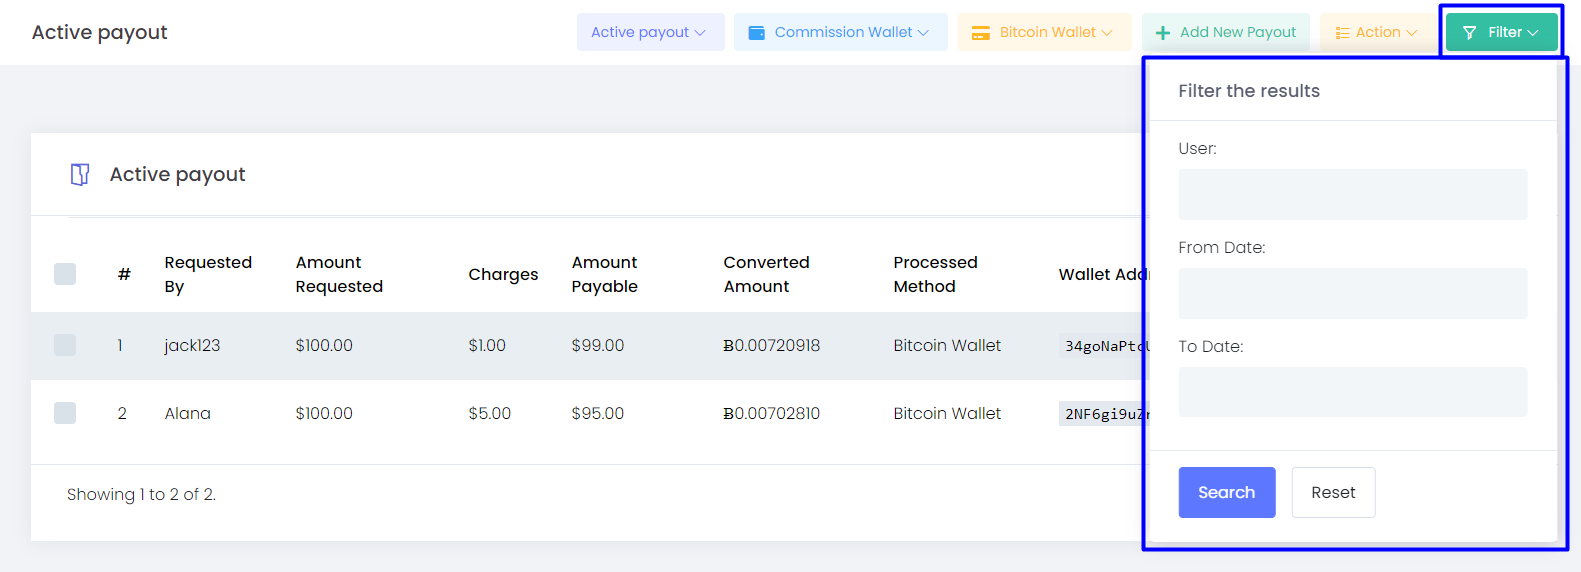
Wallet Filter
The Payout request can be from any of the wallets configured in the system, Admin can have a separate view of all the requests from every wallet like Commission Wallet, Purchase Wallet, Rewards Wallet, Loyalty Point (Any of the wallets as per the requirement)
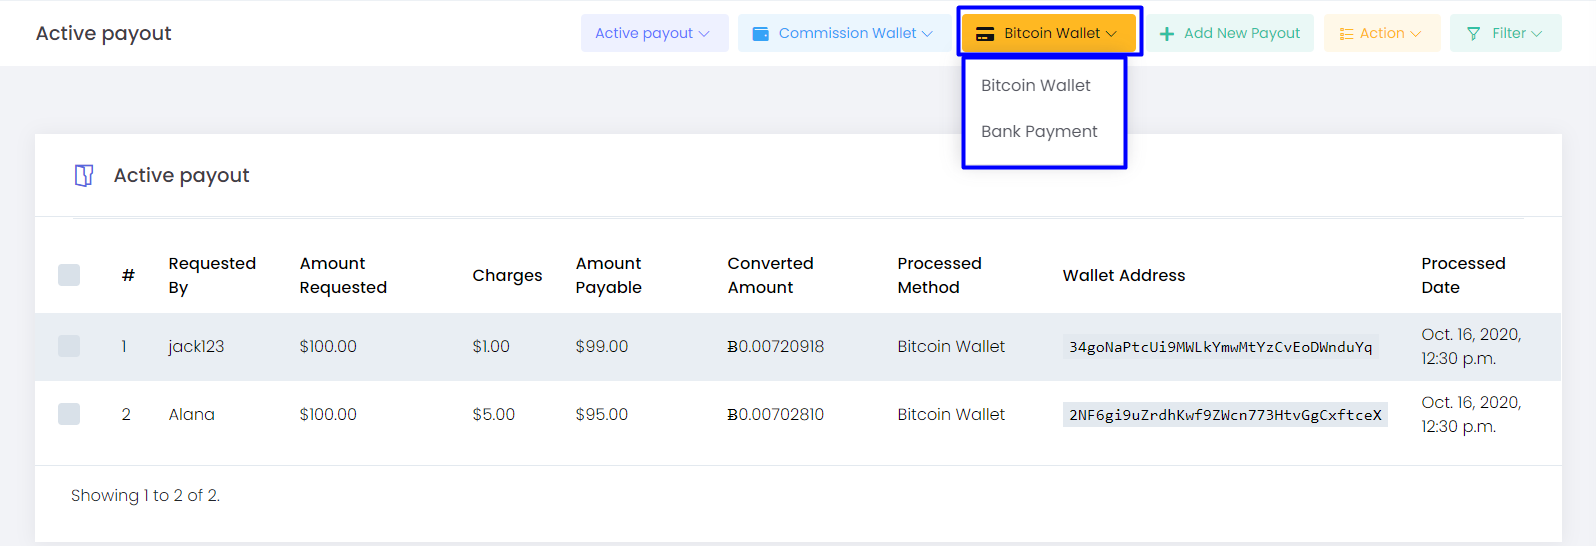
Filter using Payment Gateway
This option helps you to filter the payout requests based on the preferred payment gateway.
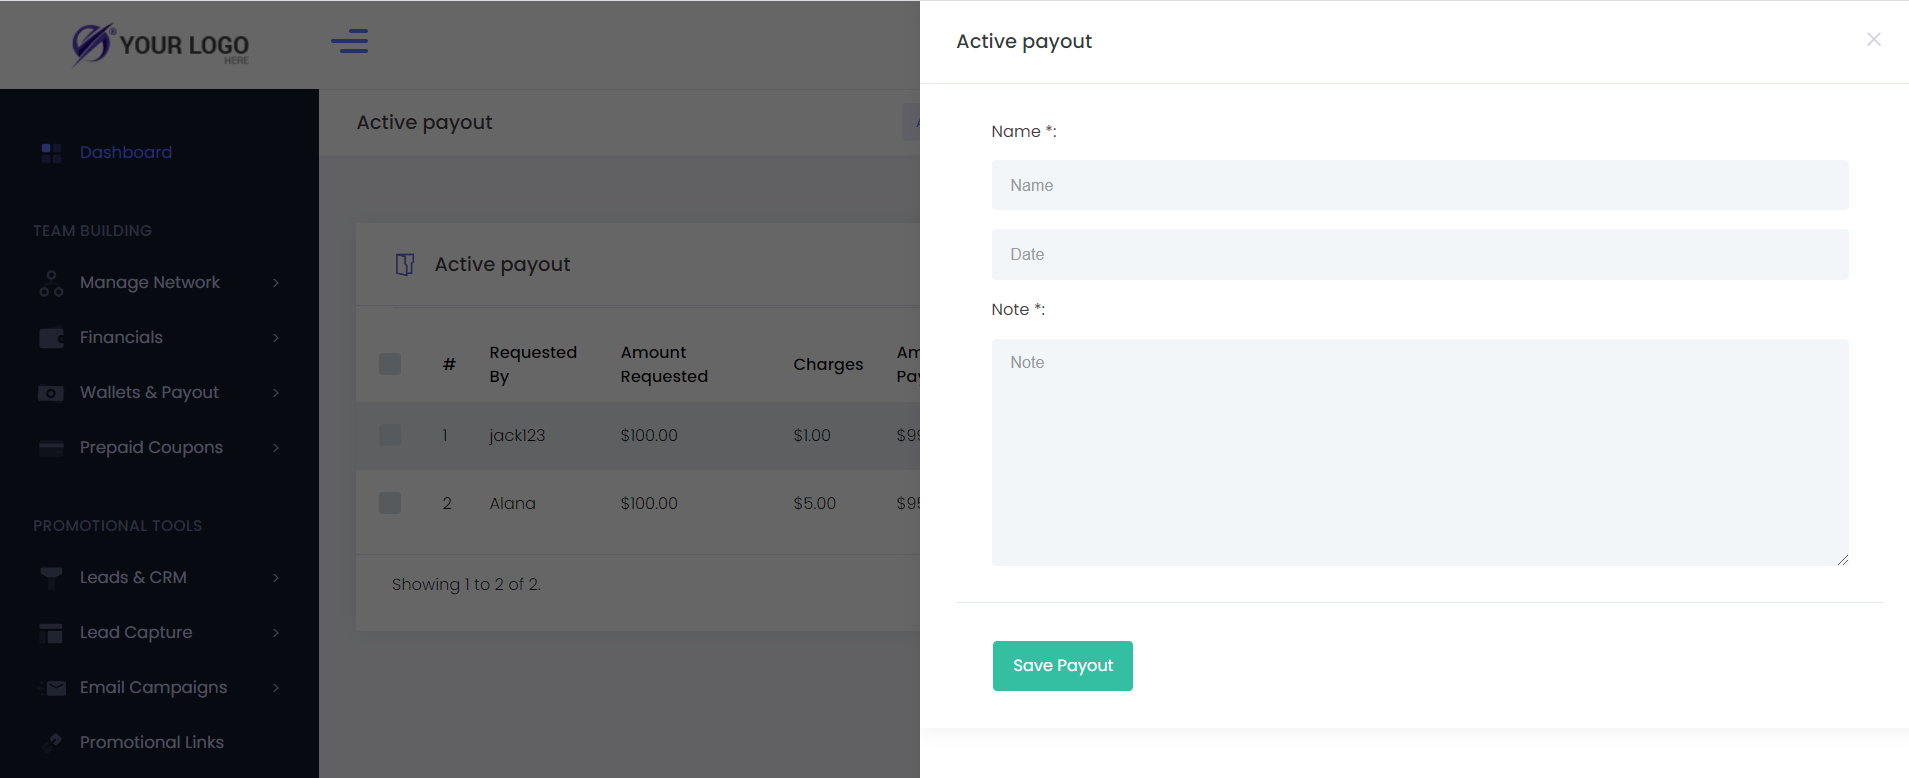
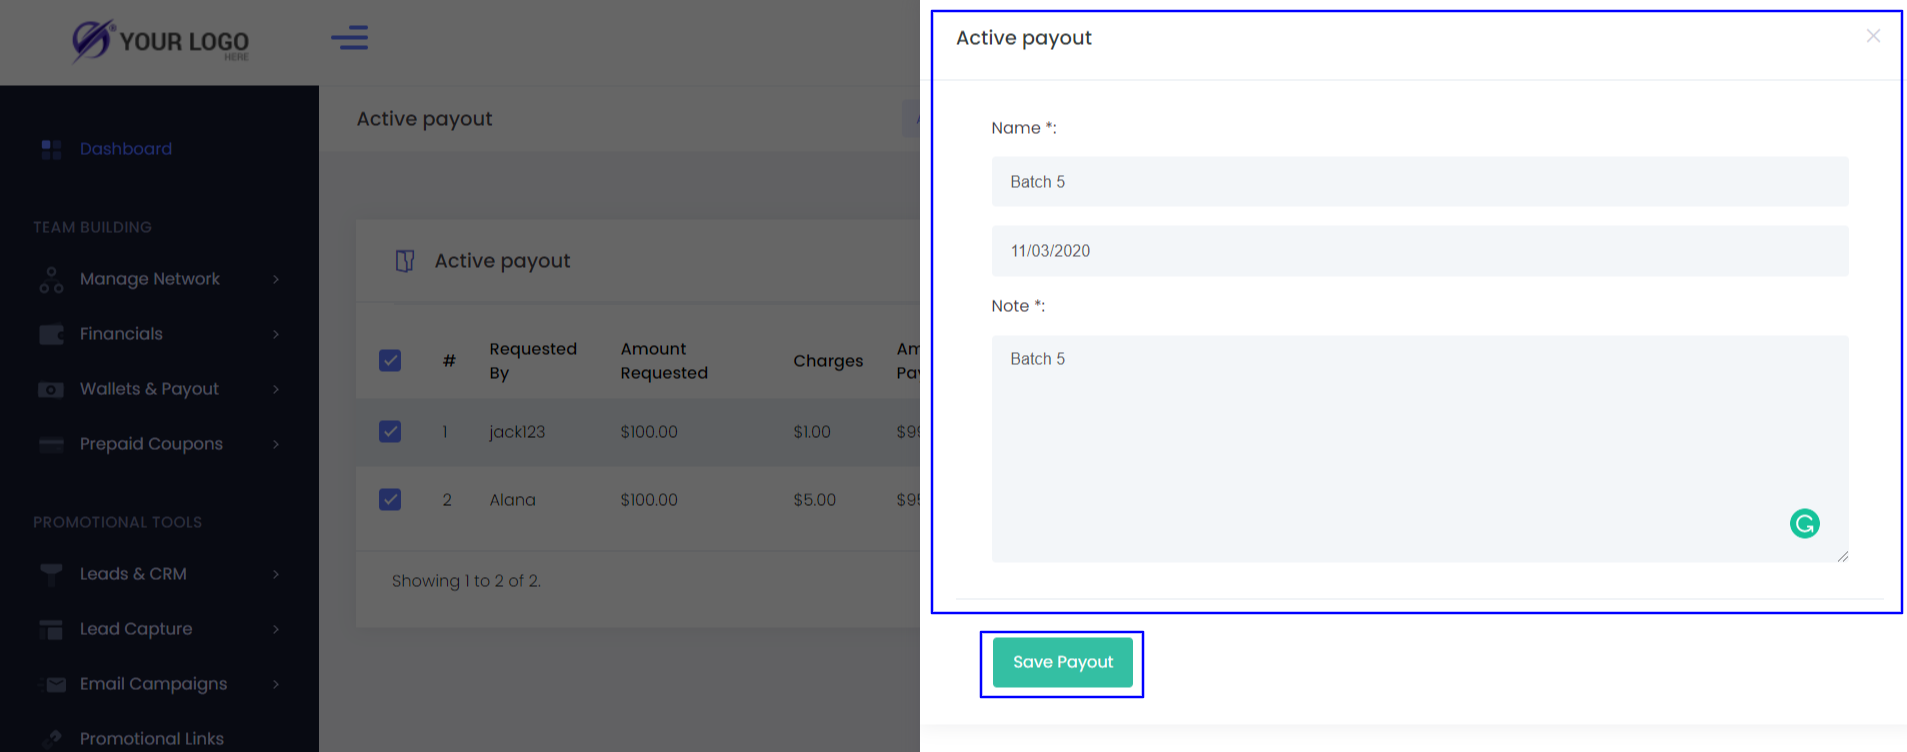
Add New Payout
This option helps to batch the payout requests so that a set of payments could be processed as a single batch.
You have to fill in the below fields and creating the batch
- Name - The name for the Batch
- Date - The payment process date
- Note - Any description for the Batch
Action
Import CSV
Filter
The filter option helps you to reach the exact member details you are looking for by submitting the username and from date to date.
How Admin Approves the Payout generated by the Users?
- Choose the Payout requested generated by the users that need to be approved.
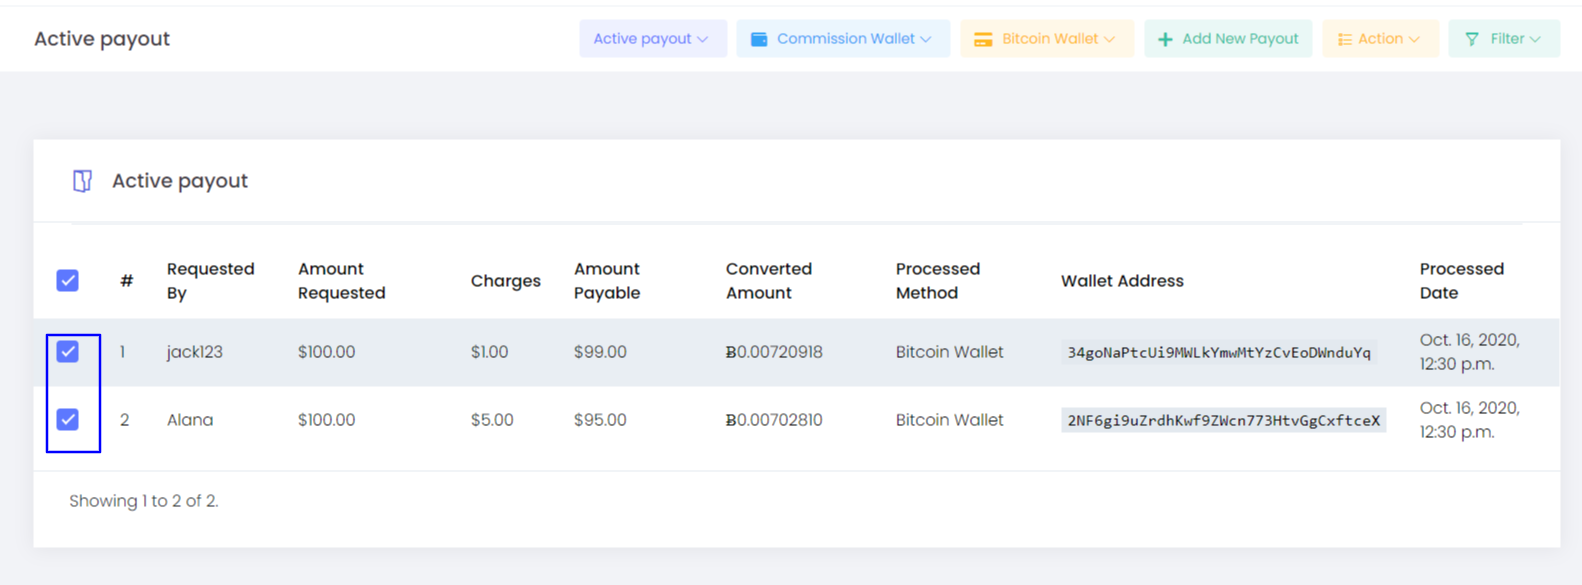
- Select the Add New Payout option put in the Name, Date, and Note for the payout, and save it for batching.
- Batching: The process where the set of requests are considered and processed as a batch
- Once the details are been saved, the status of the payout will be Processing from Requested. (Now the Admin starts the payout process)
- Now the requests will be in the Batched Payouts.
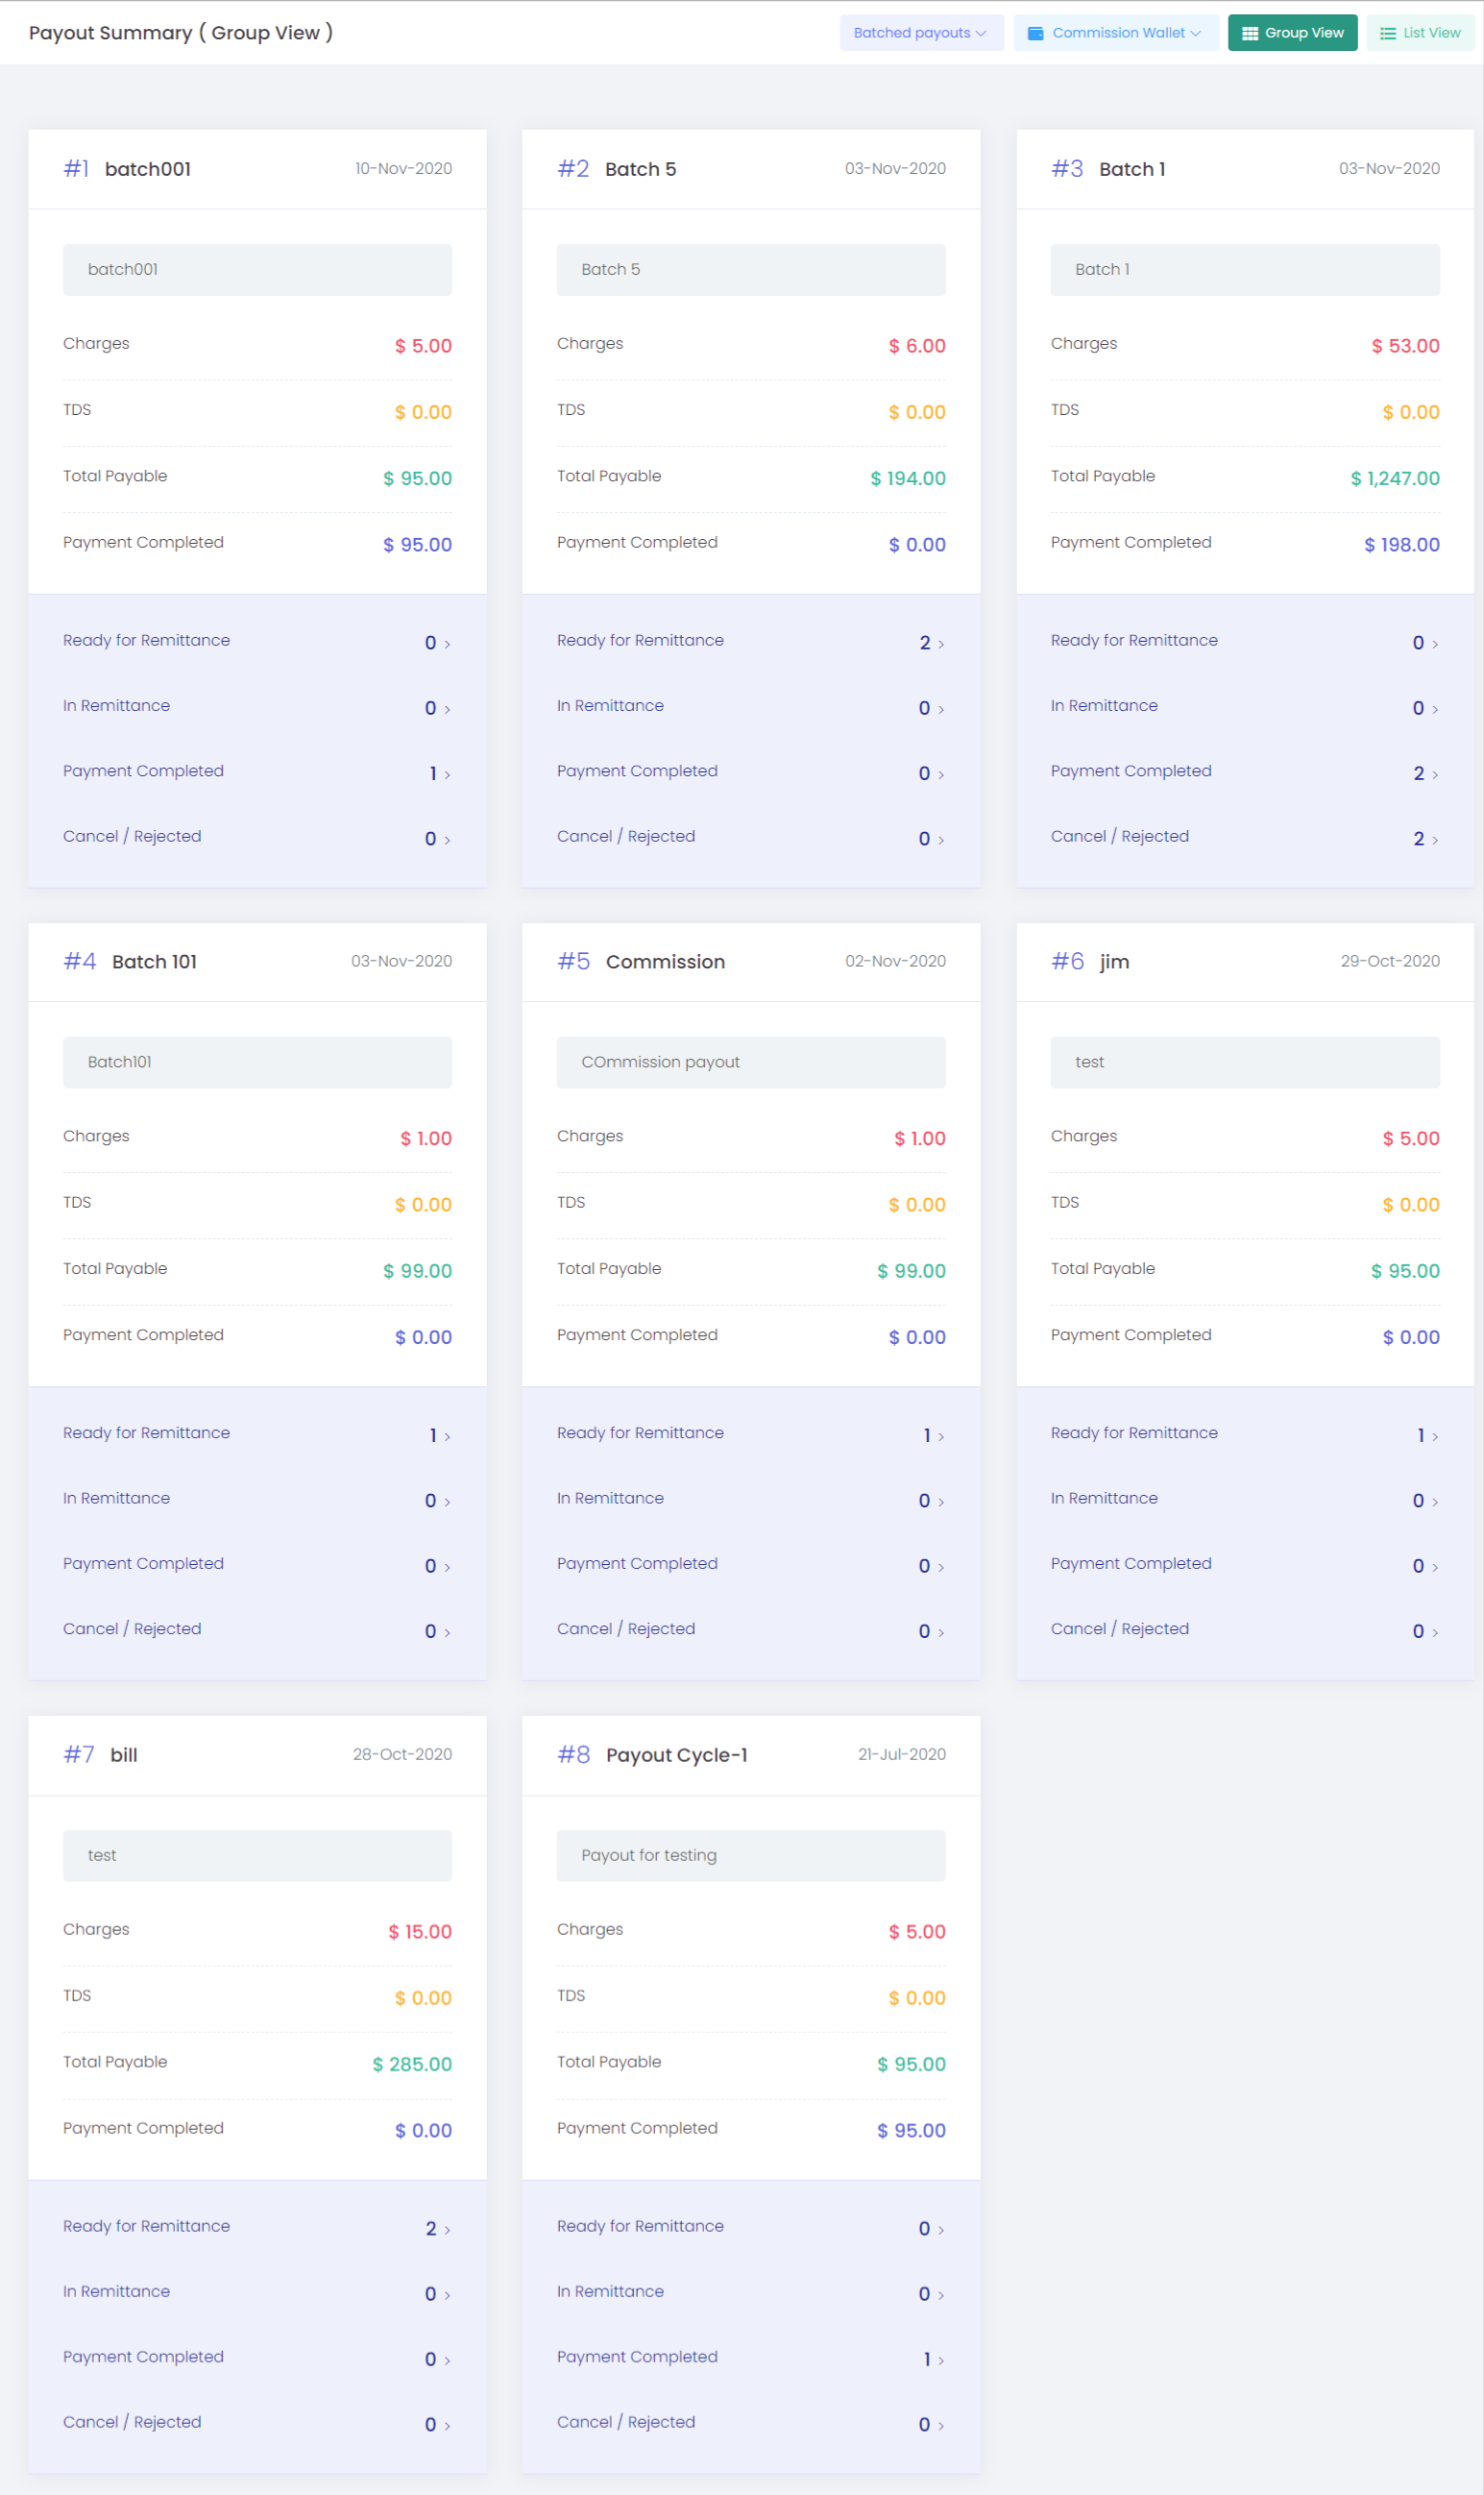
- In batched Payout shows the payout request is considered as a single set or batch.
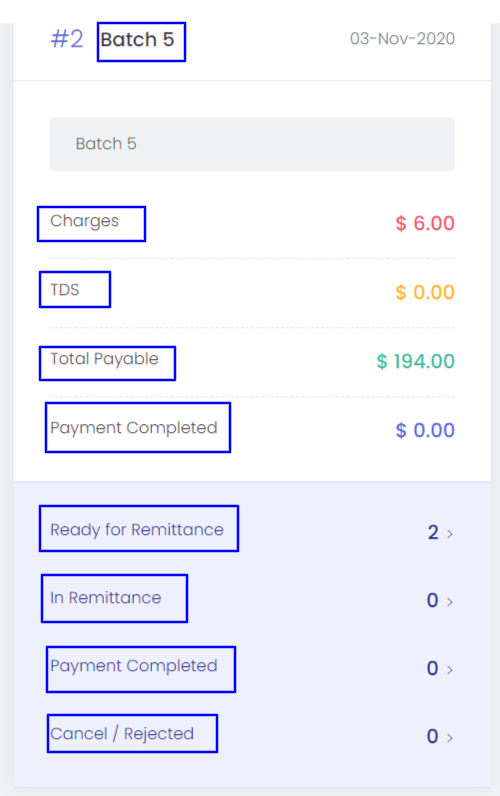
- Here we will also have a summary of all the payouts in the batch.
- Batch 101 - The Batch name
- Charges - The charges involved for the payout process
- TDS - Tax involved in the payment
- Total Payable - The total amount to be paid to the user
- Payment Completed - The total amount paid to the user
- Ready for Remittance - Shows the number of requests in the processing status
- In Remittance - Shows the number of the payout requests processed by the Admin
- Payment Completed - Shows the number of completed payments
- Cancel / Rejected - Shows the number of payments that are Cancelled / Rejected by the Admin.
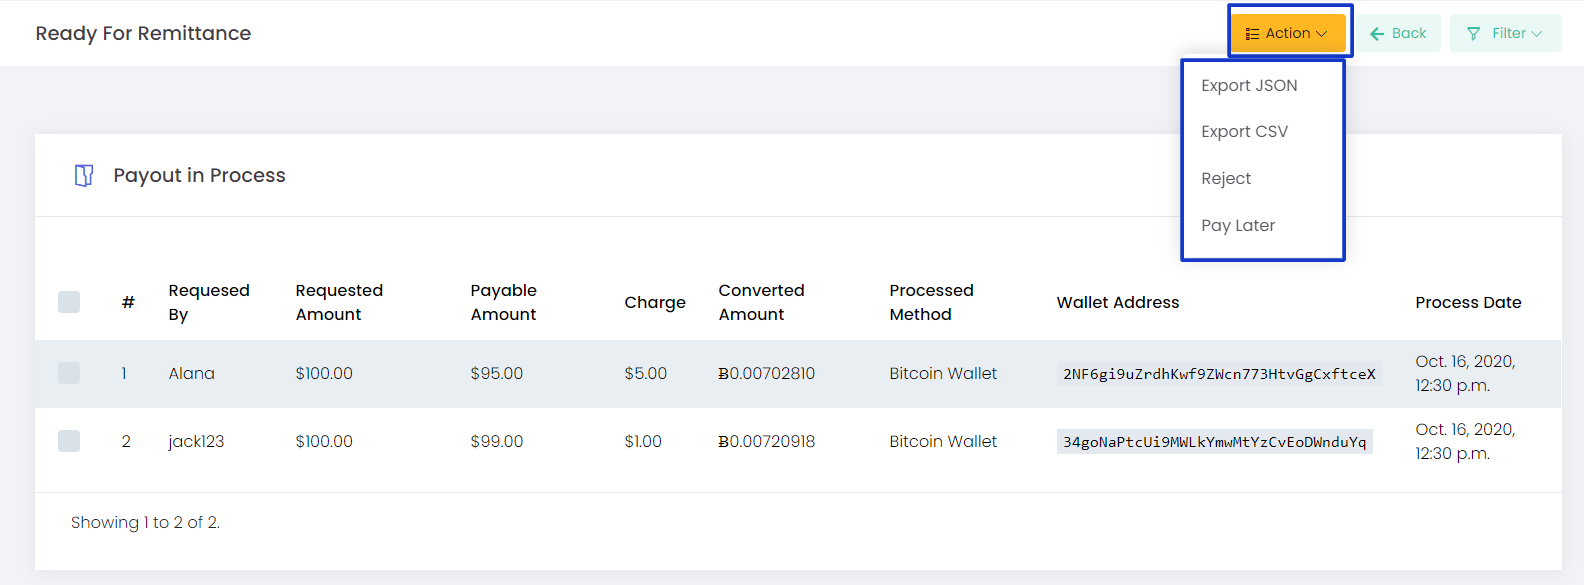
- From Ready for Remittance choose the payouts to be made and on Action, you will have an option Approve the Payout.
When BTC is used as the payment gateway for Payout:
- Admin will have no option to Approve the payment, so once the request is been batched, the admin will have to import the JSON file from Actions, and download and run the file, once it is been done the payout request will be completed and the amount will be credited to the user's account.
- Note: JSON is the external payment gateway that is used to process the BTC payment.
-
Note: It will be the same process in the case of upload the CSV option as well.
-
Reject - The payout requests that have been rejected by the Admin
-
Pay Later - Once the payment is been scheduled to Pay later, the payout requests will be moved from Payout in Process to the Active payouts.
- Once the payout is been approved by the Admin the requested amount will be credited to the user's account.
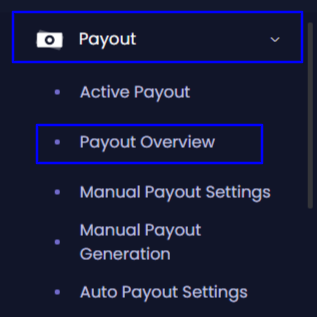
Payout Overview shows the summary of all the payout processes in the system like Active Withdrawals, Ready for Remittance, Payment completed, Cancelled payout by User, Declined payout History by Admin, and Payout History of all the Wallets.
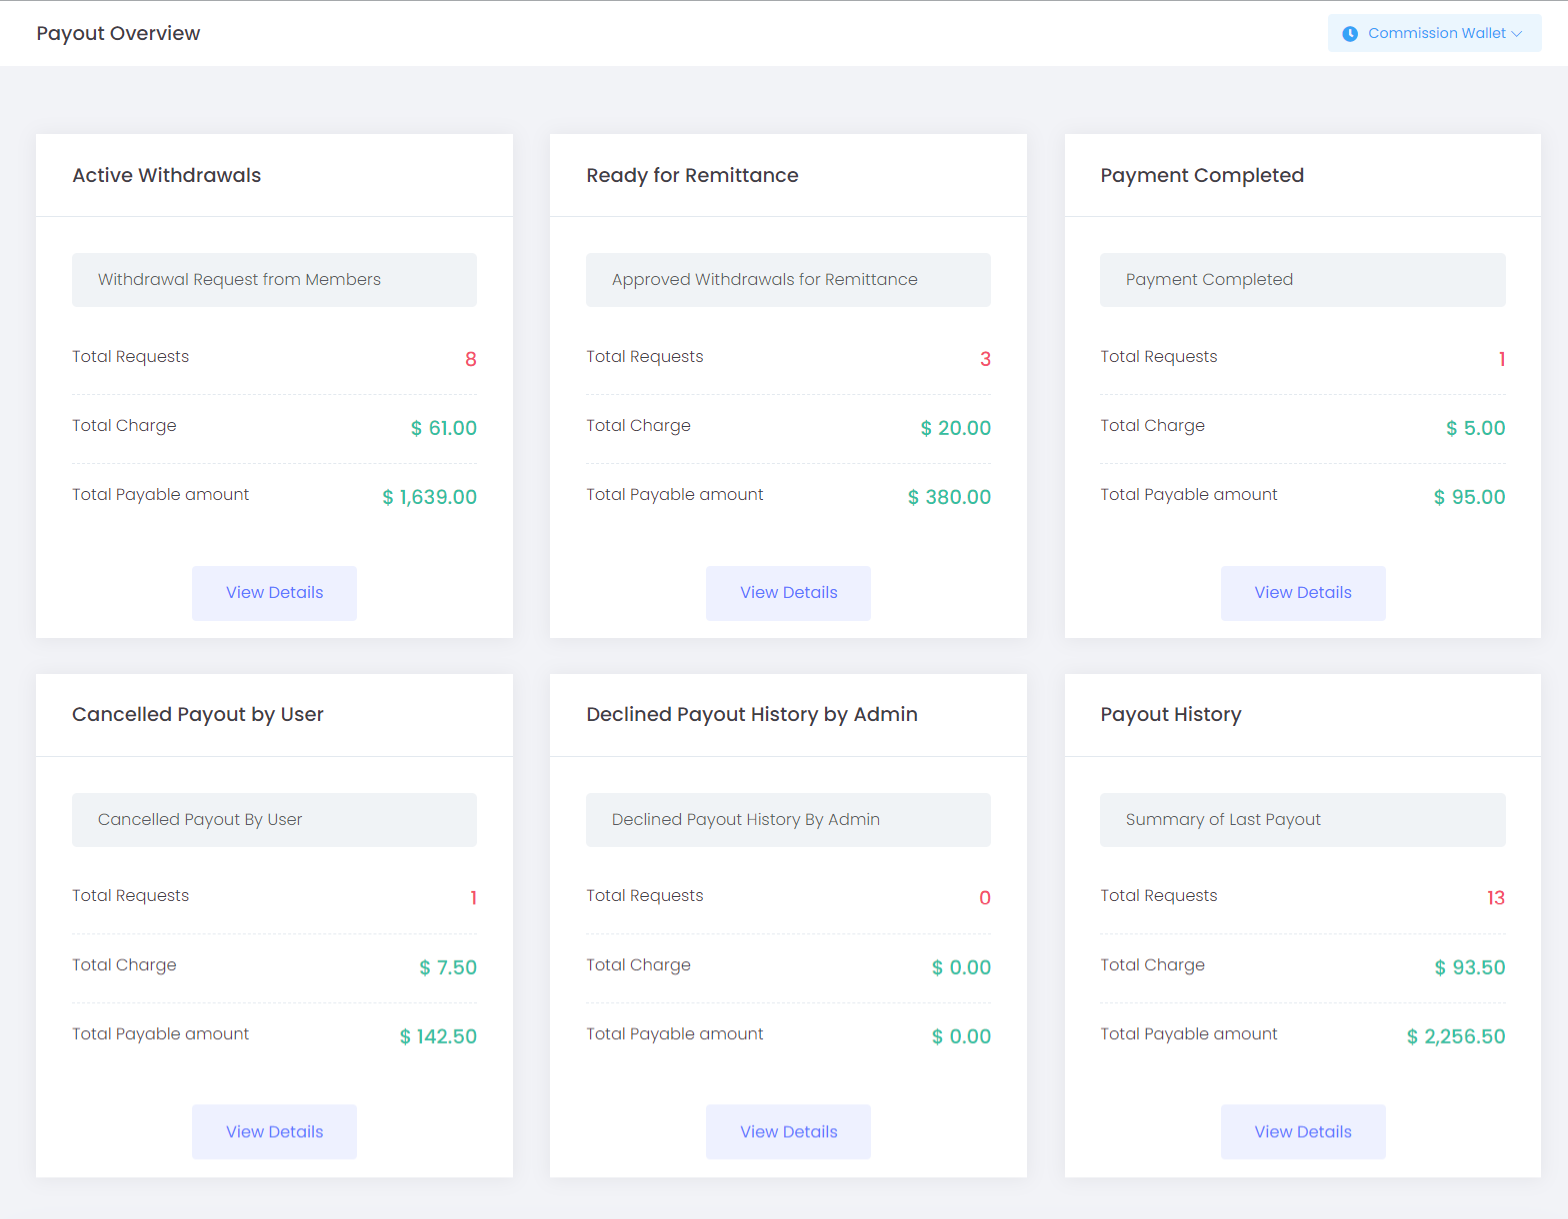
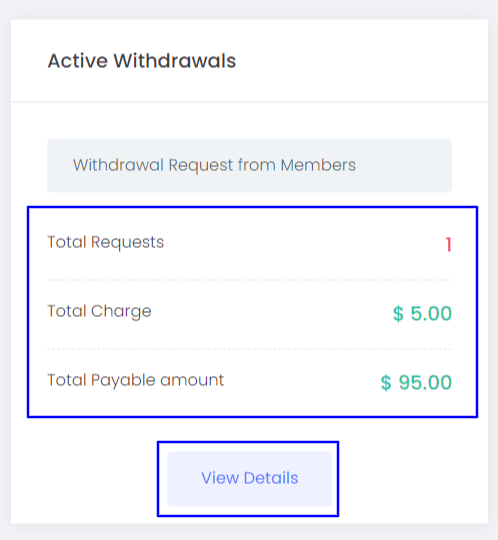
Active Withdrawals
Active Withdrawals shows the summary of the withdrawal request made by the users from all the available wallets.
From the View Details option, the admin will be redirected to the Active payout page from where the Admin can process the payments.
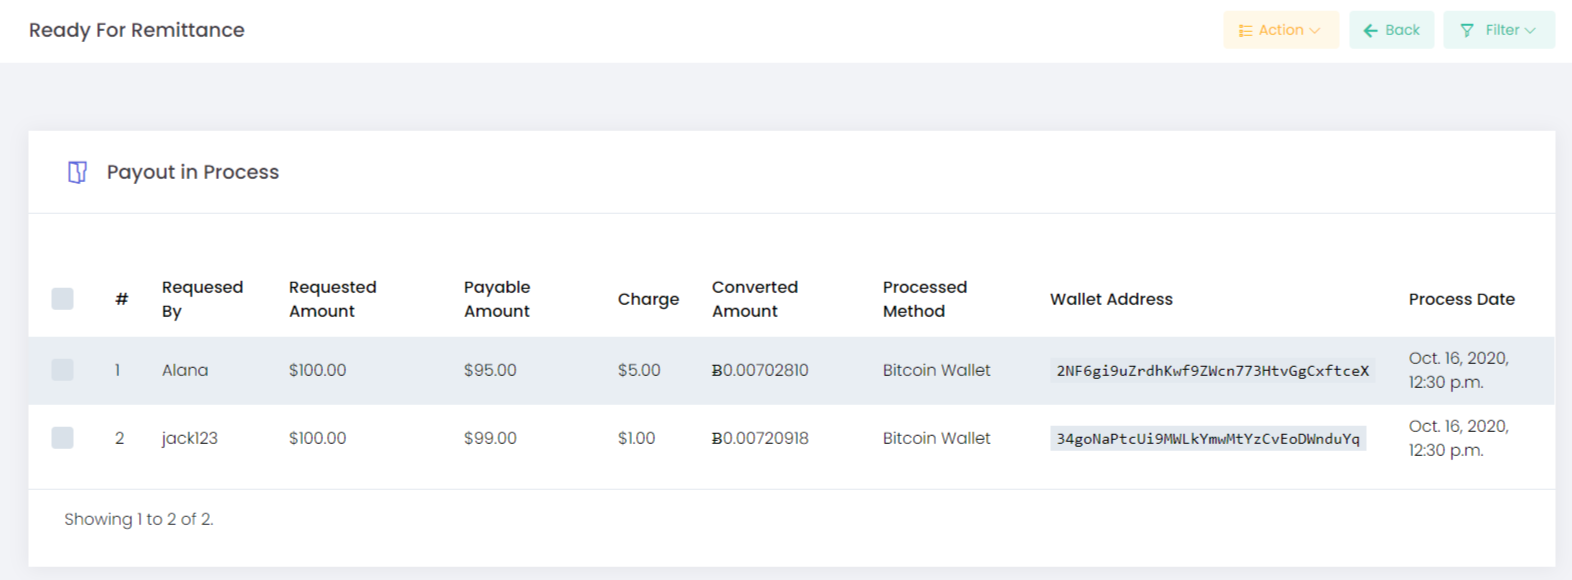
Ready for Remittance
Ready for remittance shows the summary of the Approved Withdrawals for the payment.
- Total Requests - Shows the number of active Payout requests
- Total Charges - The total charges involved for using the Payment gateway or the process
- Total Payable amount - Total amount that should be paid to the users
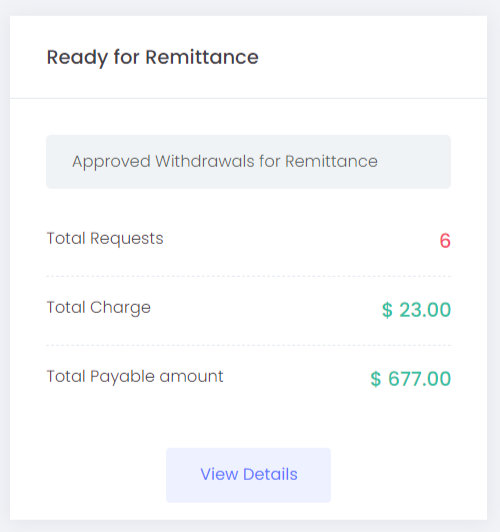
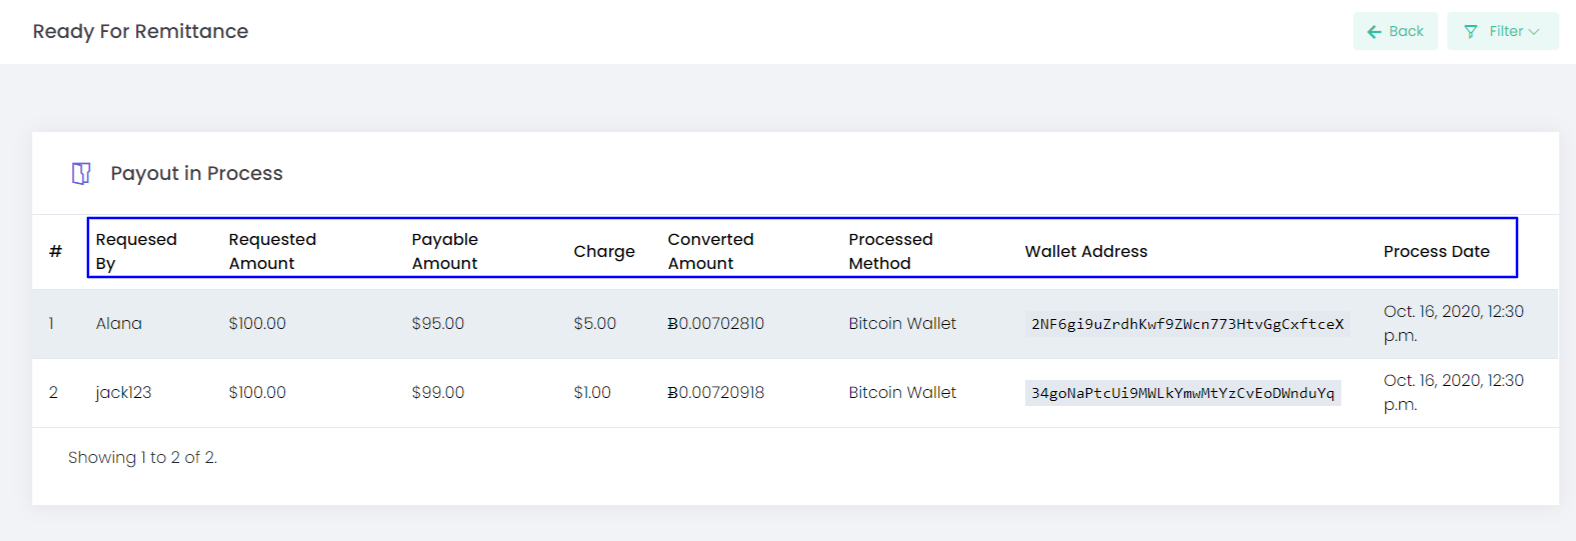
View Details - You will be able to track the list of the Payout in Process, the details included will be:
- Requested By - The name of the user who has generated the payout request.
- Amount Requested - The amount requested for the withdrawal
- Charges - Charges involved for the withdrawal process
- Amount Payable - Amount paid to the users after excluding the withdrawal
- Converted Amount - The value converted from USD to the corresponding payment gateway (BTC)
- Processed Method - The payment gateway to which the payout is made (Here it is BTC)
- Wallet Address - The wallet address to which the payment is made
- Processed Date - The date at which the payment process is been initiated
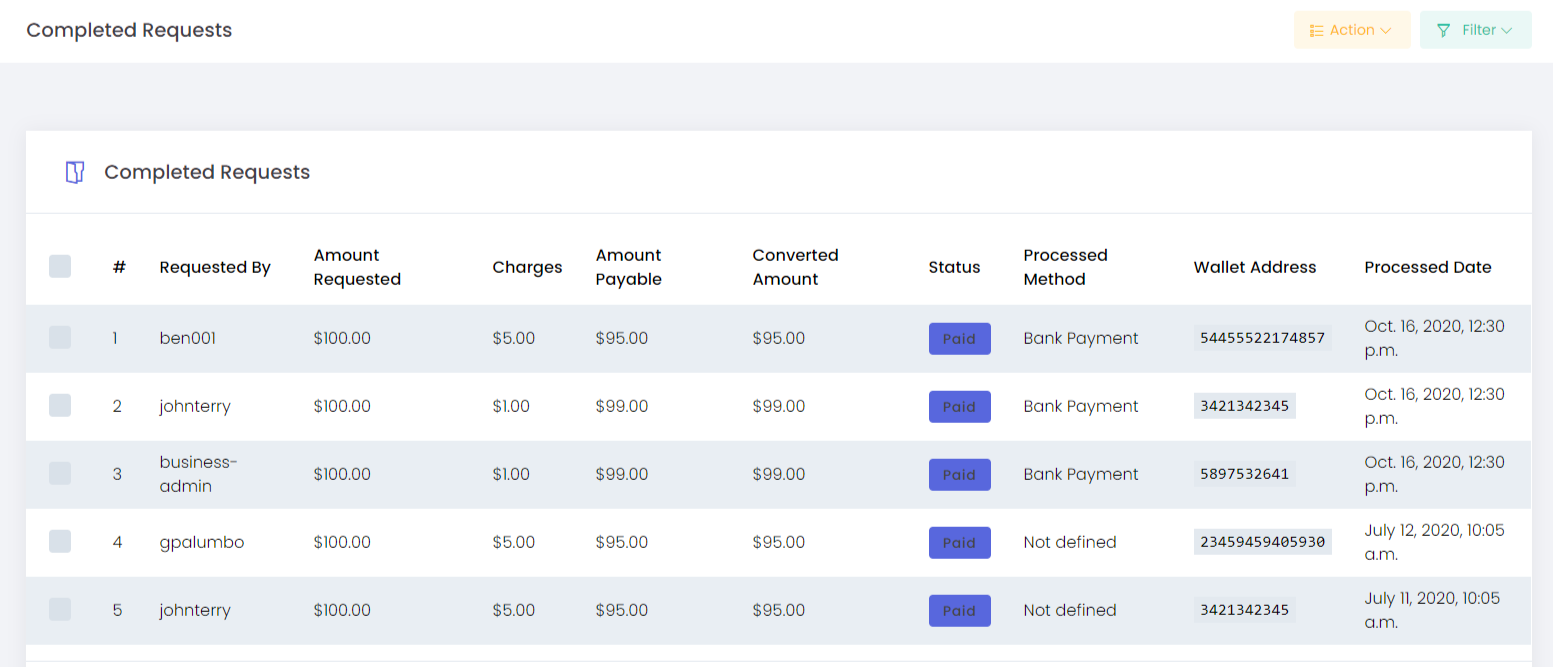
Payment Completed
Here we will get the summary of the completed payouts.
- Total Requests - Shows the total number of completed Payout requests
- Total Charges - The total charges involved for using the Payment gateway or the process
- Total Paid amount - Total amount that has been paid to the users

View Details - You will be able to track the list of the completed Payouts. The details included will be:
- Requested By - The name of the user who has generated the payout request.
- Amount Requested - The amount requested for the withdrawal
- Charges - Charges involved for the withdrawal process
- Amount Paid- Amount paid to the users after excluding the withdrawal
- Converted Amount - The value converted from USD to the corresponding payment gateway (BTC)
- Status - Indicates the status of the Payment
- Processed Method - The payment gateway to which the payout is made (Here it is BTC)
- Wallet Address - The wallet address to which the payment is made
- Processed Date - The date at which the payment process is been initiated.
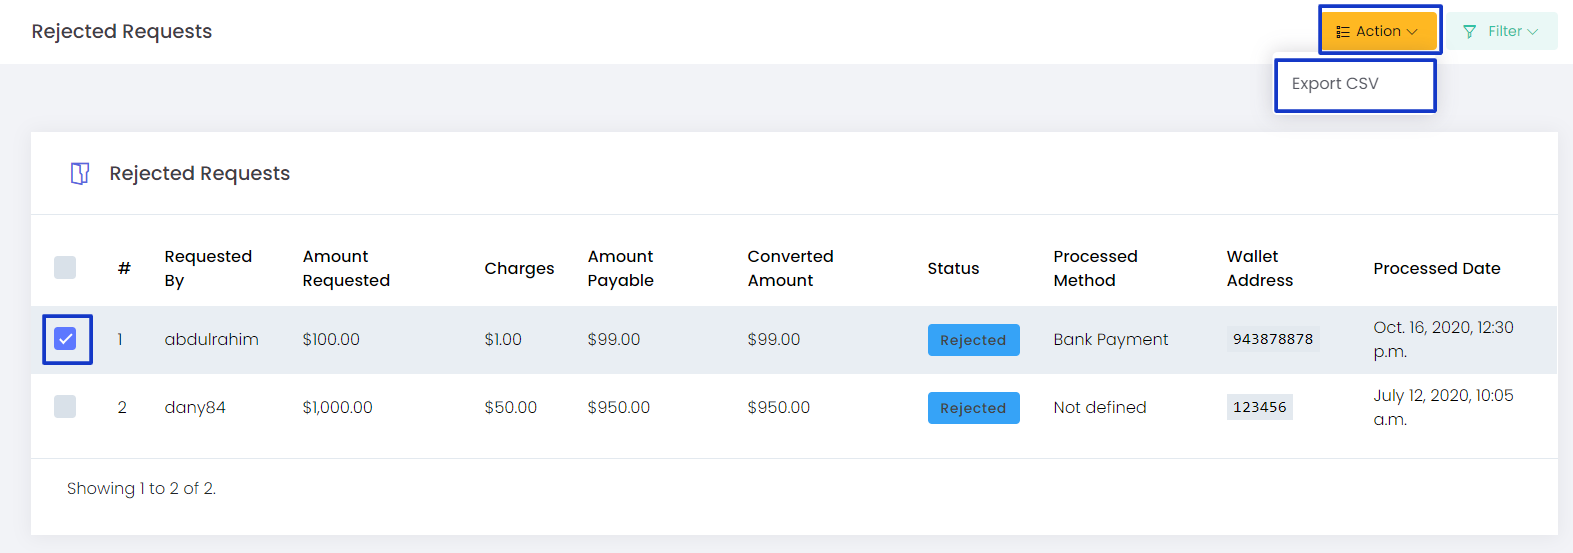
Action - Admin has an option to export the completed payout history as a CSV file, where admin will have to select the required requests and choose the Export CSV option from Actions.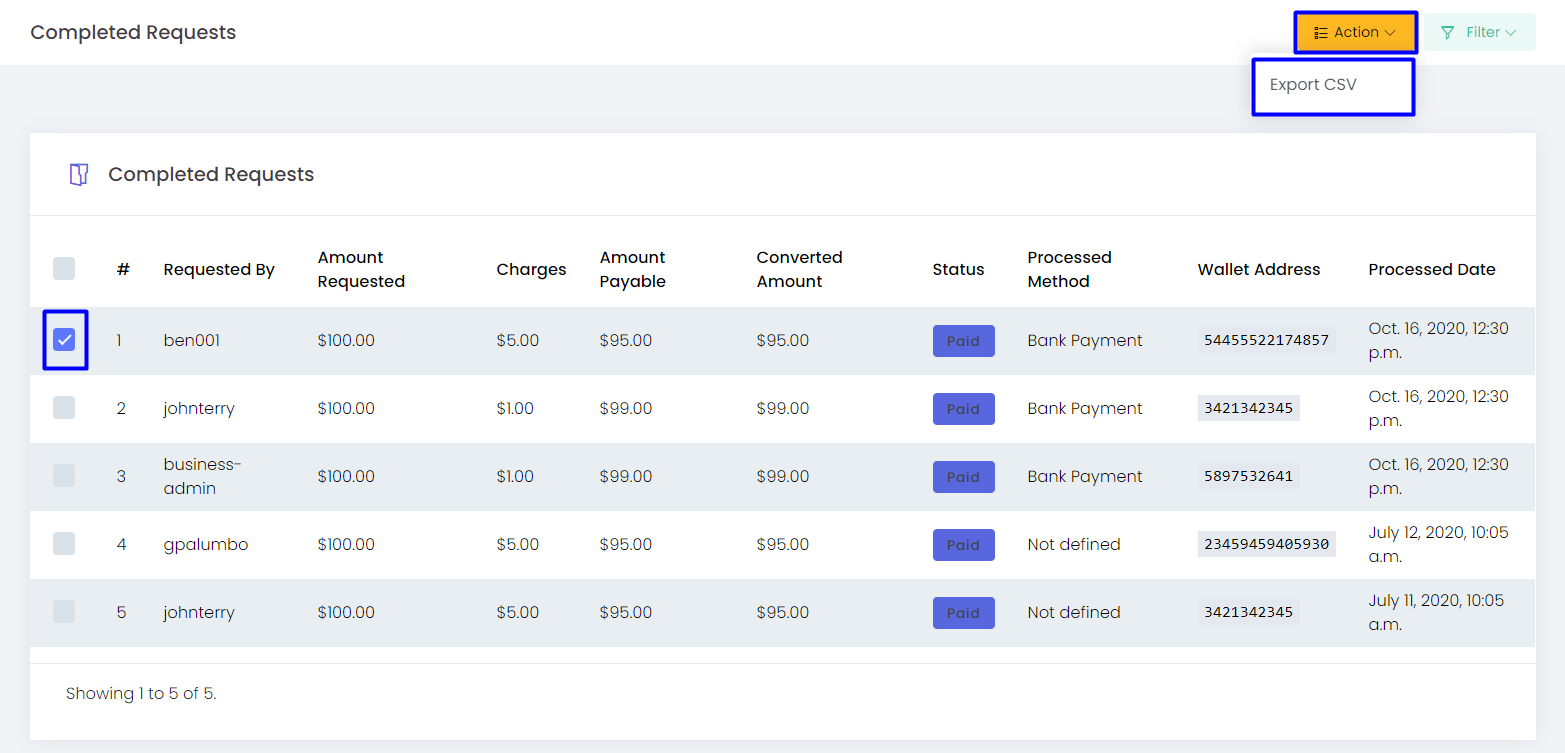
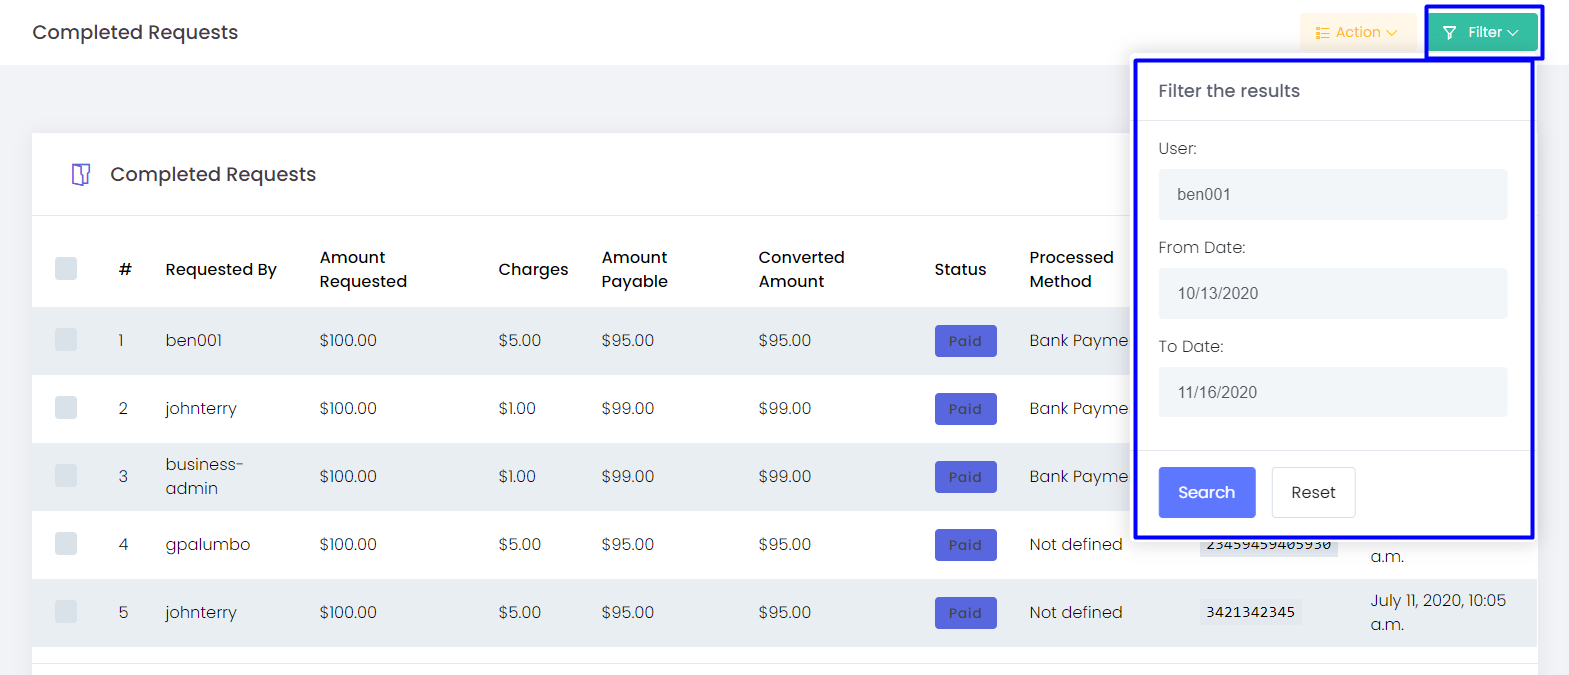
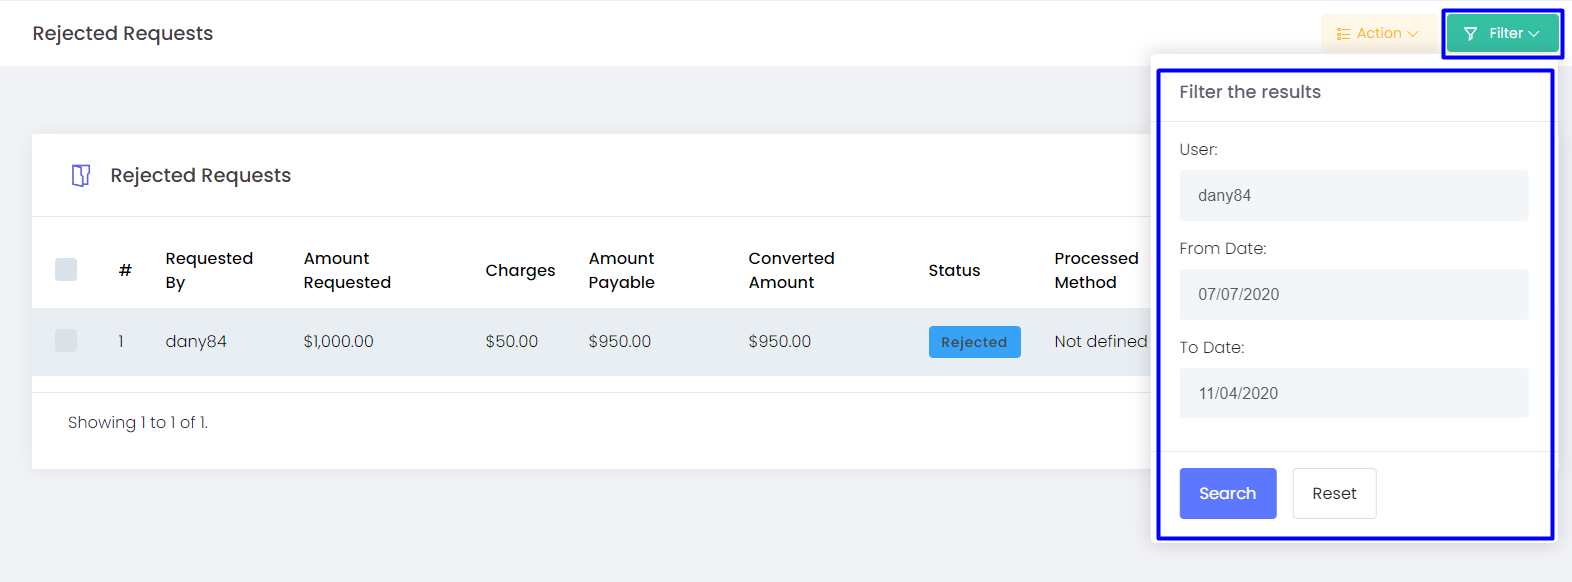
Filter -The filter option help you to reach the exact member details you are looking for by submitting the username and email address
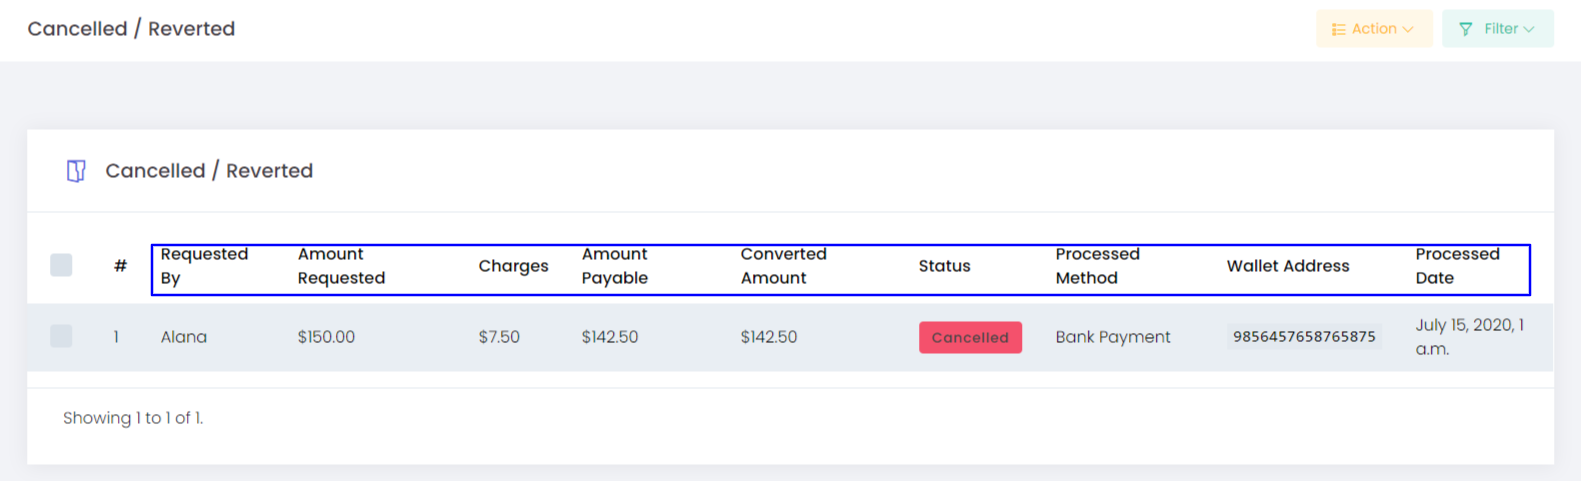
Cancelled Payout by User
It shows the payouts that have been Cancelled by the Users
- Total Requests - Shows the total number of completed Payout requests
- Total Charges - The total charges involved for using the Payment gateway or the process
- Total Amount Cancelled - Total amount that has been cancelled on the transactions by users
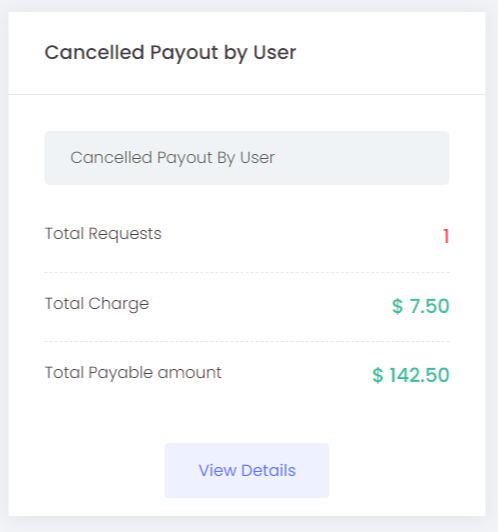
View Details - You will be able to track the list of the completed Payouts. The details included will be:
- Requested By - The name of the user who has generated the payout request.
- Amount Requested - The amount requested for the withdrawal
- Charges - Charges involved for the withdrawal process
- Amount Cancelled - The amount cancelled by each user
- Converted Amount - The value converted from USD to the corresponding payment gateway (BTC)
- Status - Indicates the status of the Payment
- Processed Method - The payment gateway to which the payout is made (Here it is BTC)
- Wallet Address - The wallet address to which the payment is made
- Processed Date - The date at which the payment process is been initiated.
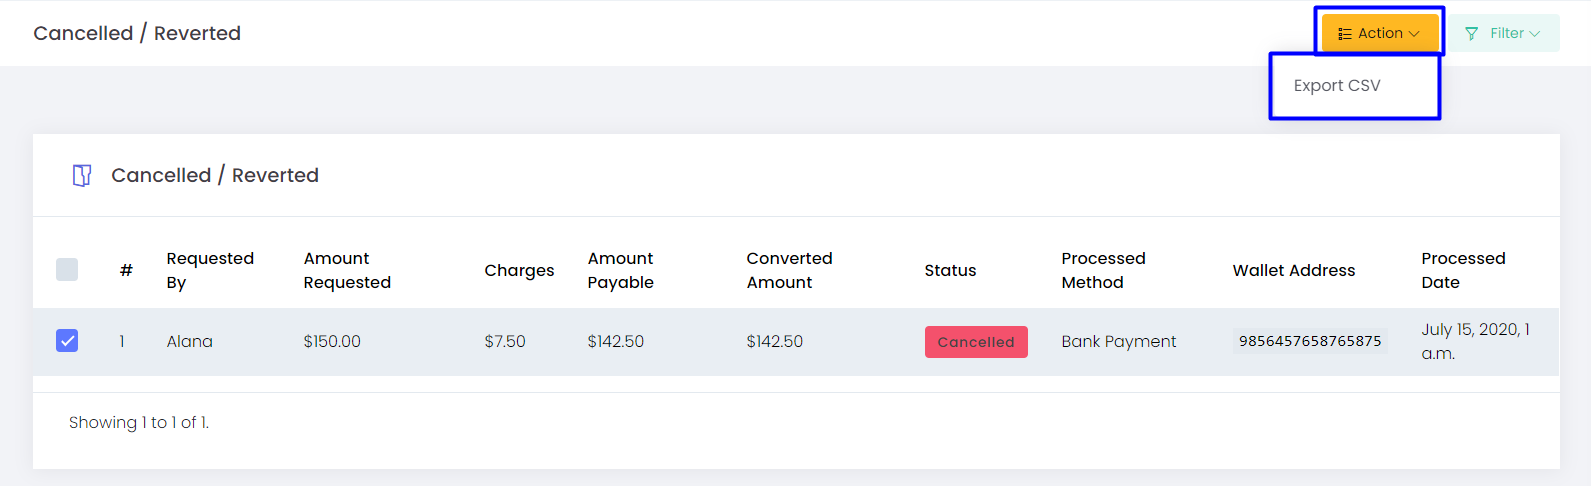
Action - Admin has an option to export the cancelled payout history as a CSV file, where admin will have to select the required requests and choose the Export CSV option from Actions.
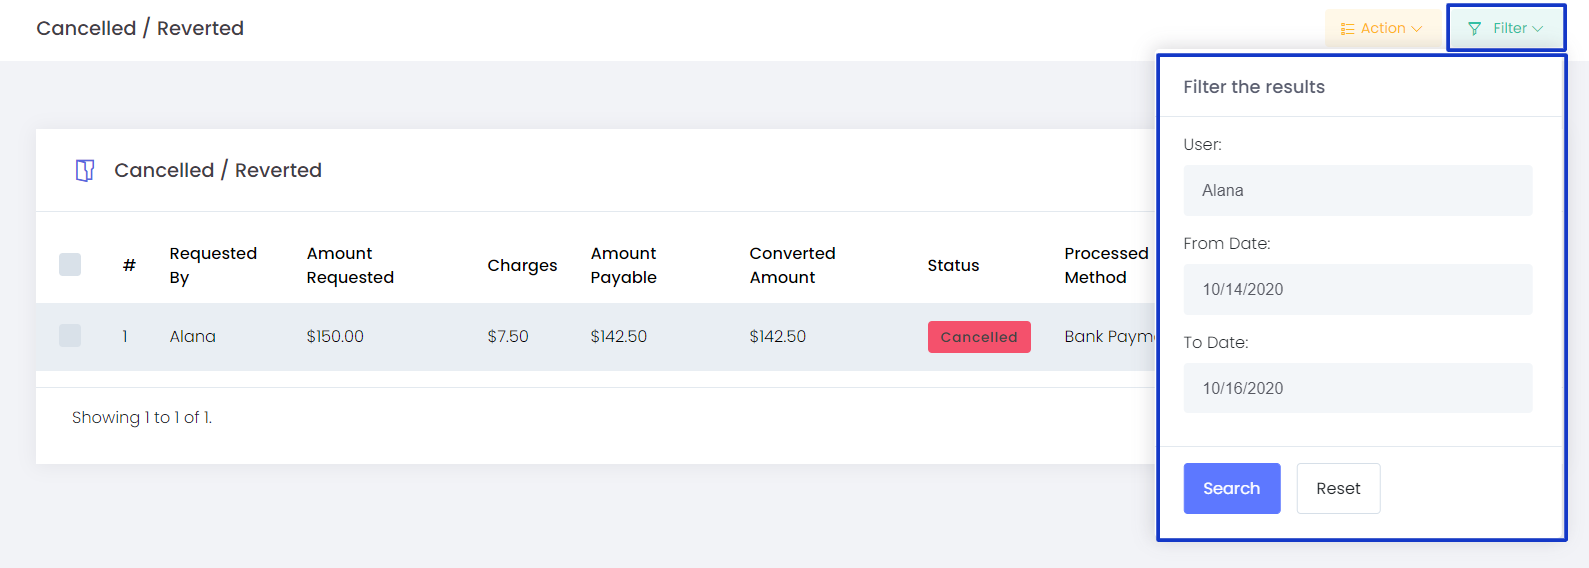
Filter -The filter option helps you to reach the exact member details you are looking for by submitting the username and email address.
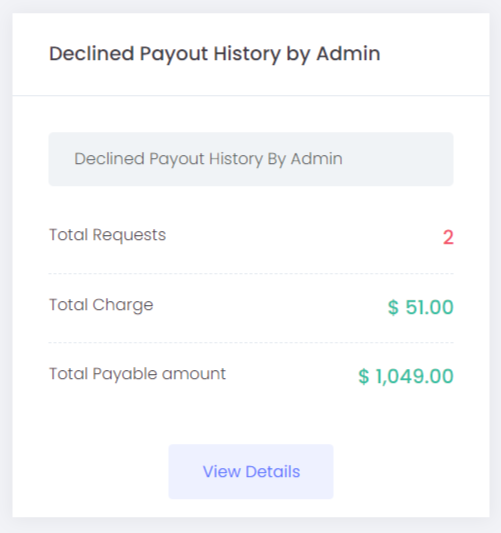
Payouts Declined by Admin
This option helps you to find the Payout History that has been declined by the Admin.
- Total Requests - Shows the total number of Payouts declined by the Admin
- Total Charges - The total charges involved for using the Payment gateway or the payment process
- Total Amount Declined- Total amount that has been declined by the Admin
View Details - You will be able to track the list of the rejected payouts. The details included will be:
- Requested By - The name of the user who has generated the payout request.
- Amount Requested - The amount requested for the withdrawal
- Charges - Charges involved for the withdrawal process
- Declined Amount - Amount declined by the admin for each user
- Converted Amount - The value converted from USD to the corresponding payment gateway (BTC)
- Status - Indicates the status of the Payment
- Processed Method - The payment gateway to which the payout is made
- Wallet Address - The wallet address to which the payment is made
- Processed Date - The date at which the payment process is been initiated.
Action - Admin has an option to export the declined payout history as a CSV file, where admin will have to select the required requests and choose the Export CSV option from Actions.
Filter -The filter option helps you to reach the exact member details you are looking for by submitting the username and email address.
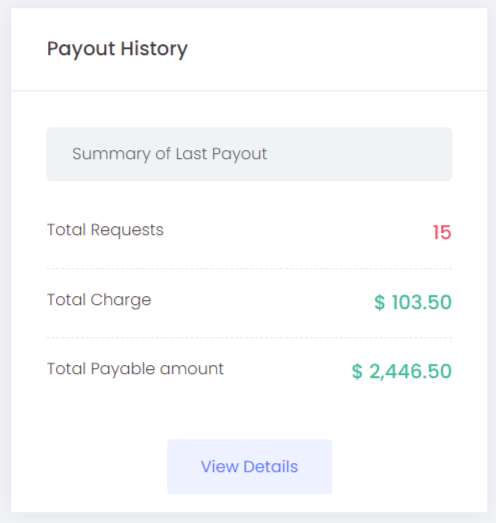
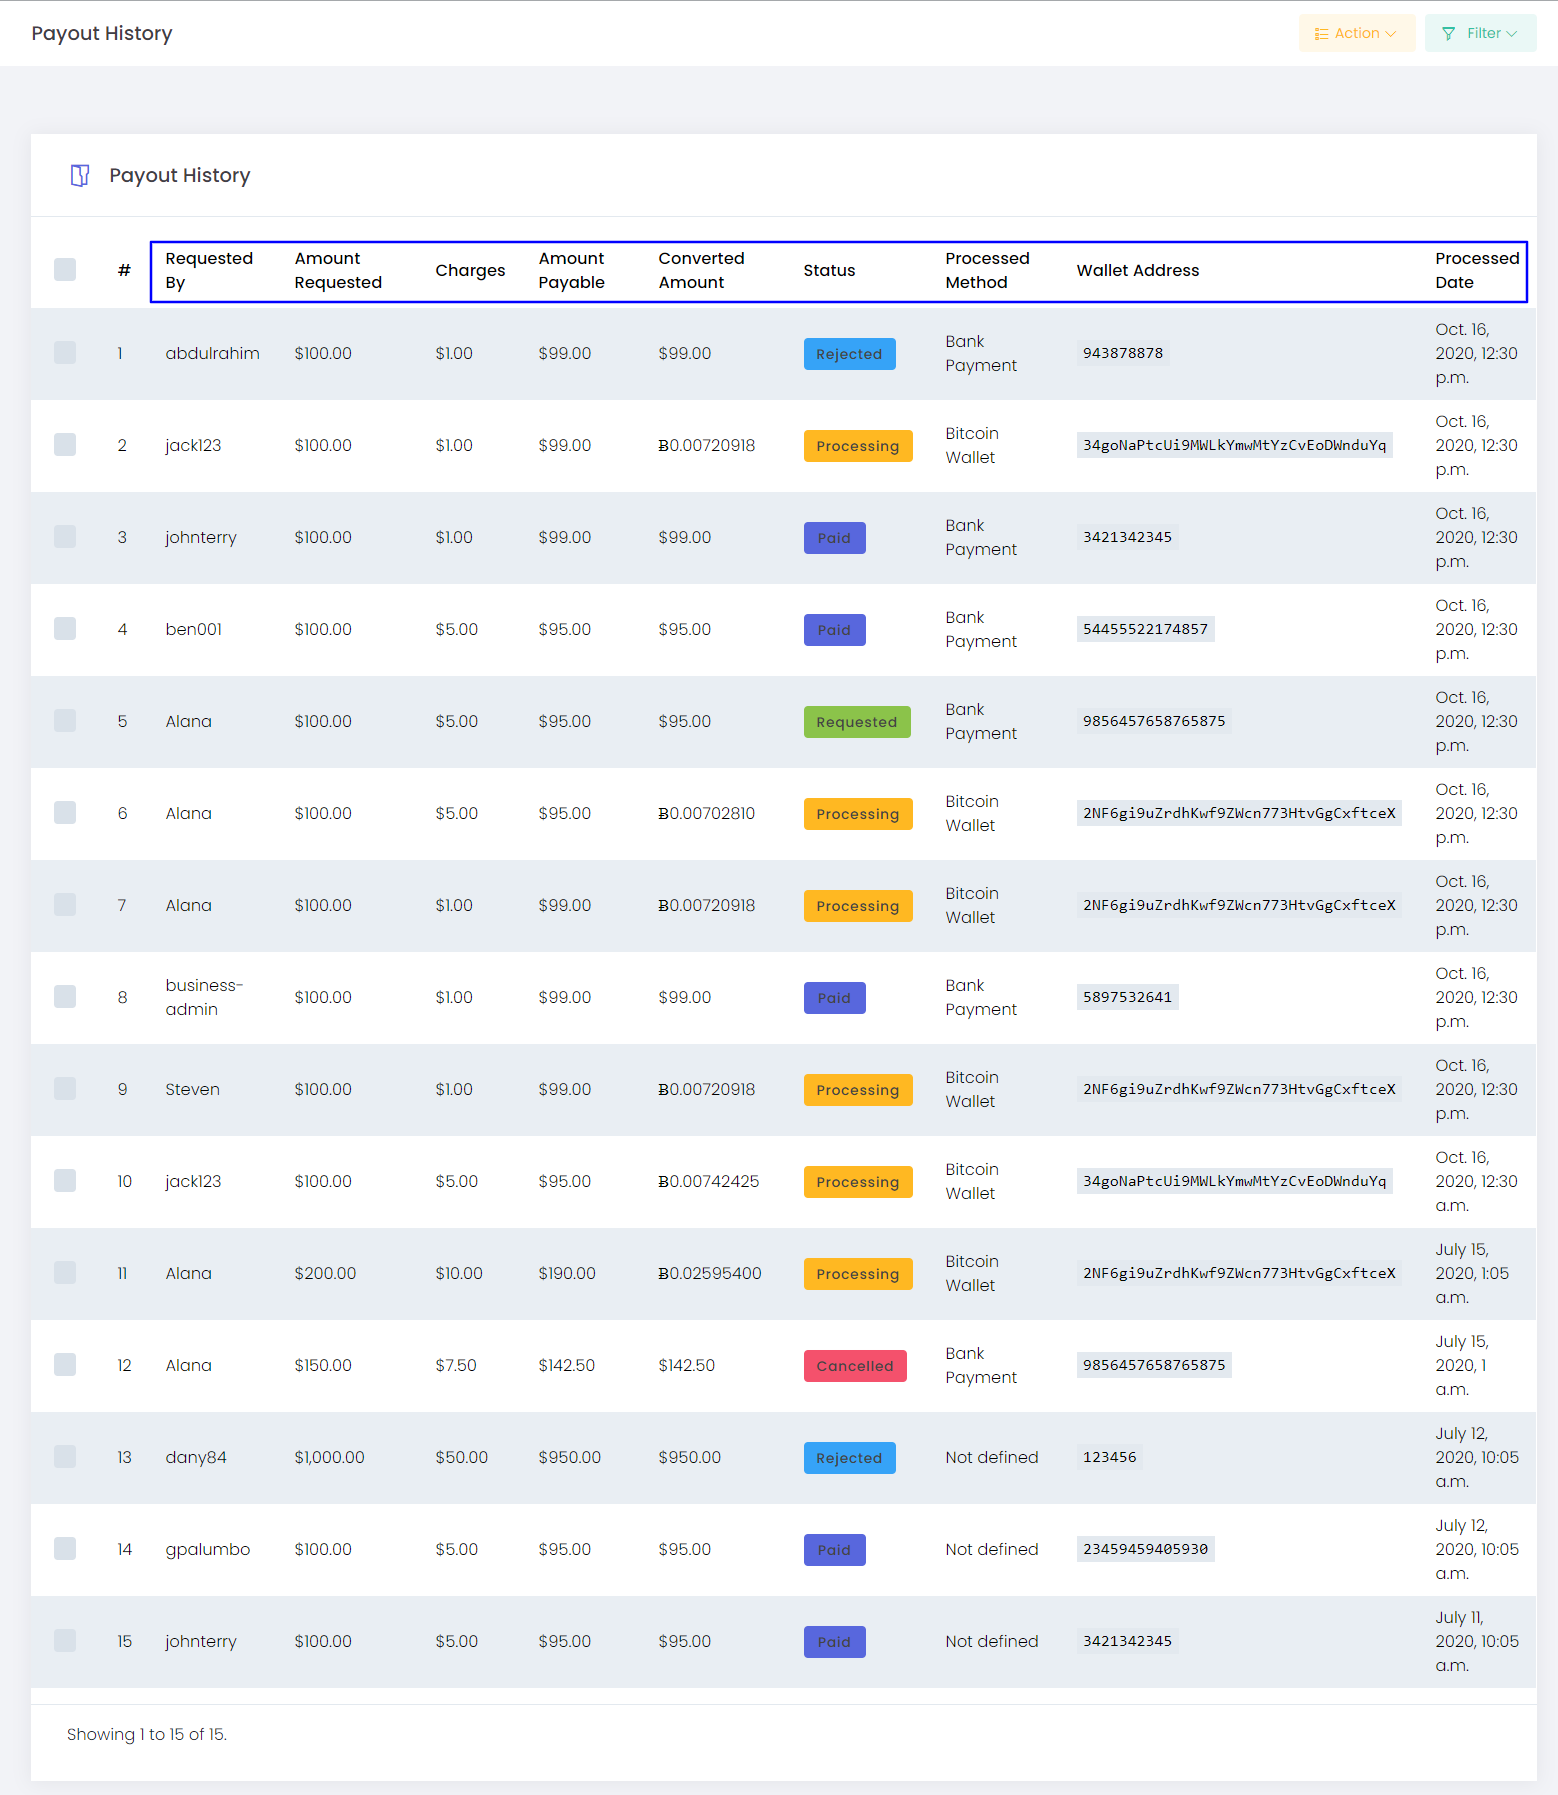
Payout History
The payout history shows the summary of all the transactions.
- Total Requests - Shows the total number of transactions
- Total Charges - The total charges involved for using the Payment gateway or the payment process
- Total Amount Transacted- Summary of the otal transacted amount
- Requested By - The name of the user who has generated the payout request.
- Amount Requested - The amount requested for the withdrawal
- Charges - Charges involved for the withdrawal process
- Transaction Amount - The amount involved for each transaction
- Converted Amount - The value converted from USD to the corresponding payment gateway (BTC)
- Status - Indicates the status of the Payment request
- Processed Method - The payment gateway to which the payout is made
- Wallet Address - The wallet address to which the payment is made
- Processed Date - The date at which the payment process is been initiated.
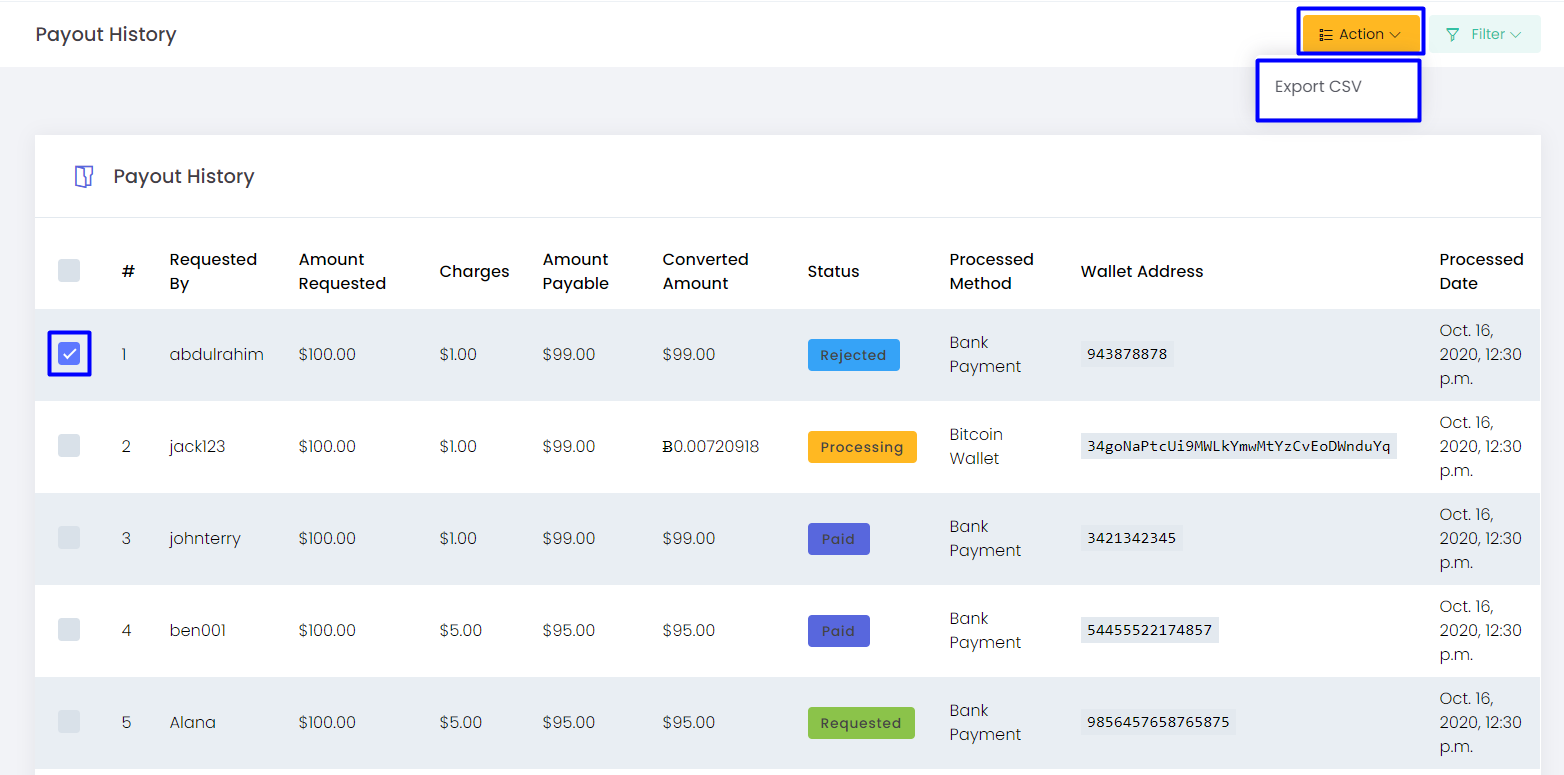
Action - Admin has an option to export the Transaction History as a CSV file, where admin will have to select the required requests and choose the Export CSV option from Actions.
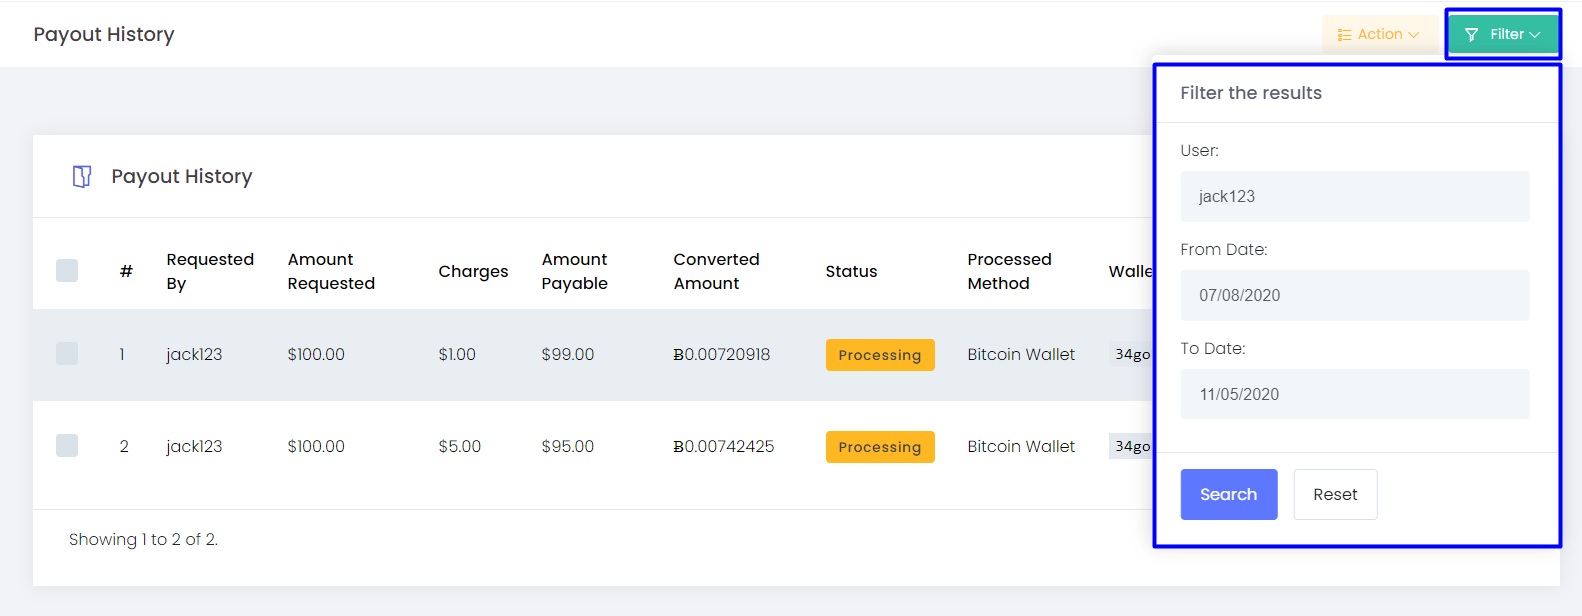
Filter -The filter option helps you to reach the exact member details you are looking for by submitting the username and email address.
Manual Payout settings help the Admin to generate the payout request for the users and proceed with the payout process, where the users don't need to generate a request from their end for the payout.
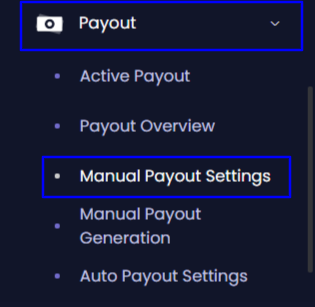
The processes or steps involved in the manual payout is the same as that of the normal payout process, the only difference is that the Payout request is generated by the Admin in this Manual Payout process.
The manual payout setting can be done for all the available wallets separately.
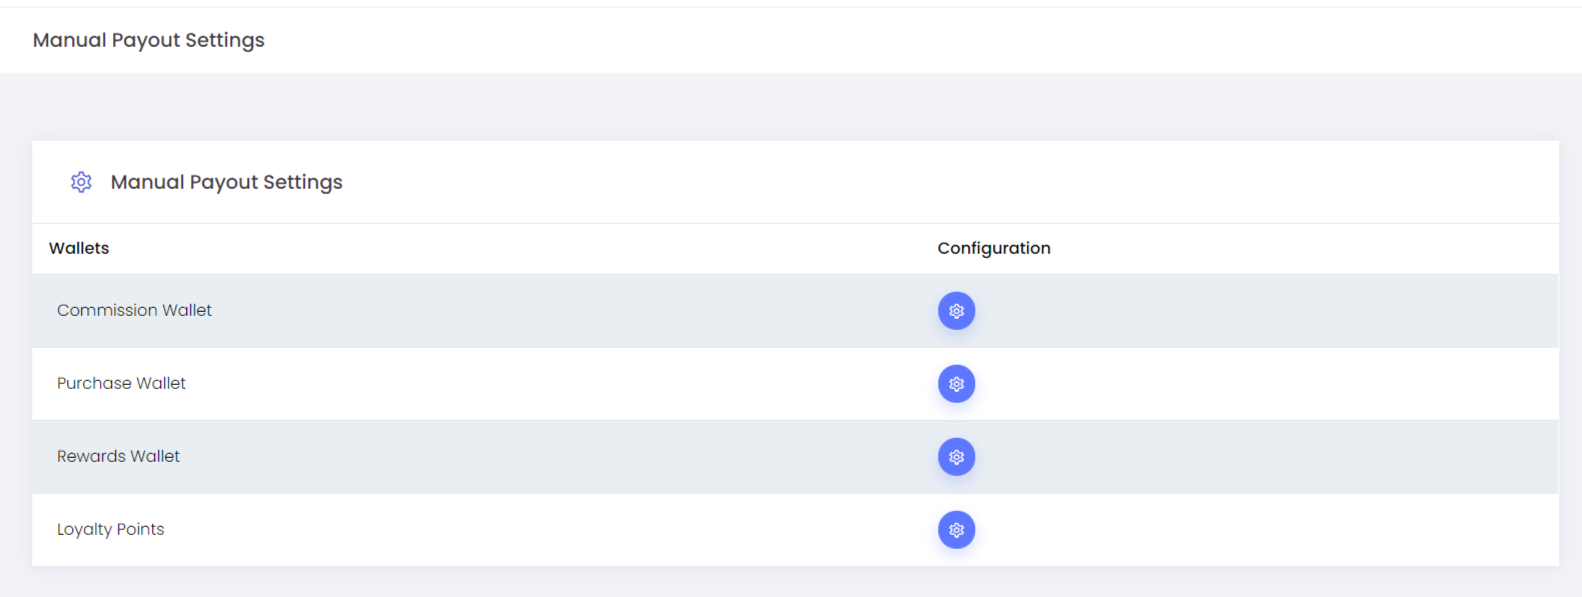
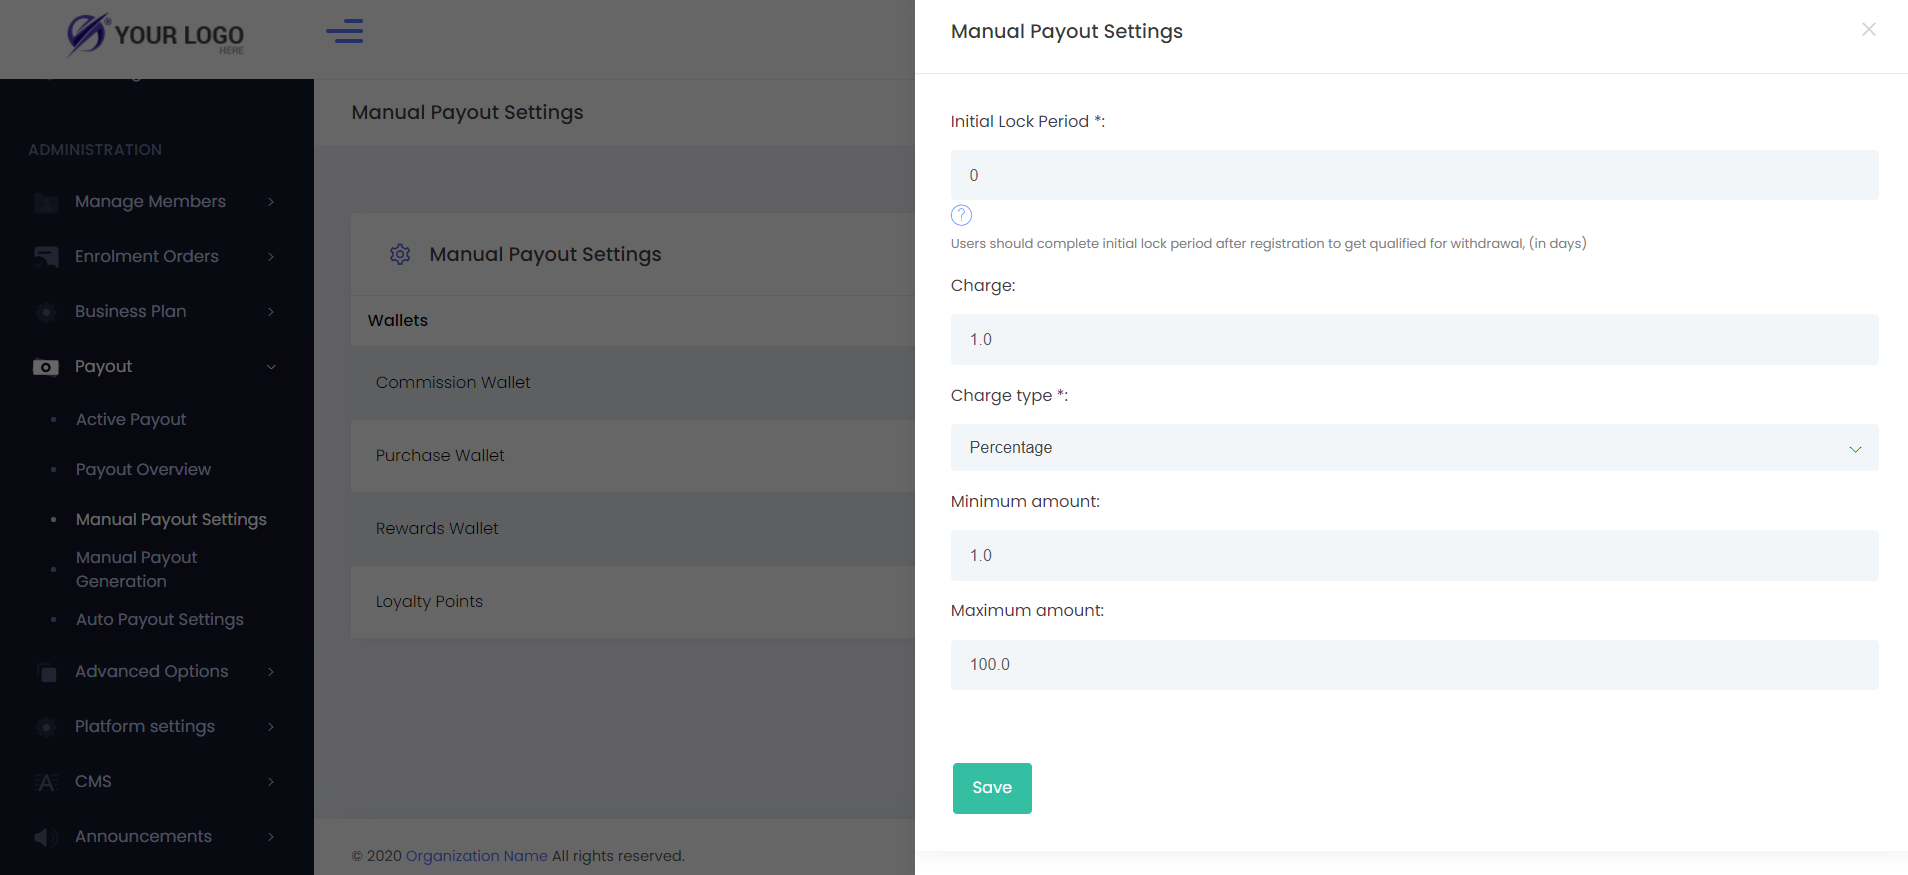
Configurations
- Initial Lock Period - The time period (in days) from which the manual payout must be applicable to users after the registration. Users should complete the initial lock period after registration to get qualified for withdrawal.
- Eg:- If we set the Initial Lock Period to be 10 days, then the Manual payout for the users will be active only after 10 days of registration
- Charges - If there are any changes for the Payout process, that could be set here
- Charge Type - To set the charge type as percentage or price
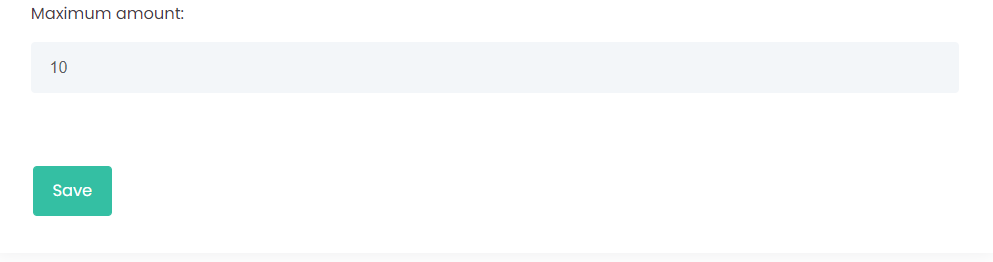
- Minimum Amount - The minimum wallet balance required for the payout process
- Maximum Amount - The maximum amount that could be withdrawn from the payout.

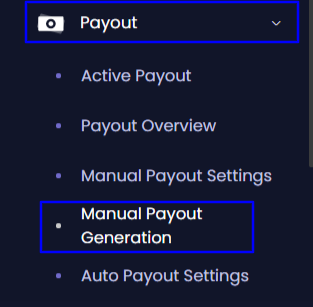
After the Manual Payout settings are done, Admin can generate the Payouts from Manual Payout Generation Menu.
There are 2 different ways with which the Manual Payout could be generated
-
Using the CSV
-
Generate Option
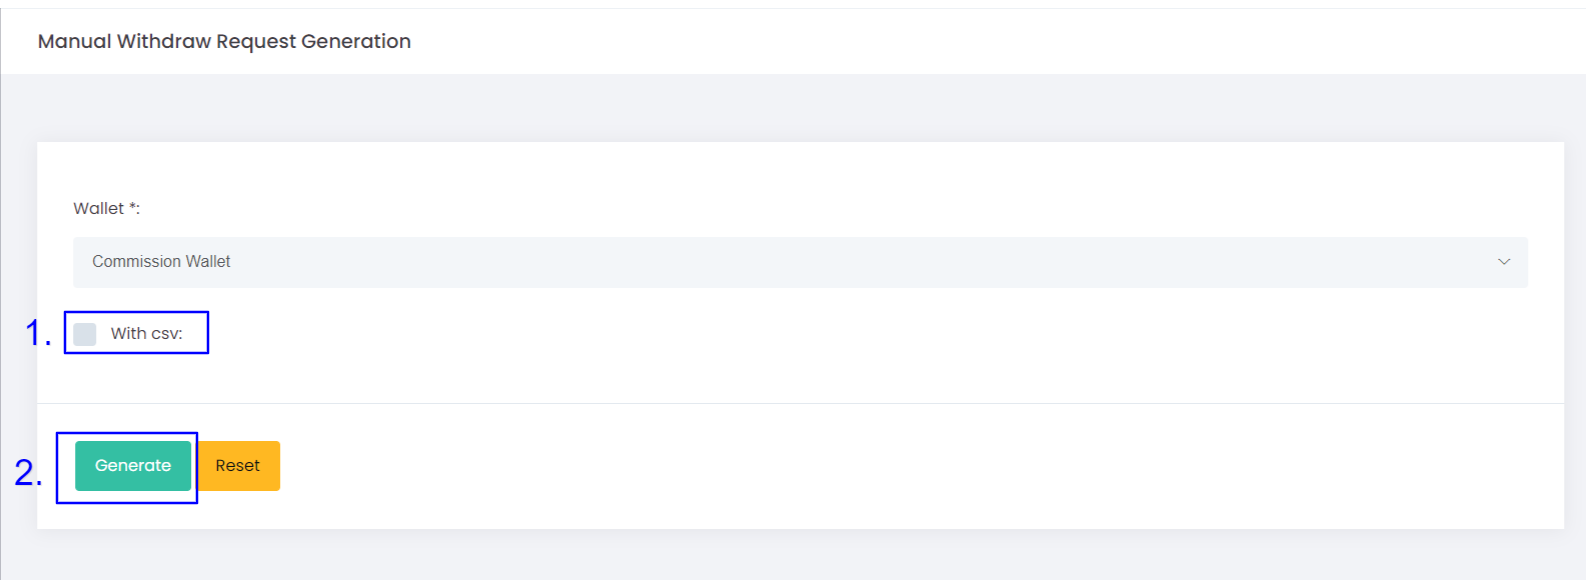
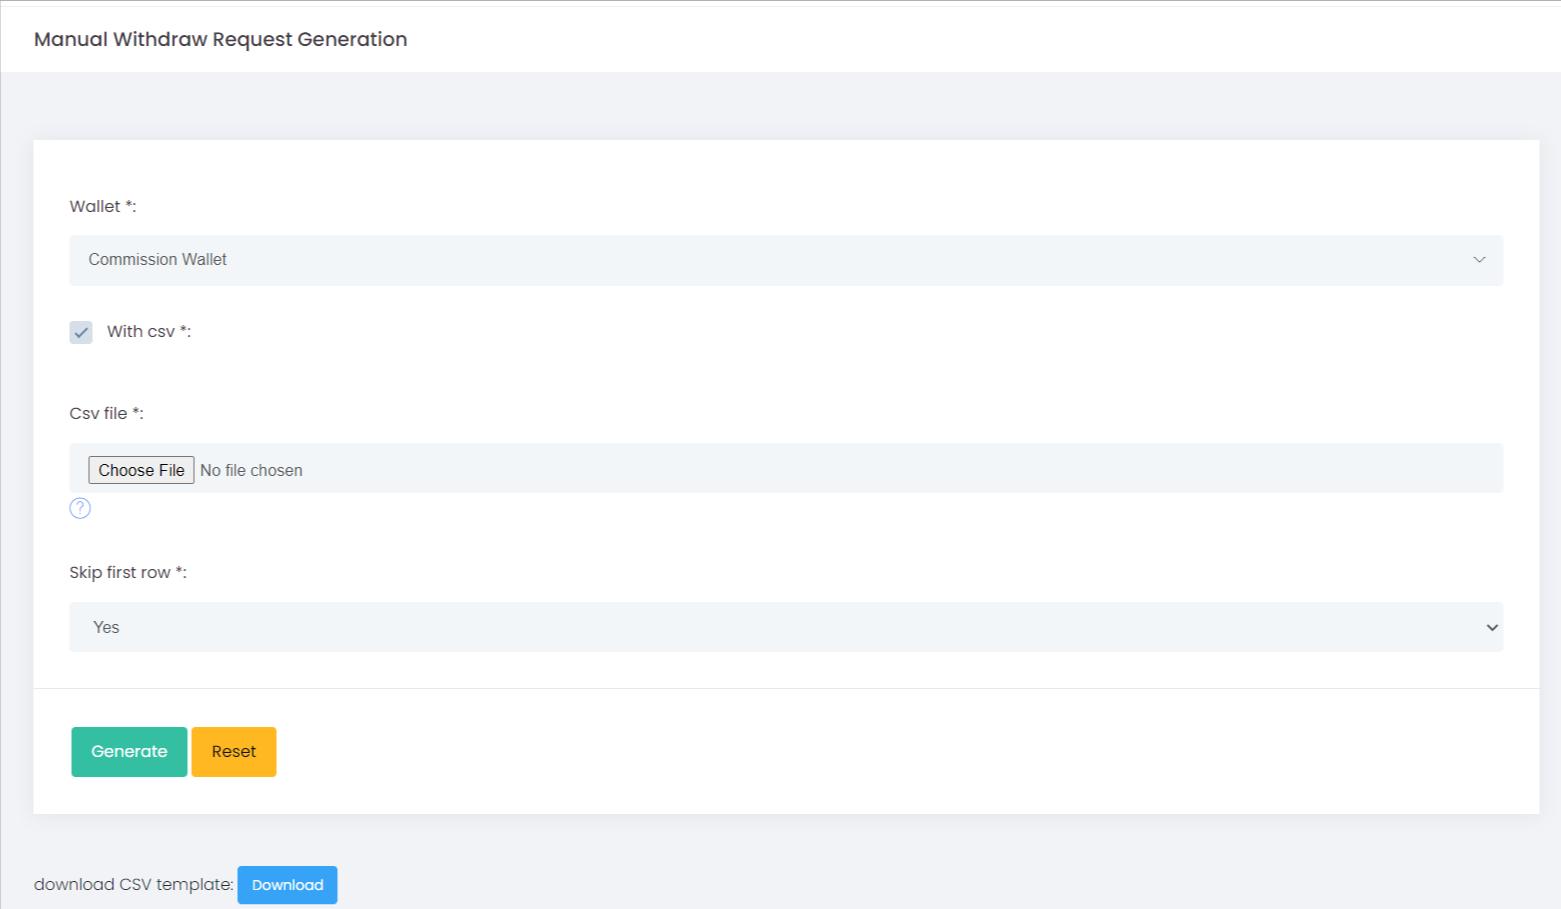
Using CSV
The benefit of using CSV is that the admin can generate the payout request for the required specific users.
How to generate the Payout Request using the CSV option?
-
Choose the required wallet with which the payout must be generated
-
Check the With CSV option, which will provide further steps to follow
-
Download the CSV file using the “Download” option
-
Fill in the username of the users of which the Payout request must be generated
-
Import the CSV using the “Choose file” from the “CSV file ” option
-
Generate the Payout requests using the “Generate” button
- Wallet - The wallet from which the commission is to be generated
- With CSV - Check this option to import the CSV file for the payout generation
- CSV file & Choose file - Import the file with the filled up data
- Skip the first row - Set it Yes, so that the first row (Heading) will be excluded while running the process
- Generate - To generate the payout request
- Reset - Option reset the pre-filled data
- download CSV template/ Download button - Using this option, Admin can download the CSV and fill in the username and import it to process further steps.
Generate Option
If the admin is using the Generate option, then the Payout request will be generated to all users who have the set criteria for the chosen wallet.
To generate the manual payout, select the required wallet, and then click on the Generate button.

Ones the Manual payout is generated using any of the 2 methods, the requests will be available in the Active payout and the admin can process the payout (https://epixelsoftware.help/docs/epixel-mlm-software-back-office-administration/V-15/administration?lang=EN)
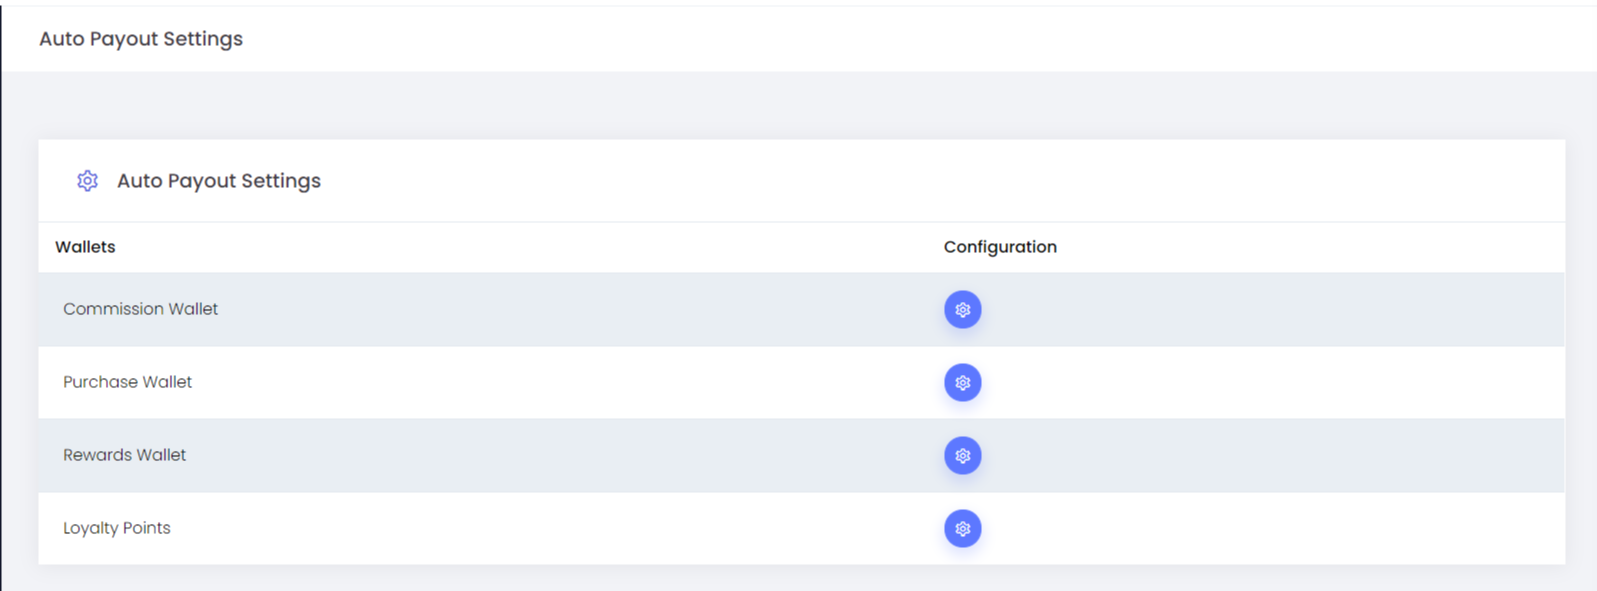
The Auto Payout settings help the Admin to generate the payout automatically once the data has been set.
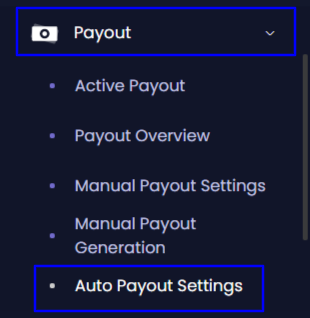
The configurations could be made for all the available Wallets in the system..
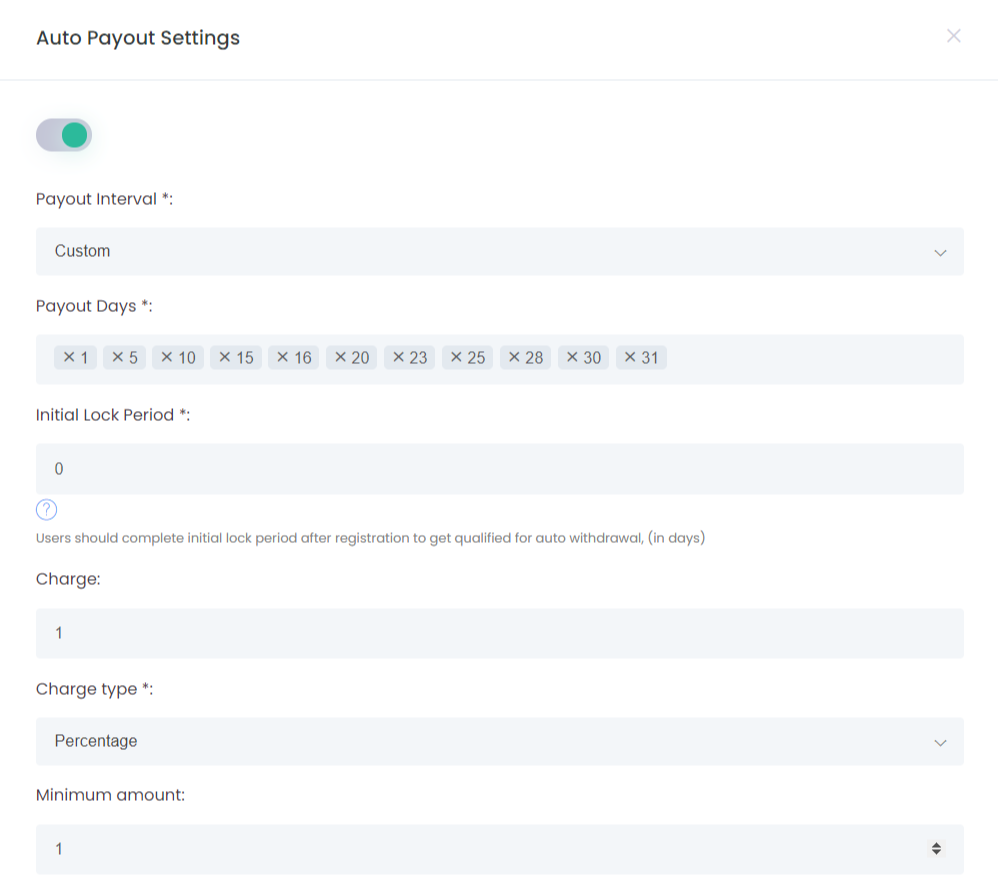
- Payout Interval - The time period at which the payout must be processed, there is Weekly, Monthly, and custom payout days
- Initial Lock Period - The time period (in days) from which the manual payout must be applicable to users after the registration. Users should complete the initial lock period after registration to get qualified for withdrawal.
- Eg:- If we set the Initial Lock Period to be 10 days, then the Manual payout for the users will be active only after 10 days of registration
- Charges - If there are any changes for the Payout process, that could be set here
- Charge Type - To set the charge type as percentage or price
- Minimum Amount - The minimum wallet balance required for the payout process
- Maximum Amount - The maximum amount that could be withdrawn from the payout.
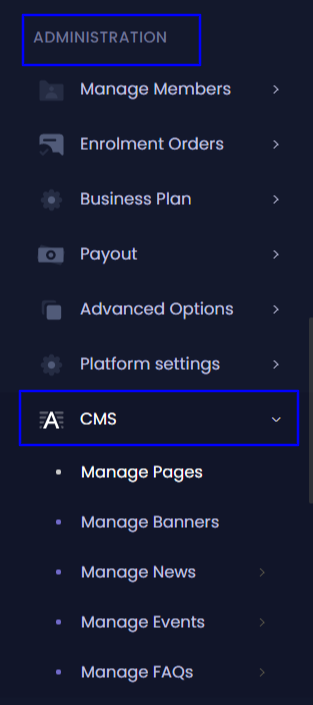
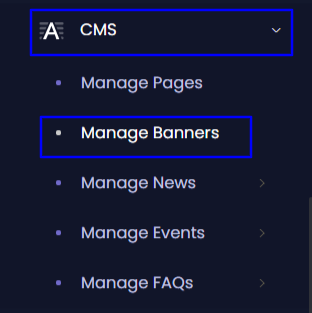
A content management system (CMS) is used to manage the creation and modification of digital content in the system.
Example of the CMS Page

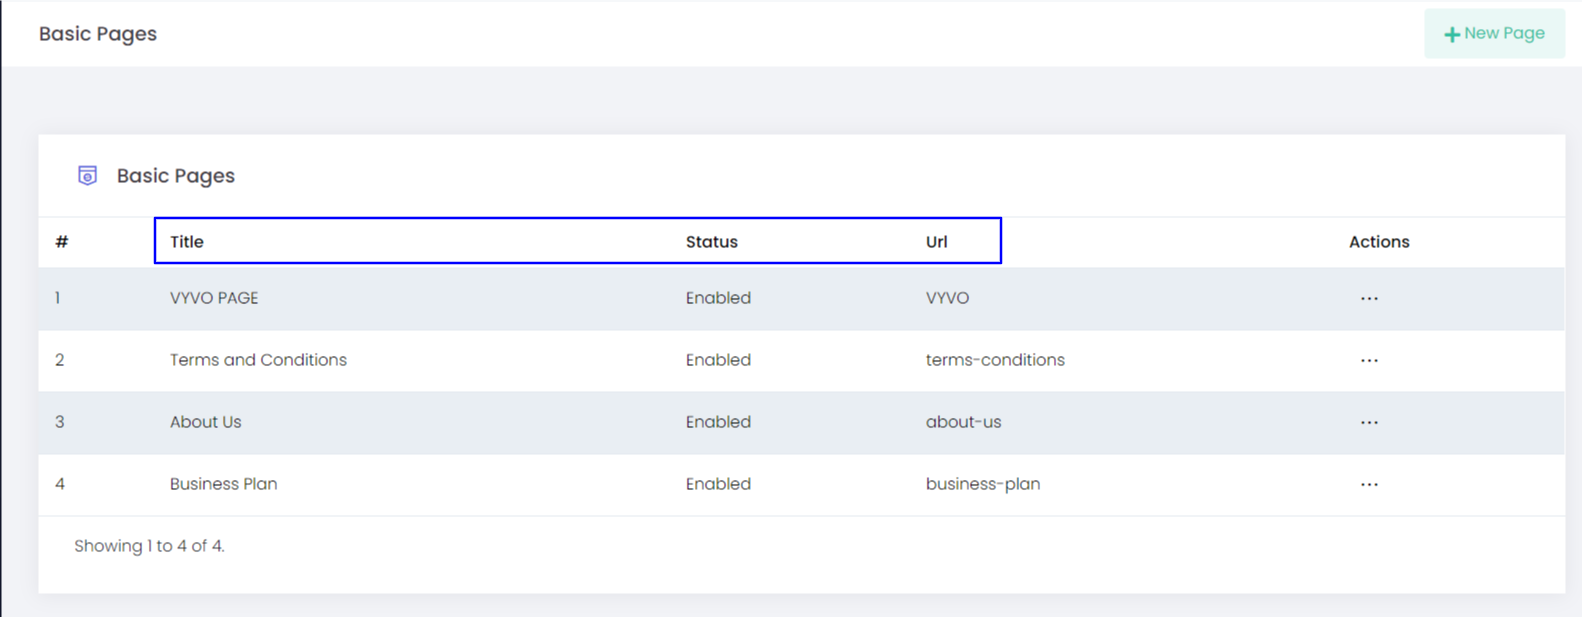
Manage Page
This option helps to create a new page and manage them for the Website.
Admin can create pages like Terms and Conditions, About Us, etc. so that these will be displayed on the landing page.
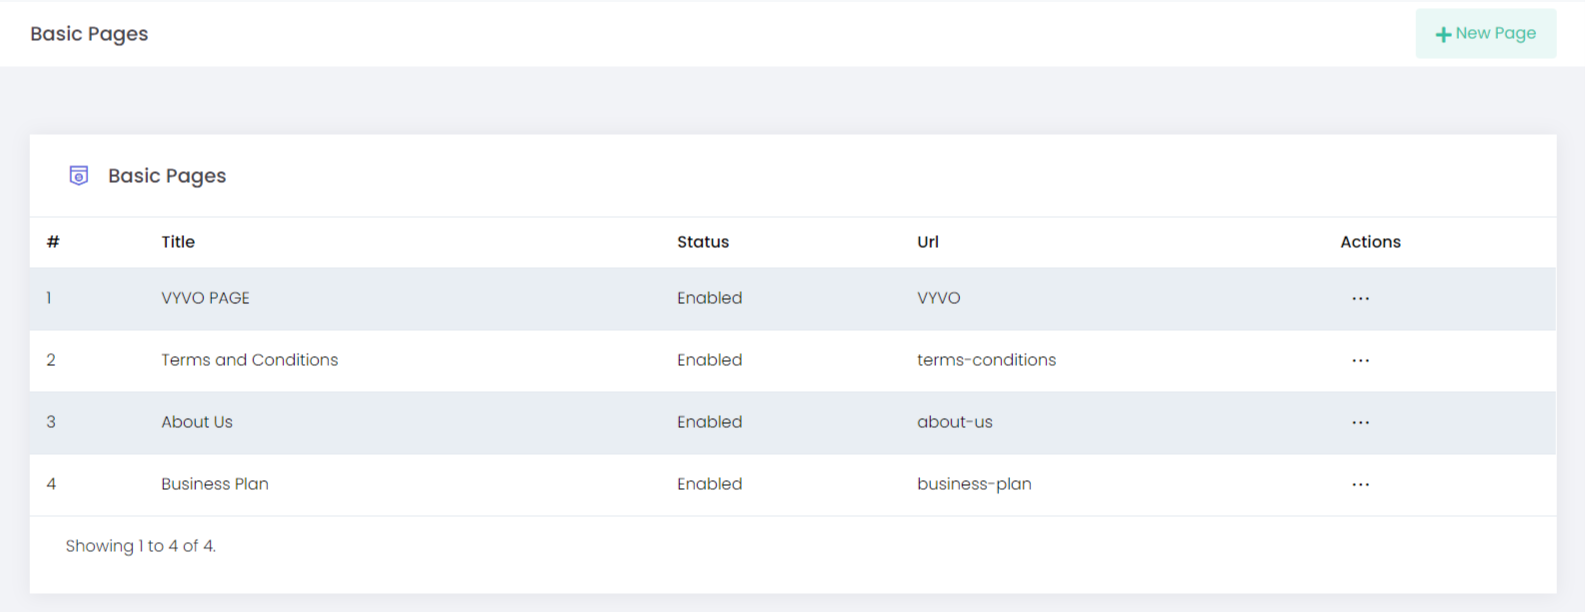
Title - The title given for the Page
Status - Show status of the page, whether the page is enabled or disabled
Url - The URL identifies the particular page on a website in an easy to read
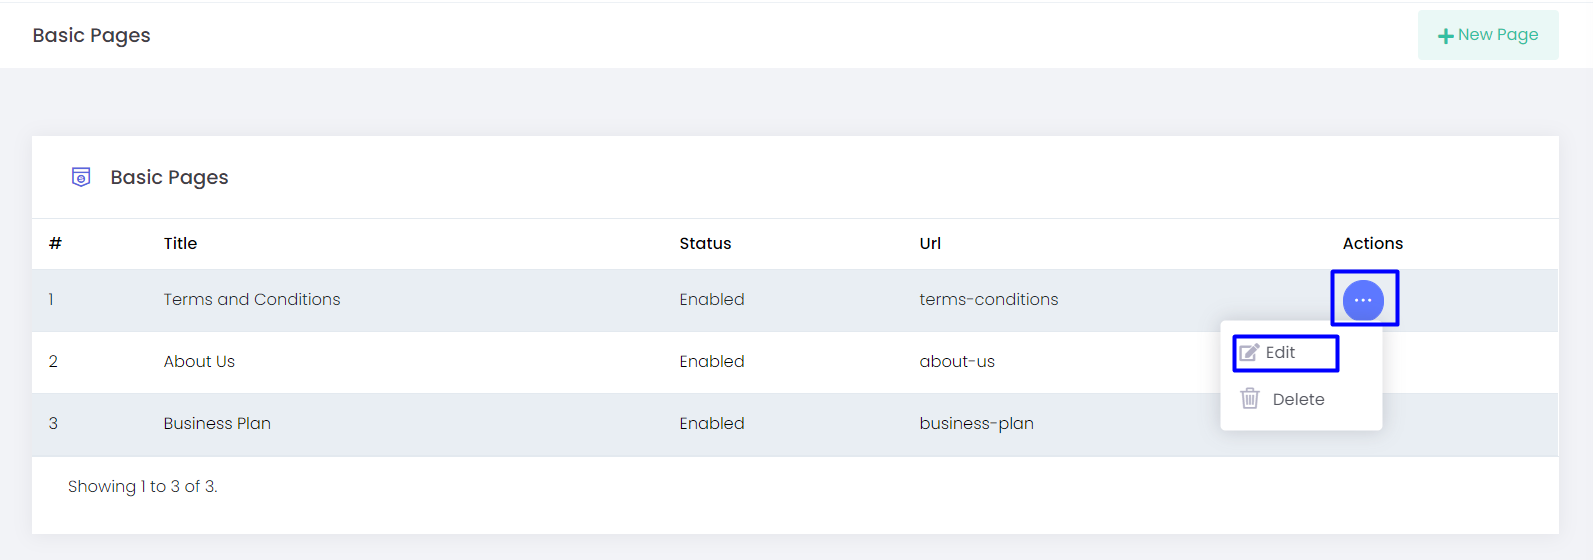
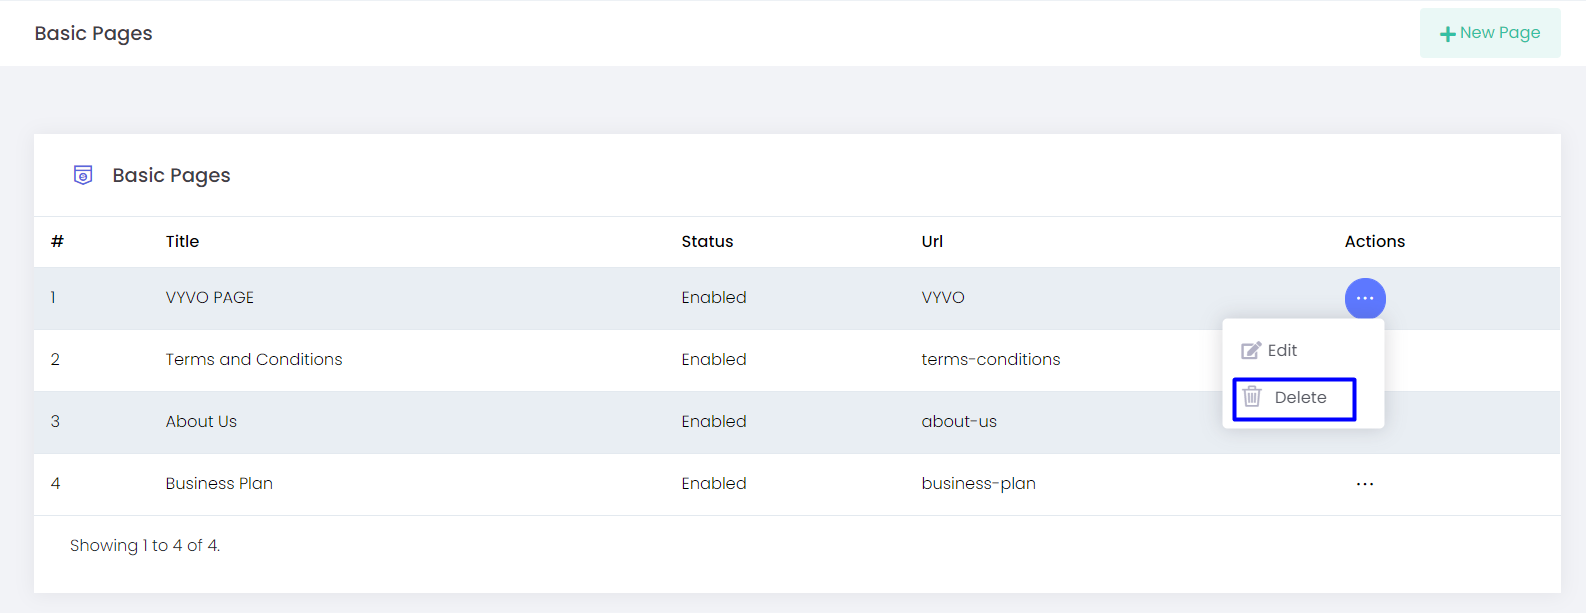
Actions
This option helps to Edit and Delete the pages

- Edit - Admin can edit the fields like:
- Title - The title of the page could be changed here
- Subtitle - The subtitle of the page could be edited from this option
- Body - The description that needed to be displayed on the page could be edited from this option.
- Status - The status of the page, whether the page could be enabled or disabled from this option.
- URL slug - You can provide a slug which identifies the particular page on a website in an easy to read form.
- Theme - You can choose whether the page must be on the landing page or on the back office
- Image - You can upload the image for the page.
- Delete - You can delete the already created page
You can make pages in multiple languages if the languages are configured in the system.
Once saved, the changes will be displayed in the front end or on the backend as configured
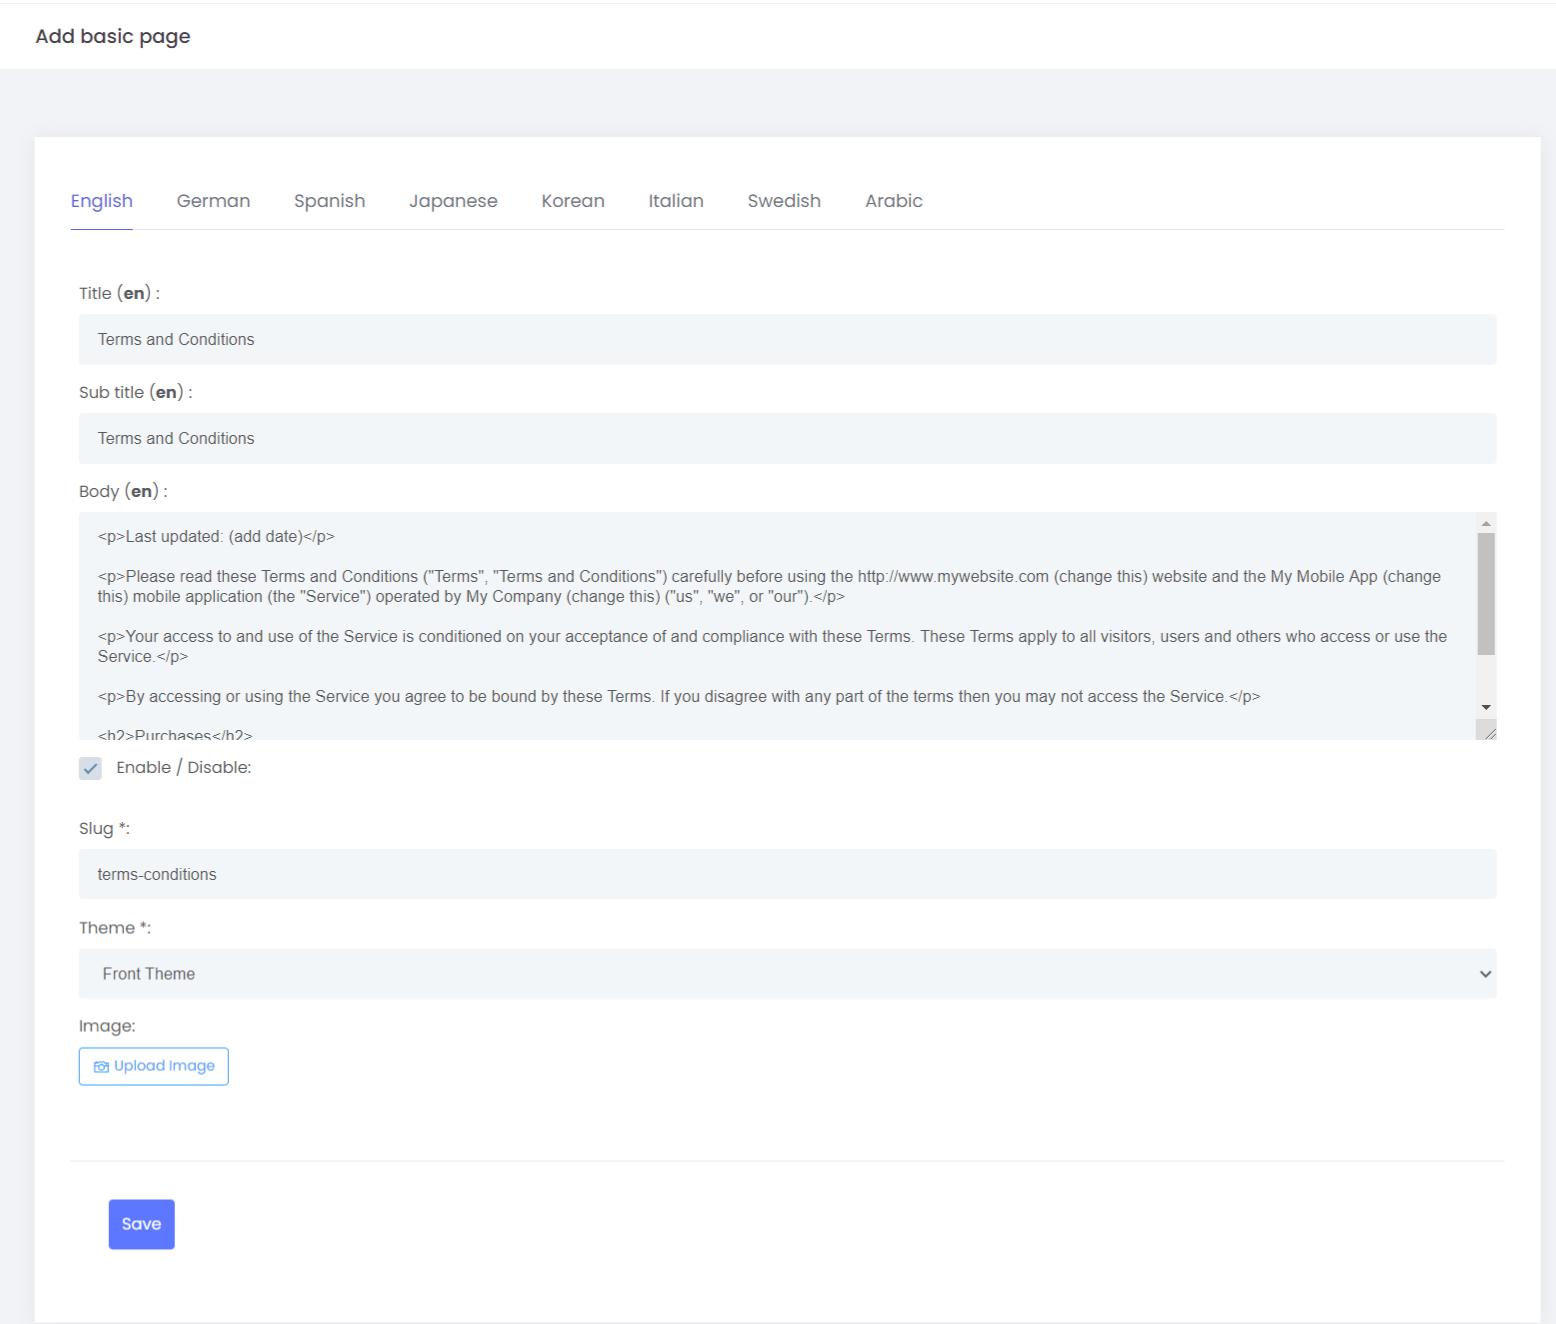
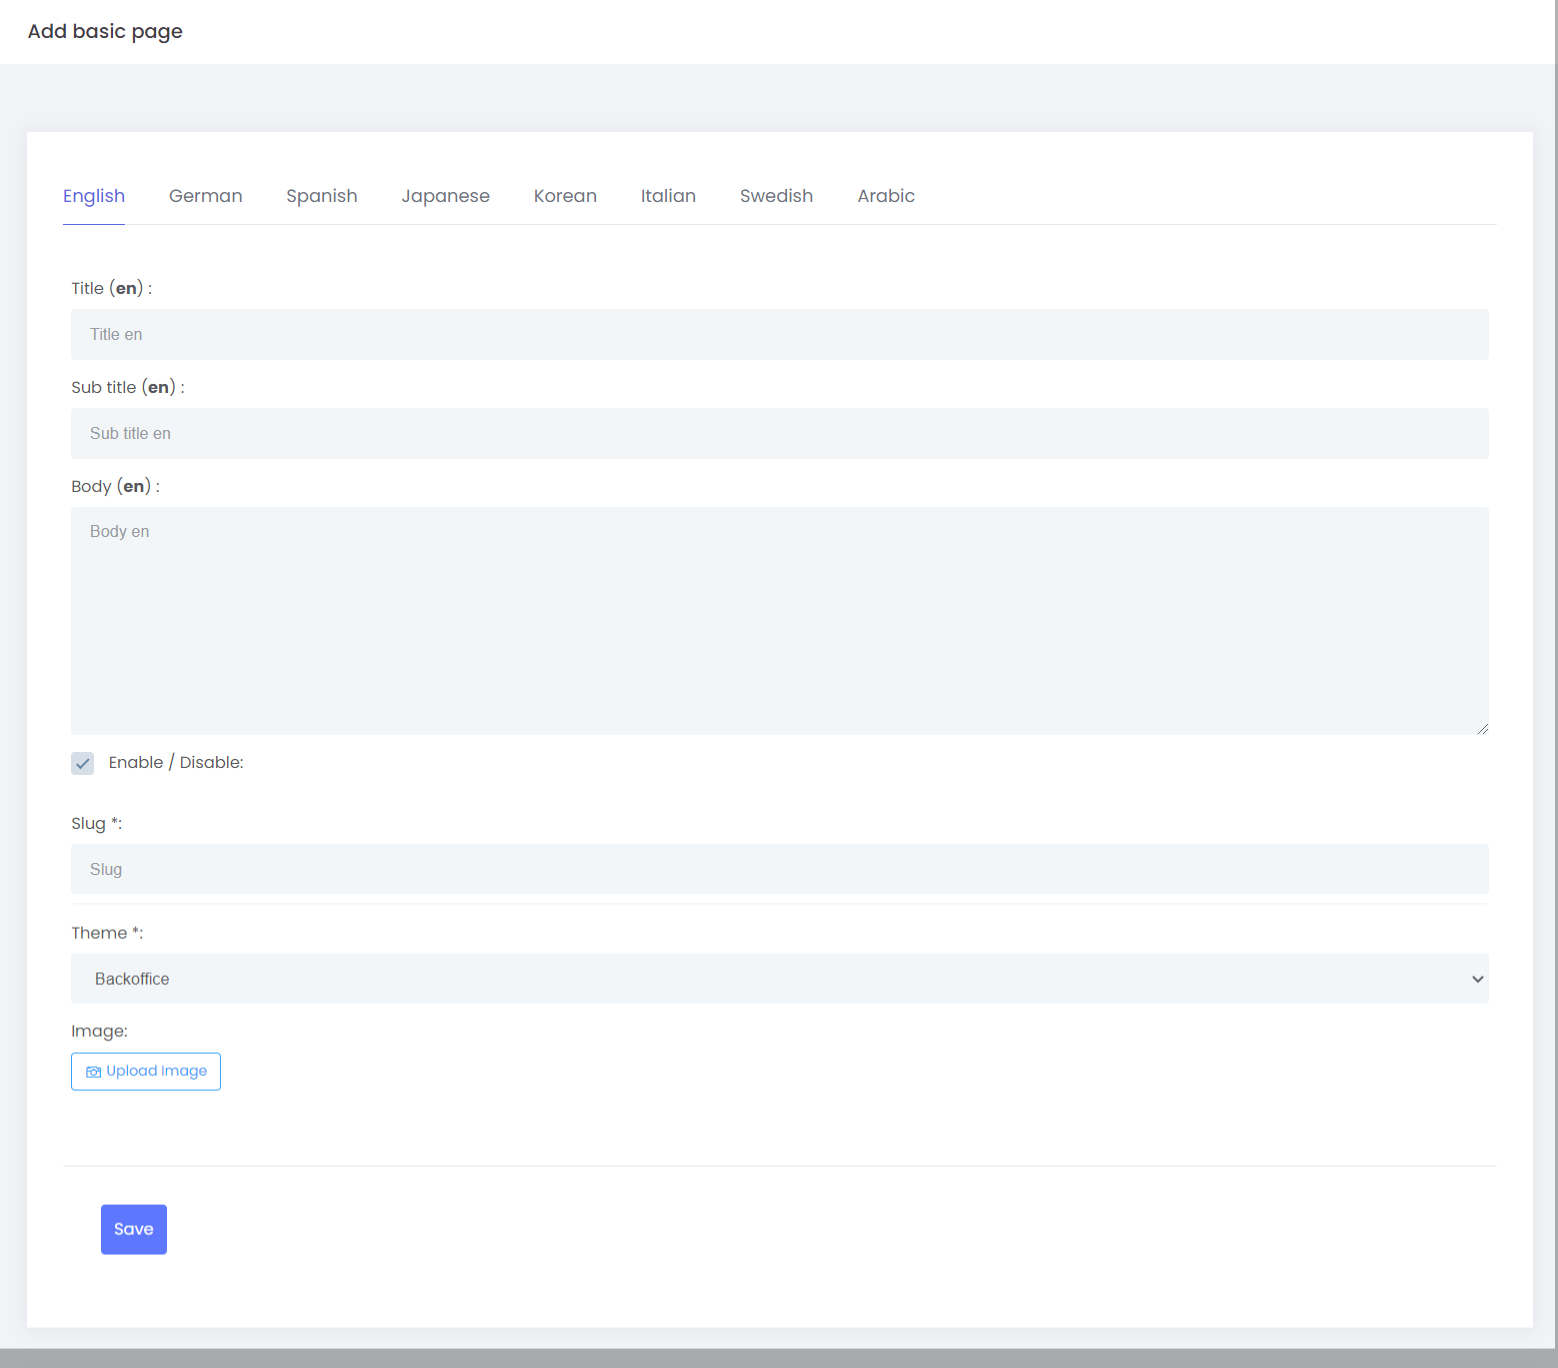
How the Admin can add a new page?
- We have a "New Page" button to add a new page
- Fill in the details like:
- Title - The title that needs to be given for the Page
- Subtitle - The subtitle for the page
- Body - The description that needed to be displayed on the page
- Enable/ Disable - The status of the page, whether the page could be enabled or disabled could be set.
- Slug - You can provide a unique identifier which identifies the page on a website in an easy to read form.
- Theme - You can choose whether the page must be on the landing page or on the back office
- Image - You can upload the image for the page
- You have an option to create the page in multiple languages if the languages are configured in the system.
- Once save the page will be created.
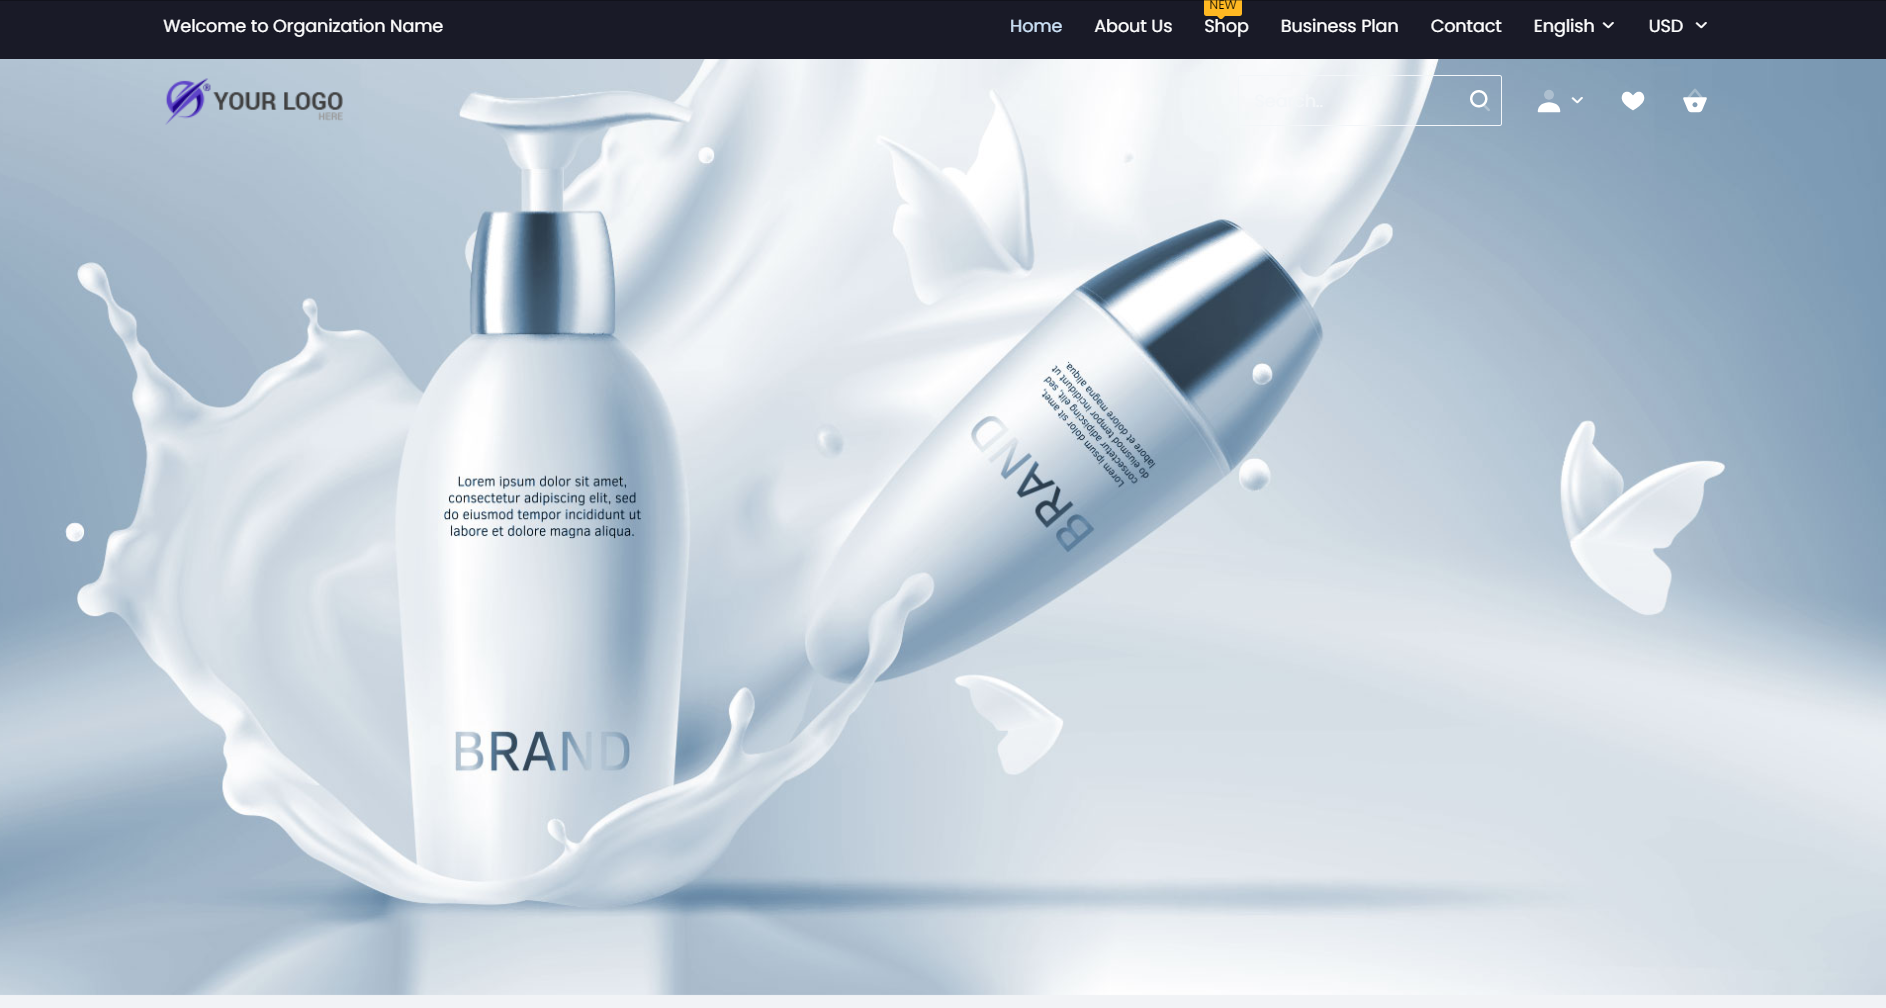
A Banner is an image that is placed on top of the website that appears at the top of every web page except the landing page or sales page.
Example Image of Banner in the landing page
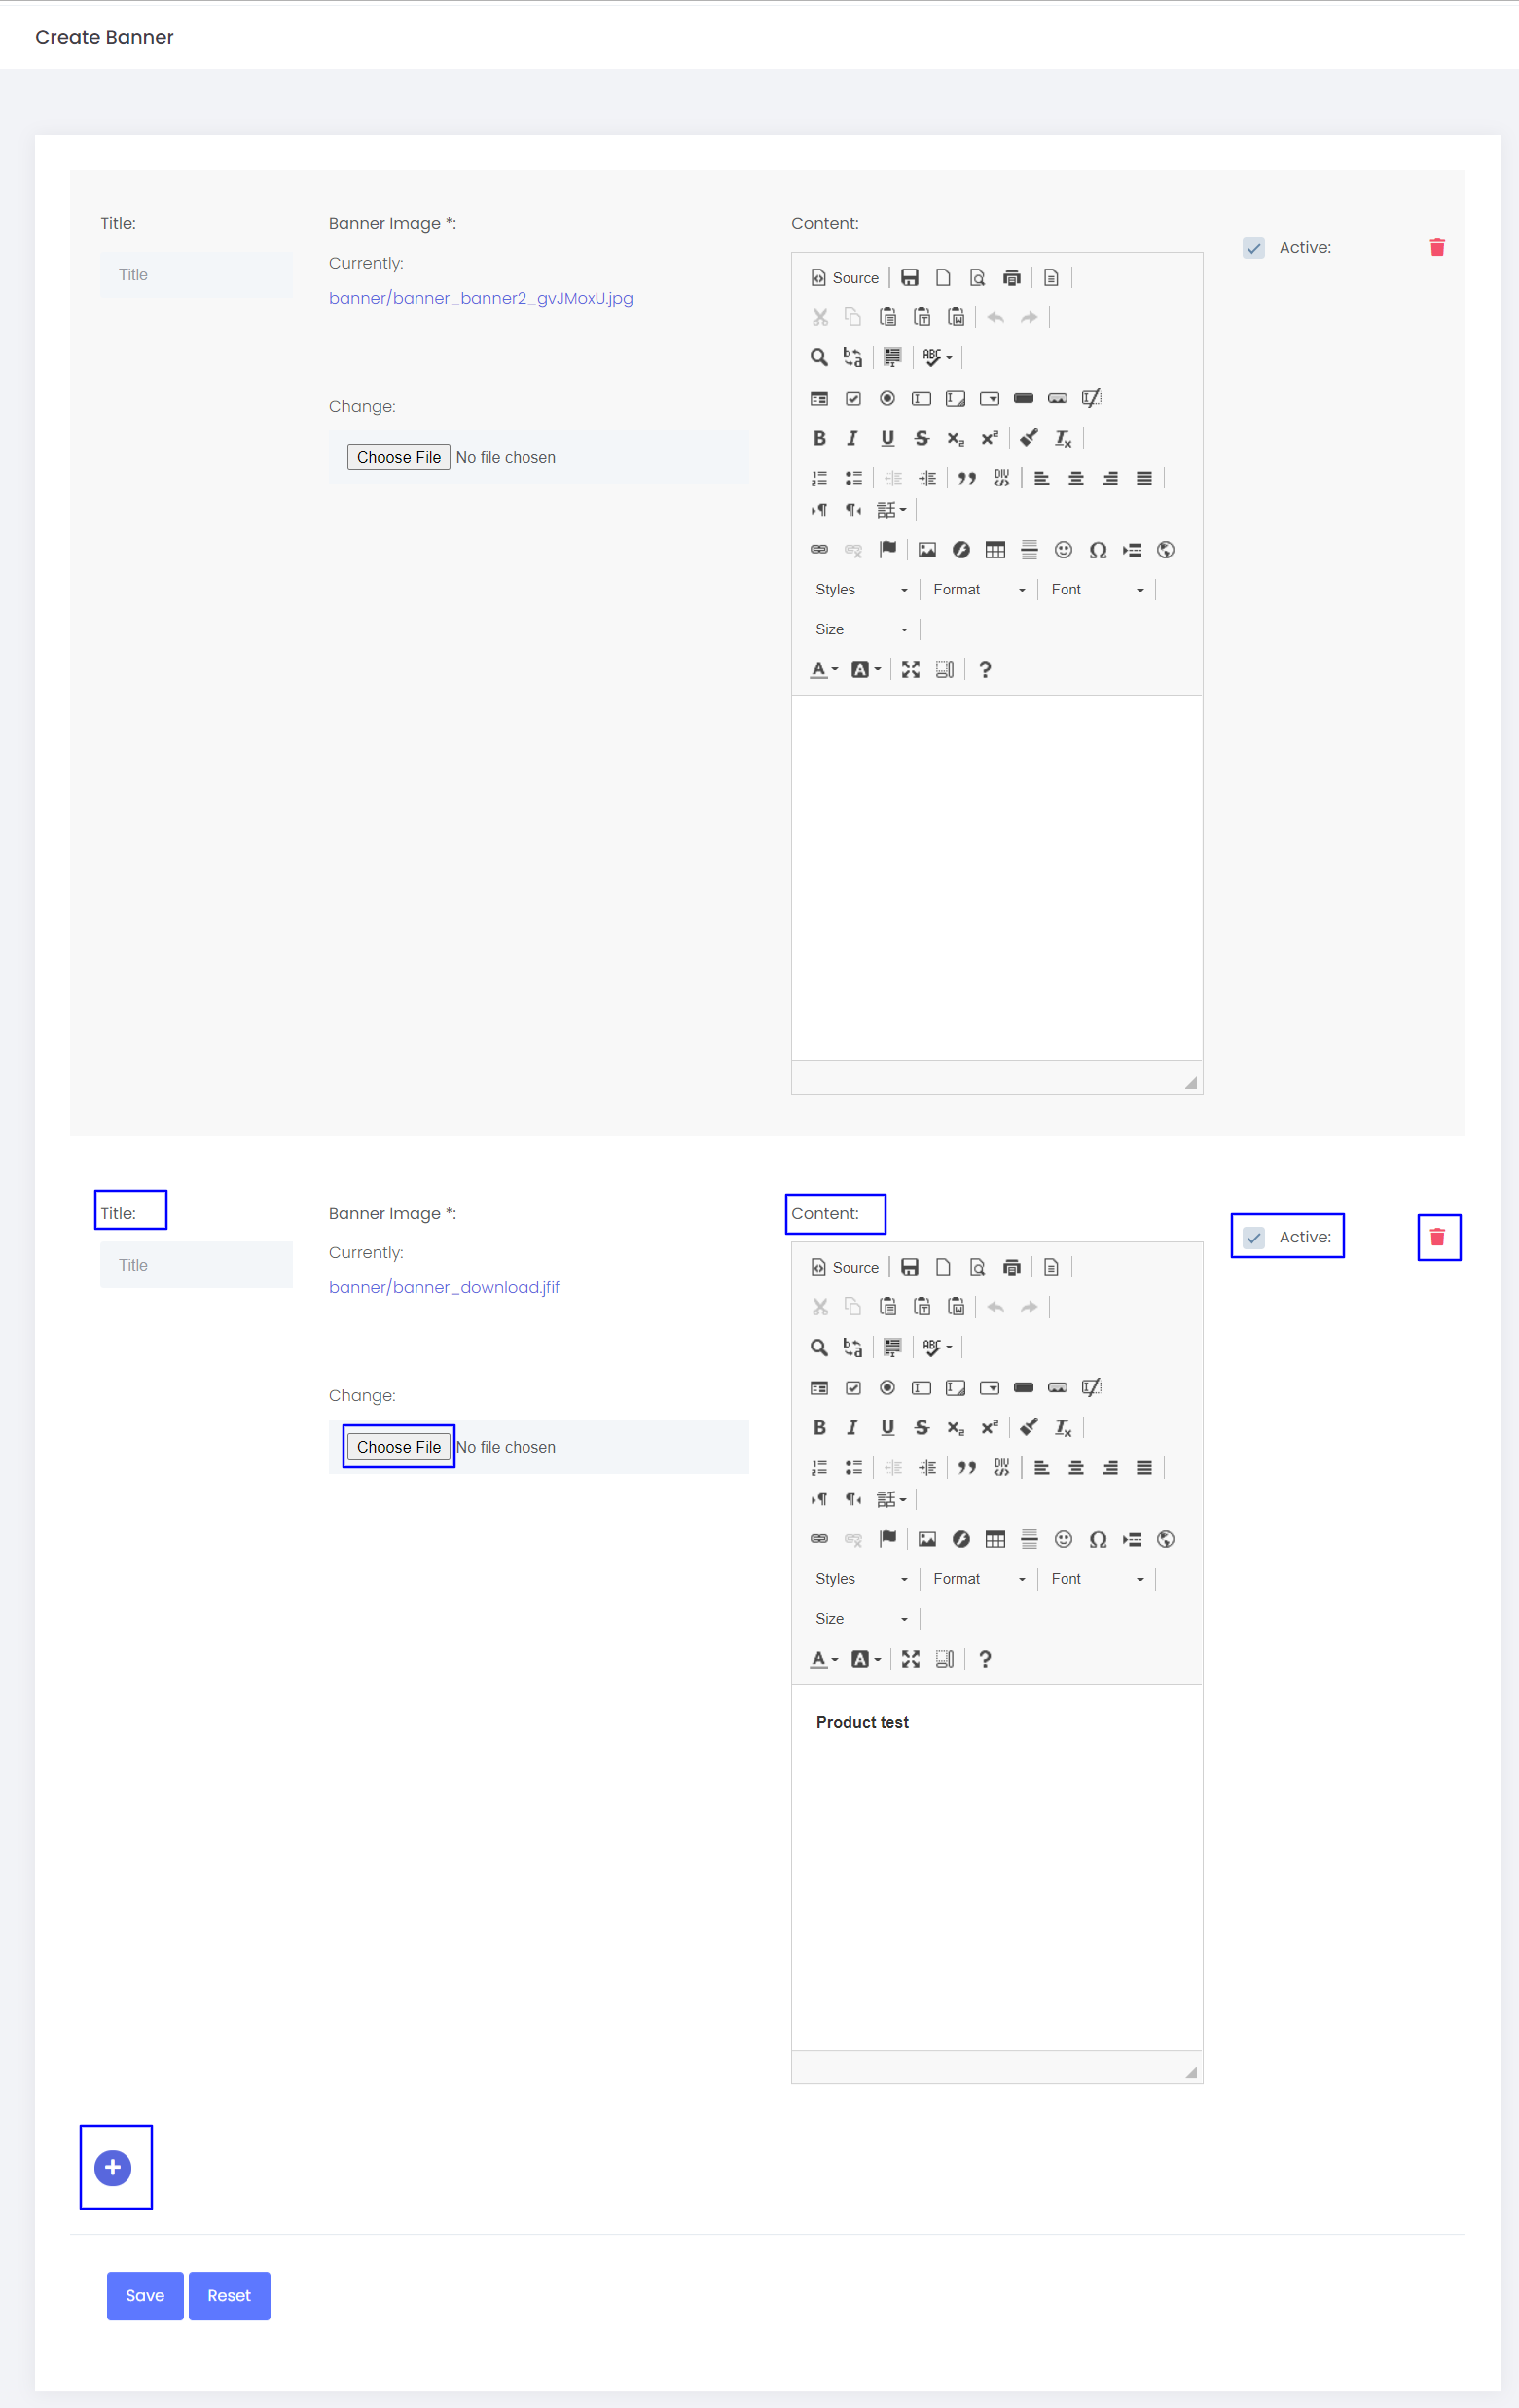
Create Banner
- On the Create banner page, there is an Add button, which is used to create a new banner
- You can give the Title for the banner from the Title filed
- There will be a default image in the Banner Image, if needed can upload a required new image from the Choose File option or use the default image
- You can put the required description for the banner from the "Content" option
- Check the "Active" option, so that the banner will be available on the landing page otherwise it will remain inactive until you make it active
- Ones saved, the banner will be displayed on the landing page
You have an option to edit/ manage and delete the created banners
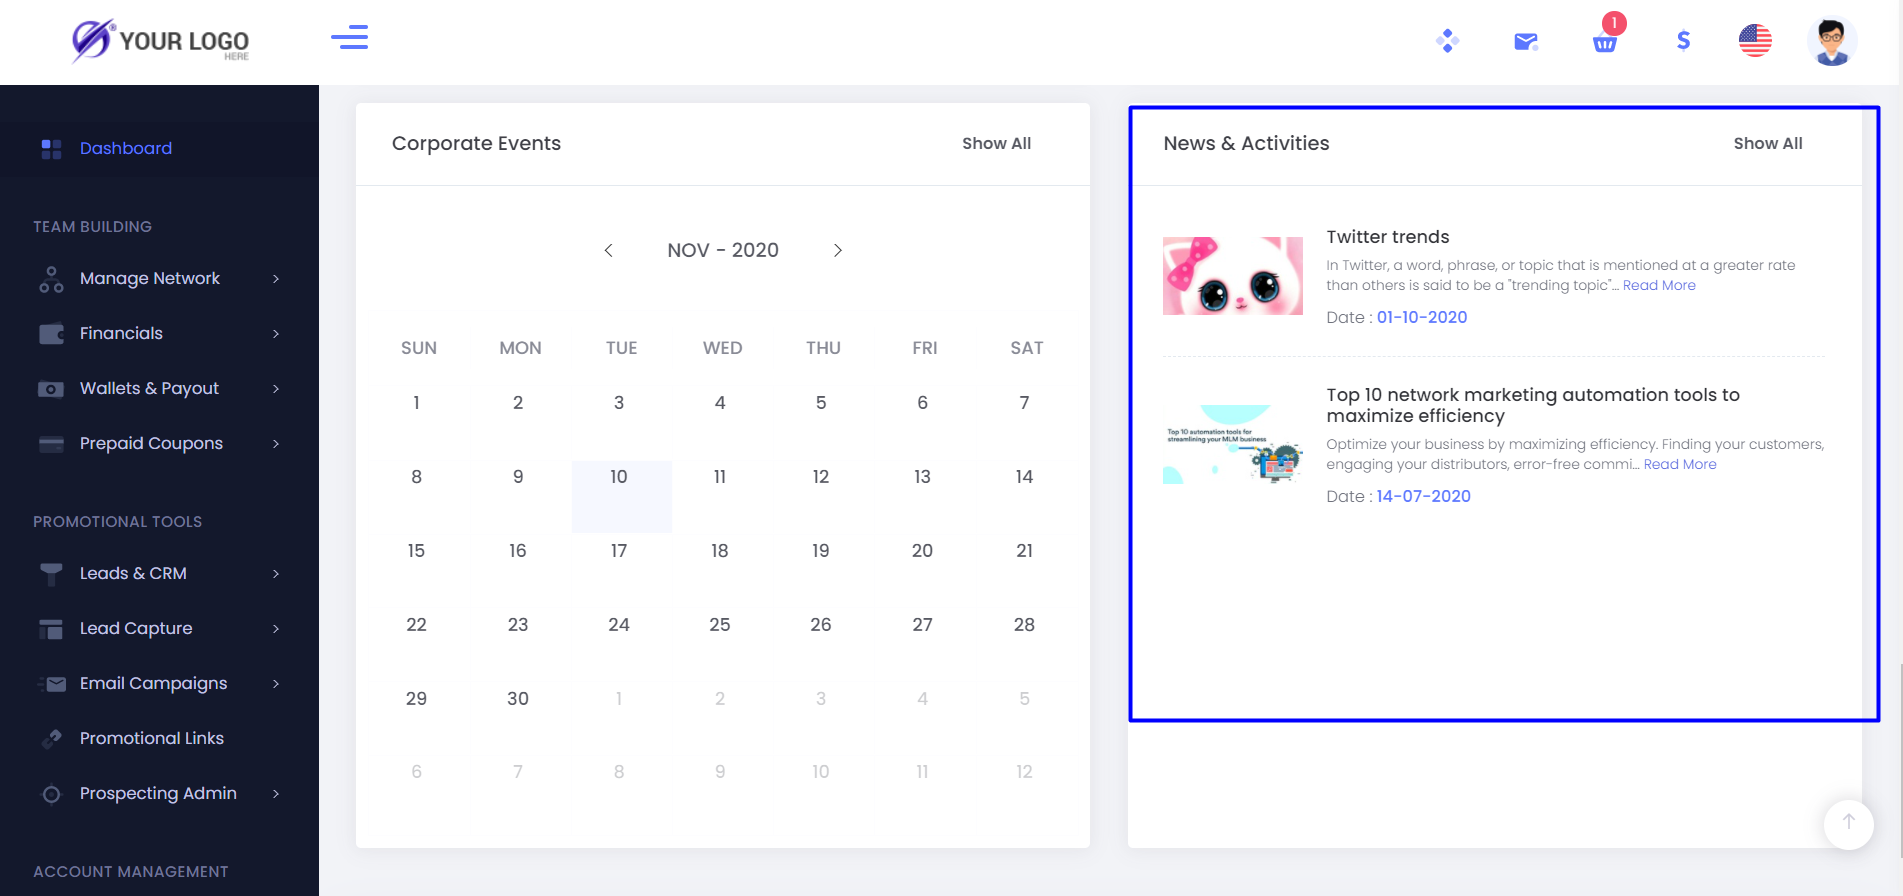
Admin can publish the News in the system using this option, which will be displayed in the Dashboard of the users
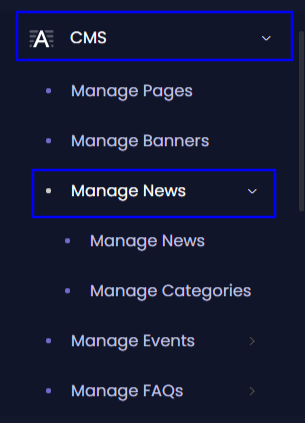
Example view of the News in the system
How to Add News?
1. You have to create a new category for the news in order to create the News
Manage Category
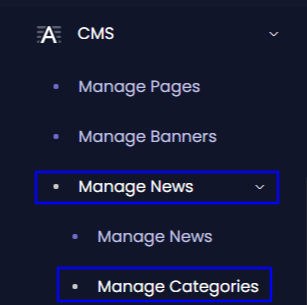
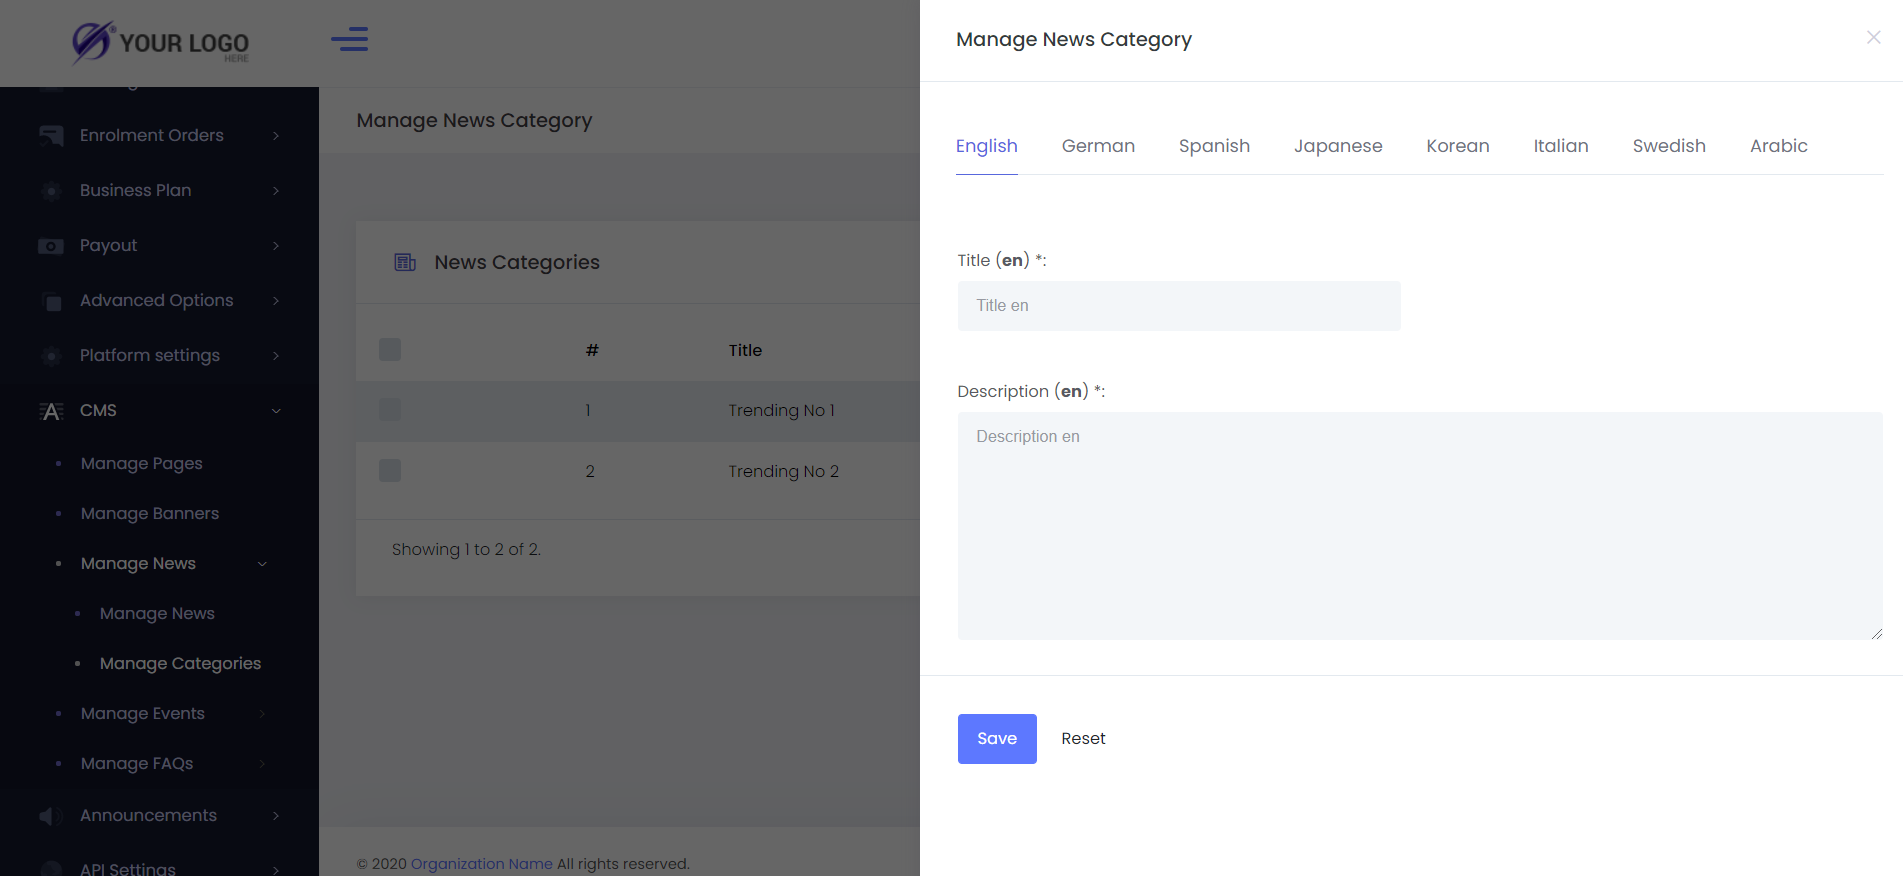
From Manage categories you can create a new category required for the news, you can click on the Add button, give the Title and the Description for the category which can be done in any languages configured in the system.
- Title - The title required for the news category
- Description - The description for the category
- Once saved, a new news category will be created
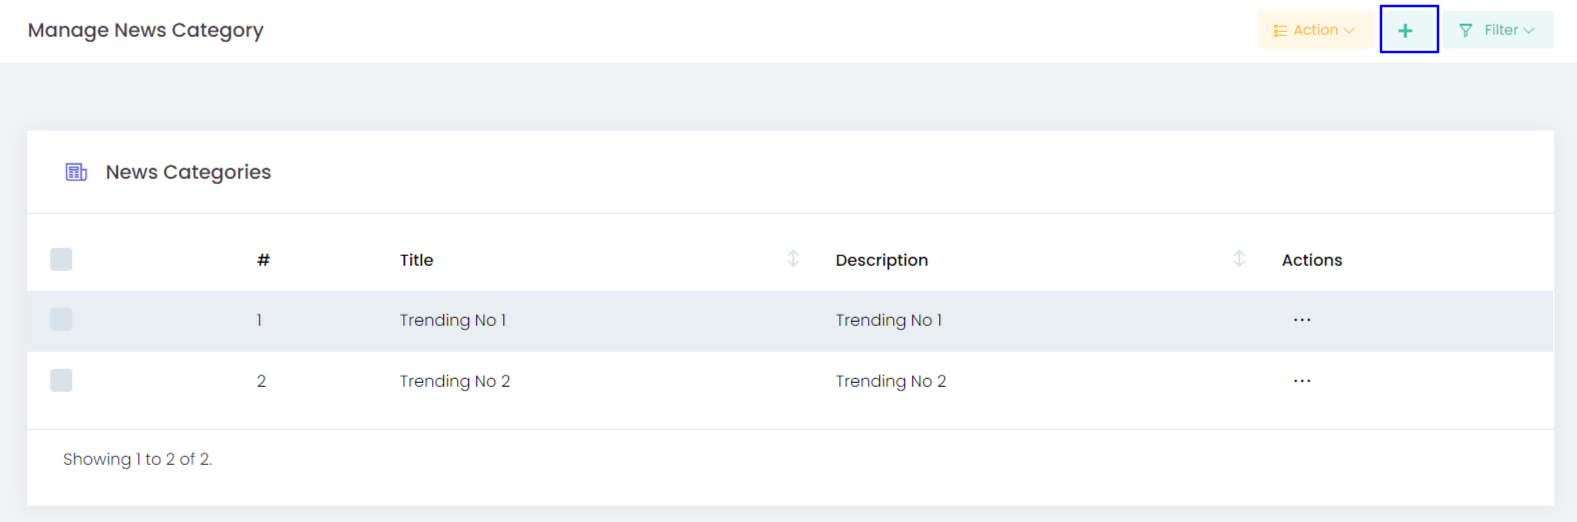
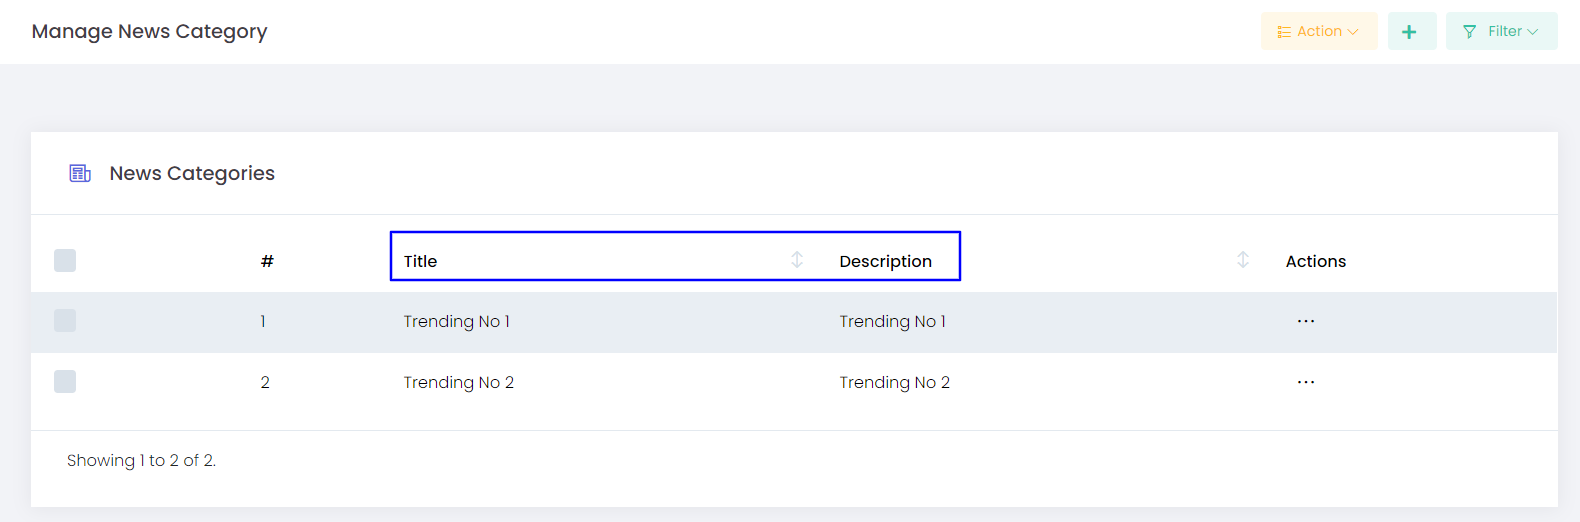
- Actions - You have an option to edit the already created category using this option
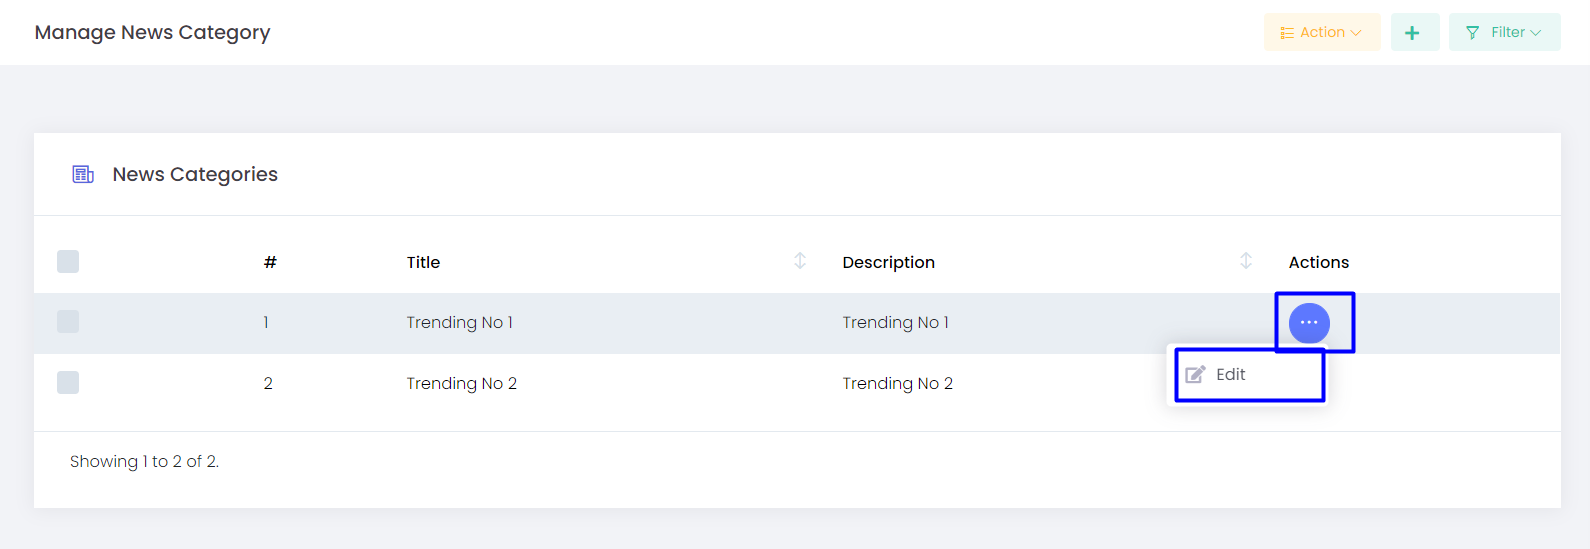
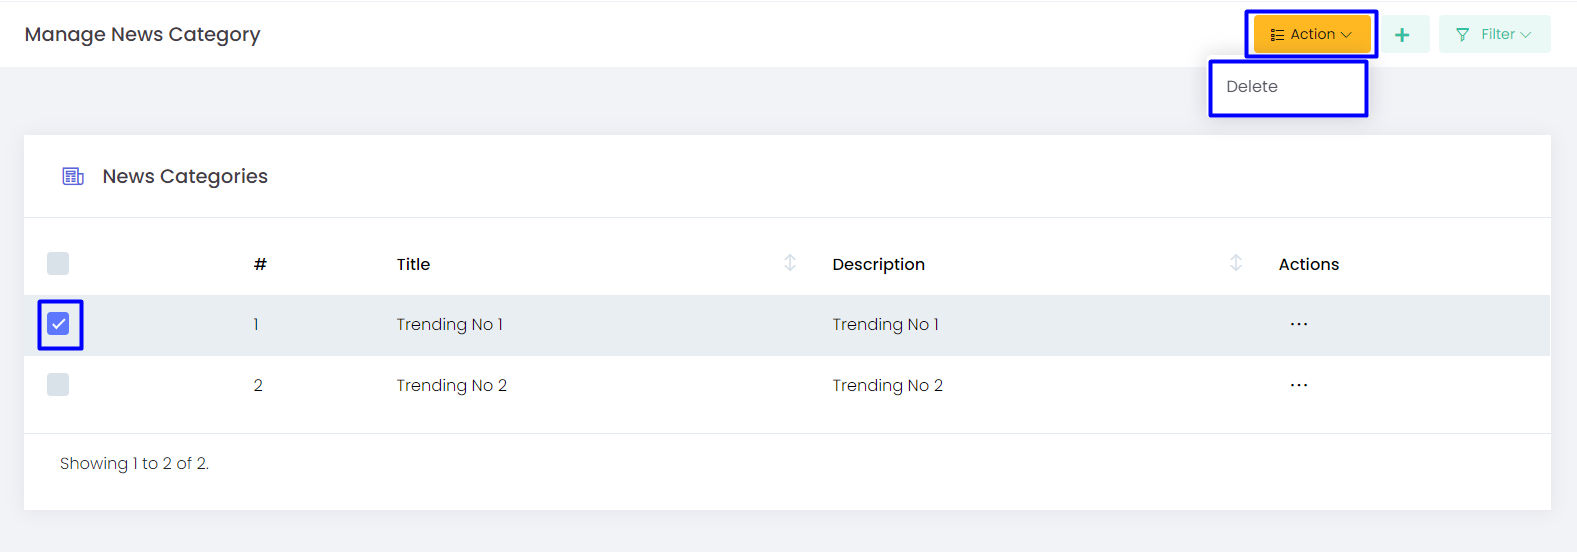
Action
You can select any of the categories, and Delete it via Action
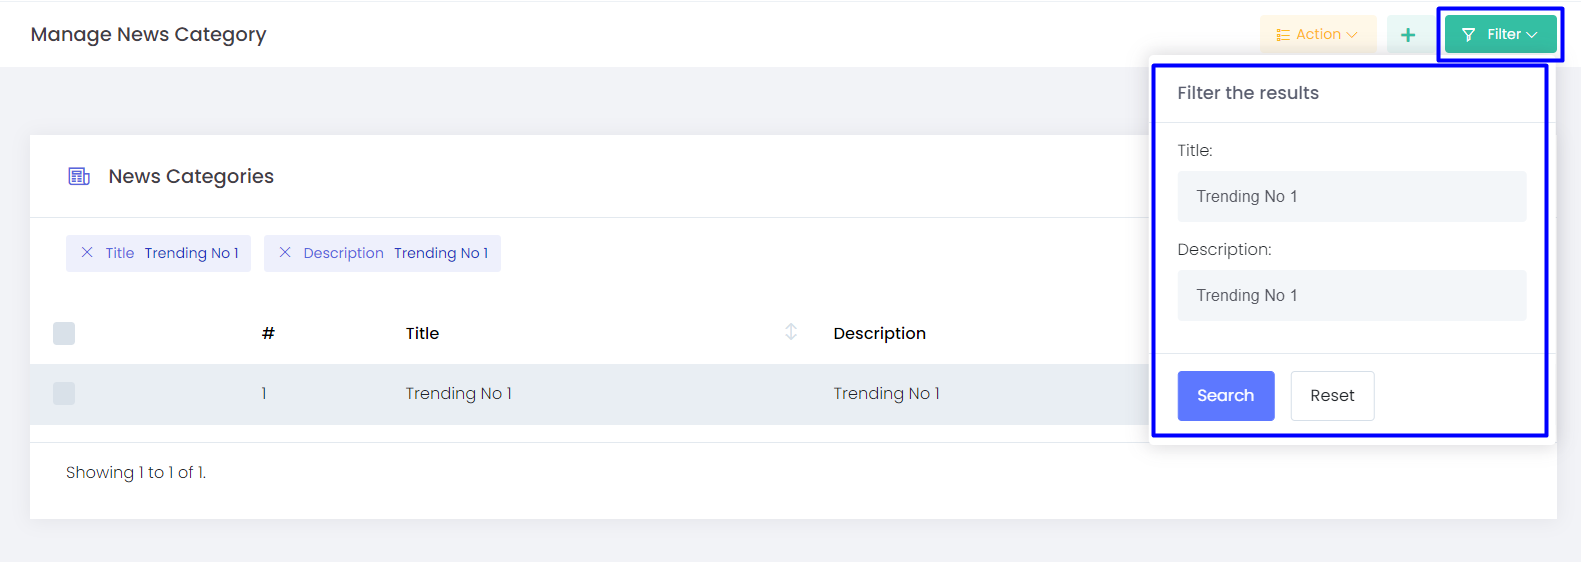
Filter
You can reach a particular required category by providing the Title and Description on the filter.
2. Once the category is been created, you can create the news via manage news
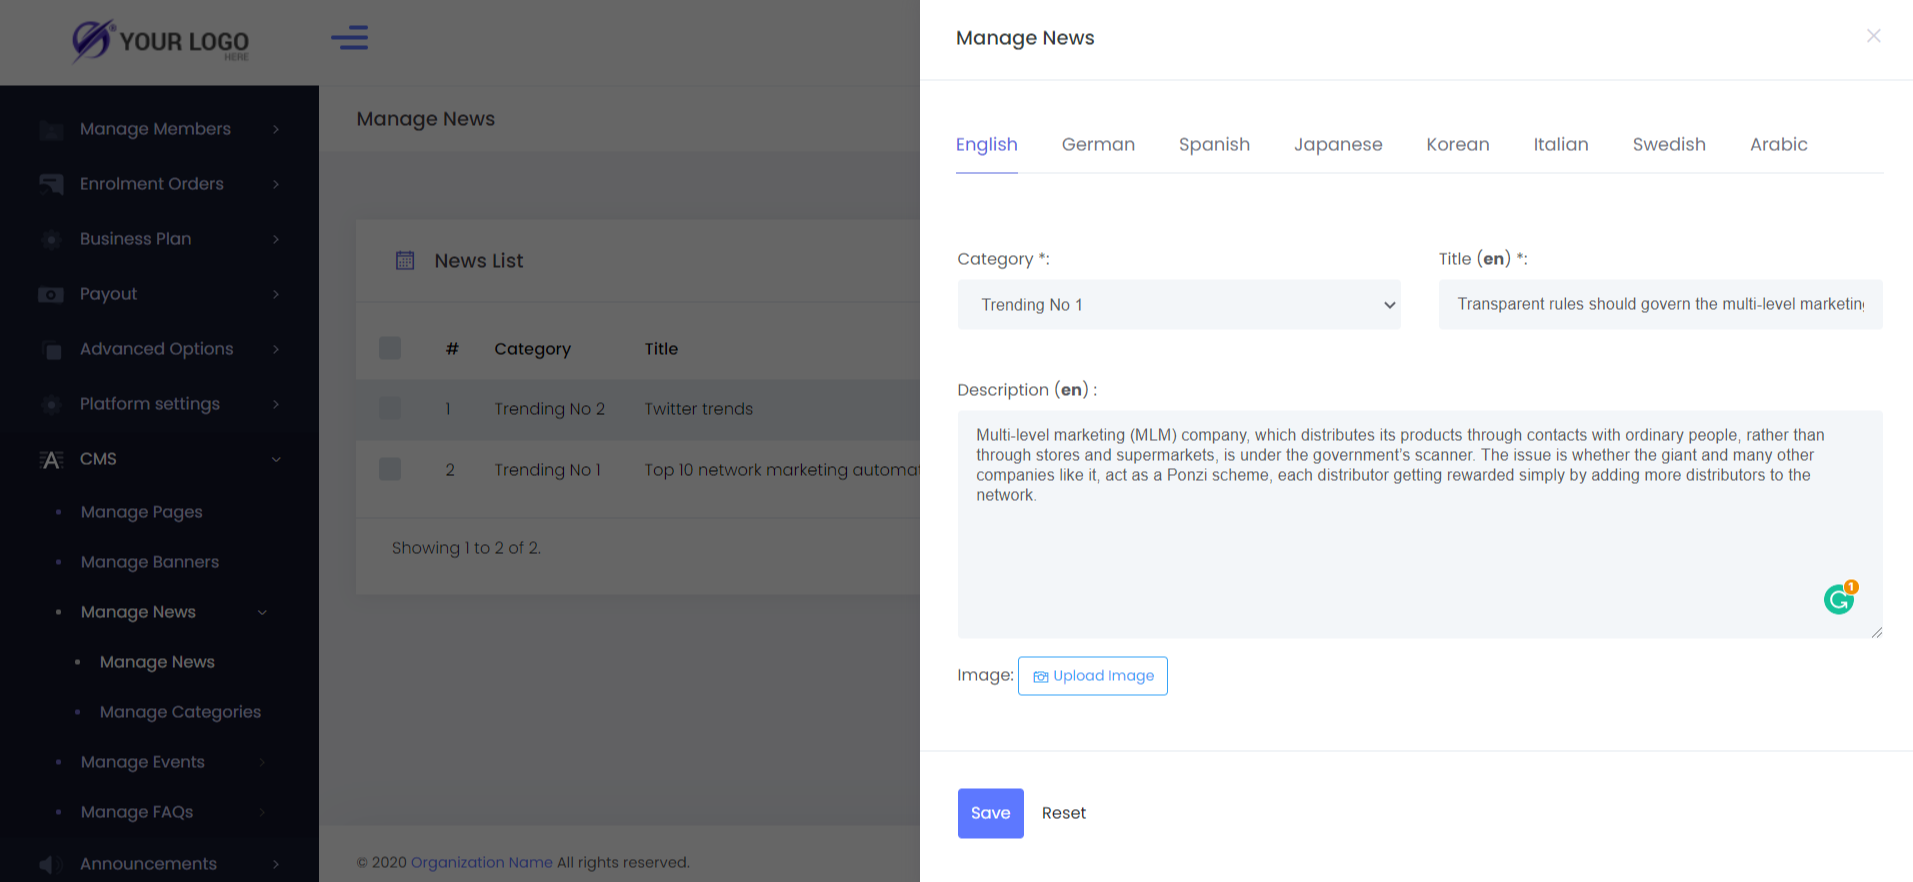
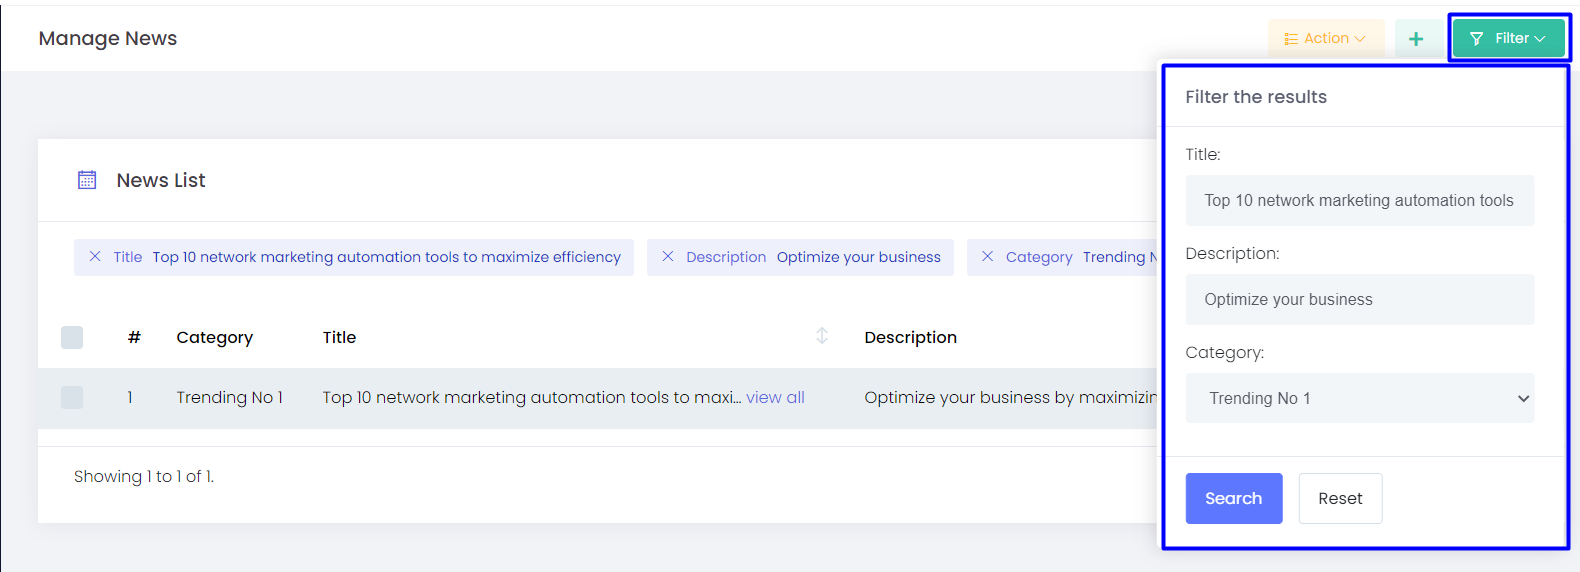
Manage News
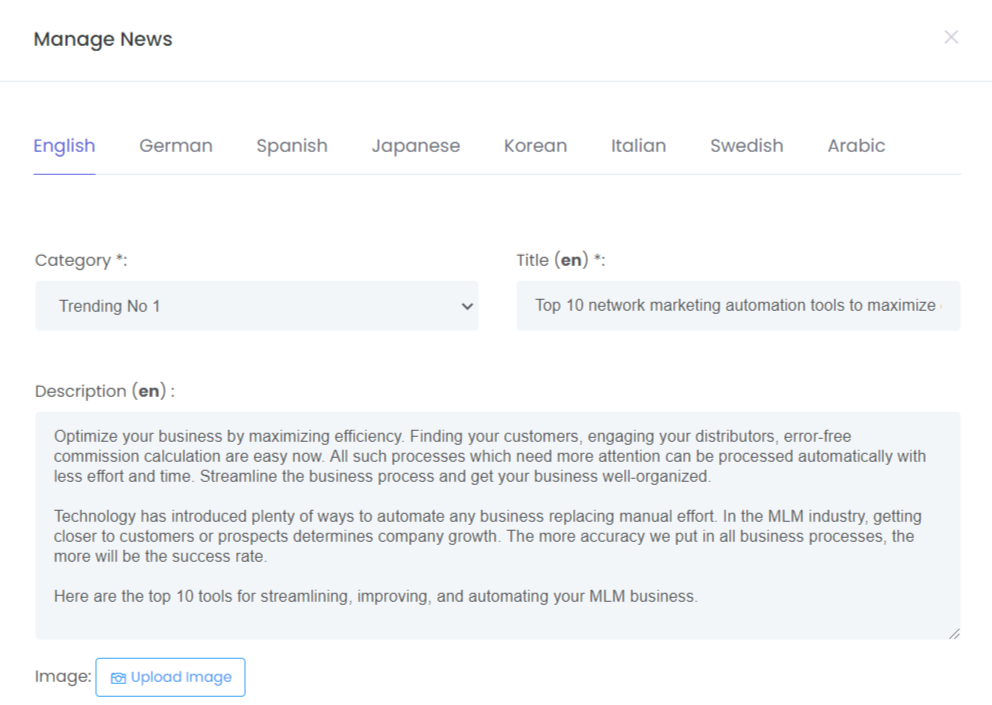
- You can add new news using the Add button
- Category - Choose the required category from the drop-down list. (The list of the created Category will be displayed here)
- Title - Title of the news
- Description - The content of the news
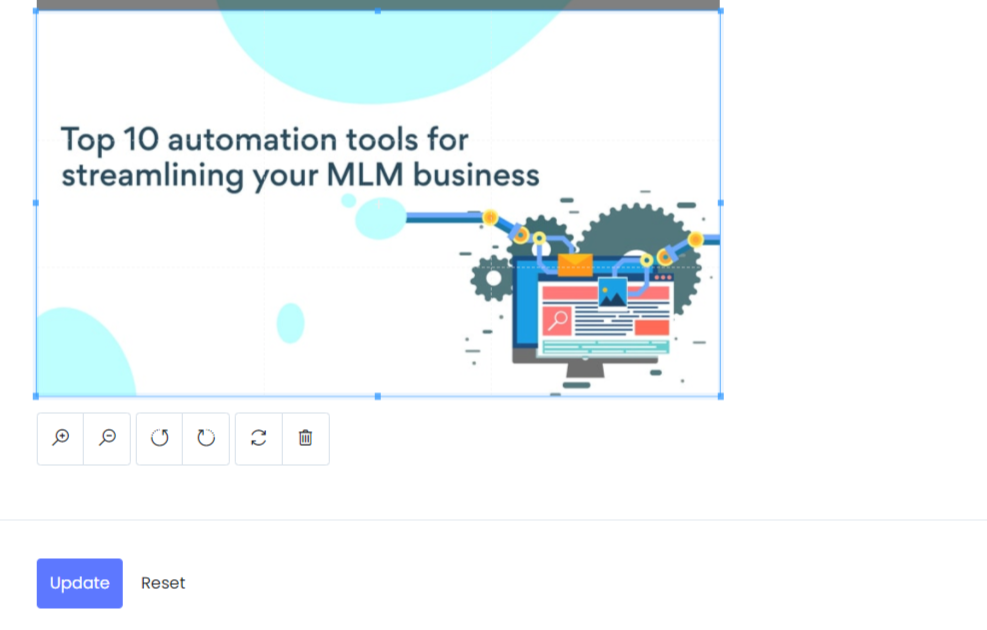
- Image - You can upload the required image using this option
- Once saved, the news will be created and will be displayed on the Dashboard
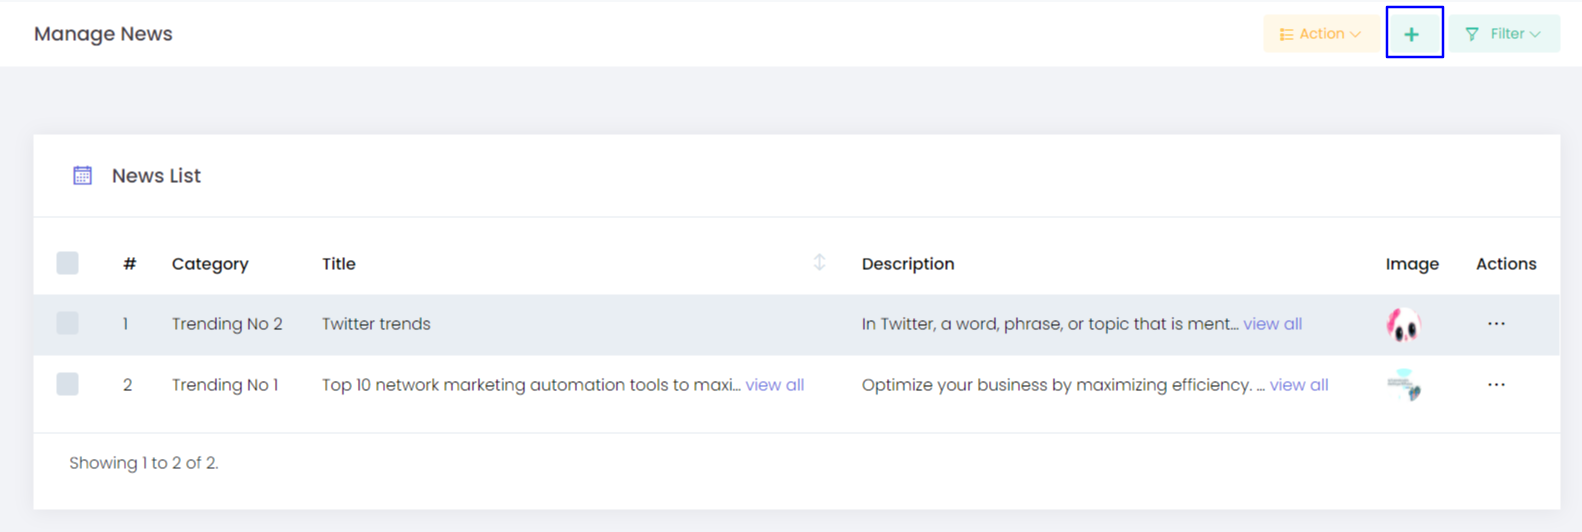
- You can find the list of the created News on the News list. The details included are:
- Category
- Title
- Description
- Image
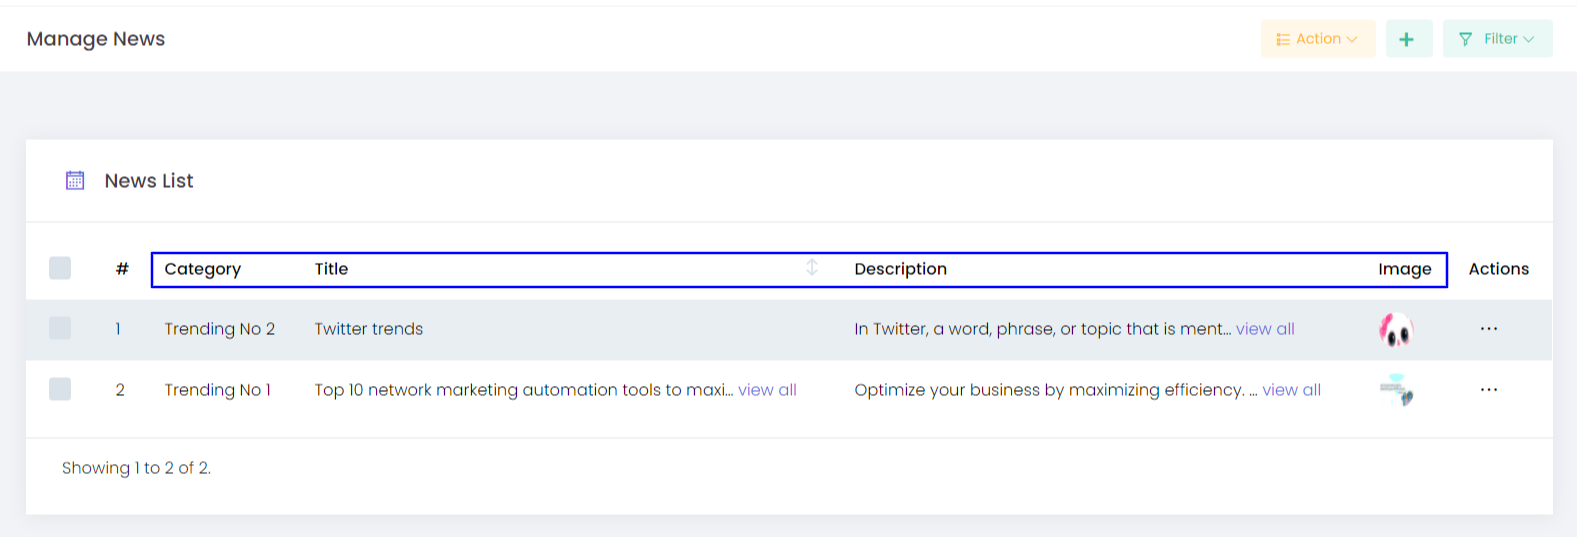
- Actions - You have an option to edit the already created News using this option
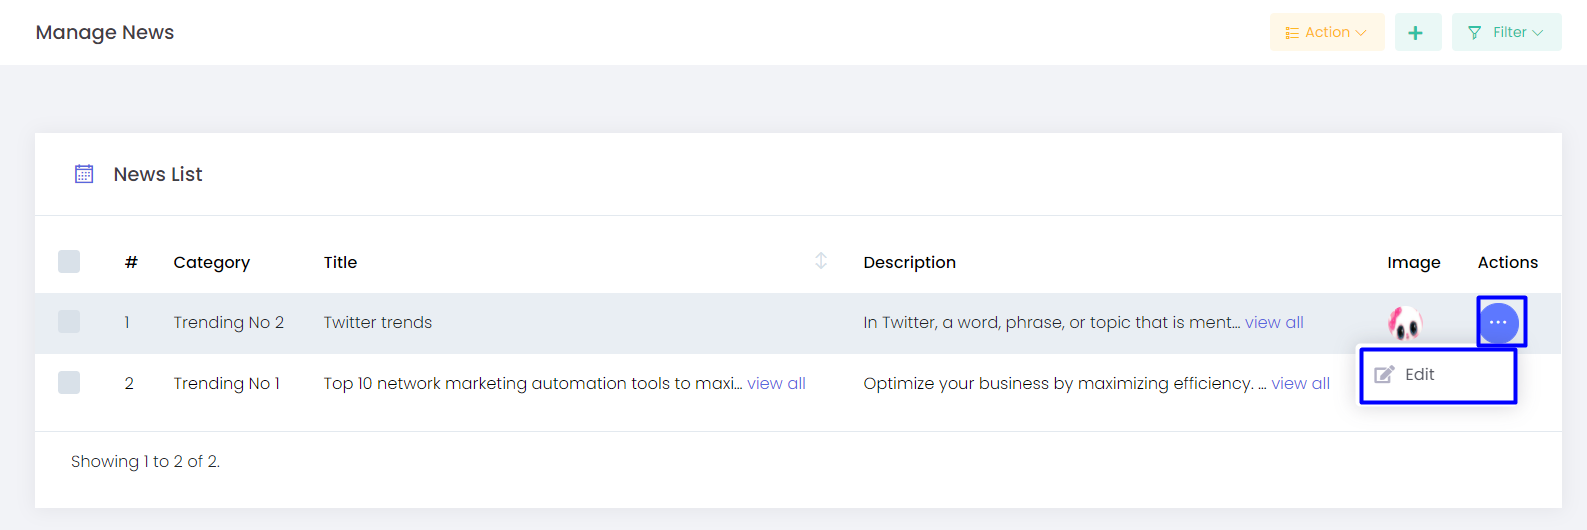
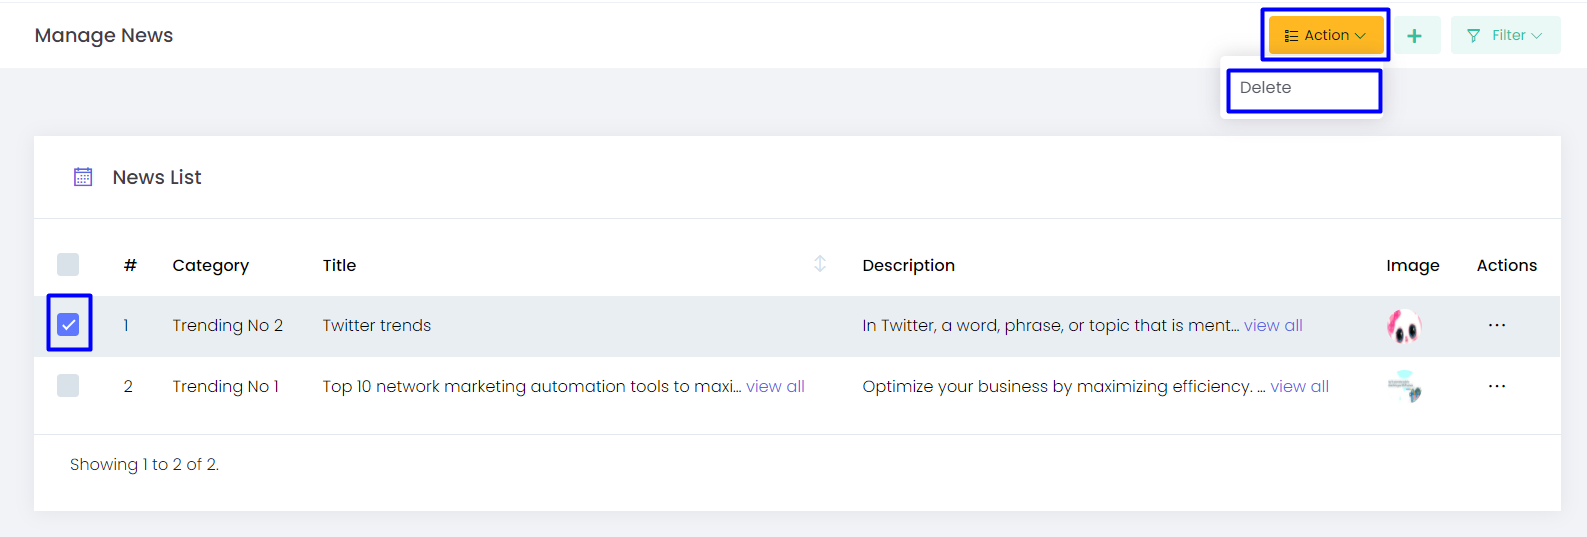
Action
You can select any of the news, and Delete it via Action
Filter
You can reach the required news by providing the Title and Description and category in the filter
3. Once the news is been created, it will be displayed on the Dashboard
If you are planning for any upcoming programs and events and you need to notify the users within the system you can use this option.
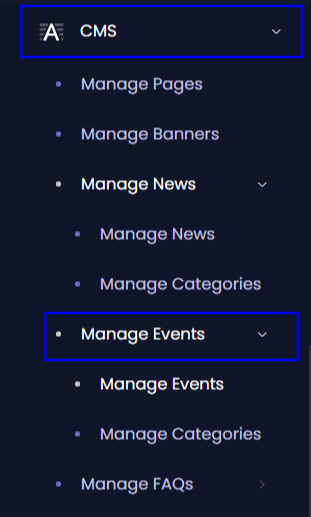
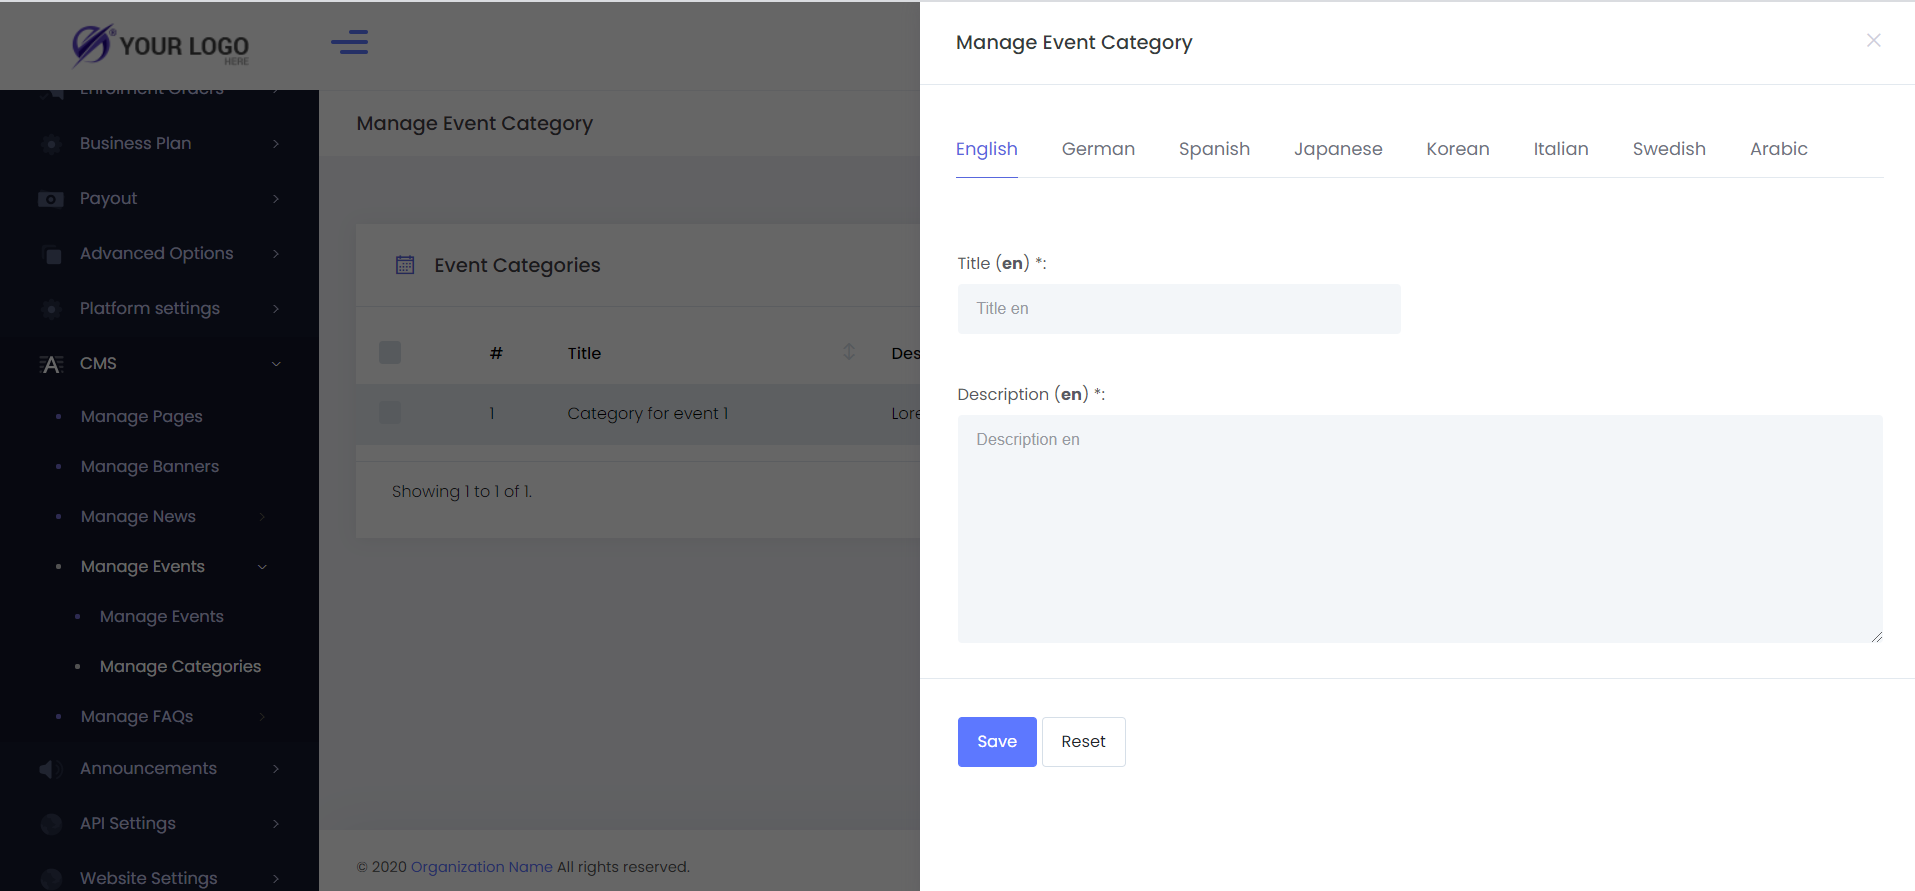
Manage Category
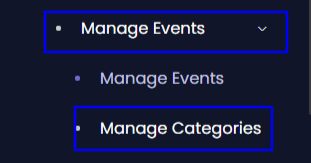
You have to create a new category before creating an event.
From Manage categories you can create a new category required for the event, you can click on the Add button, give the Title and the Description for the category which can be done in any languages configured in the system.
- Title - The title required for the event category
- Description - The description for the category
- Once saved, a new category will be created and this will be available on the create event option.

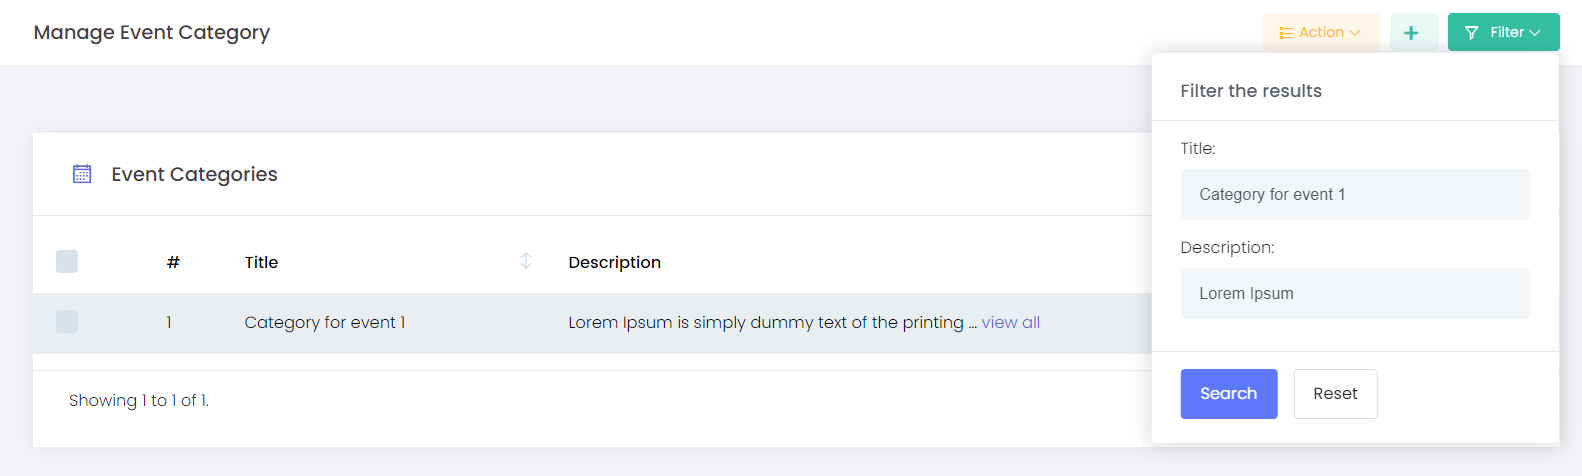
You can find the list of the created category on the Manage Event Category
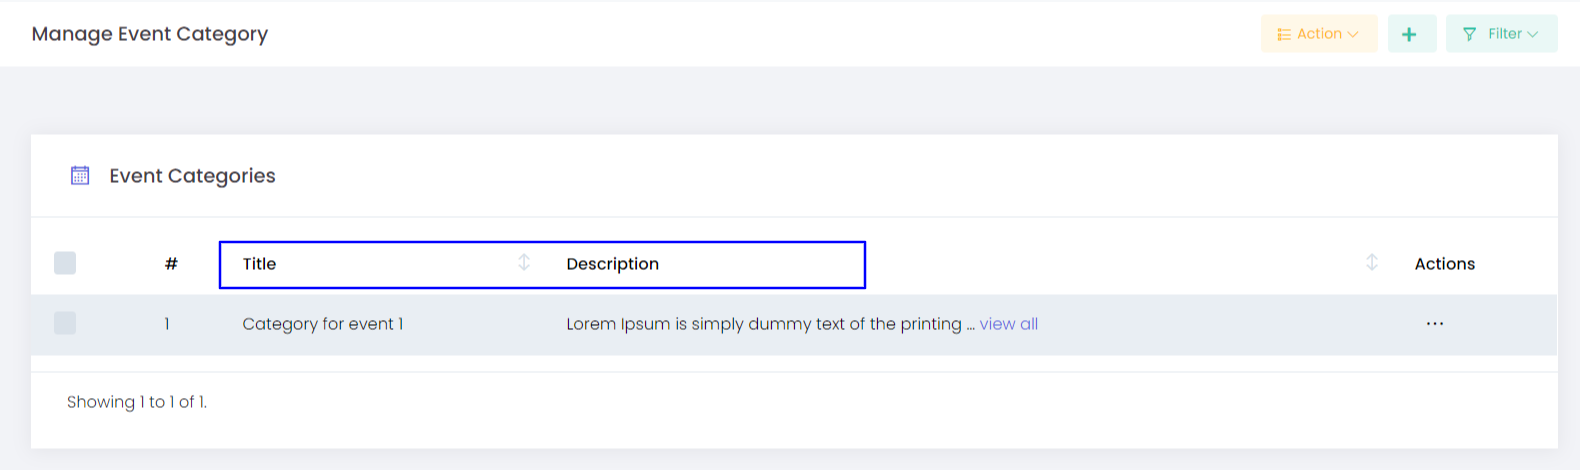
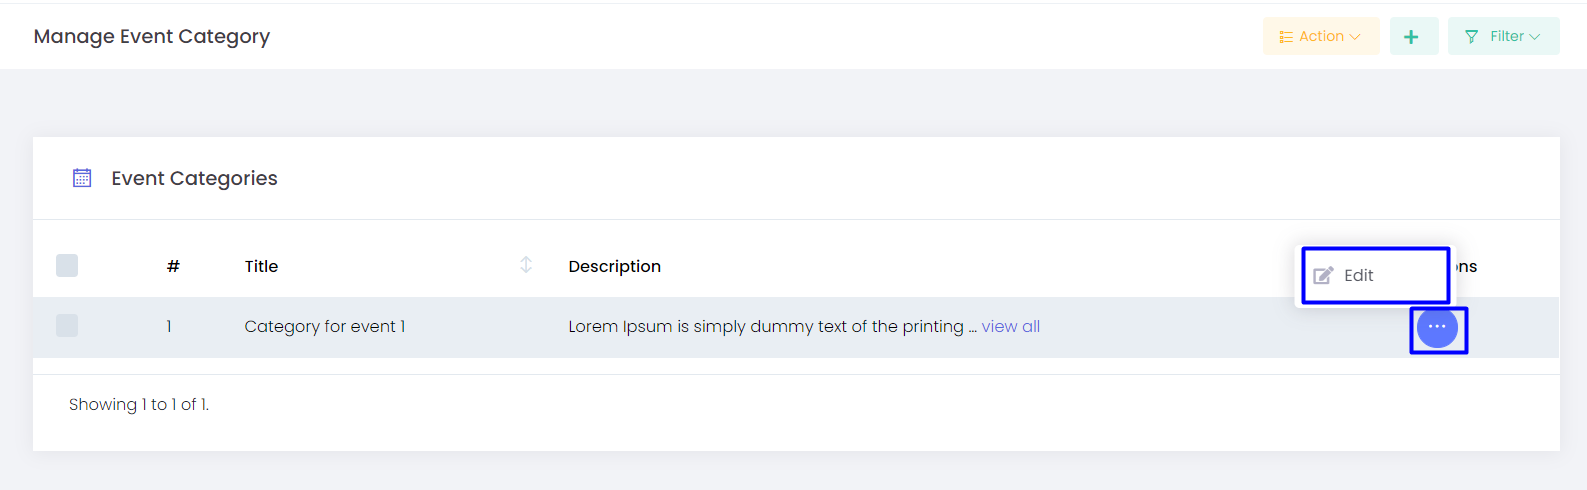
Actions - You have an option to edit the already created category using this option
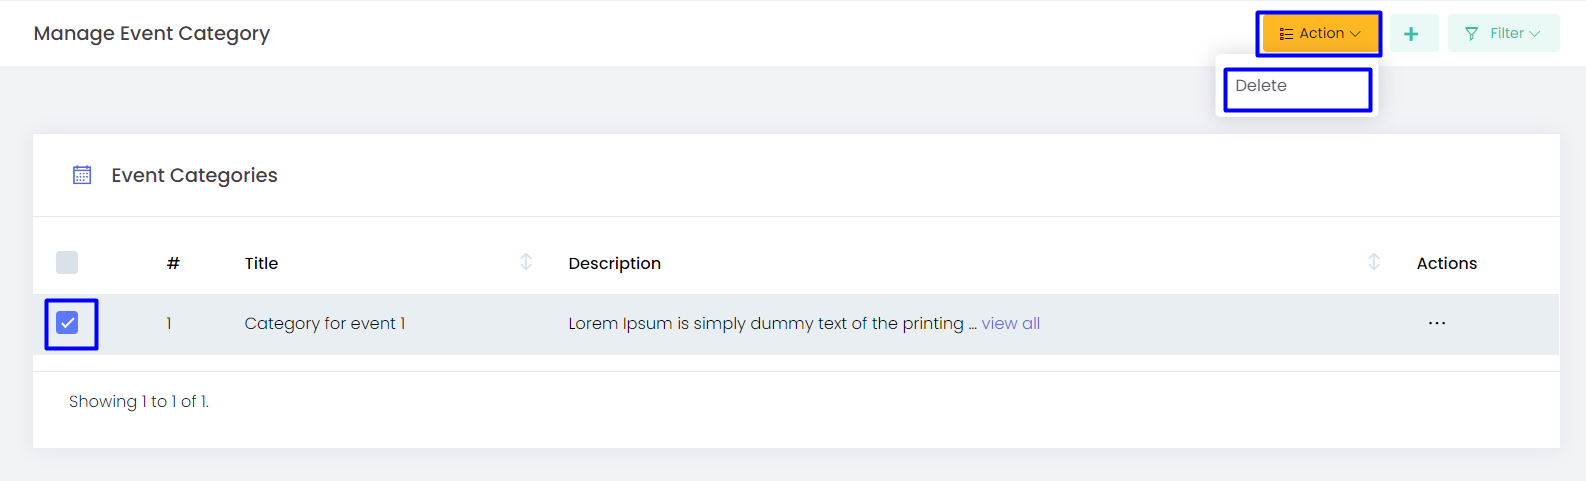
Action
You can select any of the categories, and Delete it via Action
Filter
You can reach a particular required category by providing the Title and Description on the filter
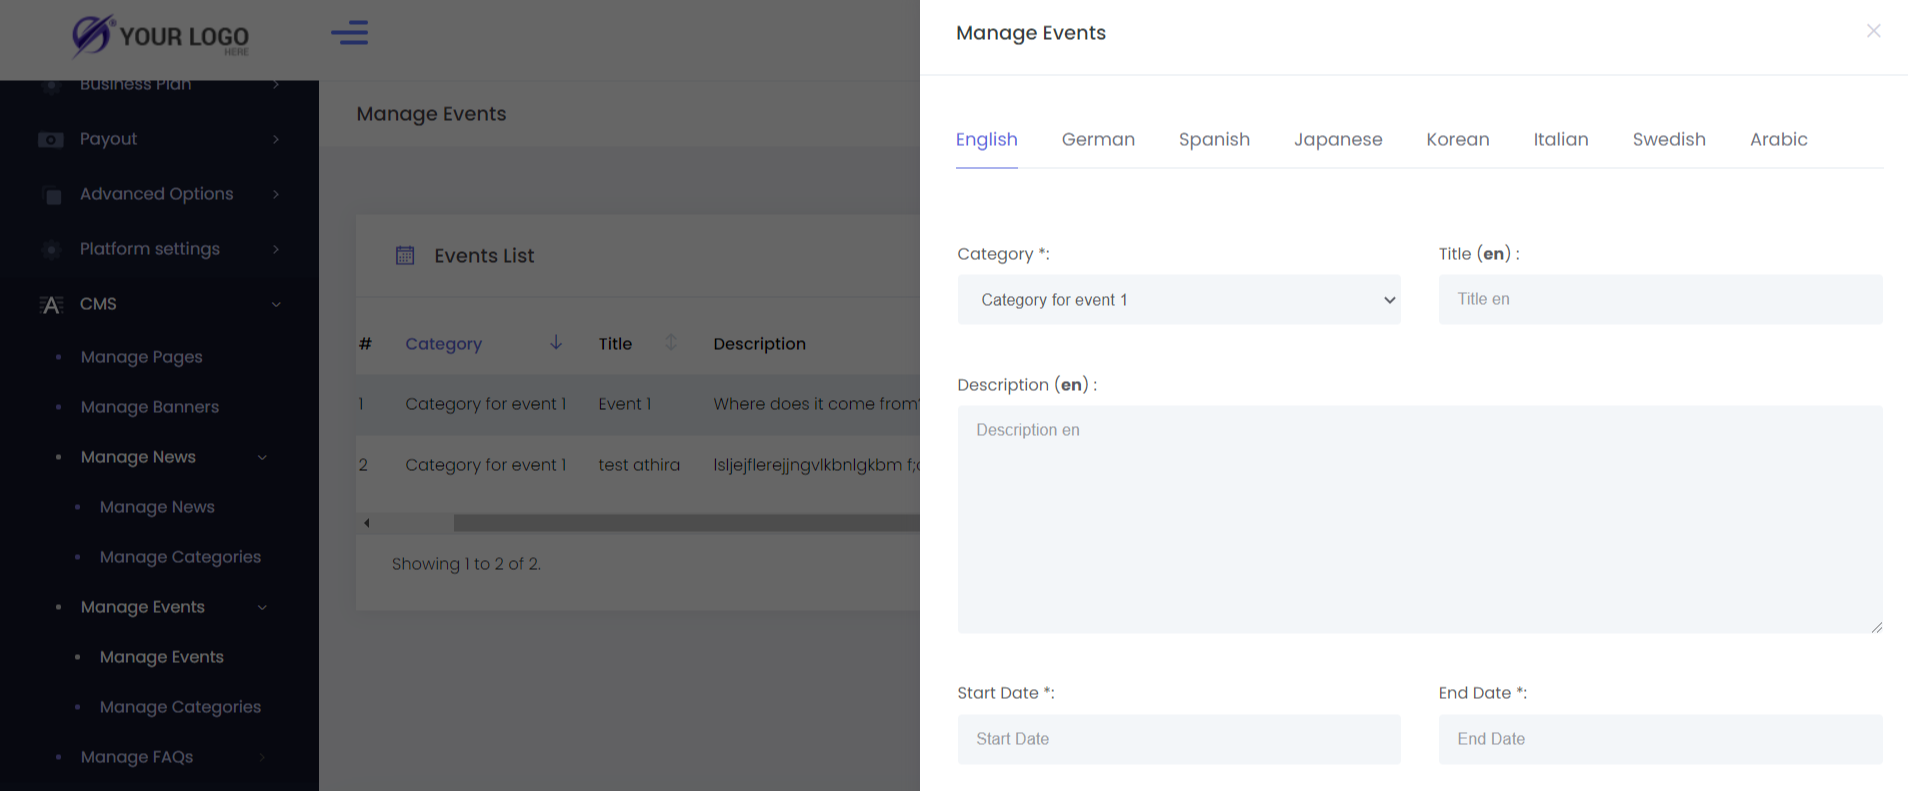
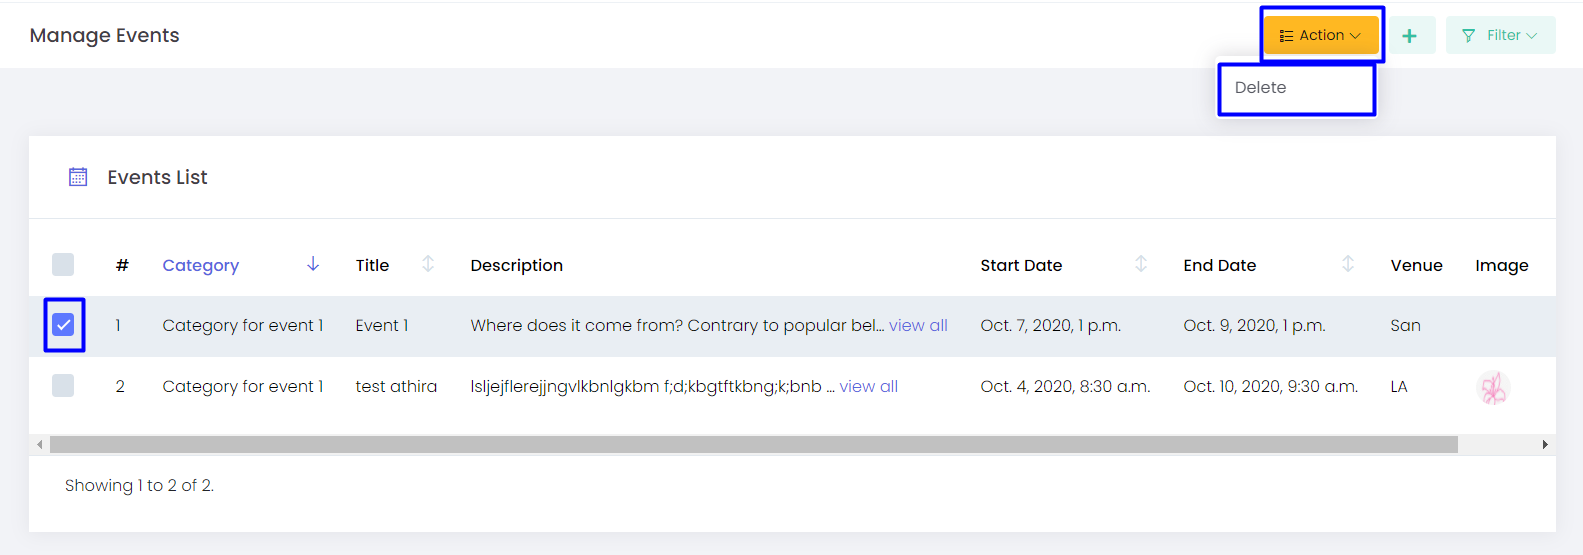
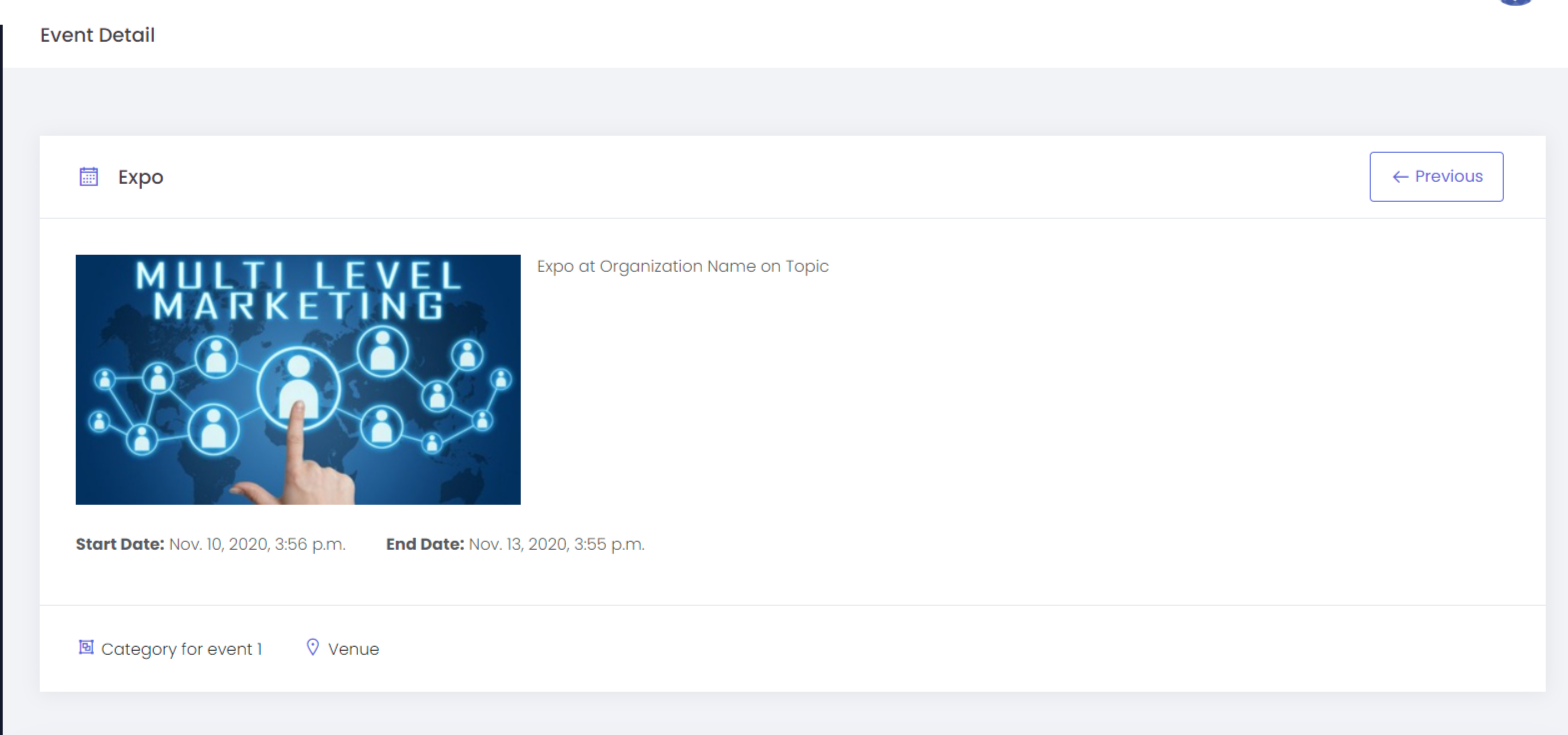
Manage Events
- You can create a new event using the Add button
- Choose the category of the Event, Title for the event, Description or the content of the event, fill in the Start Date and End Date, and Venue of the program.
- Upload the image required for the event

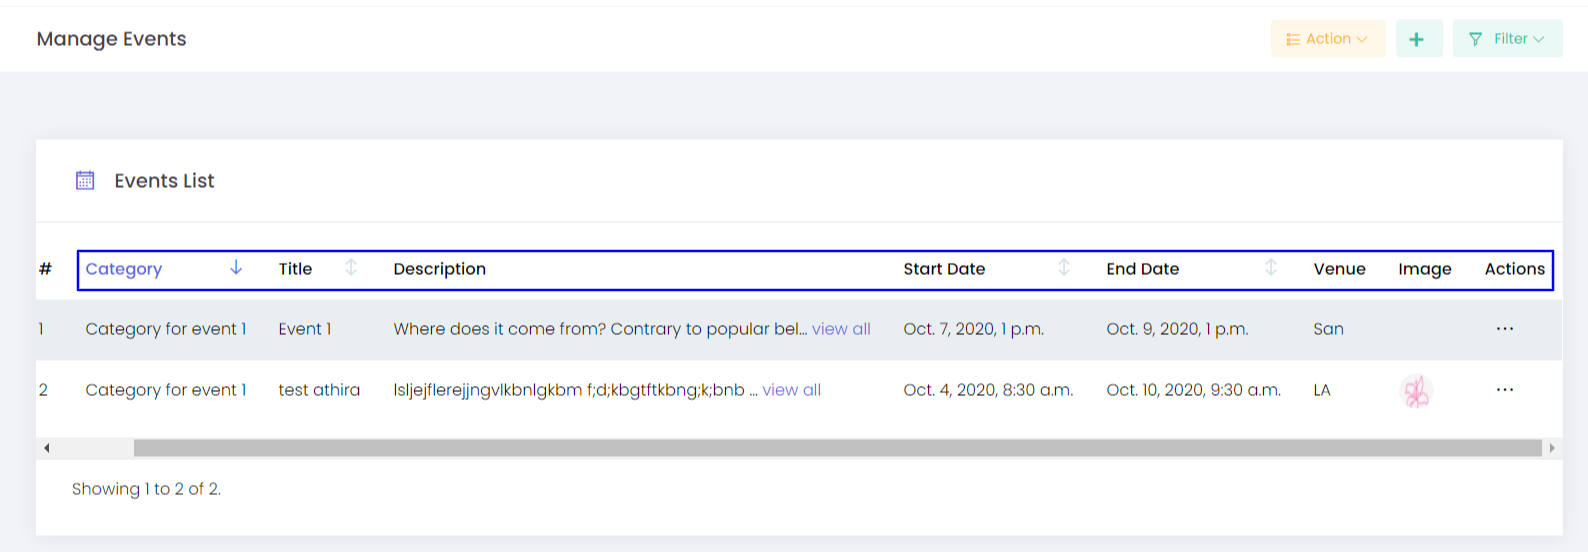
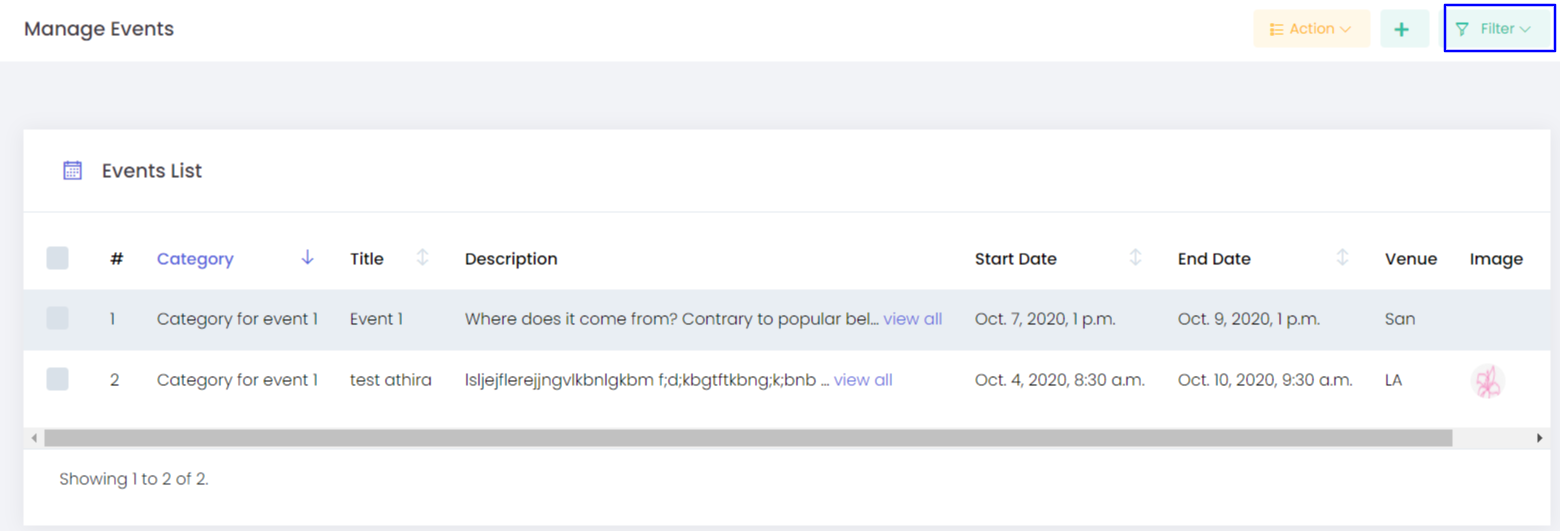
You can find the list of the created Events on the Events List. The details included are:
- Category
- Title
- Description
- Start Date
- End Date
- Venue
- Image
Actions - You have an option to edit the already created event using this option
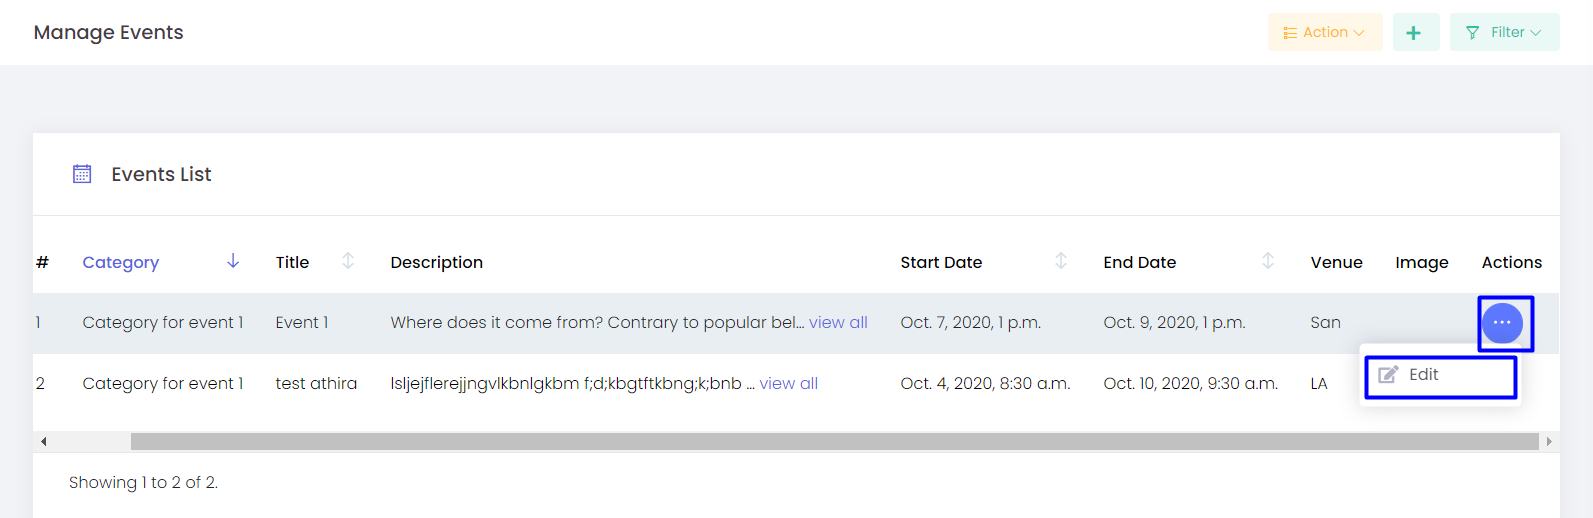
Action
You can select any of the events, and Delete it via Action
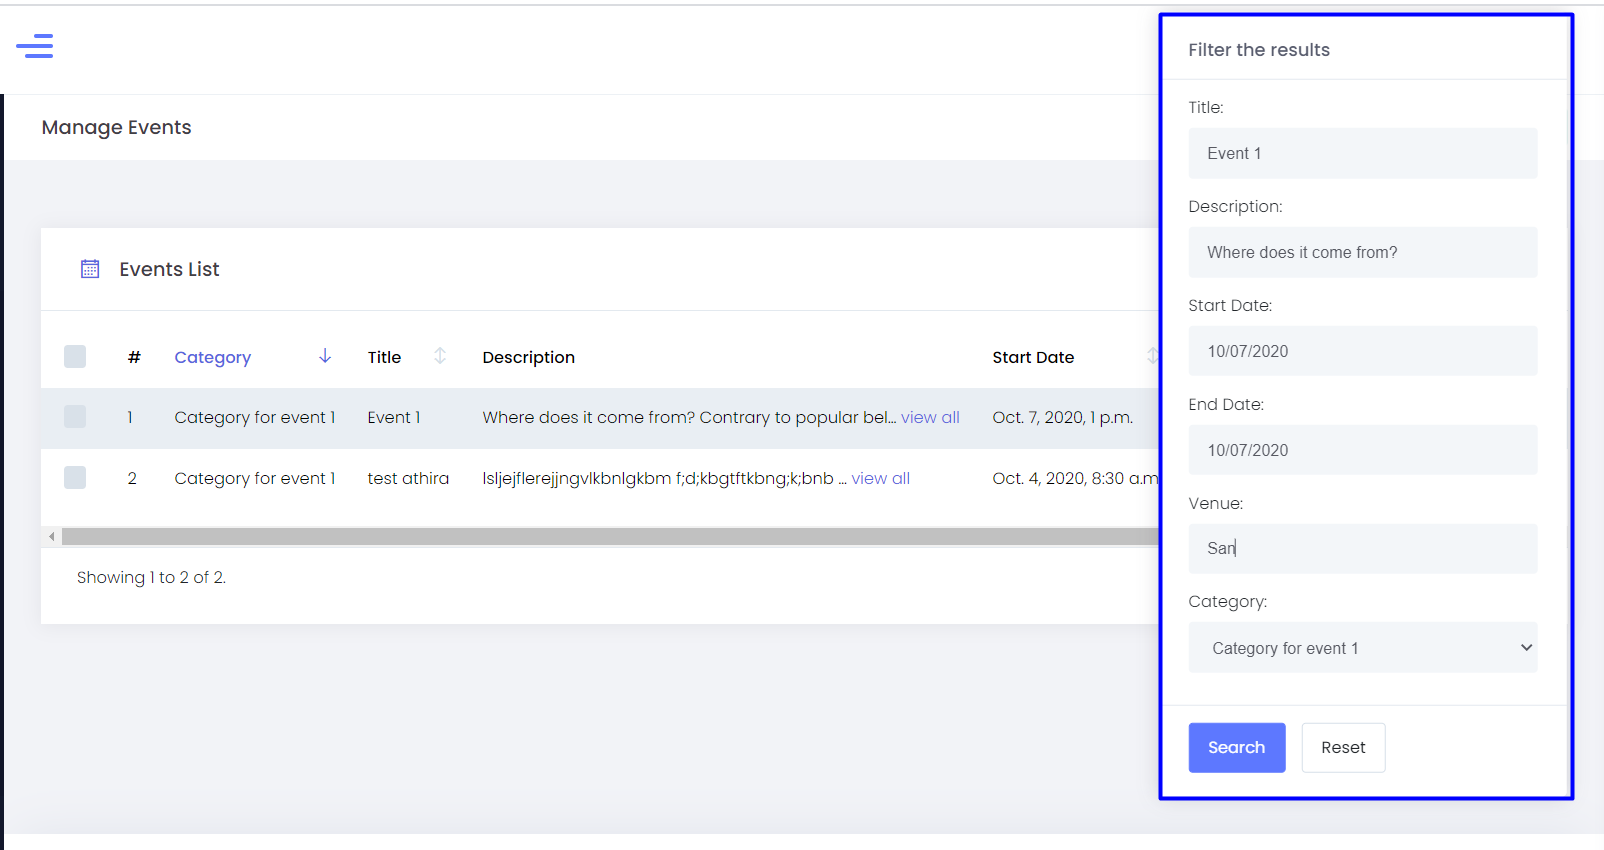
Filter
You can reach the required Event by providing the Title, Description, Start Date, End Date, Venue, and Category
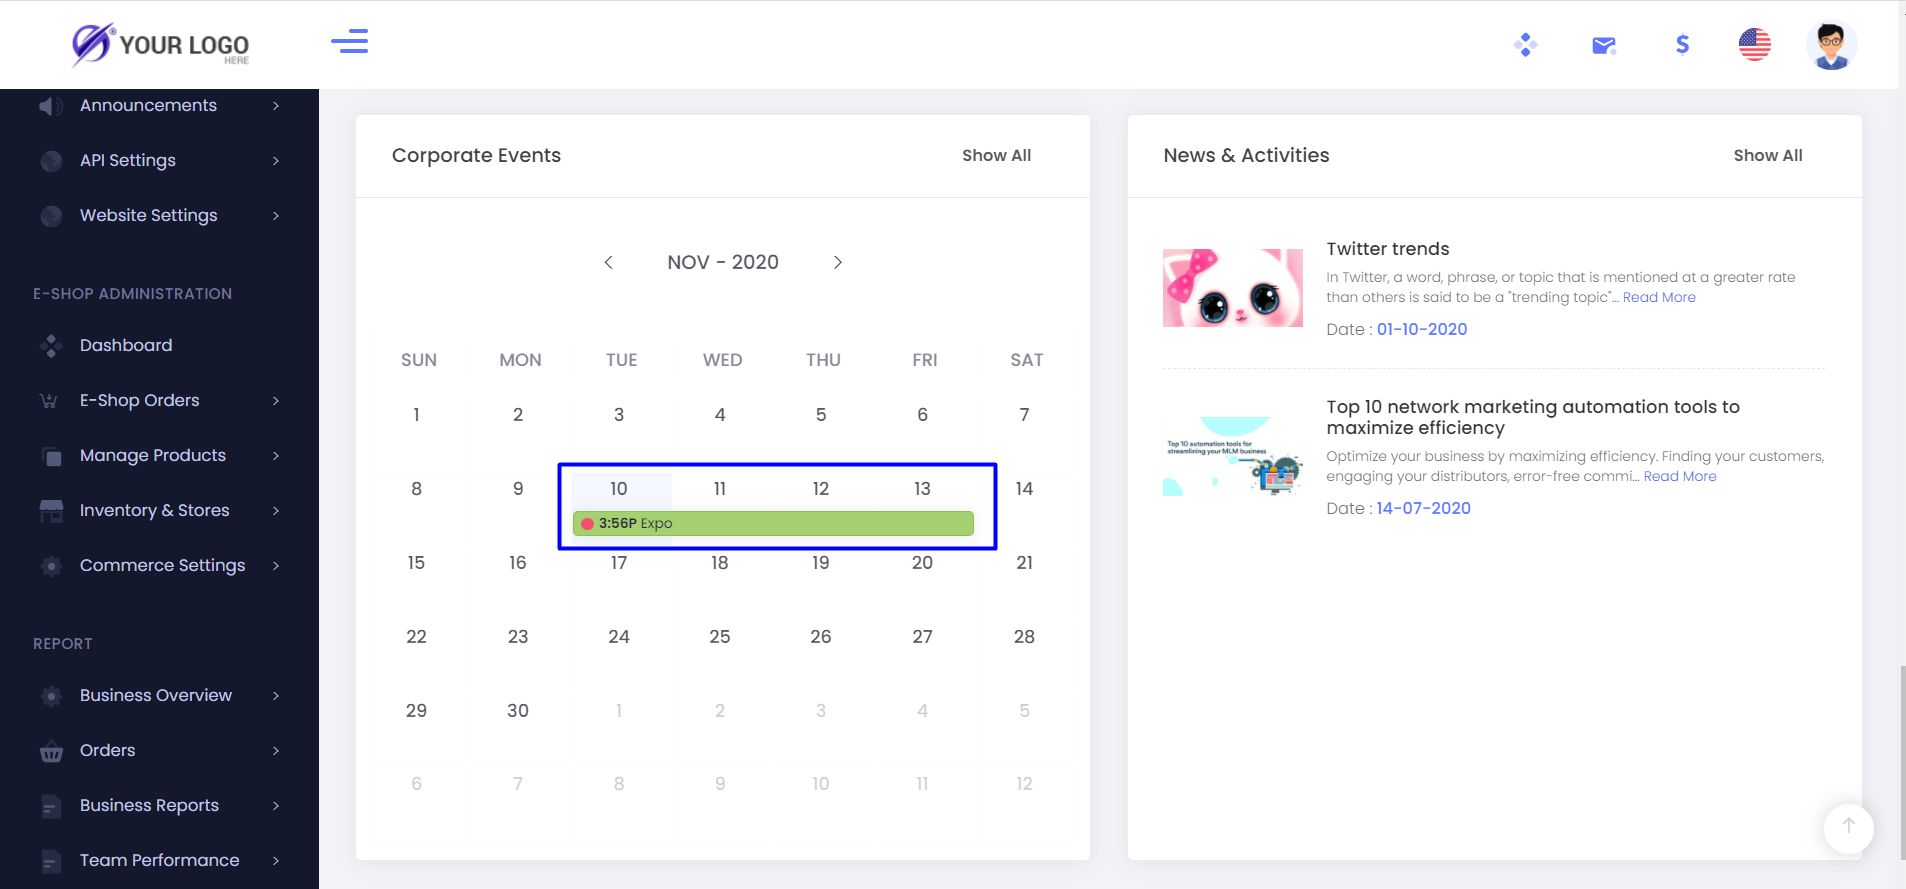
Once the events are been created, it will be displayed in the event calendar of the Dashboard
You can create and manage the Frequently Asked Questions of the system from this option.
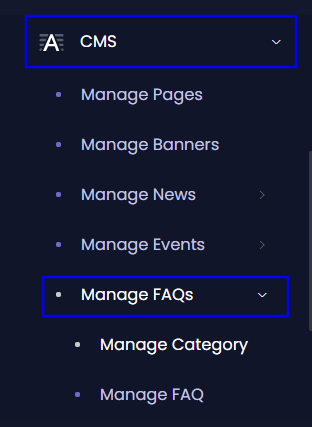
How to Create an FAQ?
- In order to create an FAQ, you have to create a category for the FAQs.
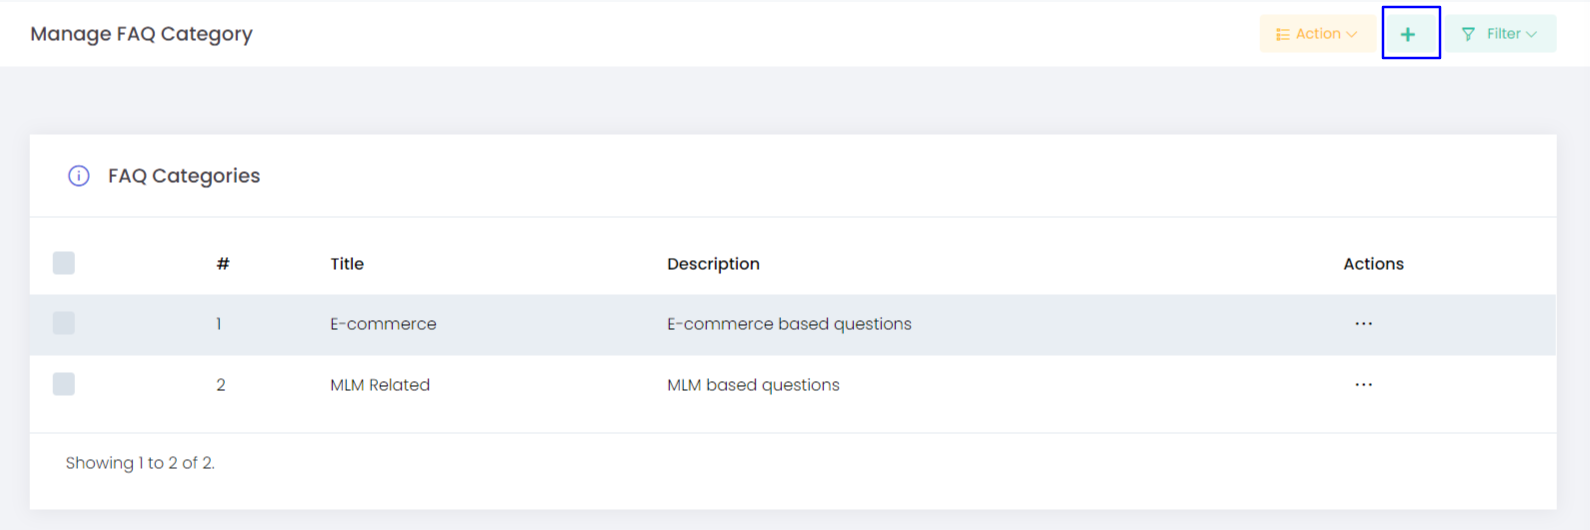
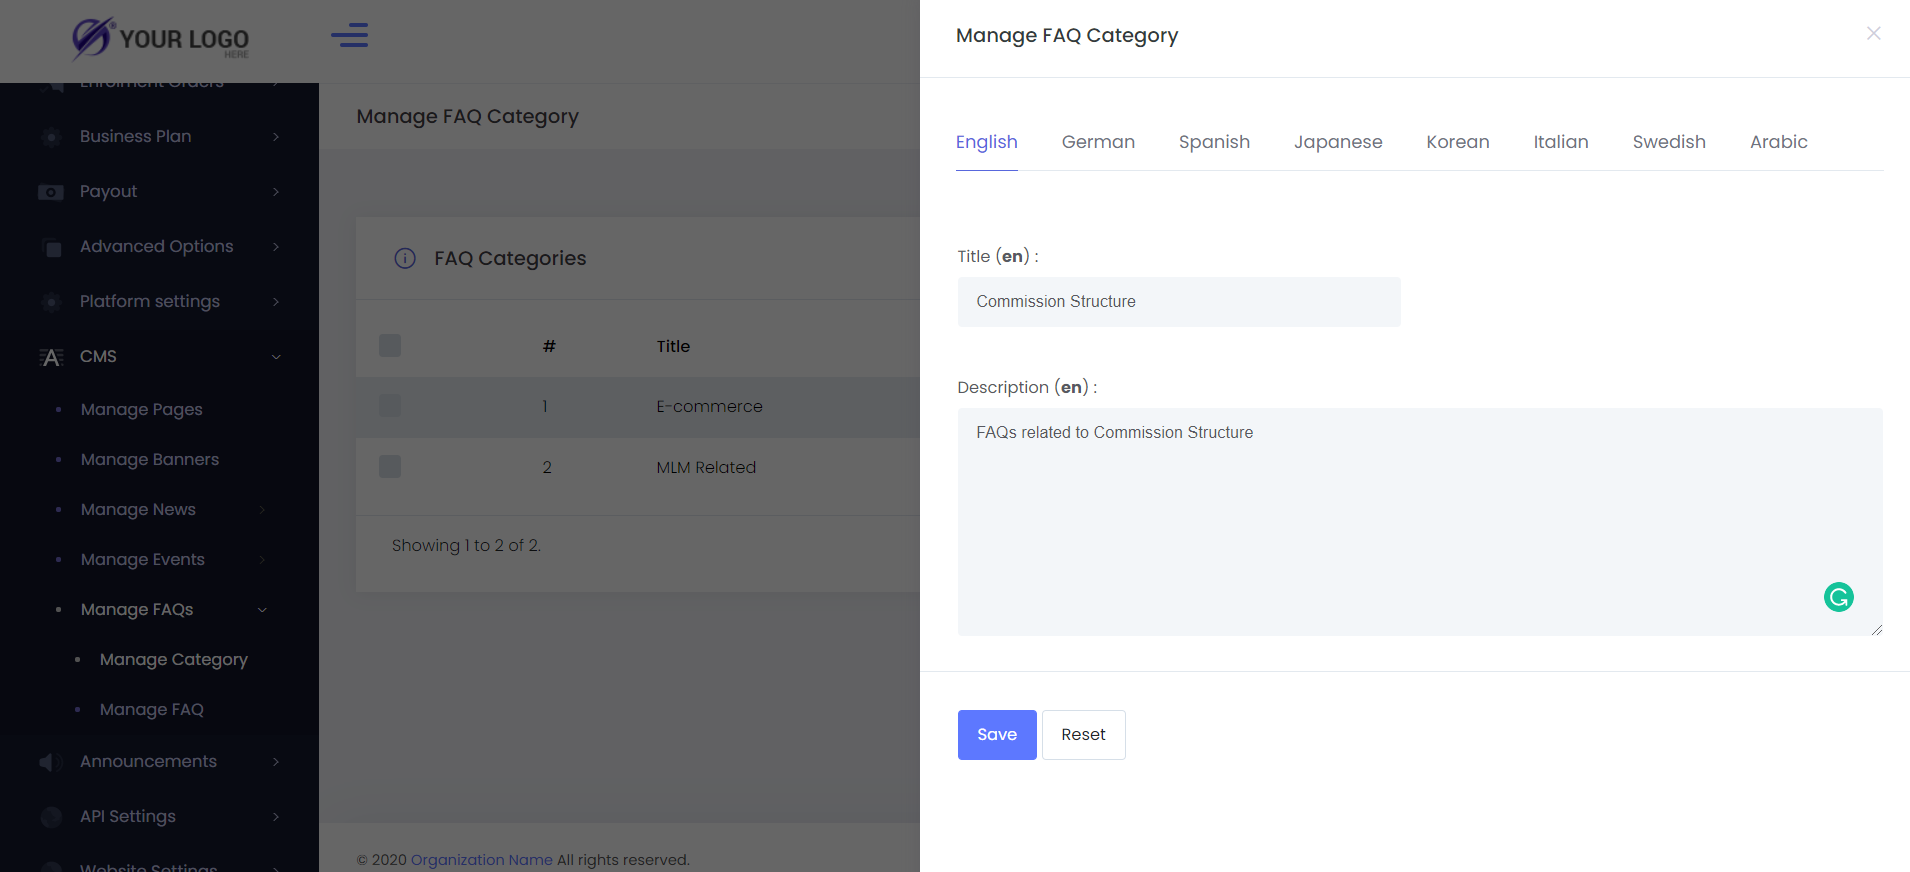
- Manage Category
- From Manage Category you can create a new category required for the FAQ, you can click on the Add button, give the Title and the Description for the category which can be done in any languages configured in the system.
-
Title - The title required for the news category.
-
Description - The description for the category.
-
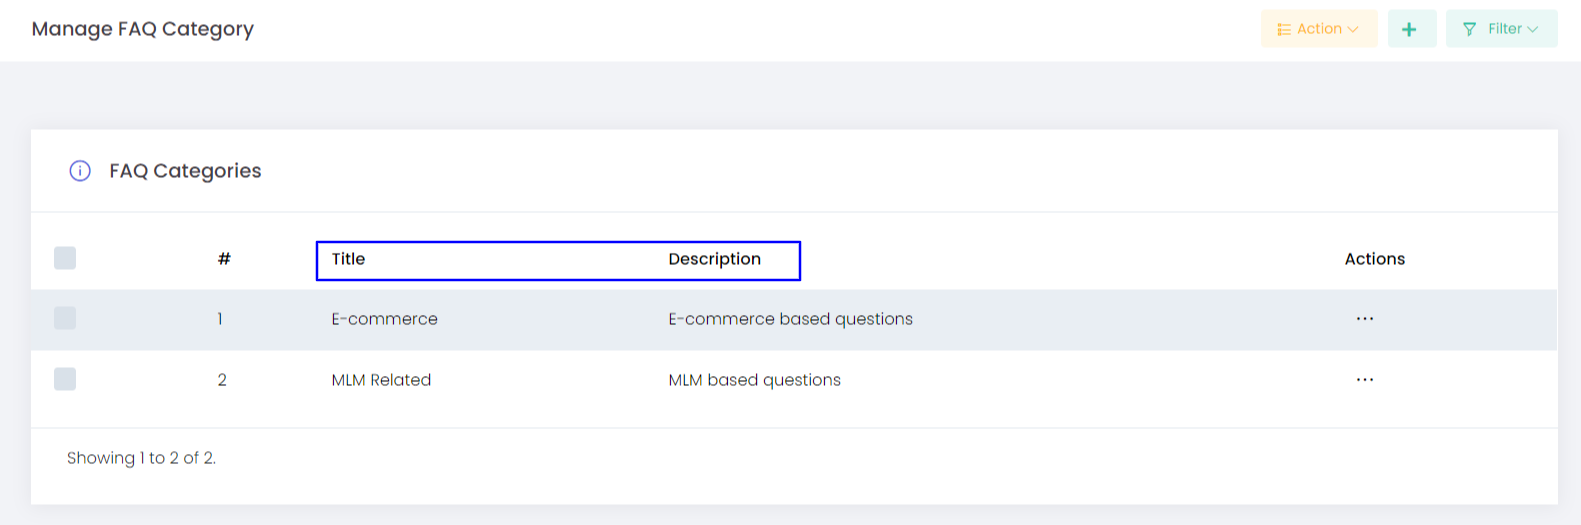
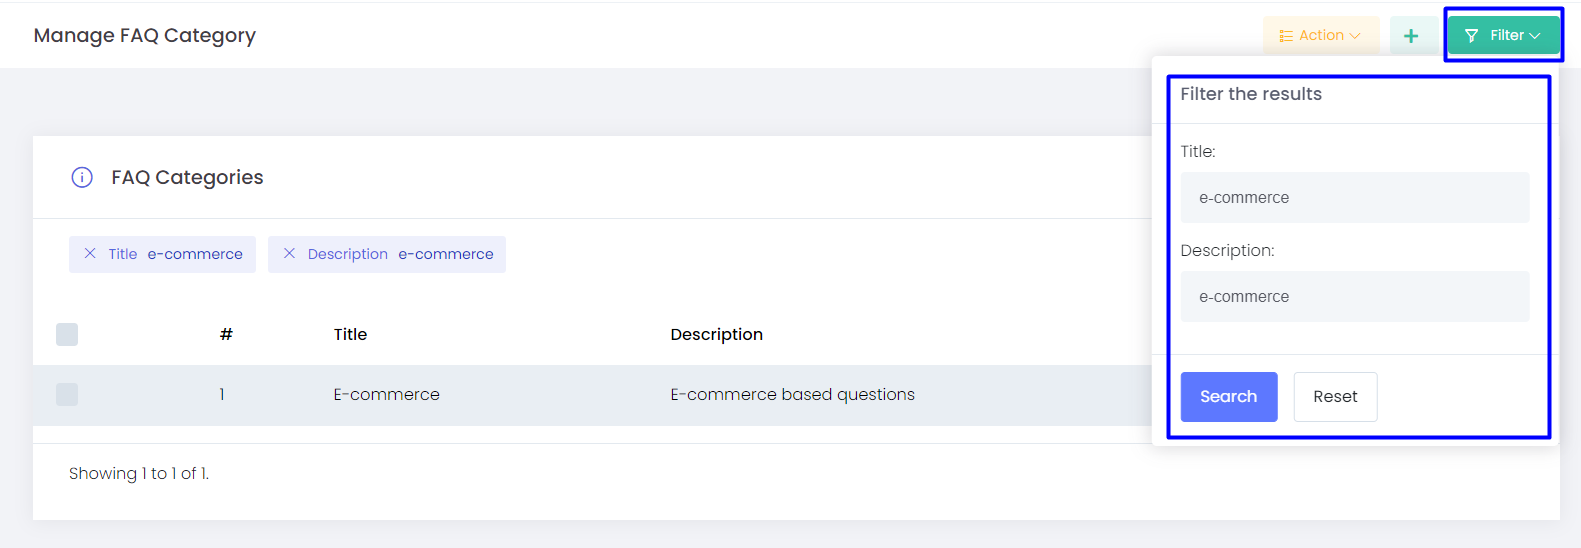
Once saved, a new category will be created and this will be available on the Manage FAQ Category.
-
-
You can find the list of the created category on the Manage Event Category.
-
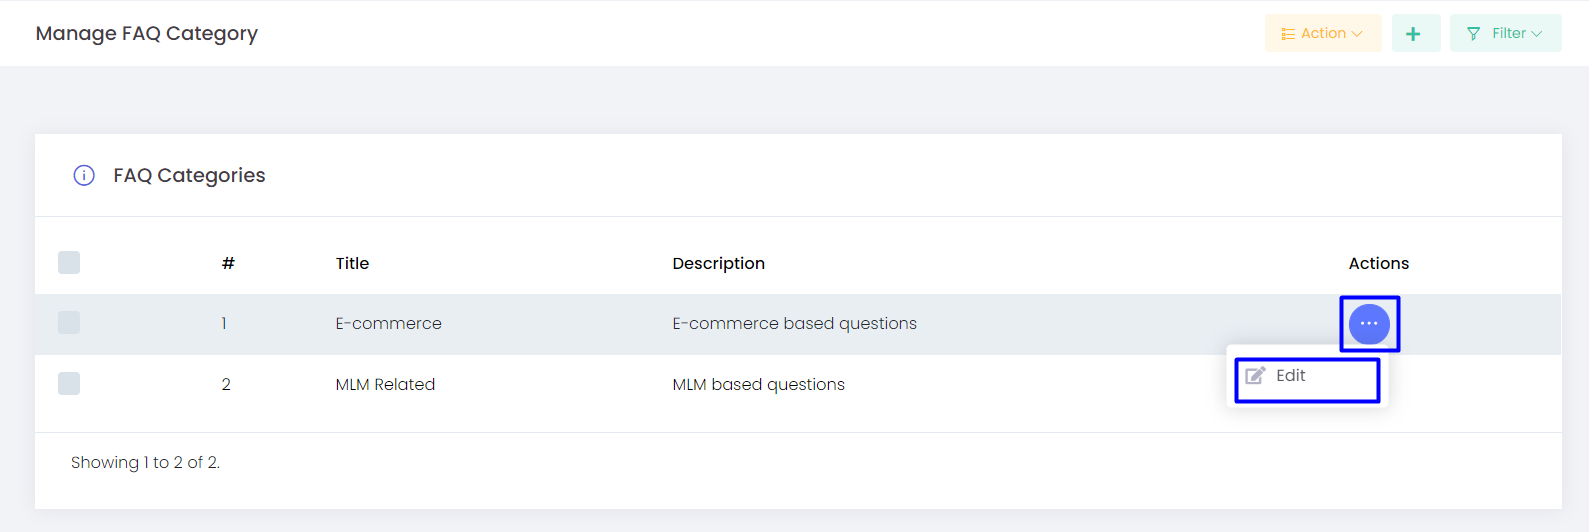
Actions - You have an option to edit the already created category using this option
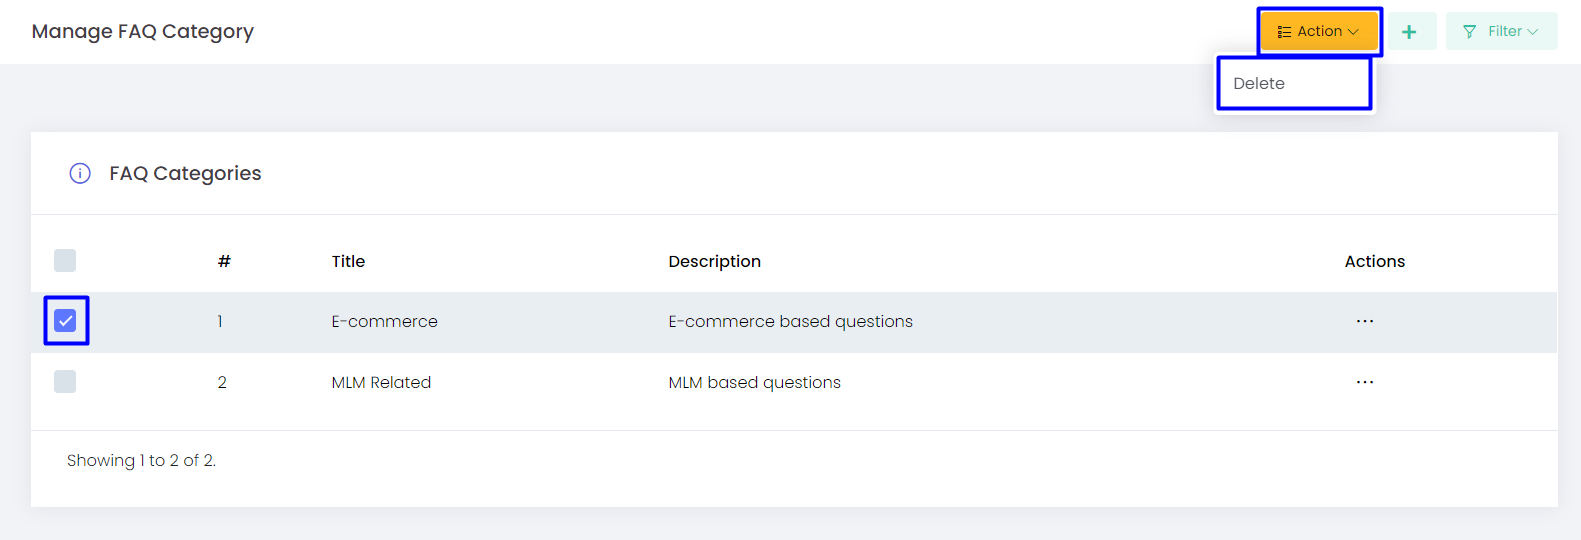
- Action - You can select any of the categories, and Delete it via Action
- Filter - You can reach the required category by providing the Title and Description on the filter
2. Once the category is been created, you can create and manage the FAQ
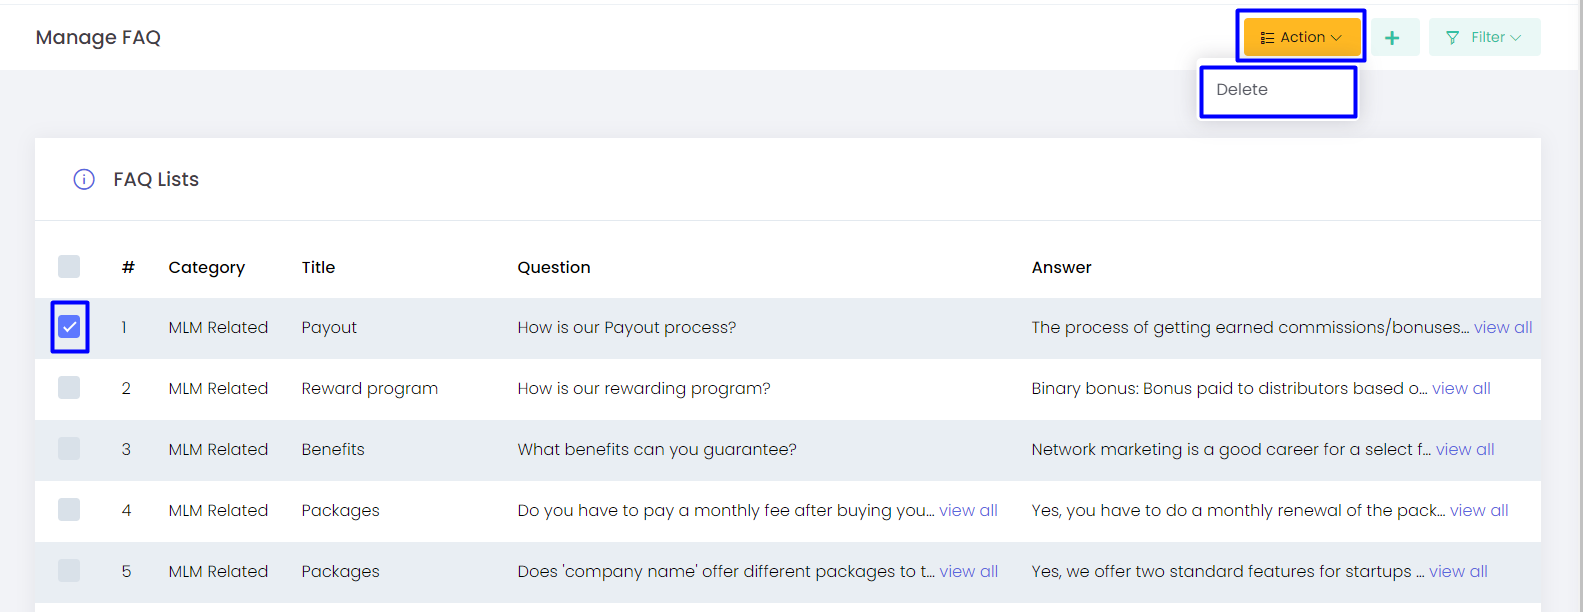
- Manage FAQ
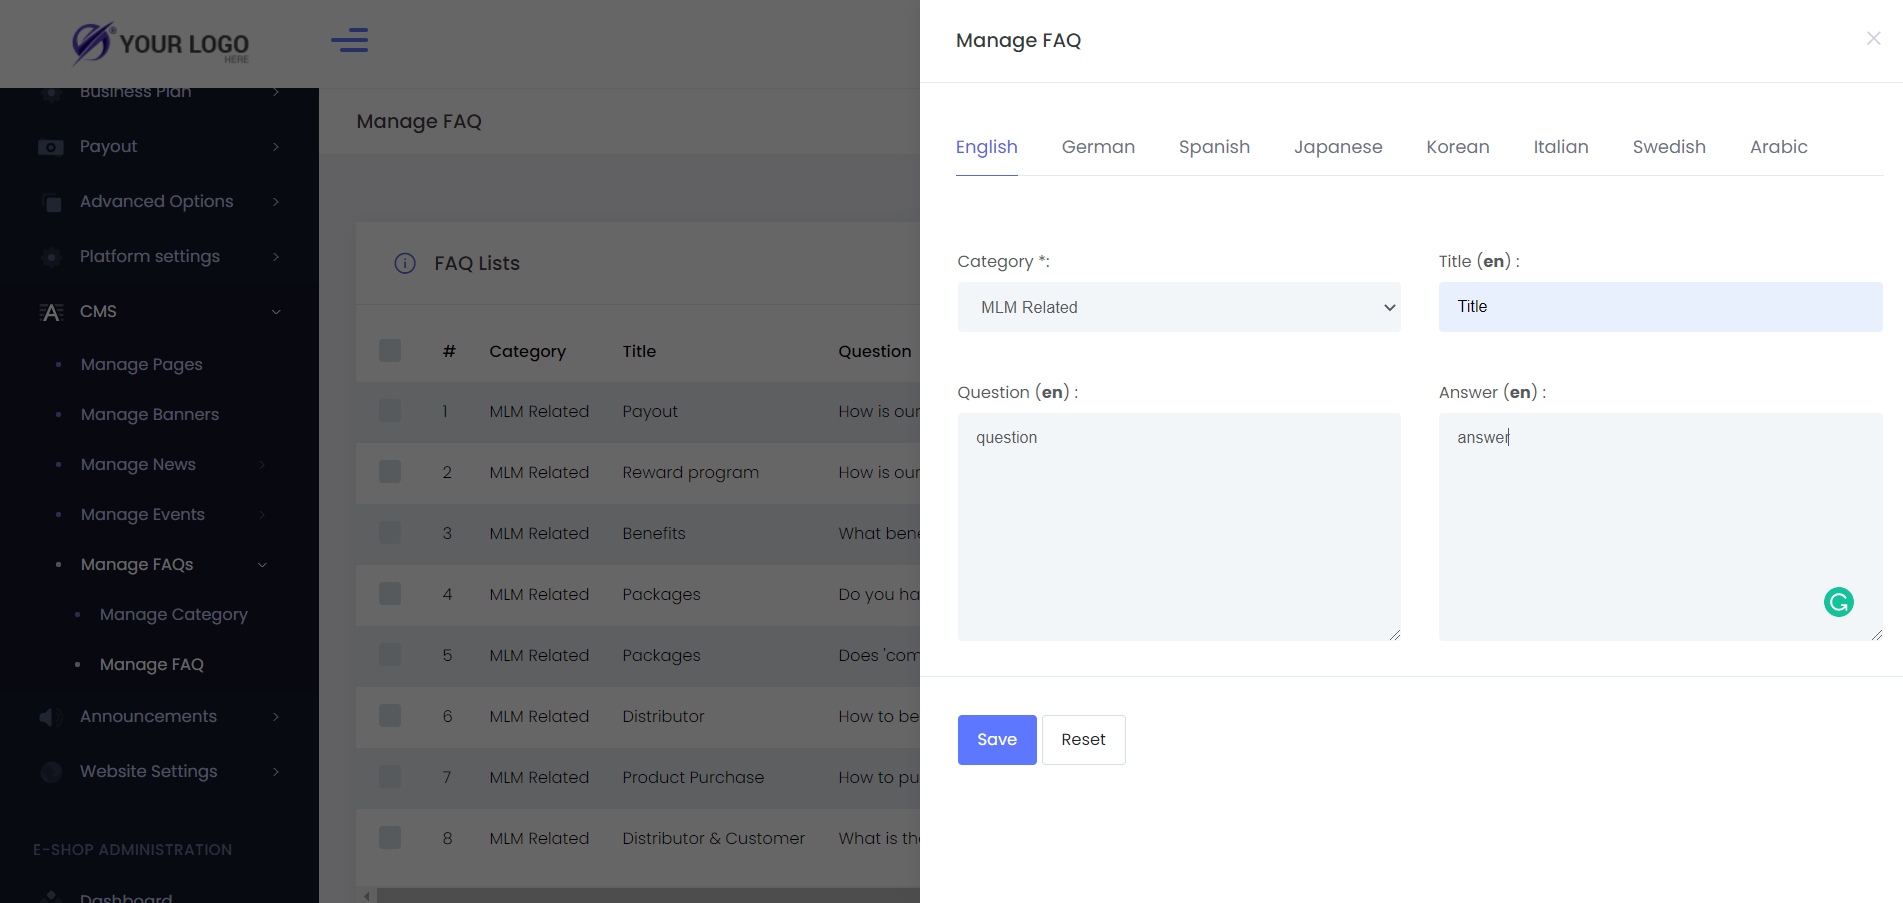
- You can add a new question using the Add button
- Choose the category for the question, provide the title of the question, question, and answer.
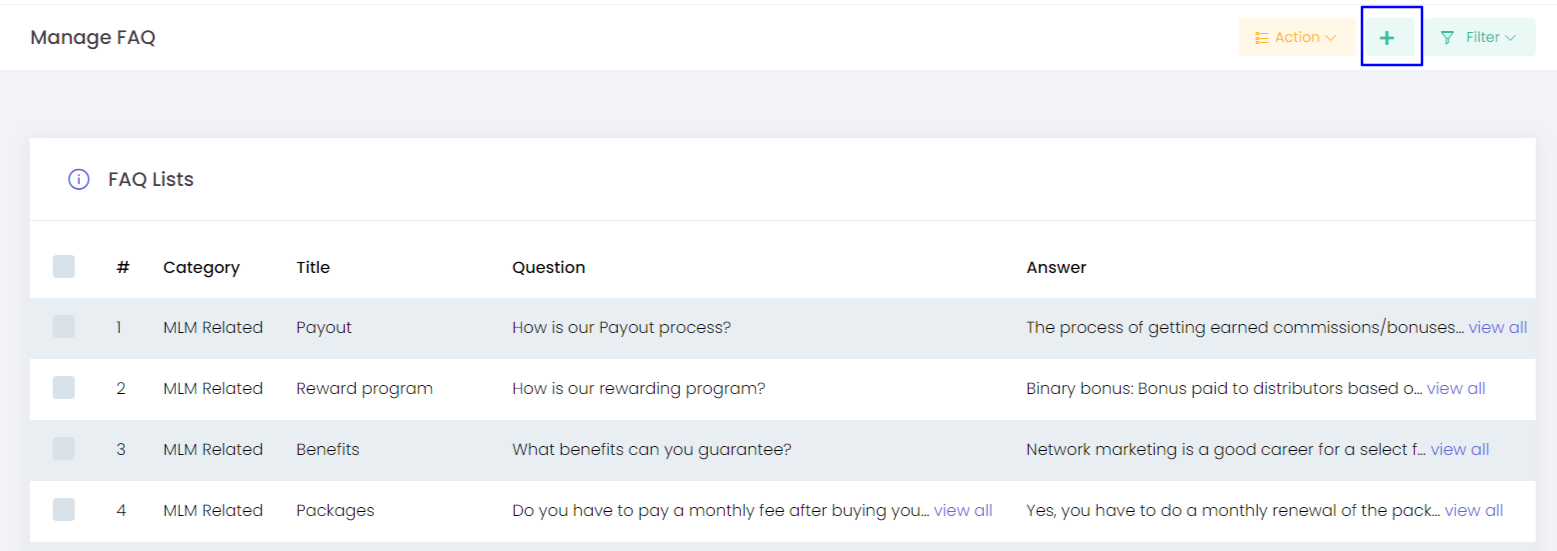
- Once saved, the question will be available in the FAQ list on Manage FAQ
- Category - The category with which the question is related to
- Title - The title of the question
- Question - The question that the admin has added
- Answer - The relevant answers to the questions that the admin have added
- Actions - You have an option to edit the already created FAQs using this option
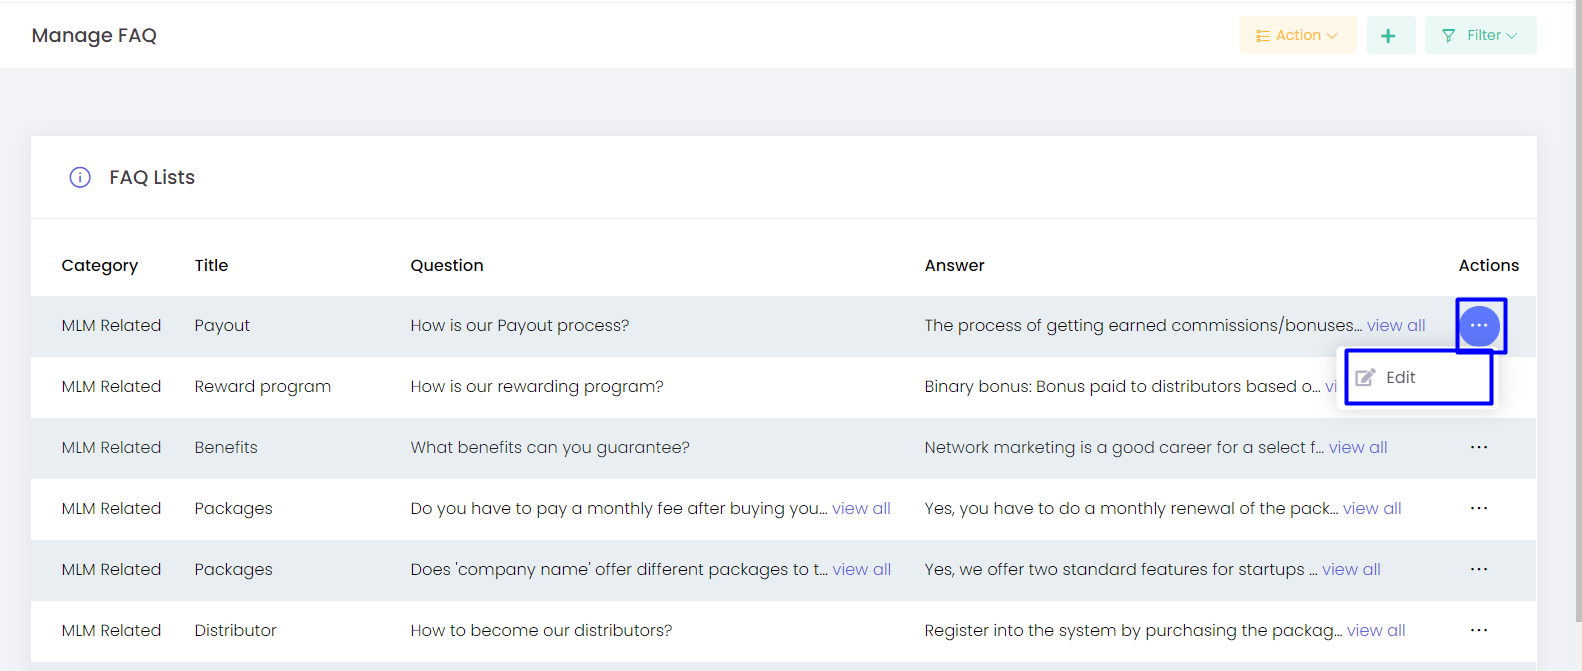
Action
You can select any of the events, and Delete it via Action
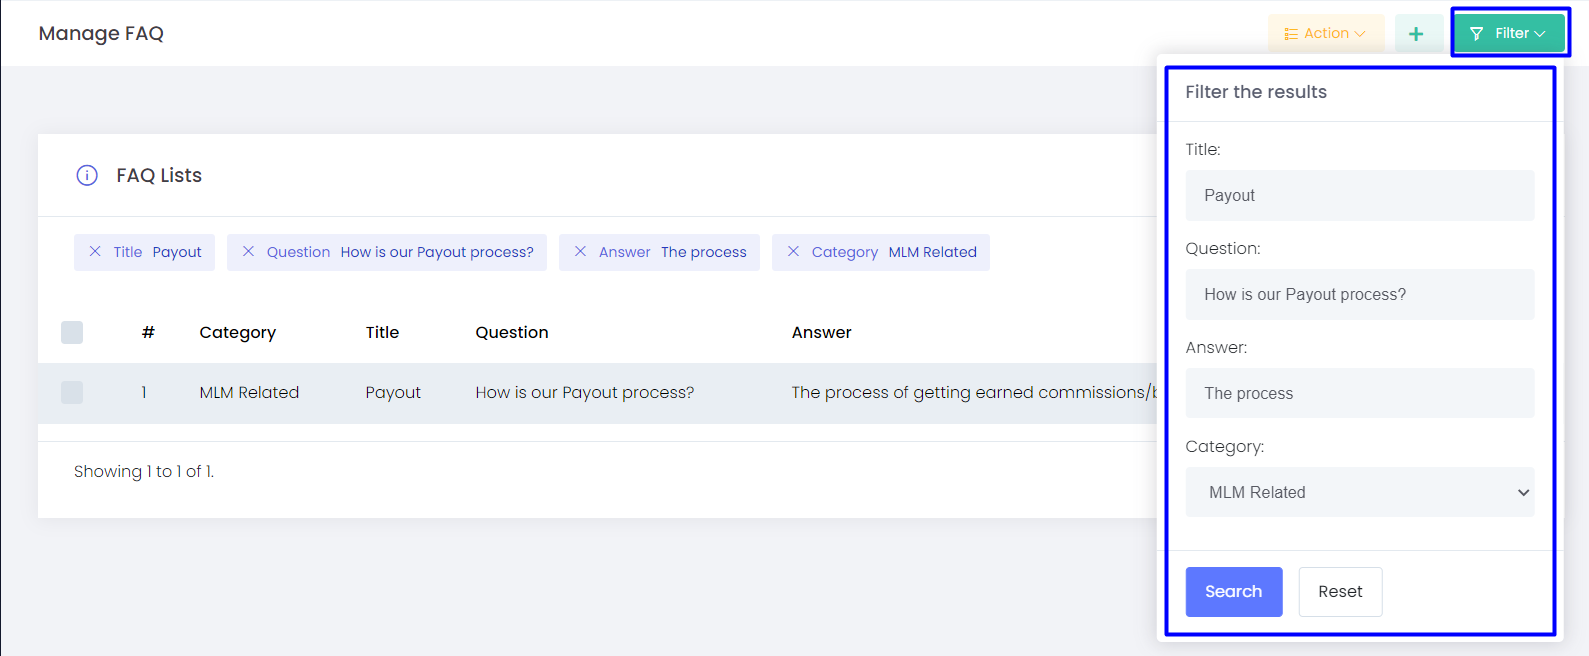
Filter
You can reach the required Event by providing the Title, Description, Question, Answer, and Category
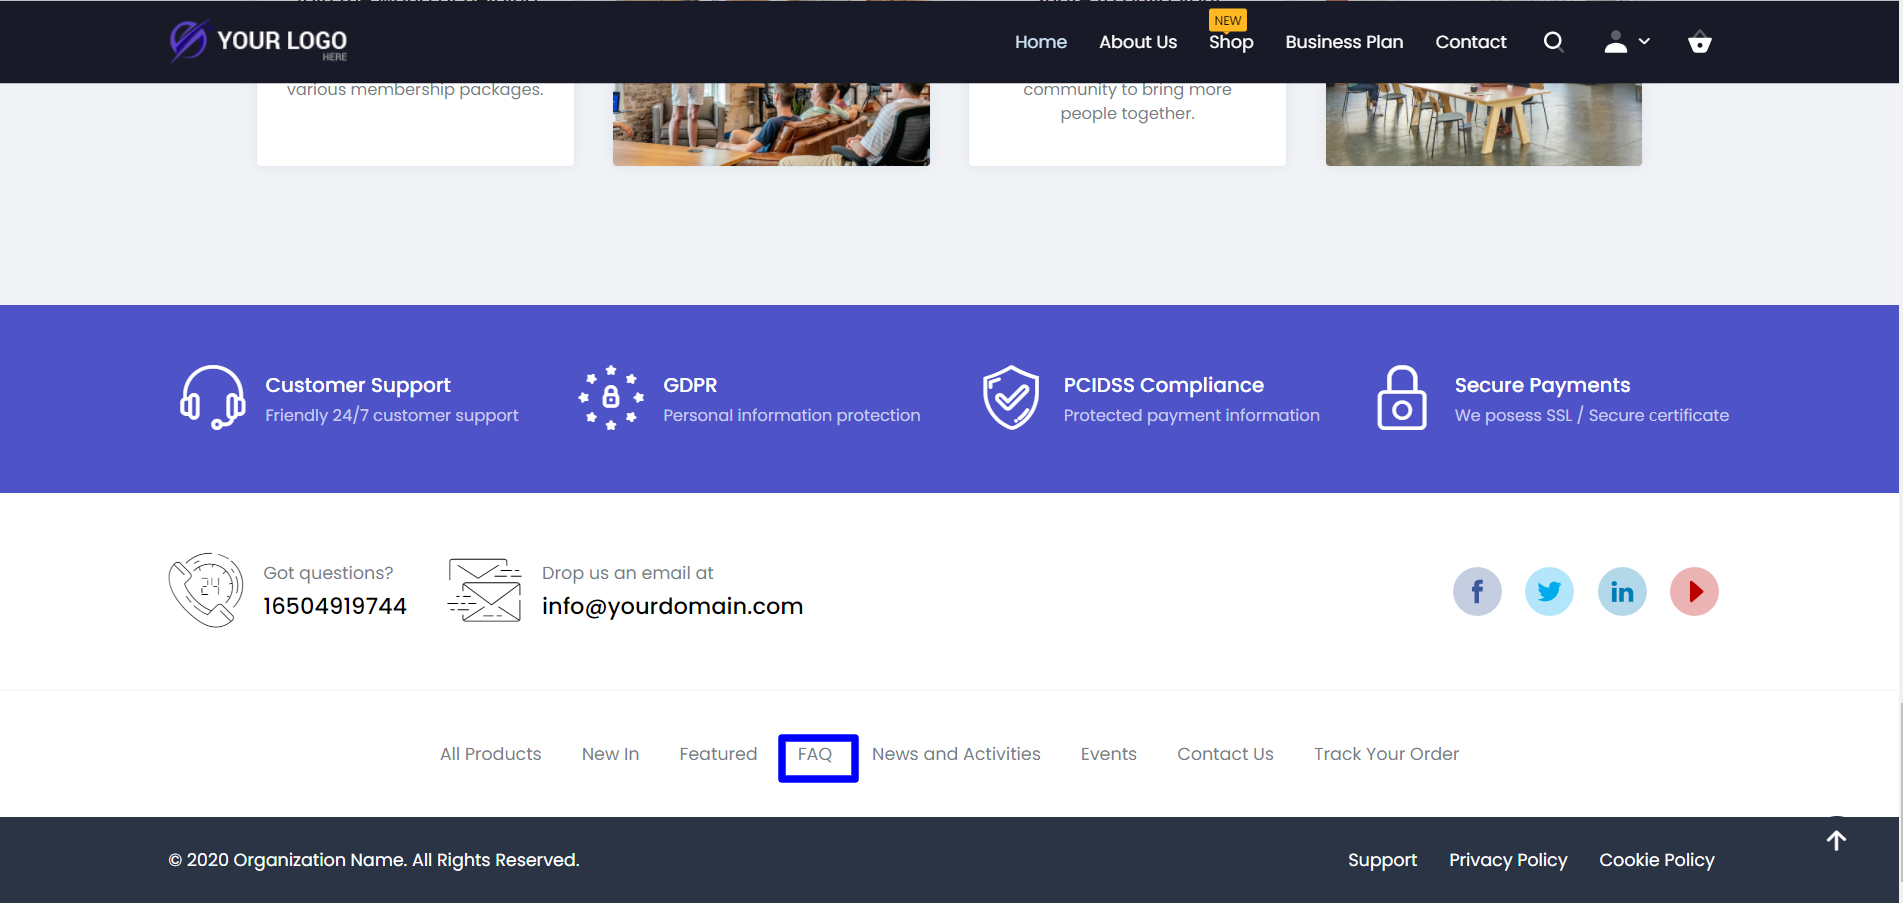
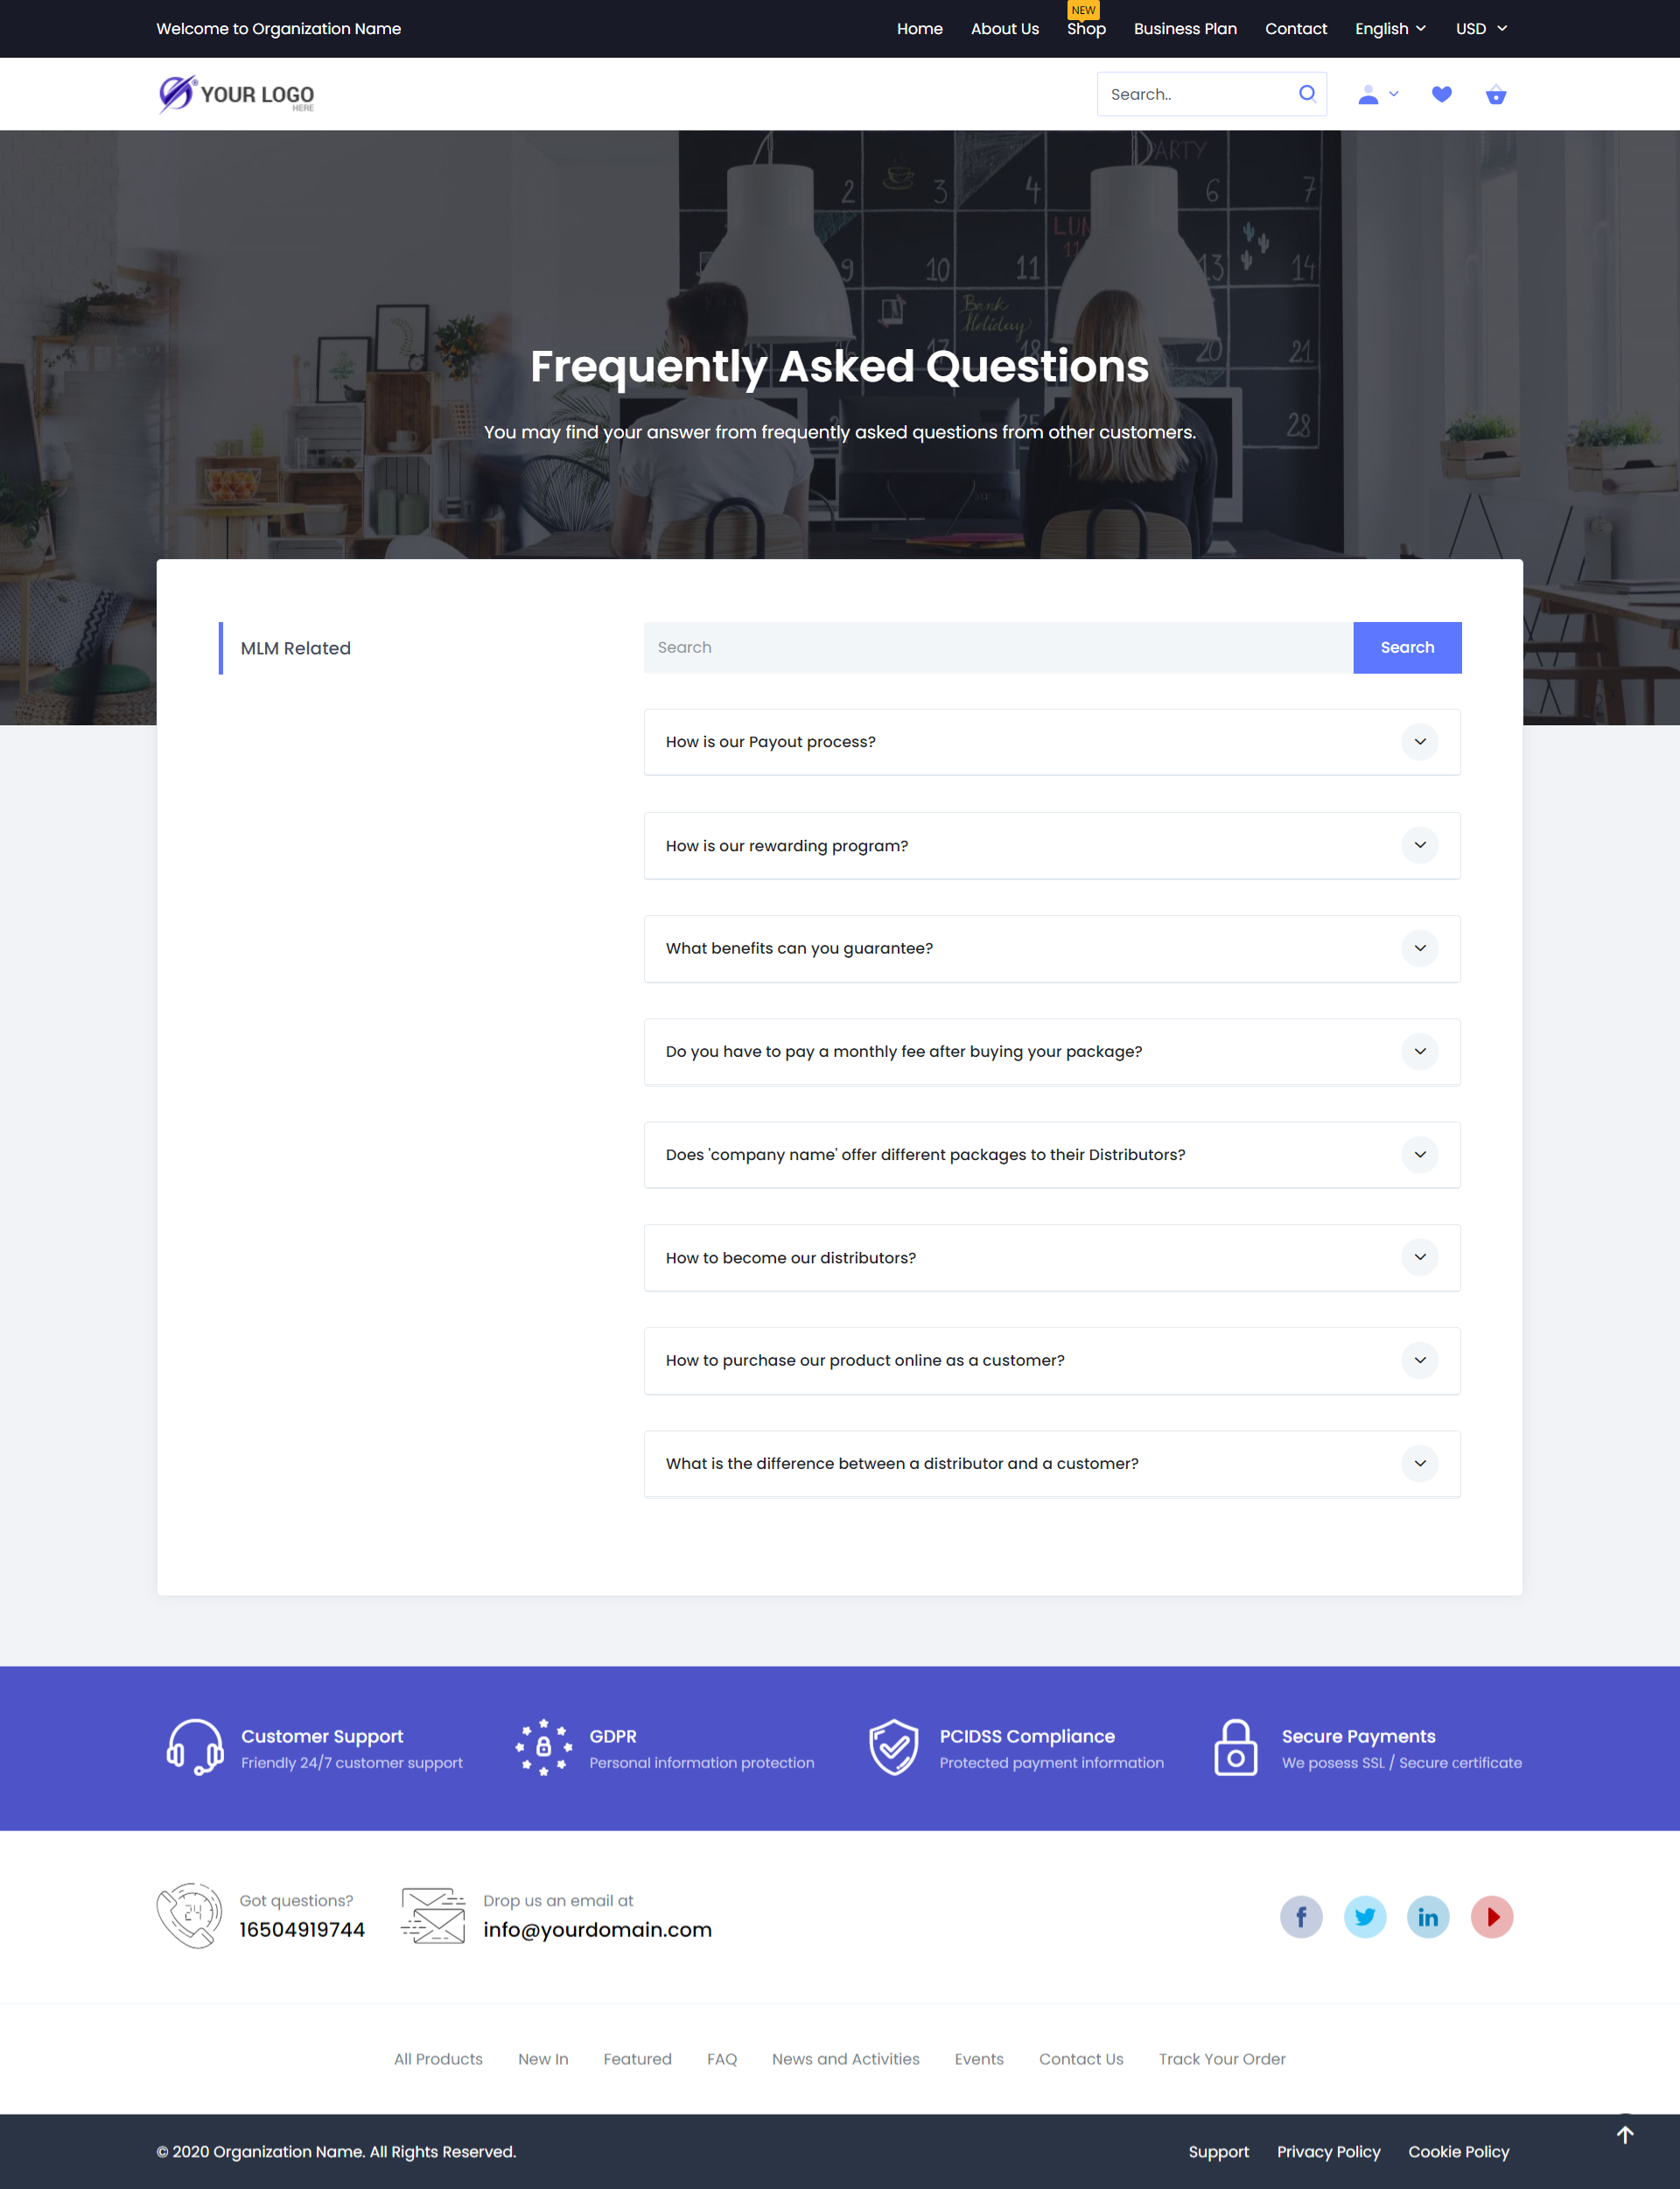
3. The created FAQs will be available as a quick link in the website on click, you will be redirected to the FAQ page which will be visible for all.
If there are any new occurrences or any mandatory processes to be made Admin can notify the users via Announcements.
Create Announcement
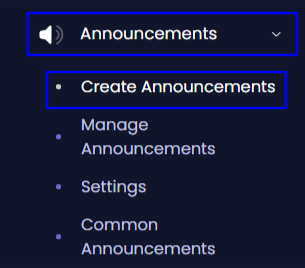
- Admin can create a new announcement via Create Announcements
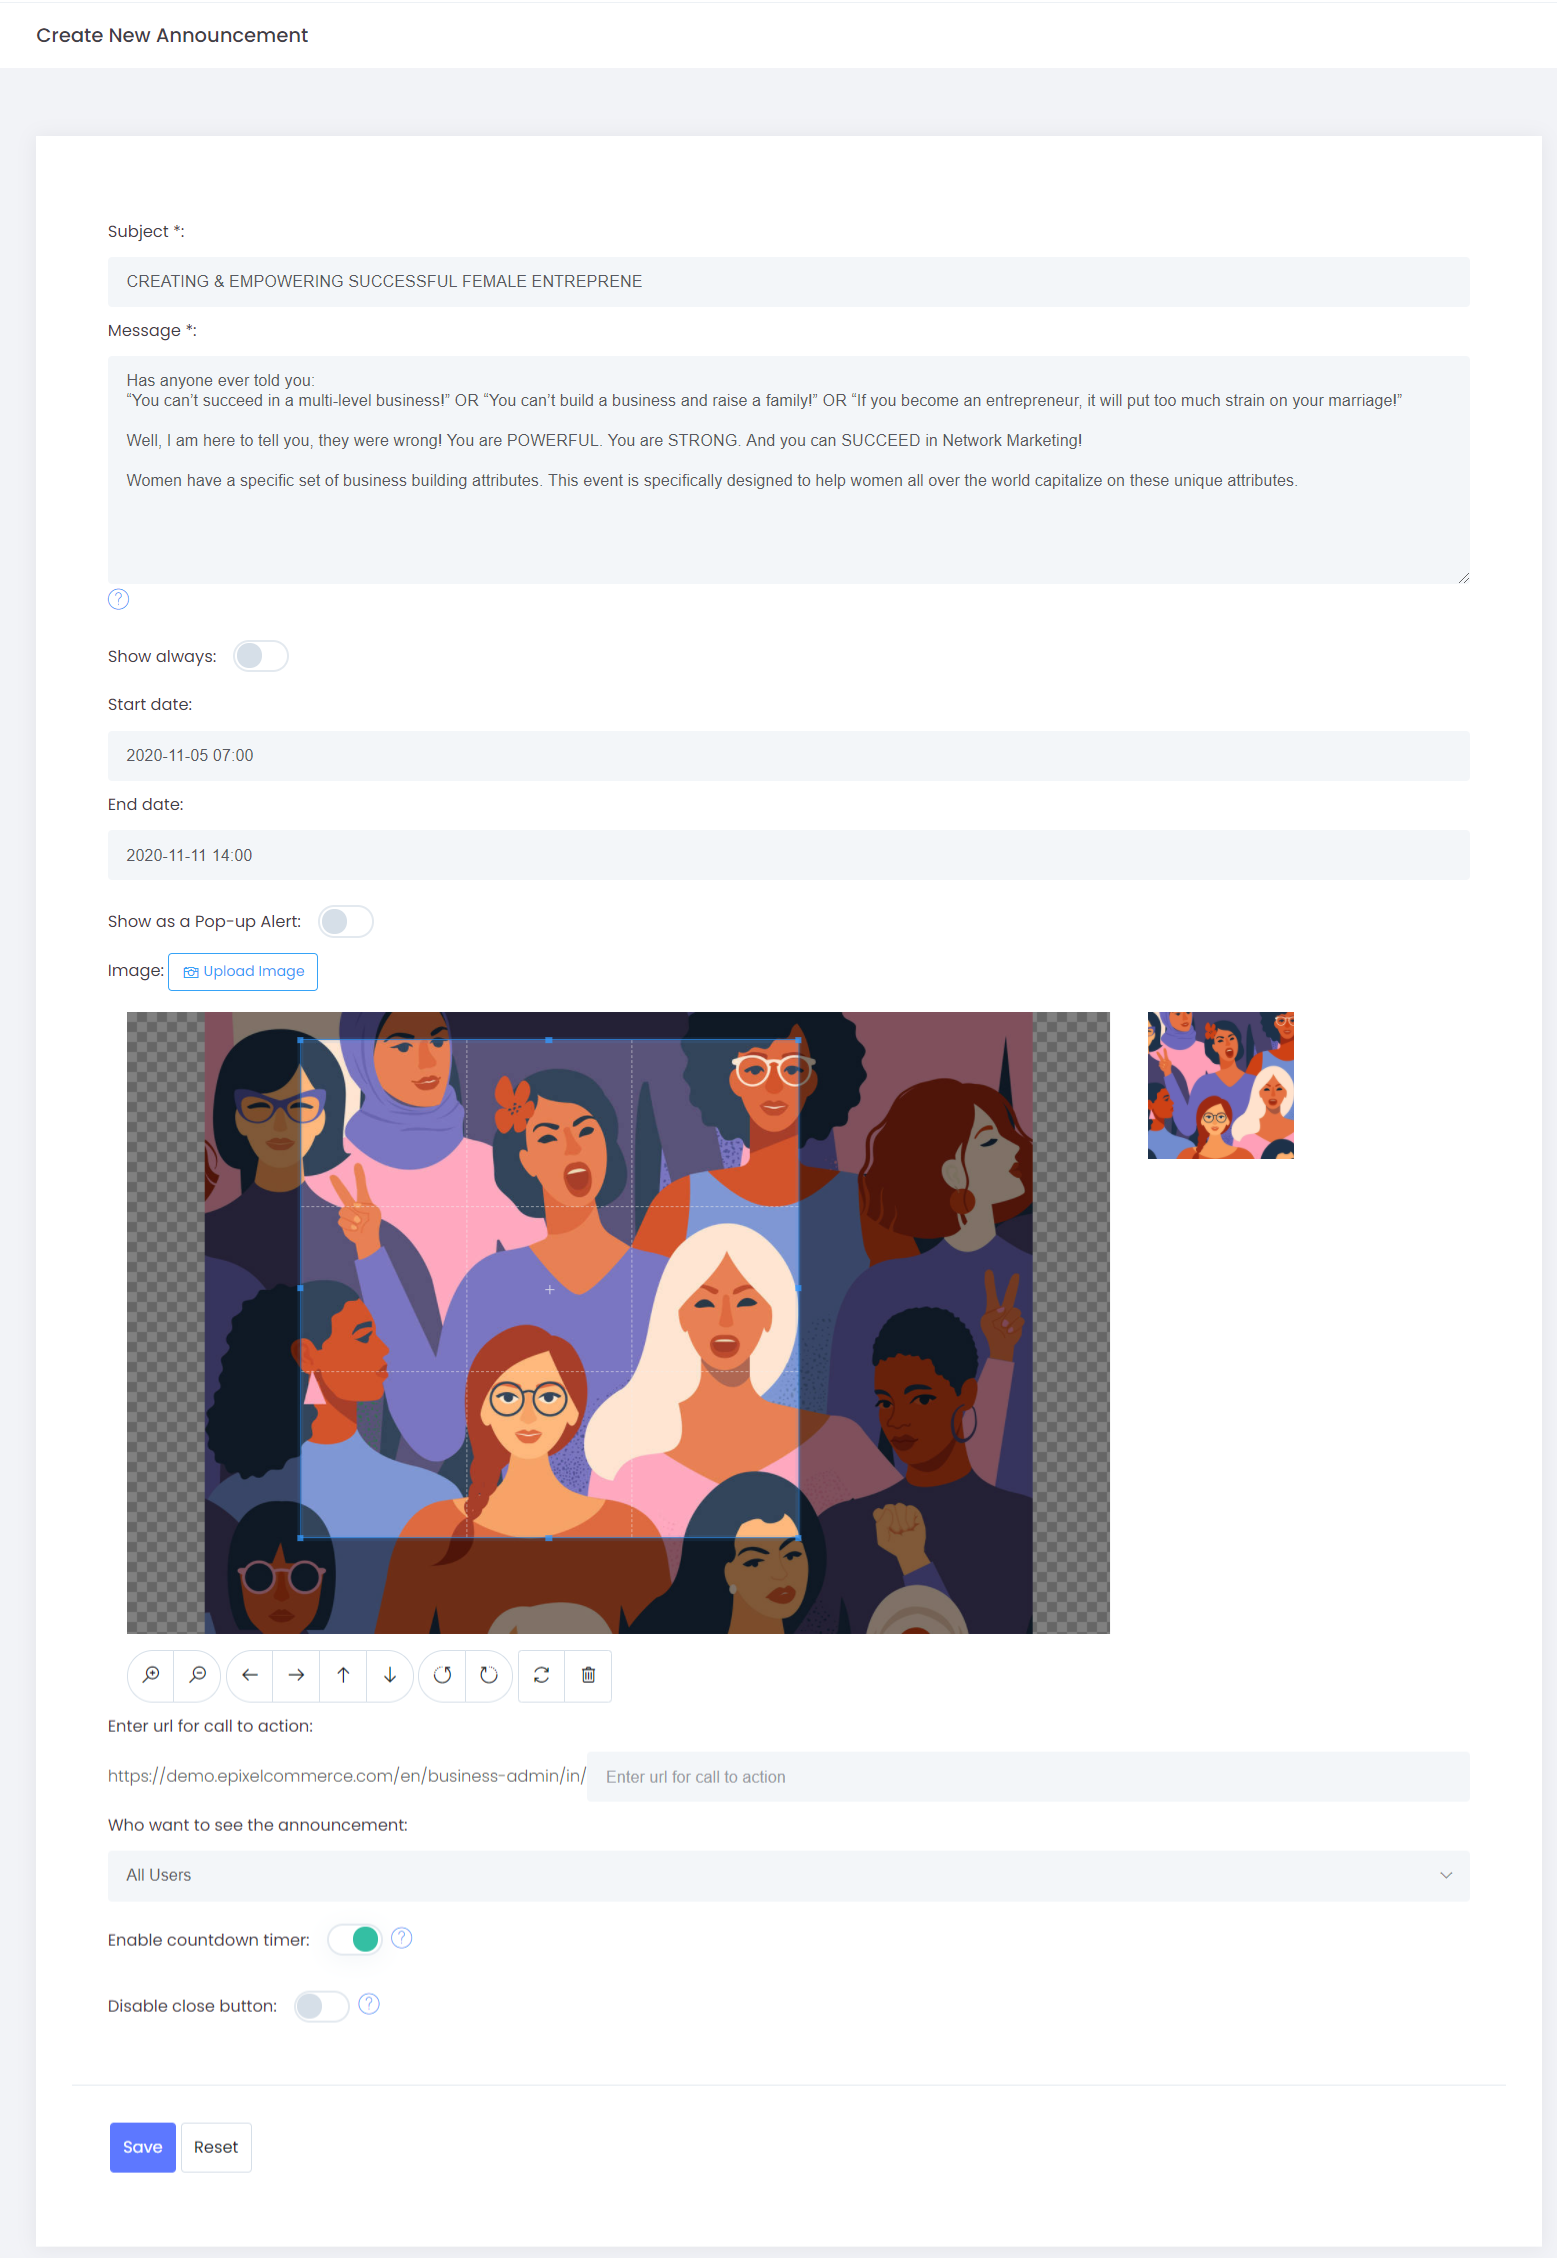
- Subject - The subject of the announcement could be given at this option
- Message - A short description of the content of the announcement (The Max length of the text is 500)
- Show always - You can set the duration of the display of the announcement
- Start date - The start date for the display
- End date - The end date for the display
- Show as a Pop-up Alert - You can set it whether it must be shown as a Pop-up Alert
- Image - You can upload the image required for the Announcement
- Enter URL for call to action - You can provide a url/ link of a page here, so that users will be redirected to a particular page once clicked on the link
- eg: If the announcement is to complete the KYC process or payment process, you can provide the link of that particular page so that users will be redirected to that page on clicking the link for the announcement to complete the process.
- Who wants to see the announcement - You can choose to whom the announcement to be displayed, whether it is to all users or Only specific users
- If it is to specific users/ particular Roles/ particular Ranks you have to enter the name of the specific users/ Roles/ Ranks.
- Enable countdown timer - You can enable the countdown timer which will be running from the current time to the end time of the announcement
- Disable close button - You can disable the close button so that no users can close the announcement and it will be shown every time from the Start Date to END Date
- Once saved, the announcement will be created
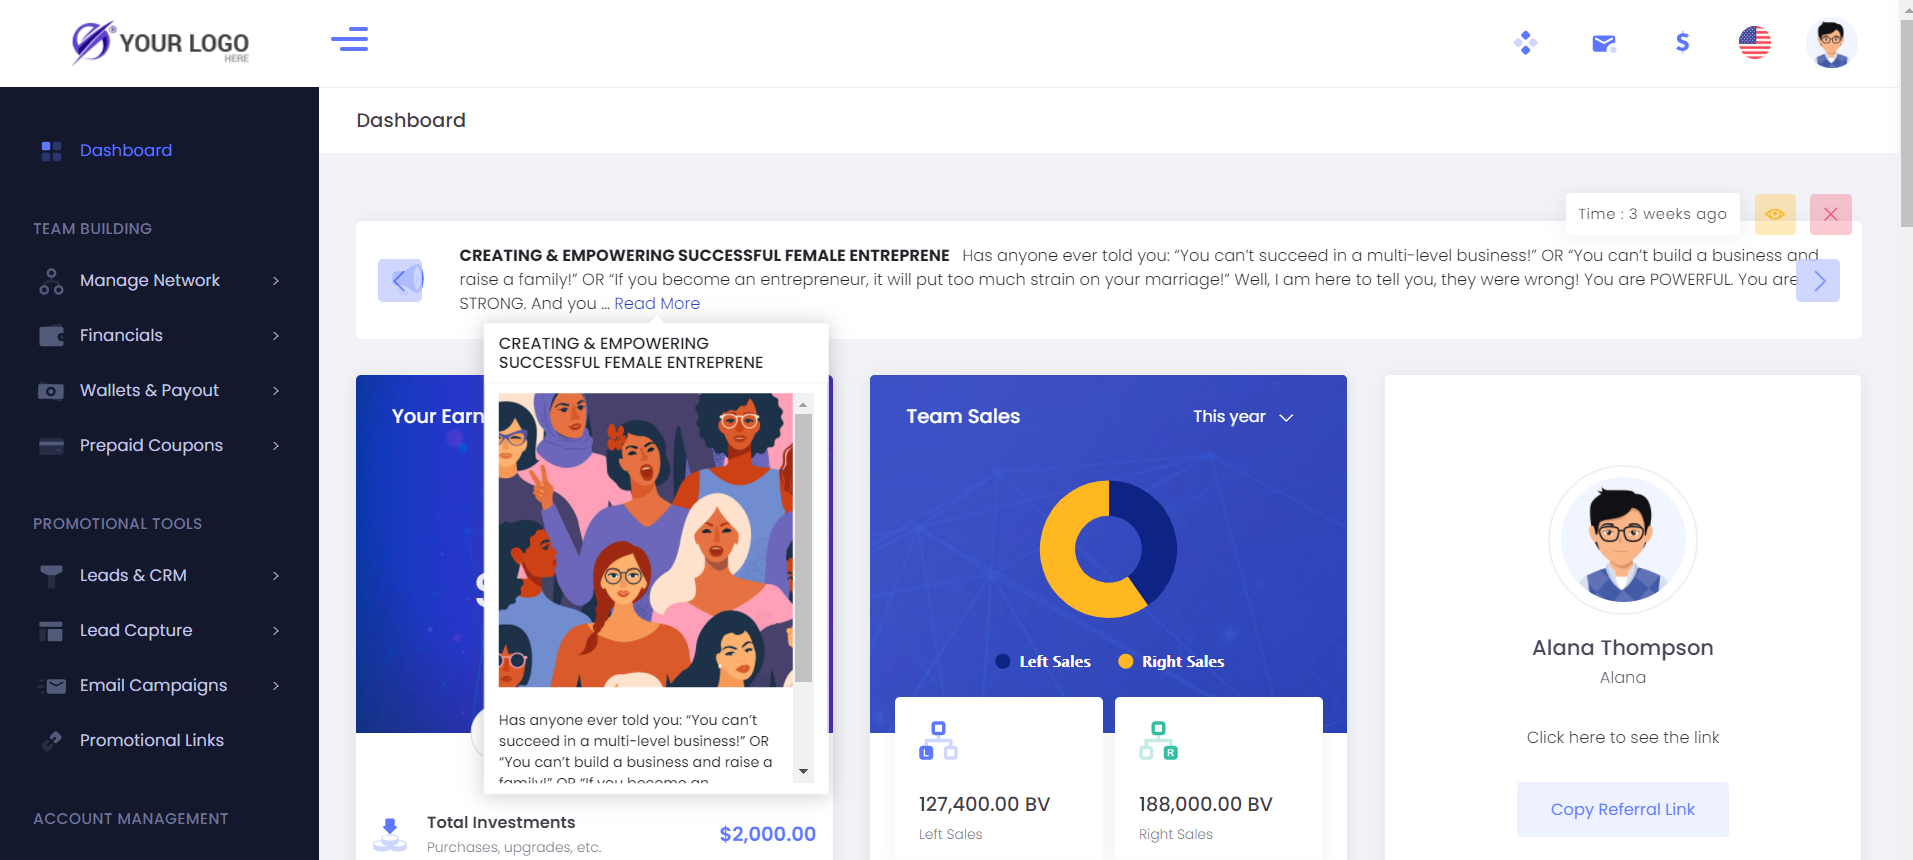
Once the announcement is been created it will be displayed on the dashboard of the users.
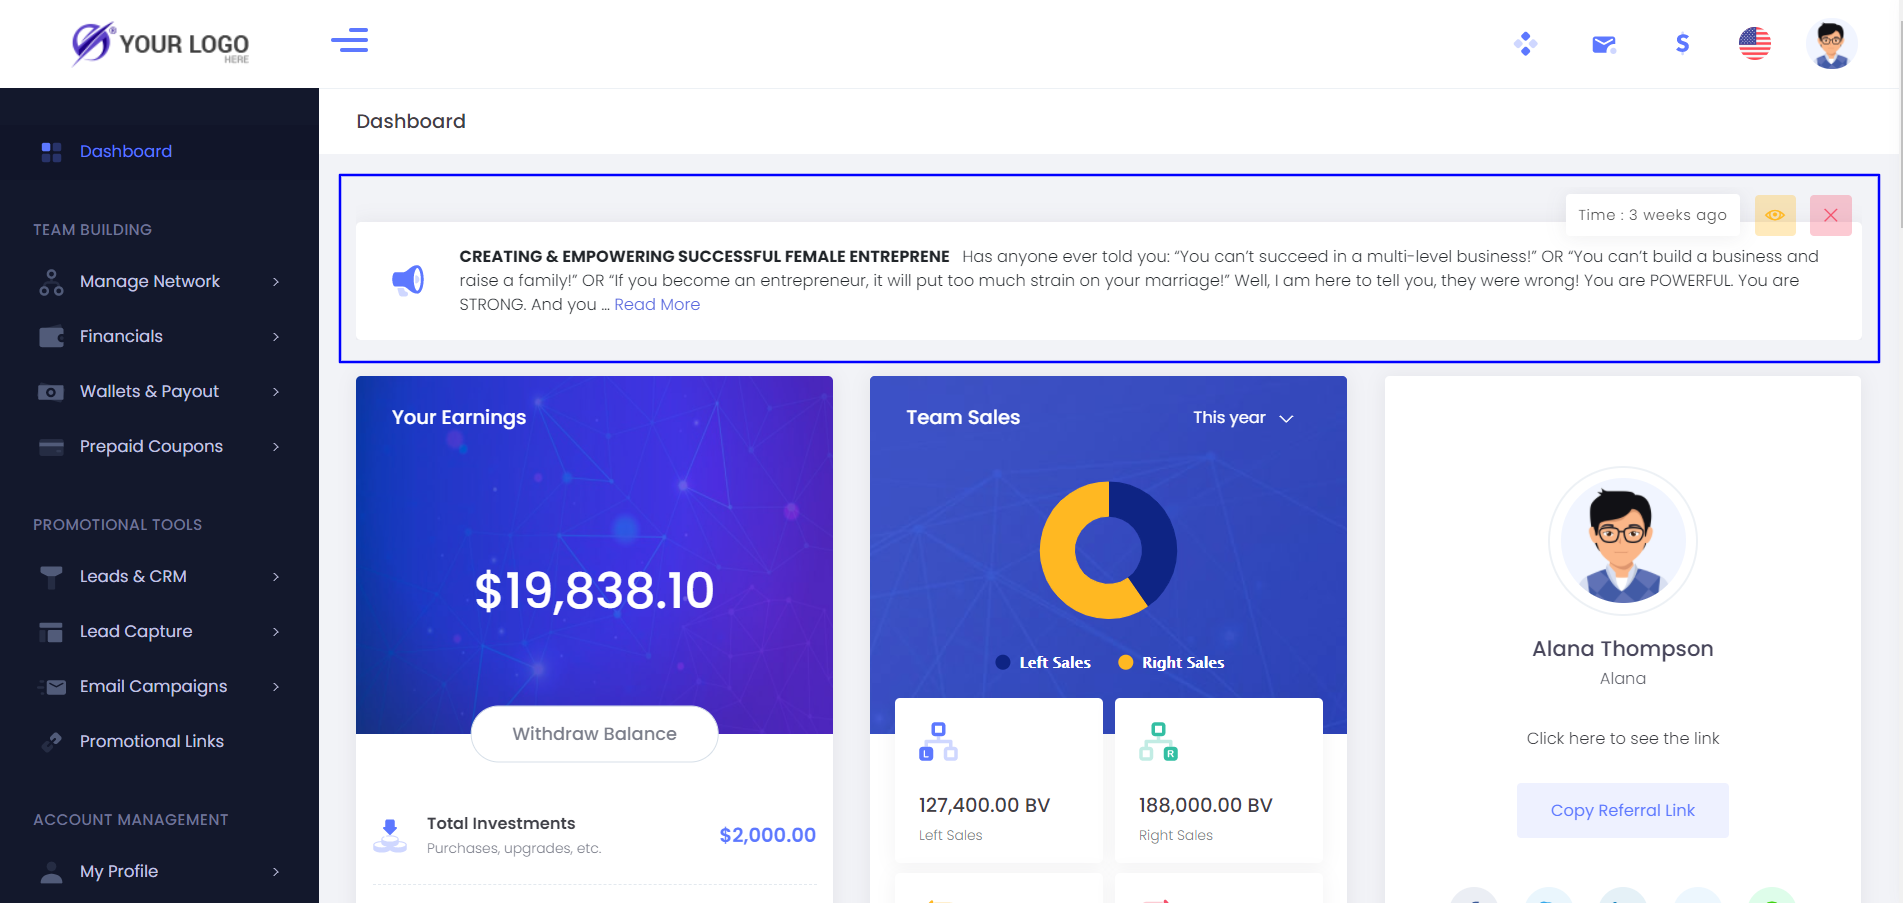
Click on read more to view the announcement and details.
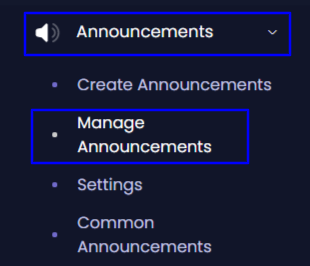
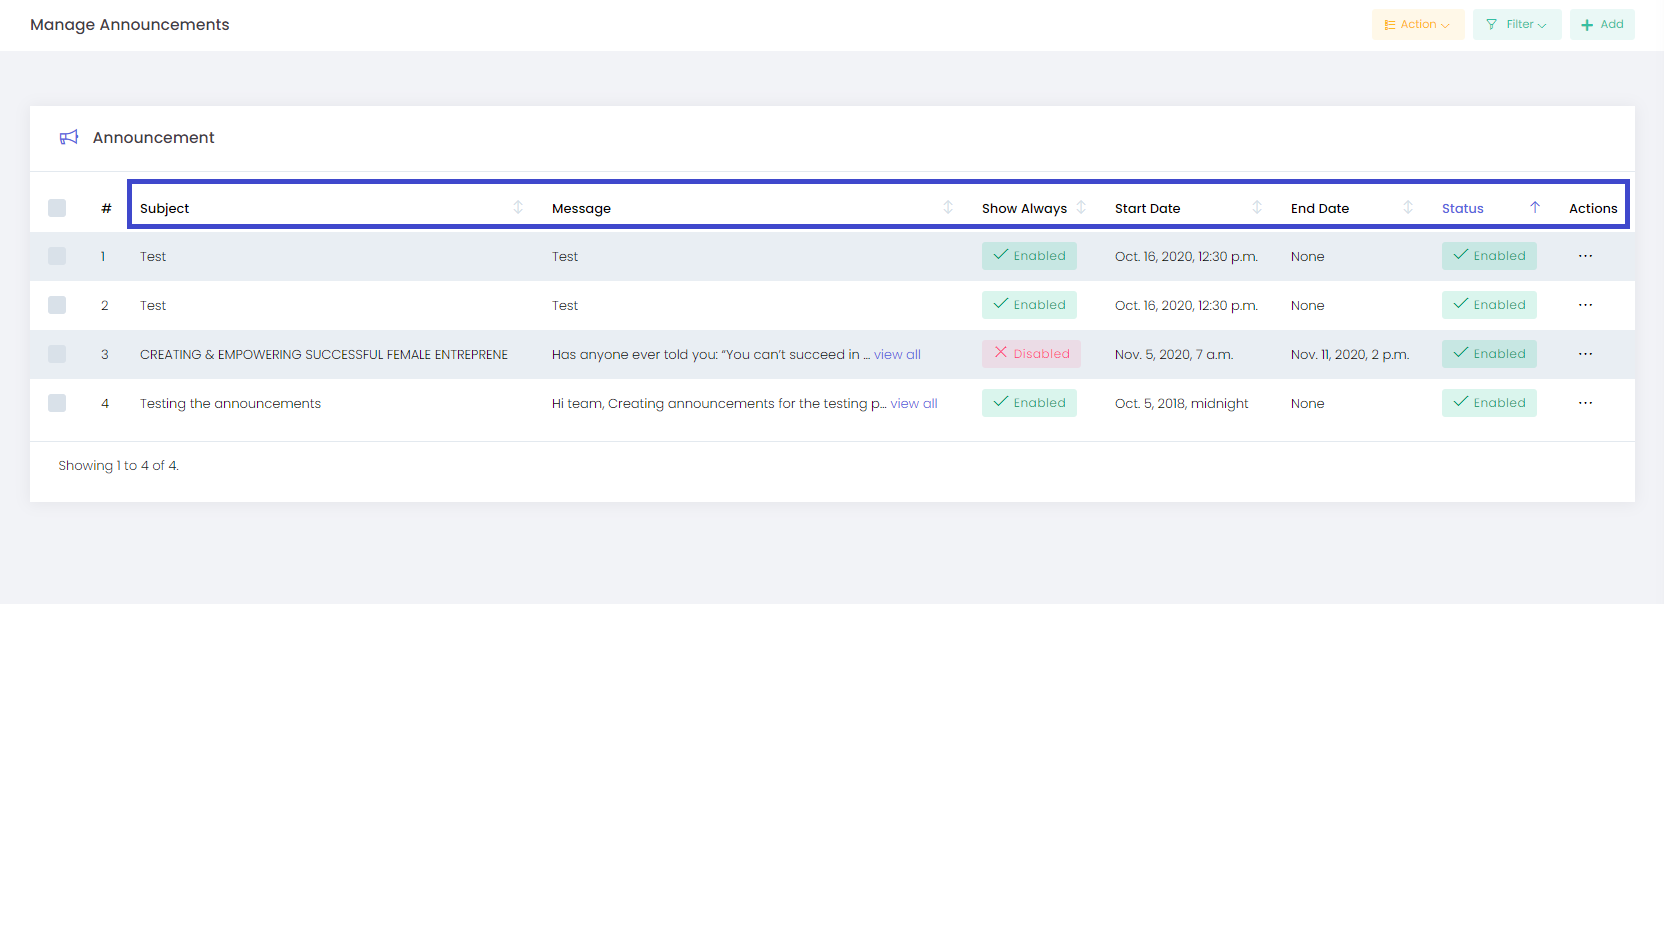
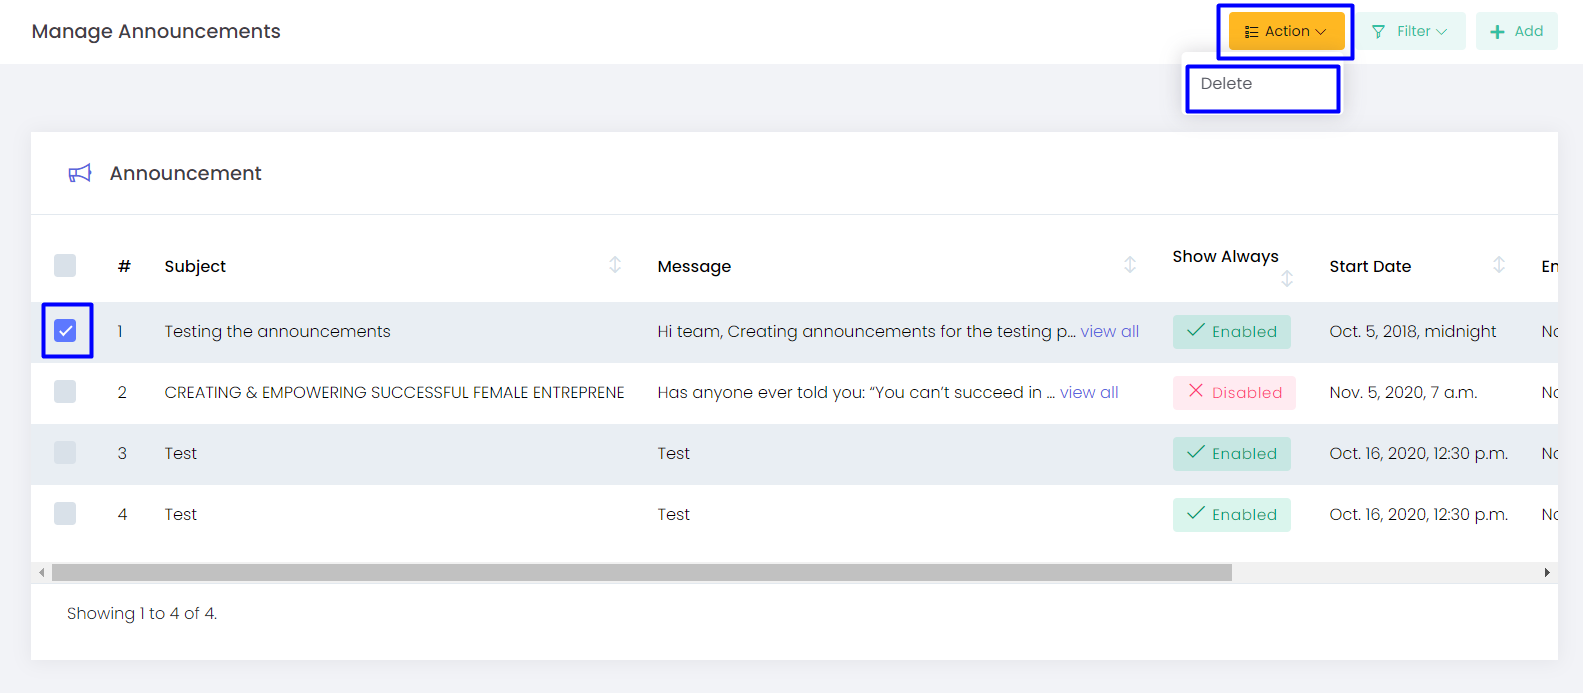
Admin can manage the already created announcements and add a new announcement using this option
- Subject - The subject of the announcement could be given at this option
- Message - A short description of the content of the announcement (The Max length of the text is 500)
- Show Always - It shows whether it is shown always or not
- Start Date - The start date for the display of the announcement
- End date - The end date for the display of the announcement
- Status - The status of the announcement will be shown here
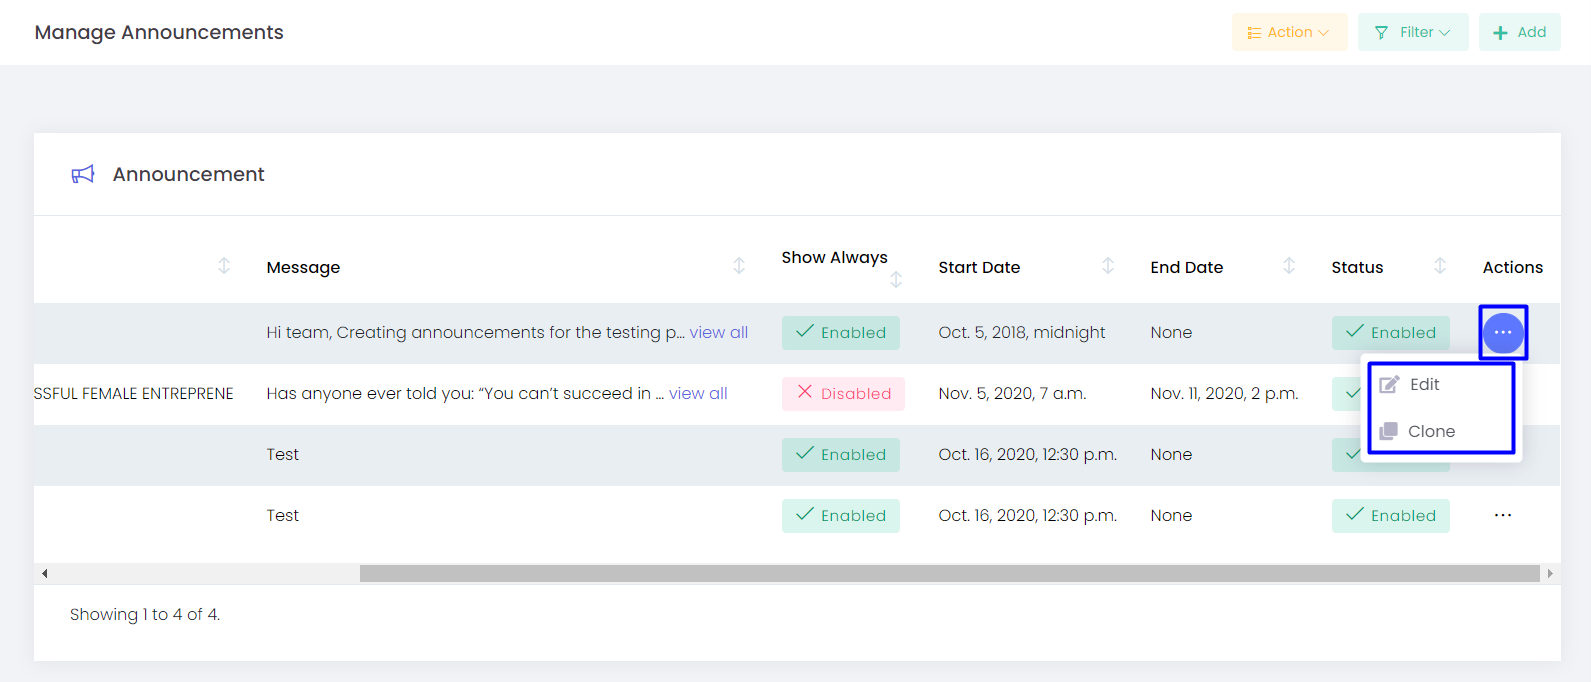
- Actions
- Edit - You can edit the created announcement from Edit in Actions
- Clone - You can create the copy/ clone of the announcement using this option
Action
You can select any of the categories, and Delete it via Action
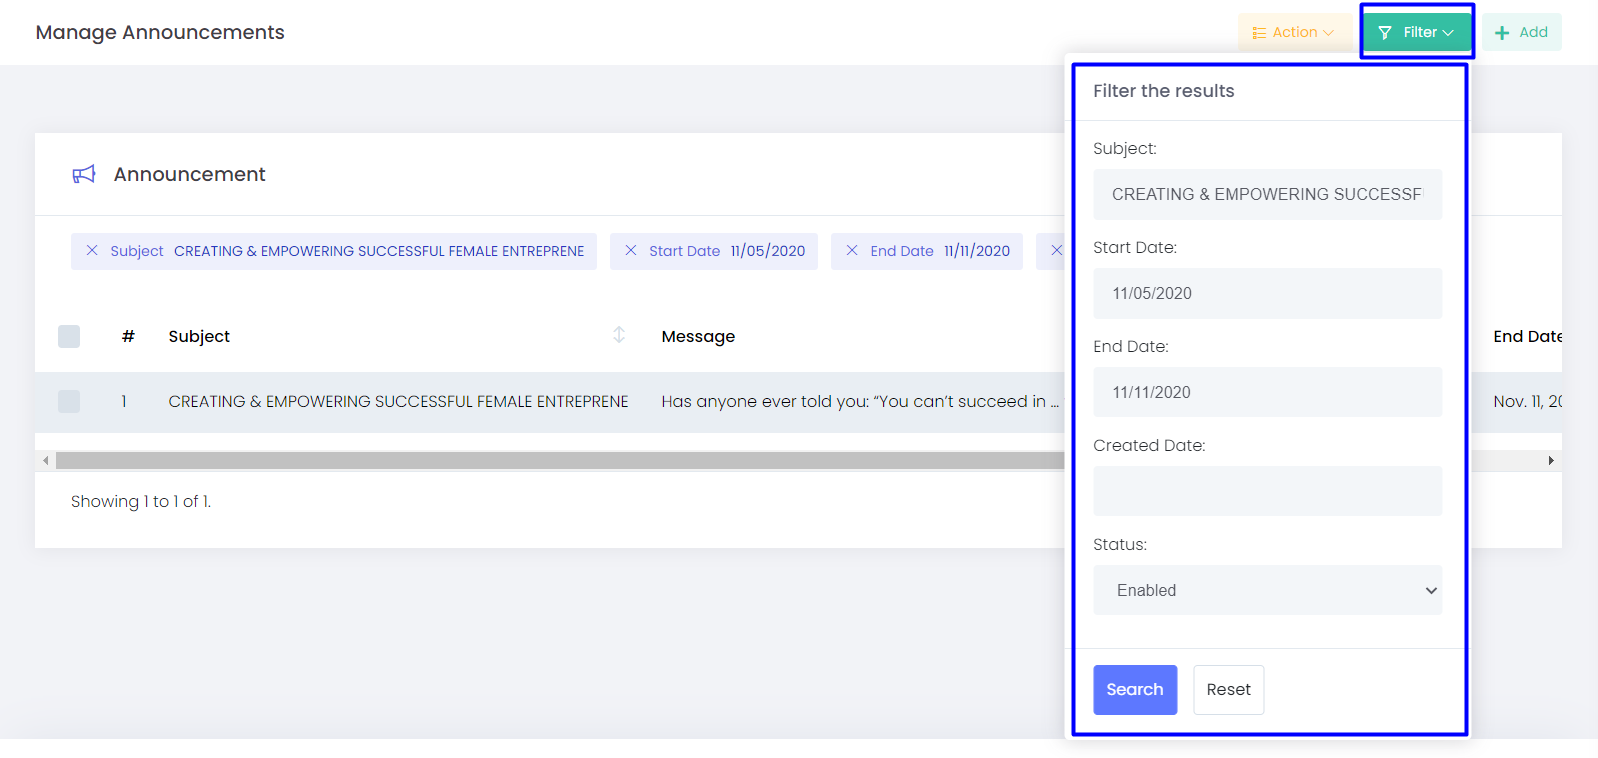
Filter
You can reach a particular required category by providing the Title and Description on the filter
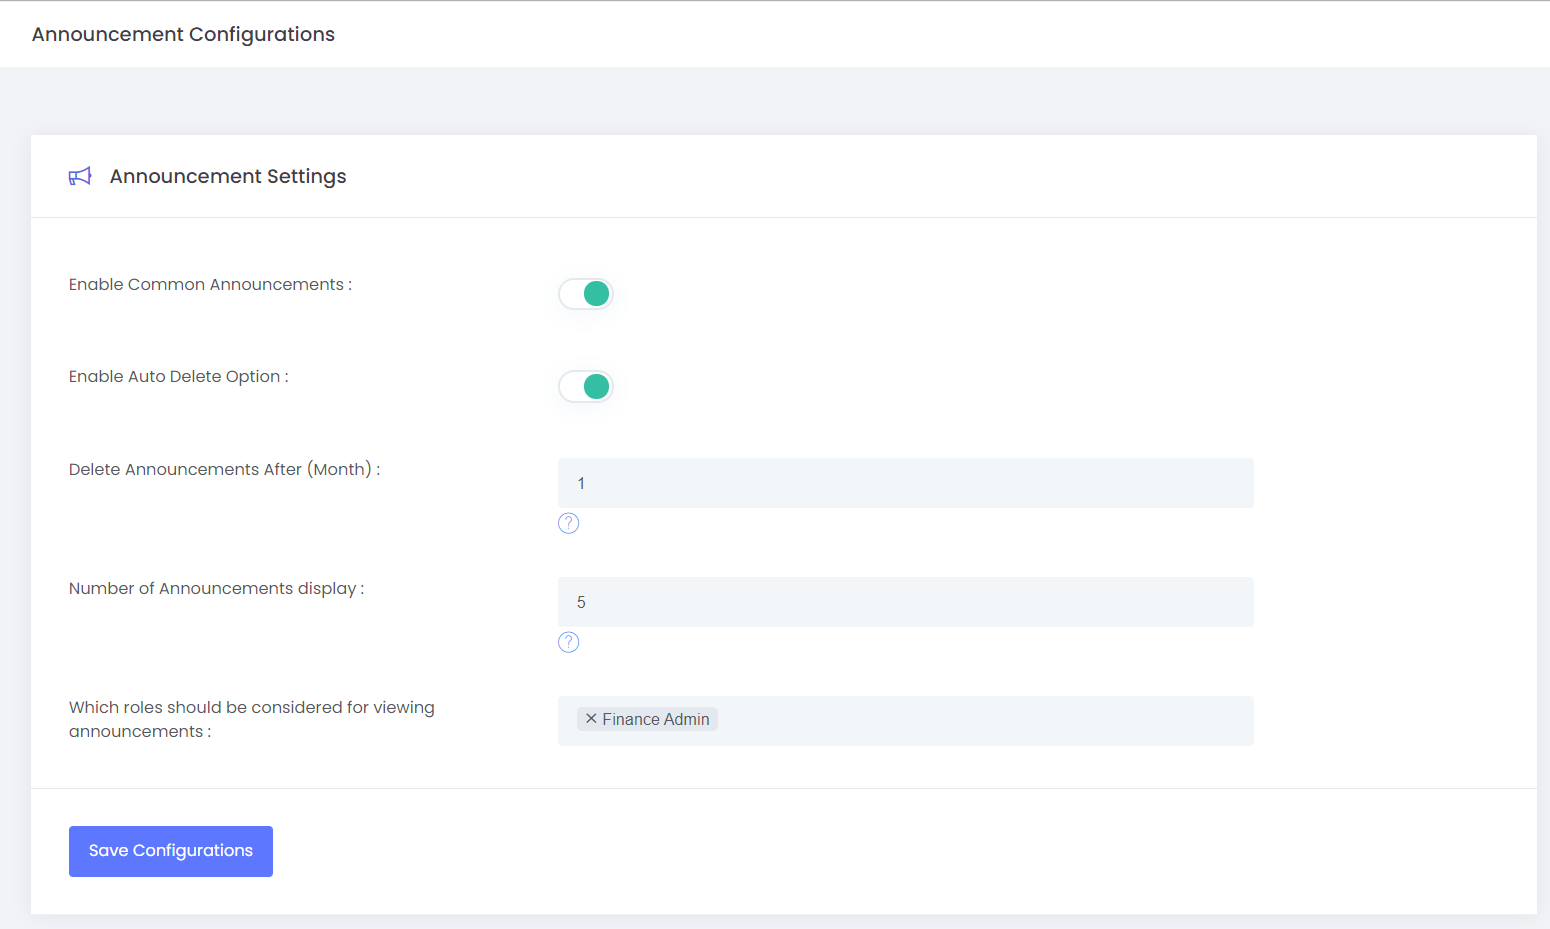
Admin can make the Announcement Configurations from this option, the configurations included are:
- Enable Common Announcements - Once the common announcement is enabled, the common announcement will be displayed to the users based on the criteria
- Enable Auto-Delete Option - Once the option is been enabled, the announcement will be automatically deleted after the set end date
- Delete Announcements After (Month) - Admin can set the number of months after which the announcement should be deleted from the created date
- Number of Announcements display - Maximum number of announcements that could be displayed in the dashboard
- Which roles should be considered for viewing announcements - Admin can configure users of which user role could view the announcement so that only the members of that particular role could view the announcements
Common Announcements are some of the predefined announcements available in the system which will be shown for all the users in the system.
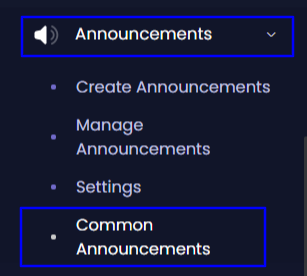
When a user registers and login into the system, this announcement will be shown to them depending on the criteria.
For Example consider the announcement "For Update KYC Details", if a member joined the system and if he/she has not completed the KYC details that member will be notified until the process is completed.
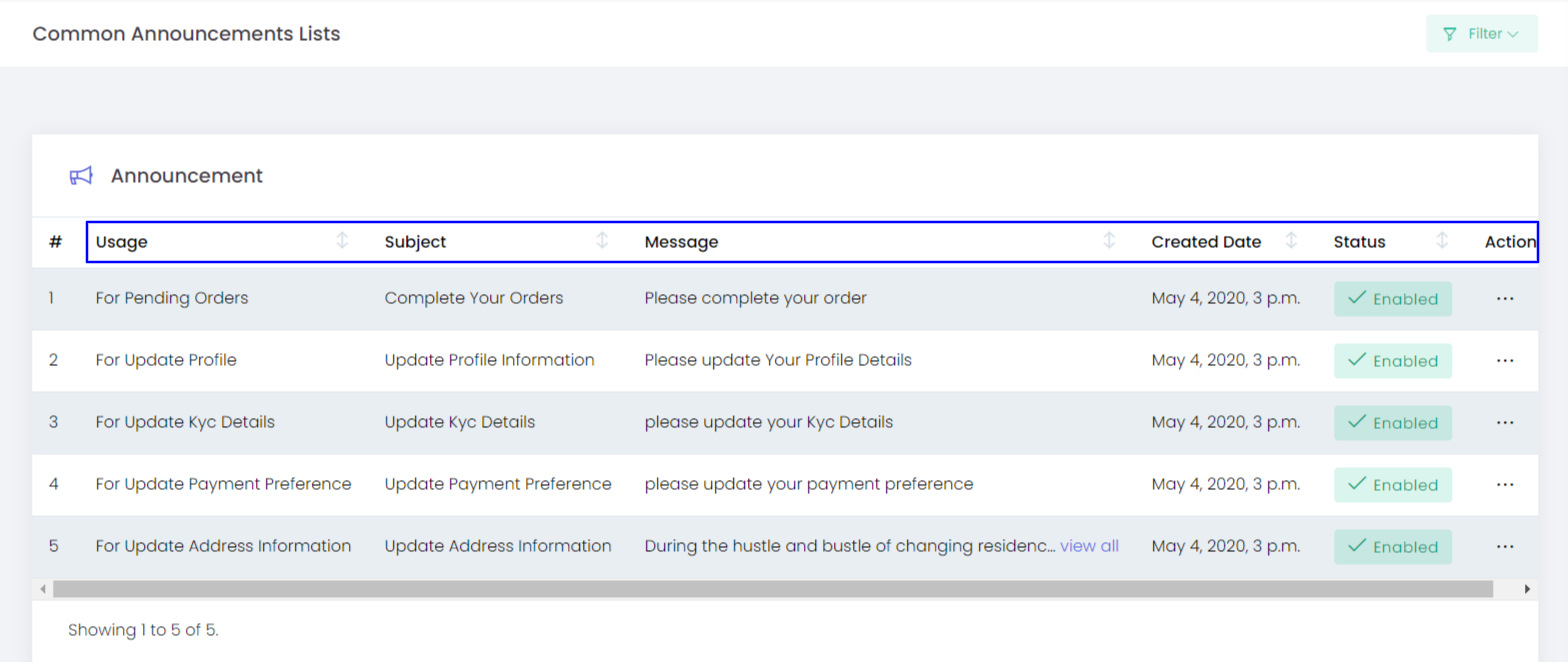
The details included for the available announcement are:
- Usage - The criteria for announcement display
- Subject - Subject/ title of the announcement
- Message - The description/ message included
- Created Date - The date at which the announcement was created
- Status - Shows whether the announcement is Enabled/ Disabled
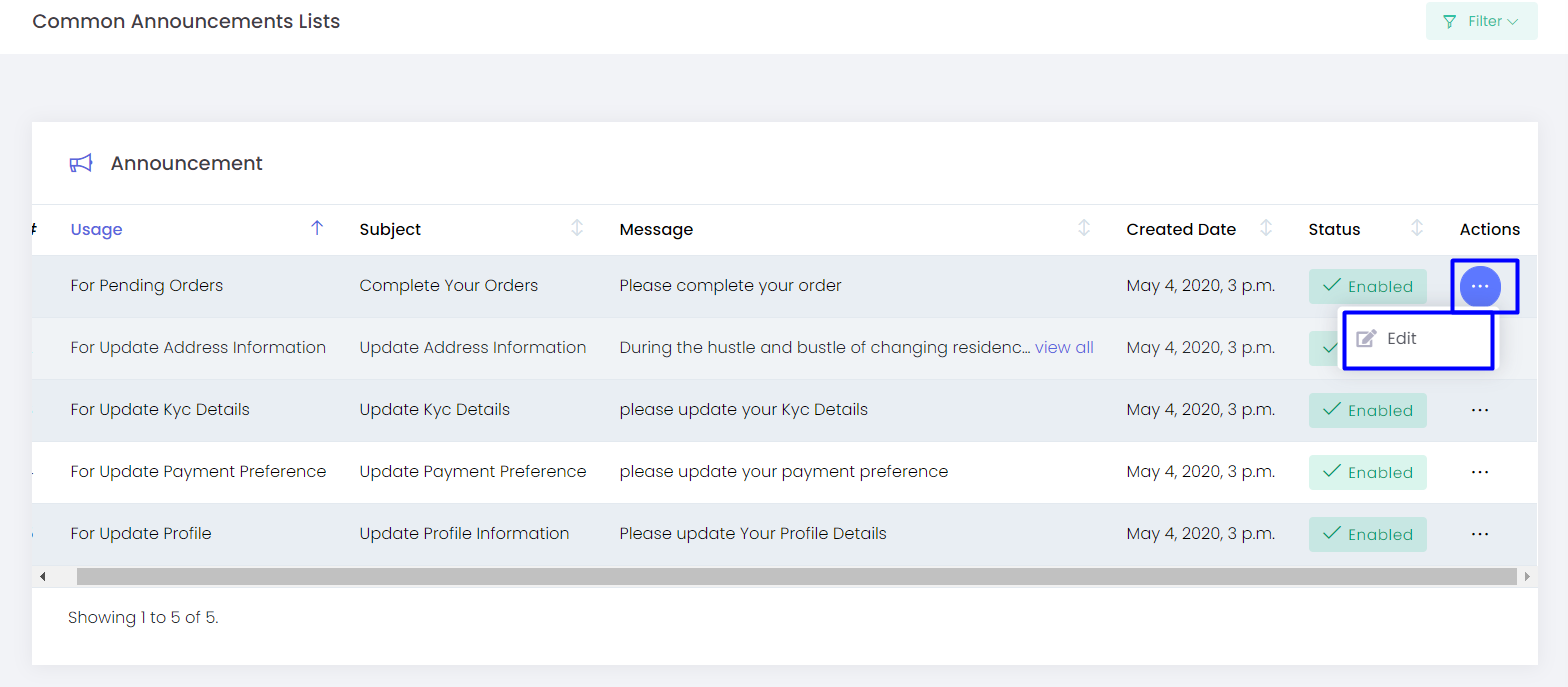
- Actions - You can edit the subject, message and change the URL (Enter URL for the call to action - You can provide a URL/ link of a page here so that users will be redirected to a particular page once clicked on the link) and change announcement enable/ disable from Edit in Actions
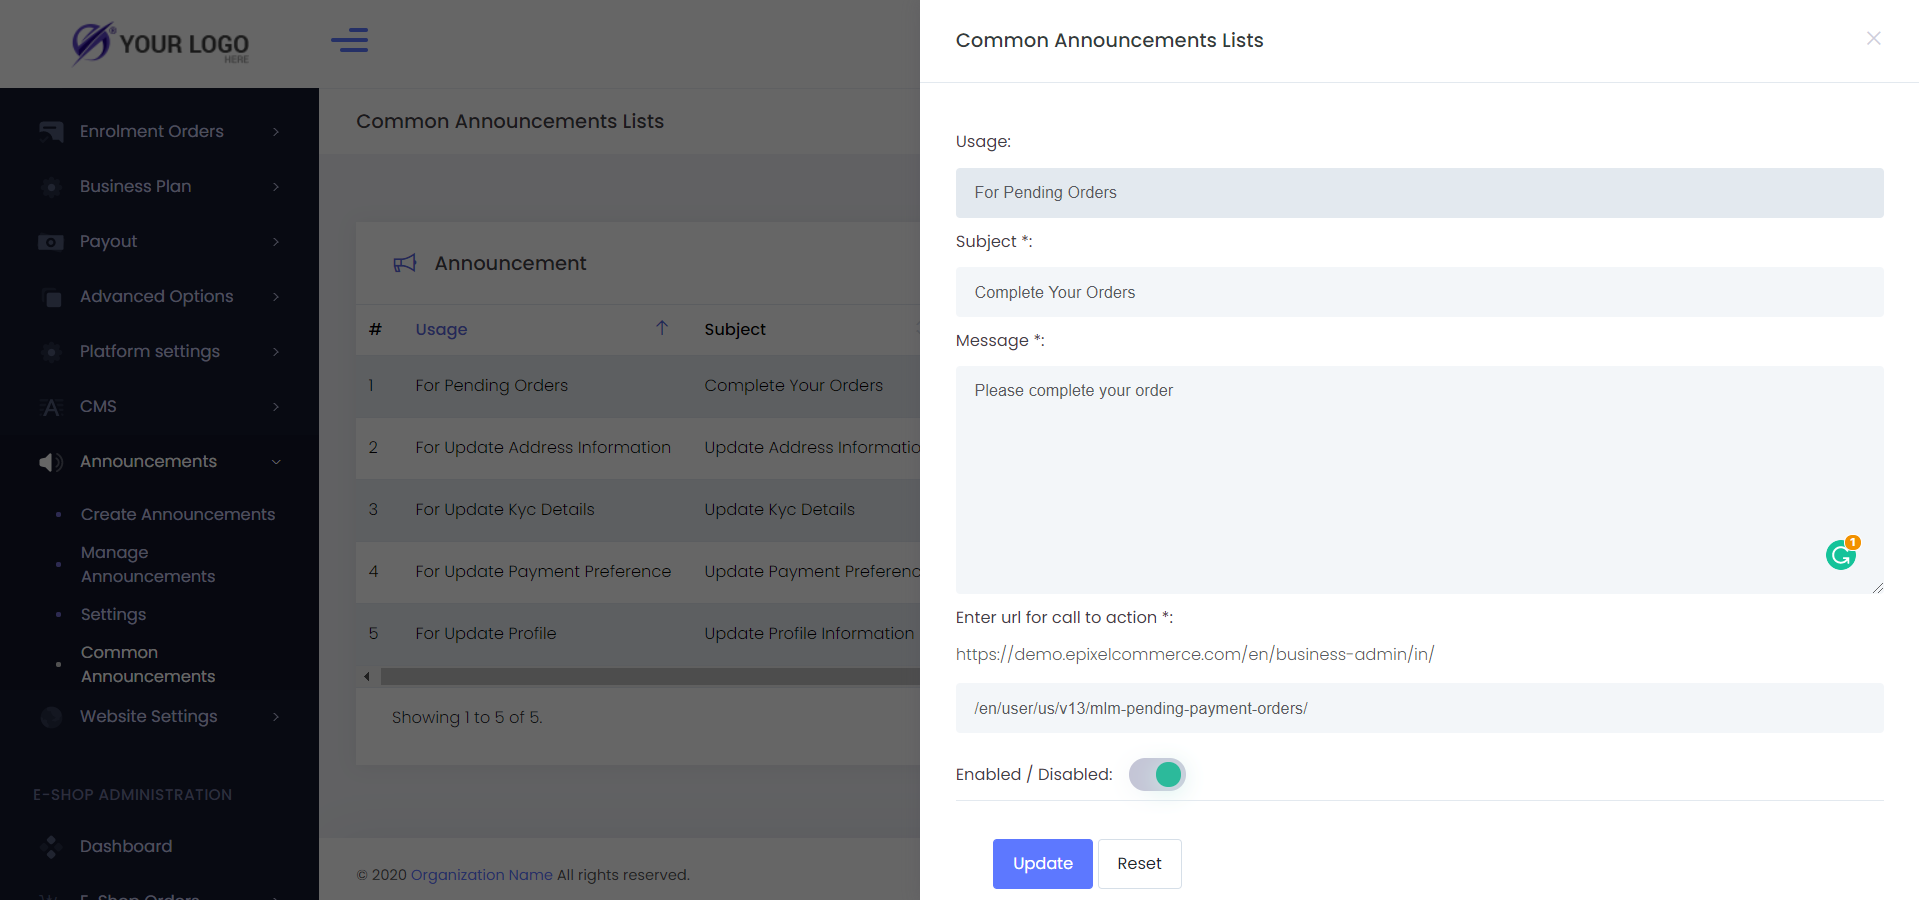
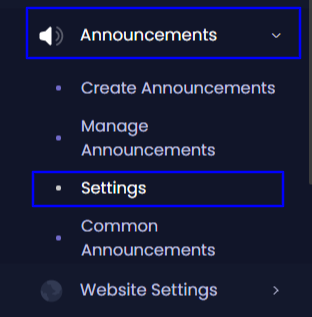
You can also enable the common announcement from the Settings options (https://epixelsoftware.help/docs/epixel-mlm-software-back-office-administration/V-15/administration?lang=EN#announcement-settings-EN)
Once the Common Announcement is enabled, they will be displayed on the dashboard of the users.
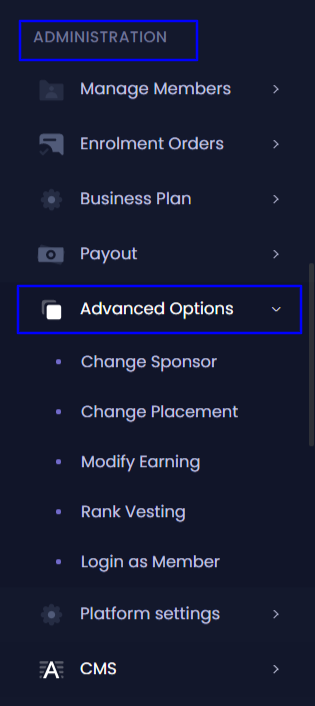
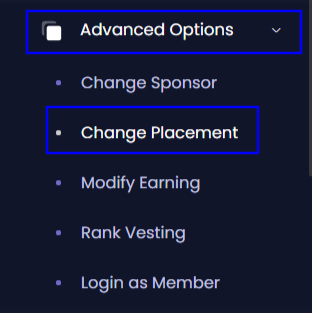
Advanced Options helps the Admin to change or modify sponsor, placement, earnings, rank.
Admin has the option to Easily Modify the sponsor of members anytime.
The only criteria for changing the sponsor of a user is, the new sponsor must be the Sponsor or upline sponsor (Sponsor of sponsors) of that user.
Eg:
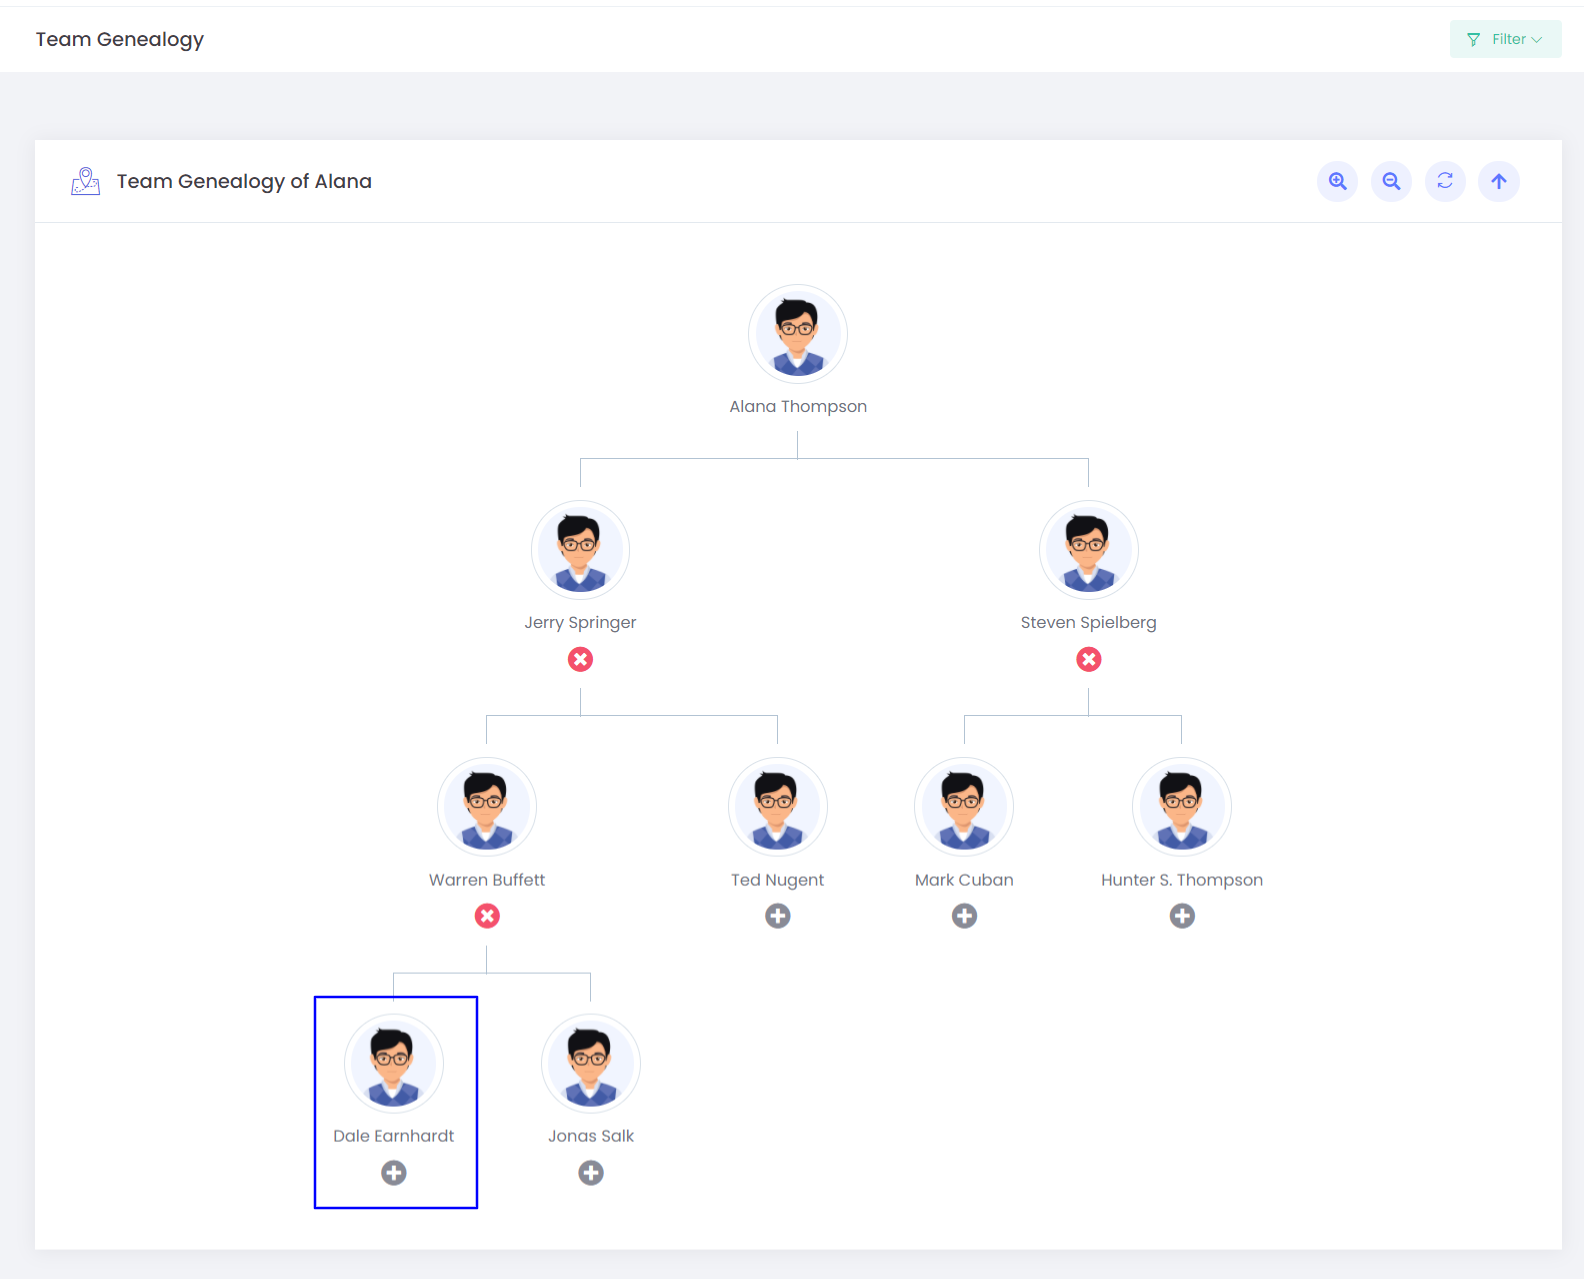
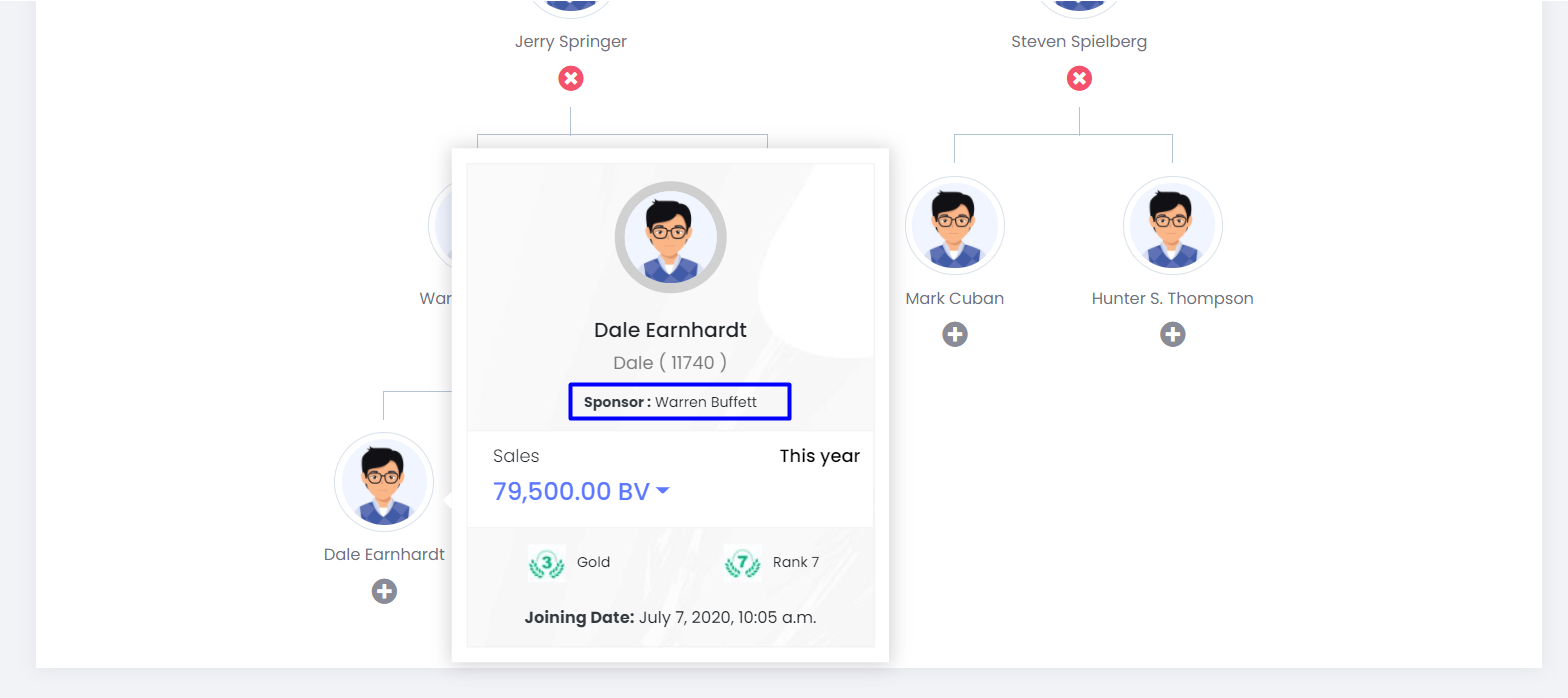
From the image, consider if we are changing the sponsor of Dale Earnhardt whose sponsor is Warren Buffett. We have to change the sponsor to Jerry Springer (who is the sponsor of Warren Buffett) or to Alana Thompson (who is the sponsor of Jerry Springer.)
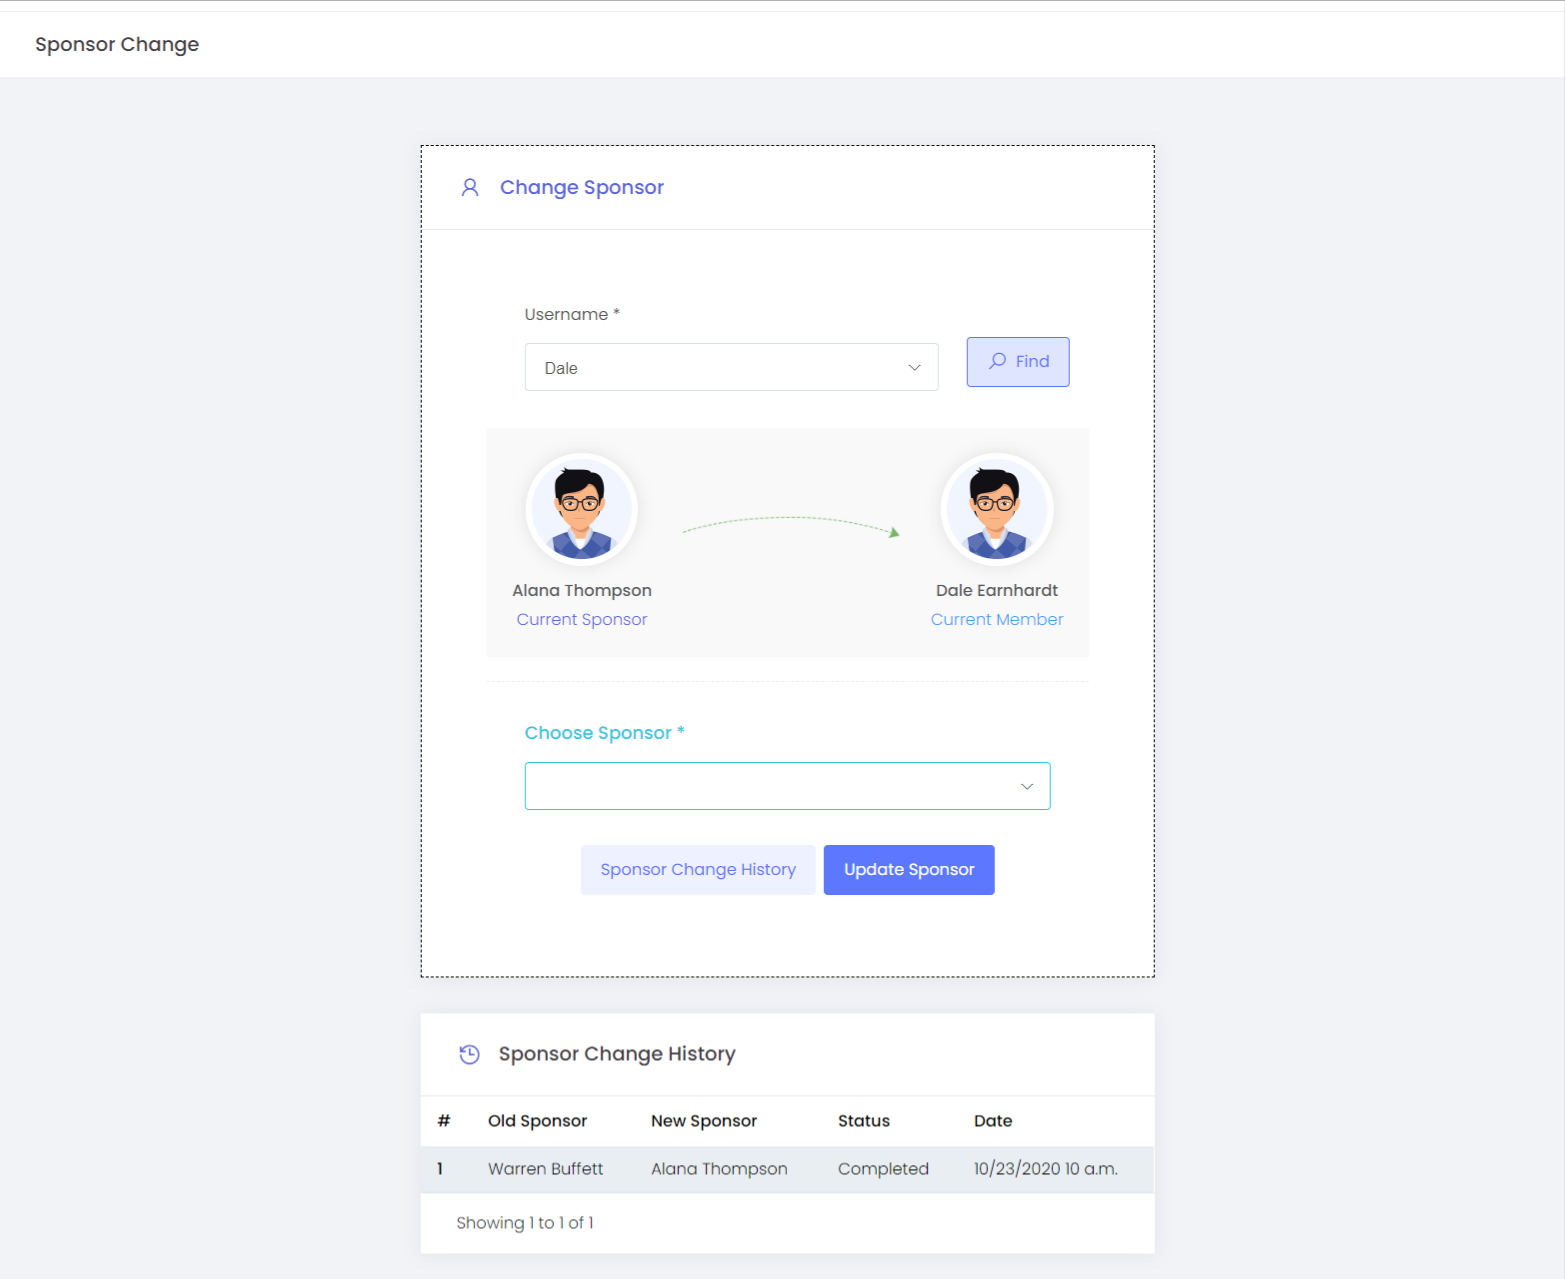
How Admin changes the Sponsor?
- Admin can use the Change Sponsor option from Advanced Options
- Put in the Username and Find the details of the user whose Sponsor need to be changed
- Choose the New Sponsor and Update Sponsor
- The Sponsor change history could be tracked from the Sponsor Change History button
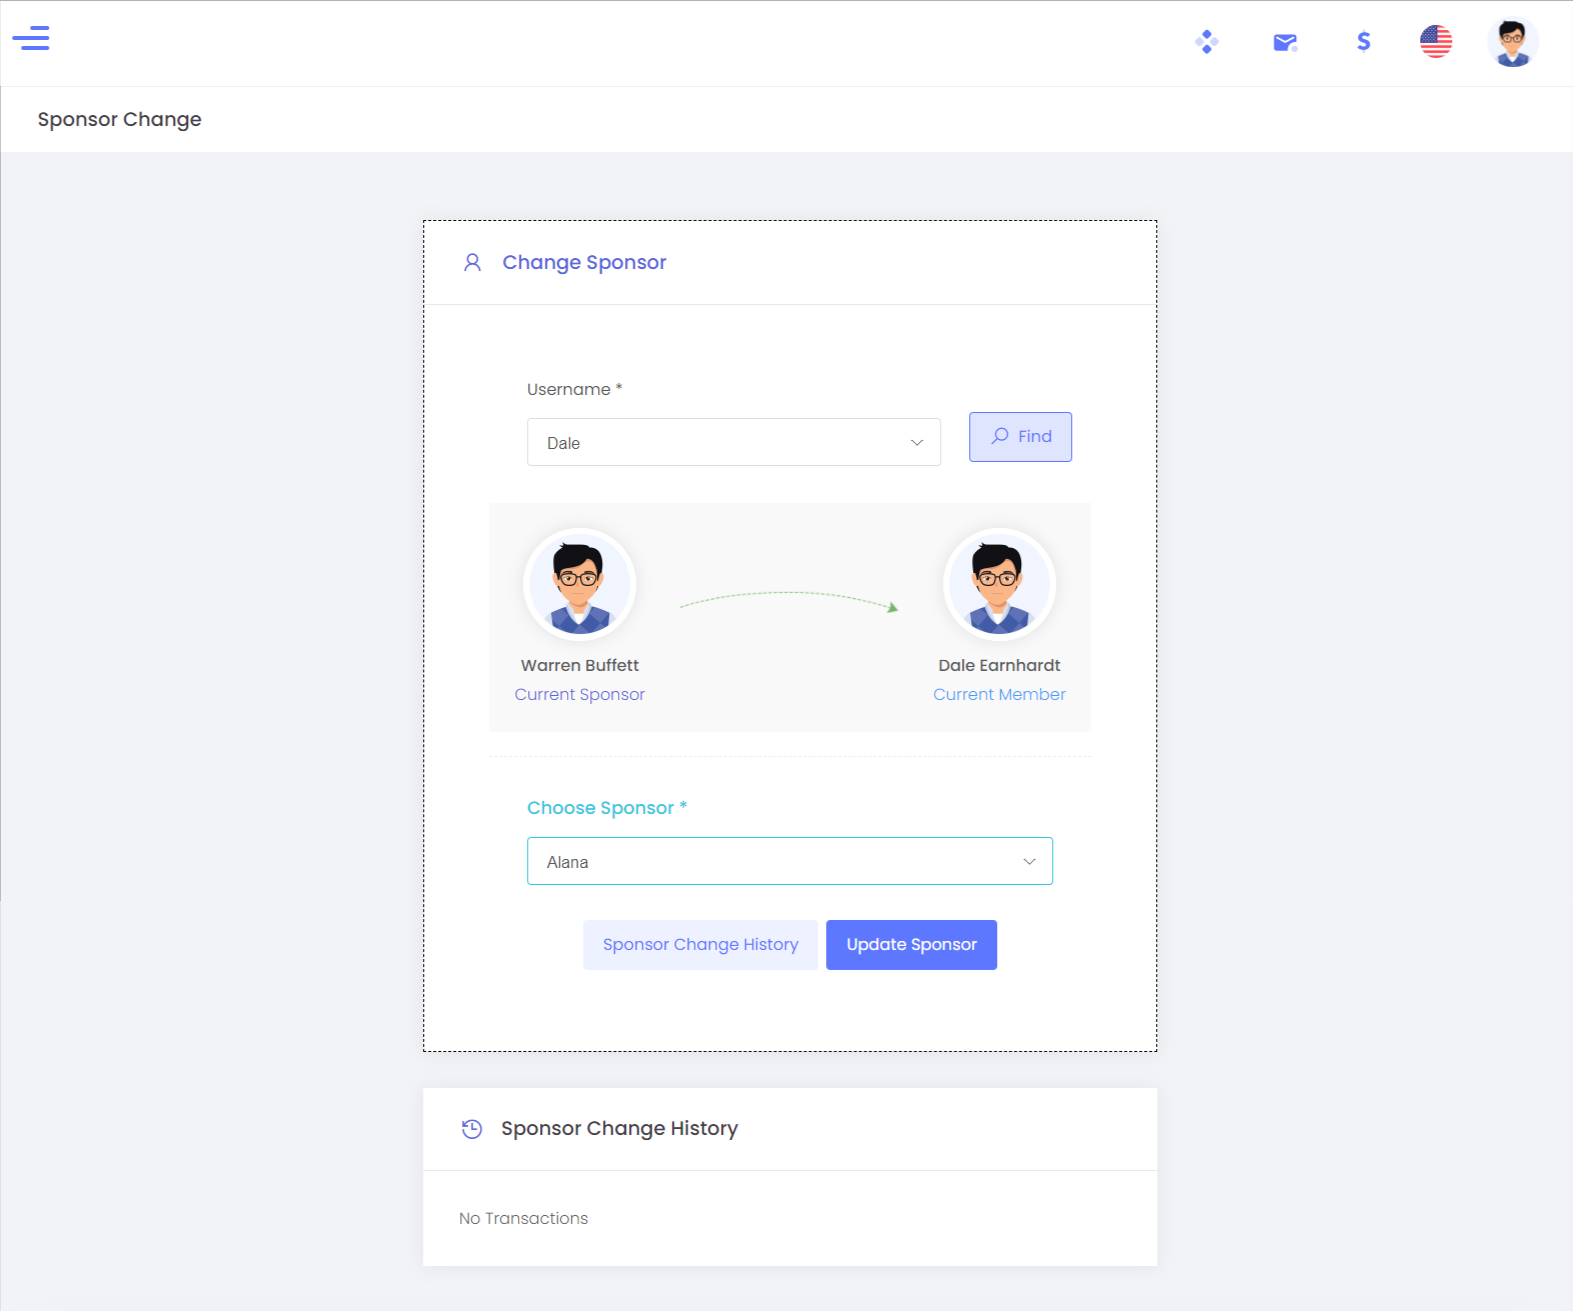
- The fields included are:
- Username - The name of the user whose Sponsor is to be changed
- Find - Use this option to find the user details
- Choose Sponsor - Choose the new Sponsor under which the user needs to be placed
- Update Sponsor - Click this button to change the Sponsor
- Sponsor Change History - Here we will have the history of the sponsor changes taken place in the system
Change Placement
The position or the placement of the user in the Genalogy could be changed using this option.
On changing the placement, the parent of the user is changed and the user is been placed under any of the legs of the sponsor of that user.
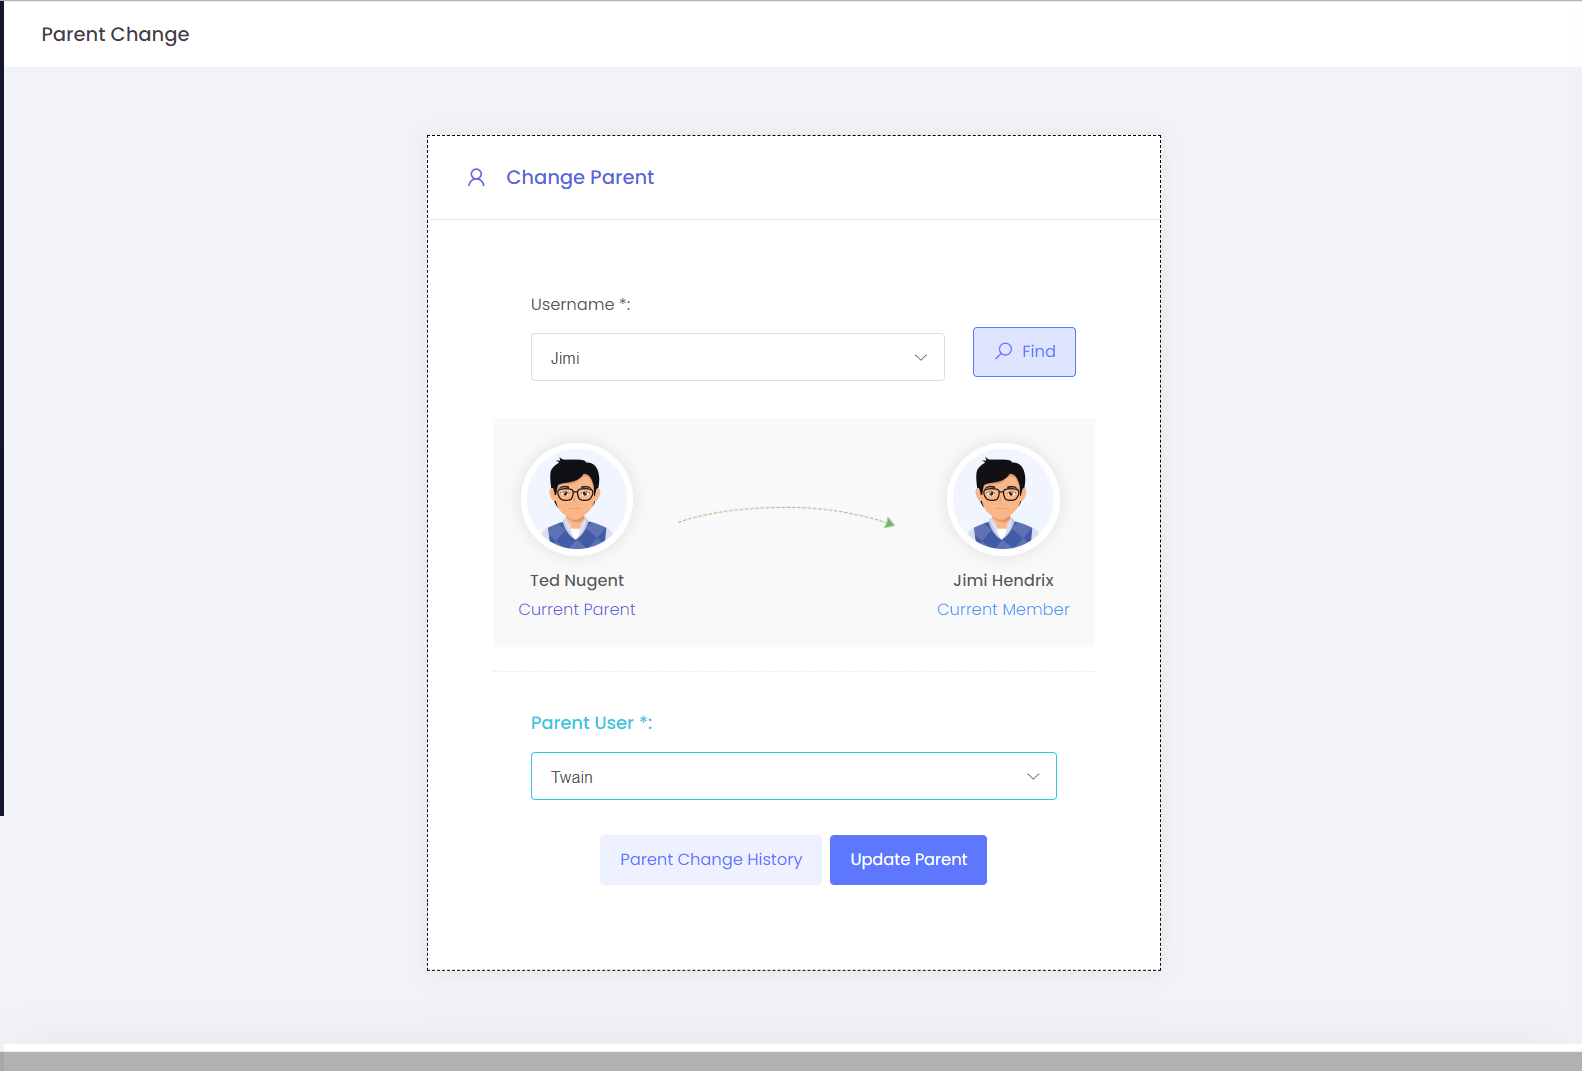
How Admin Changes the Position/ Parent of the user?
- Admin can use the Change Placement option from Advanced Options
- Put in the Username and Find the details of the user whose position need to be changed
- Choose the New Parent where the user must be newly placed and Update Parent
- The Parent change history could be tracked from the "Parent Change History" button
Example:
From the below image,
Ted Nugent is the Sponsor of all the downline users. Consider that we are changing the position of Jimi Hendrix.
We could change his position Jimi Hendrix anywhere under the tree of Ted Nugent.
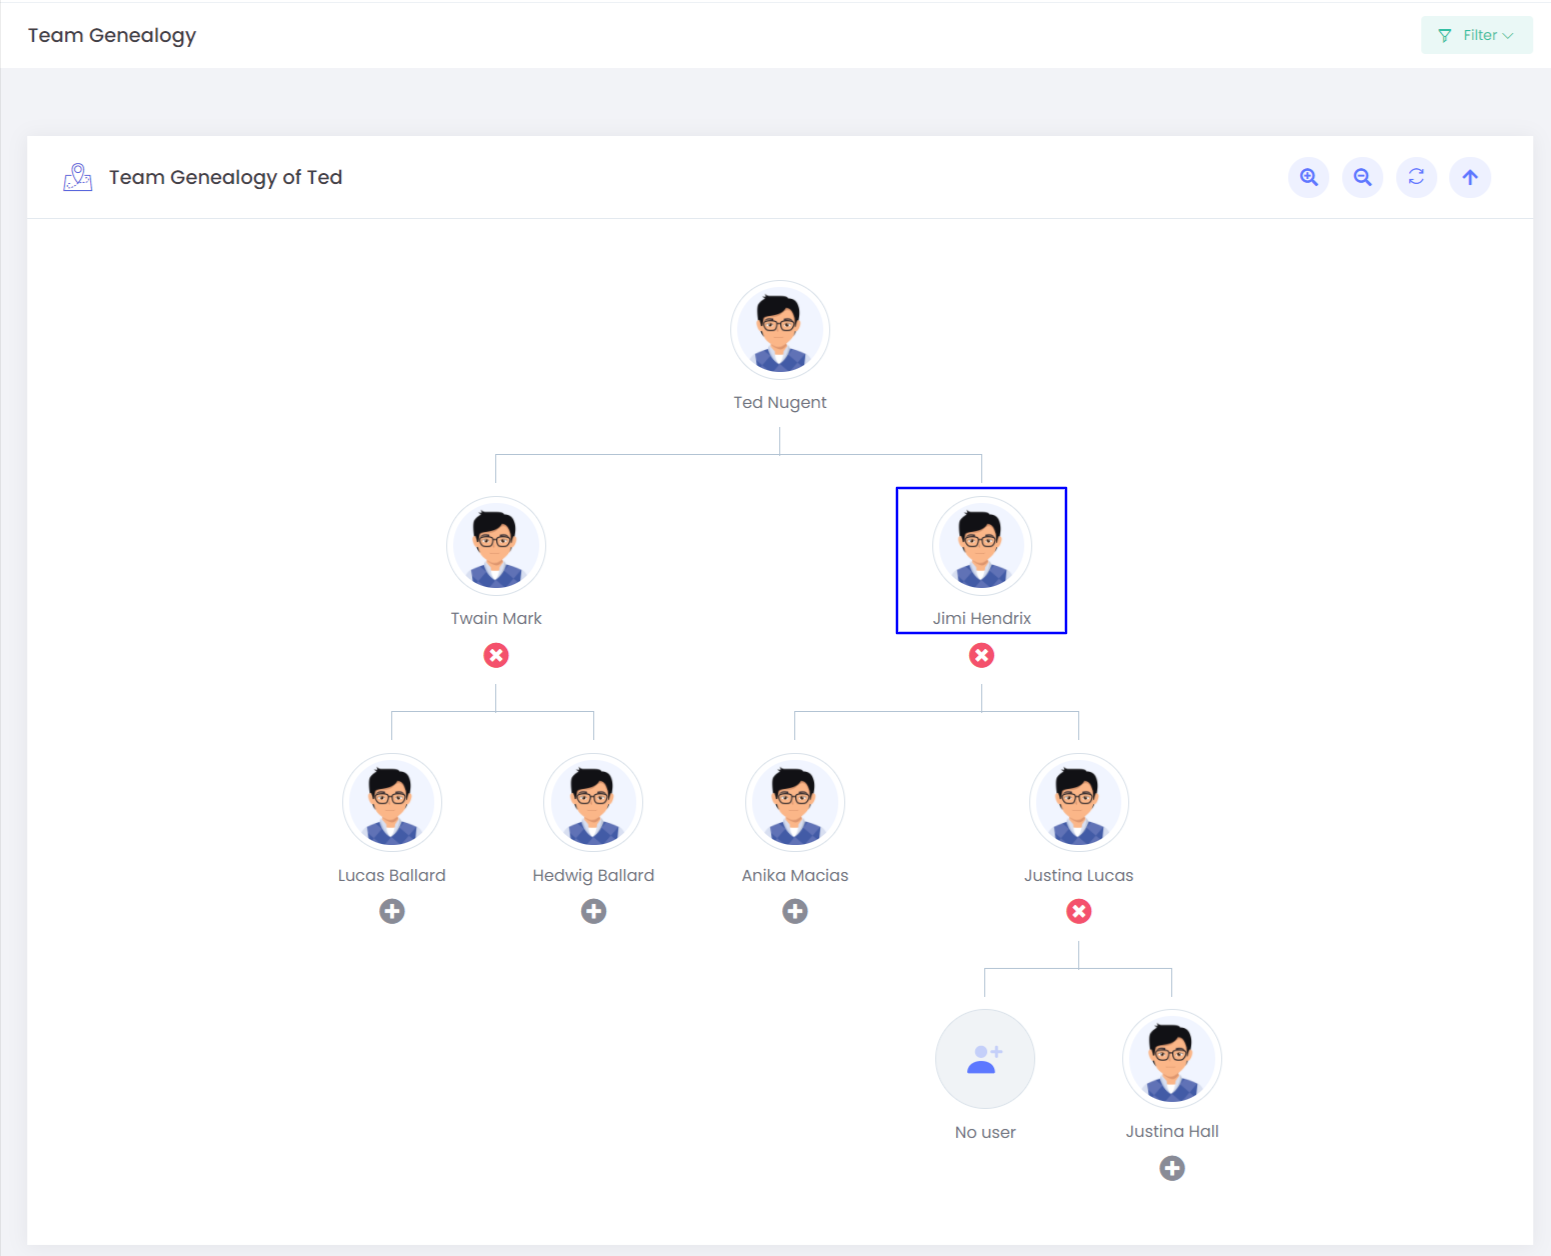
The parent of Jimi Hendrix is Ted Nugent now, we are updating it to Taiwan Mark
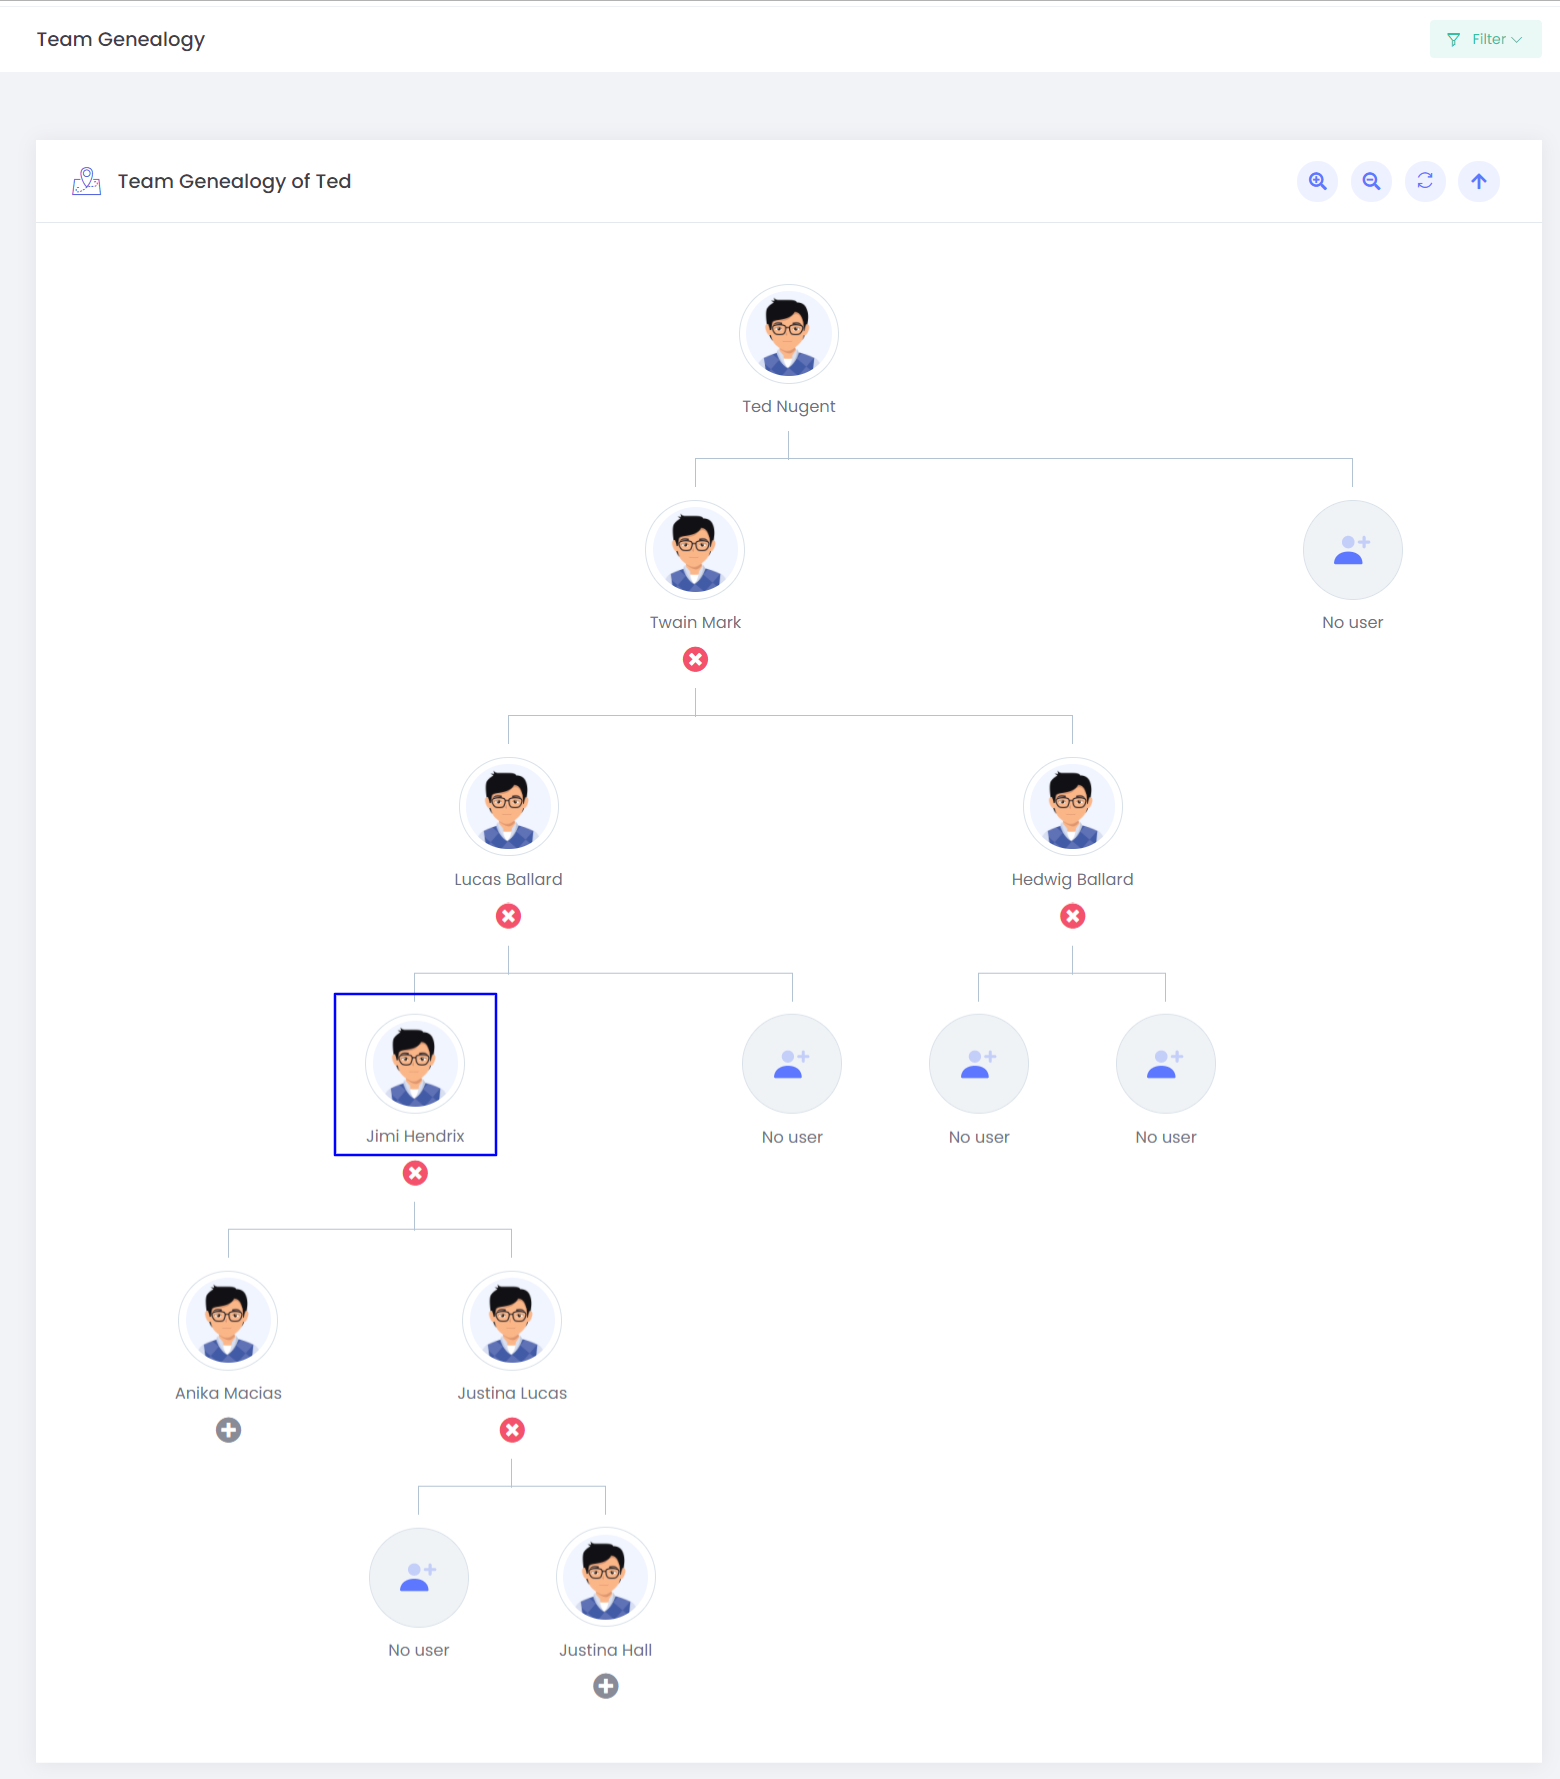
The parent is been changed to Taiwan and we could track it from Parent Change History.

Also, the Genealogy tree will be updated.
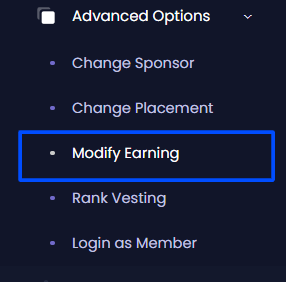
Admin could add or deduct the amount from the user wallet using this option.
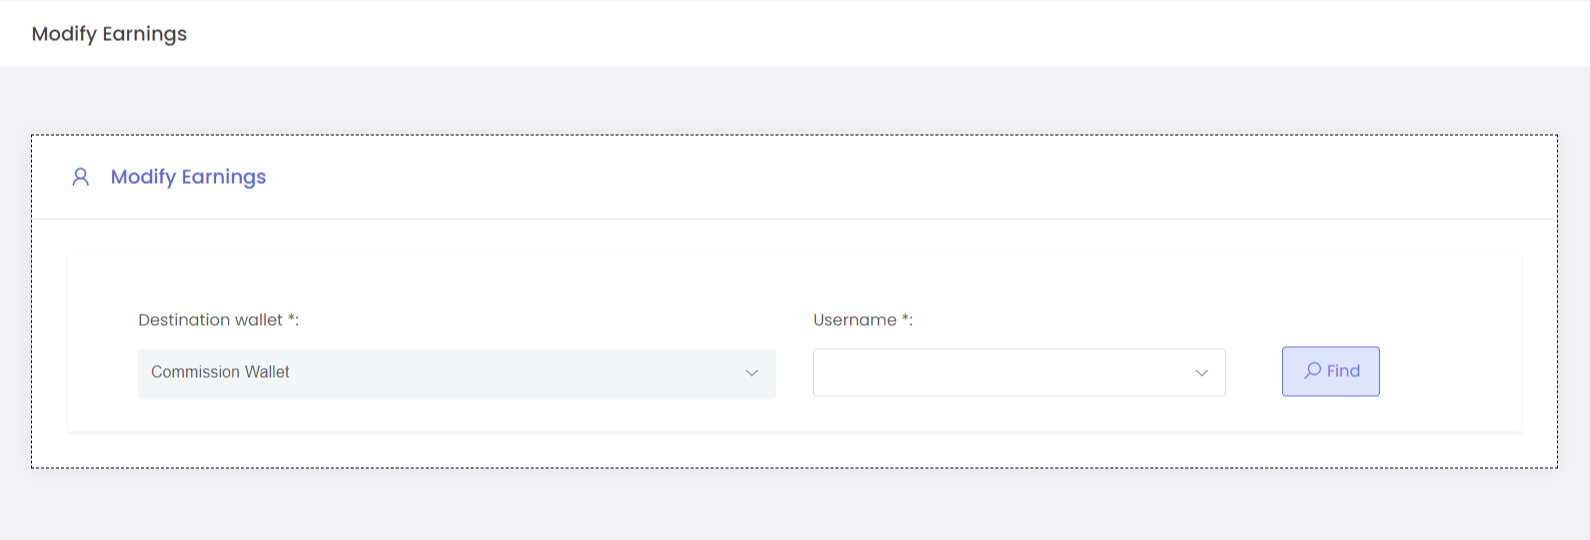
- Destination wallet - The wallet to which the earnings must be modified. All the available wallets in the system will be listed here.
- Username - The name of the user whose earnings must be modified
- Find - Option to find the details after putting in the username
- Add Fund - Admin could add the amount to the selected wallet using this option
- Deduct Fund - Admin could deduct the amount from the selected wallet.
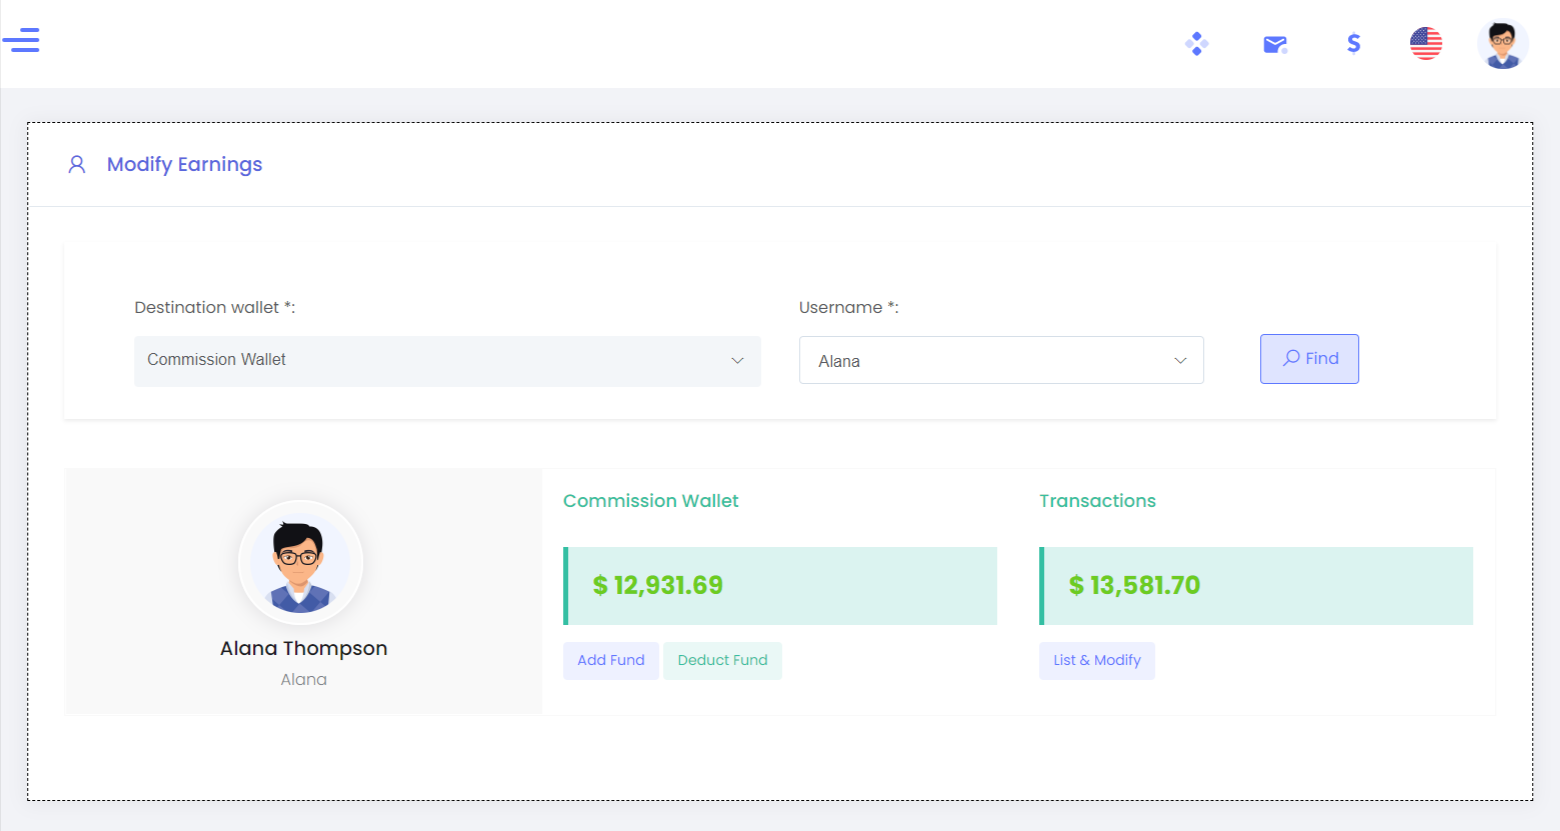
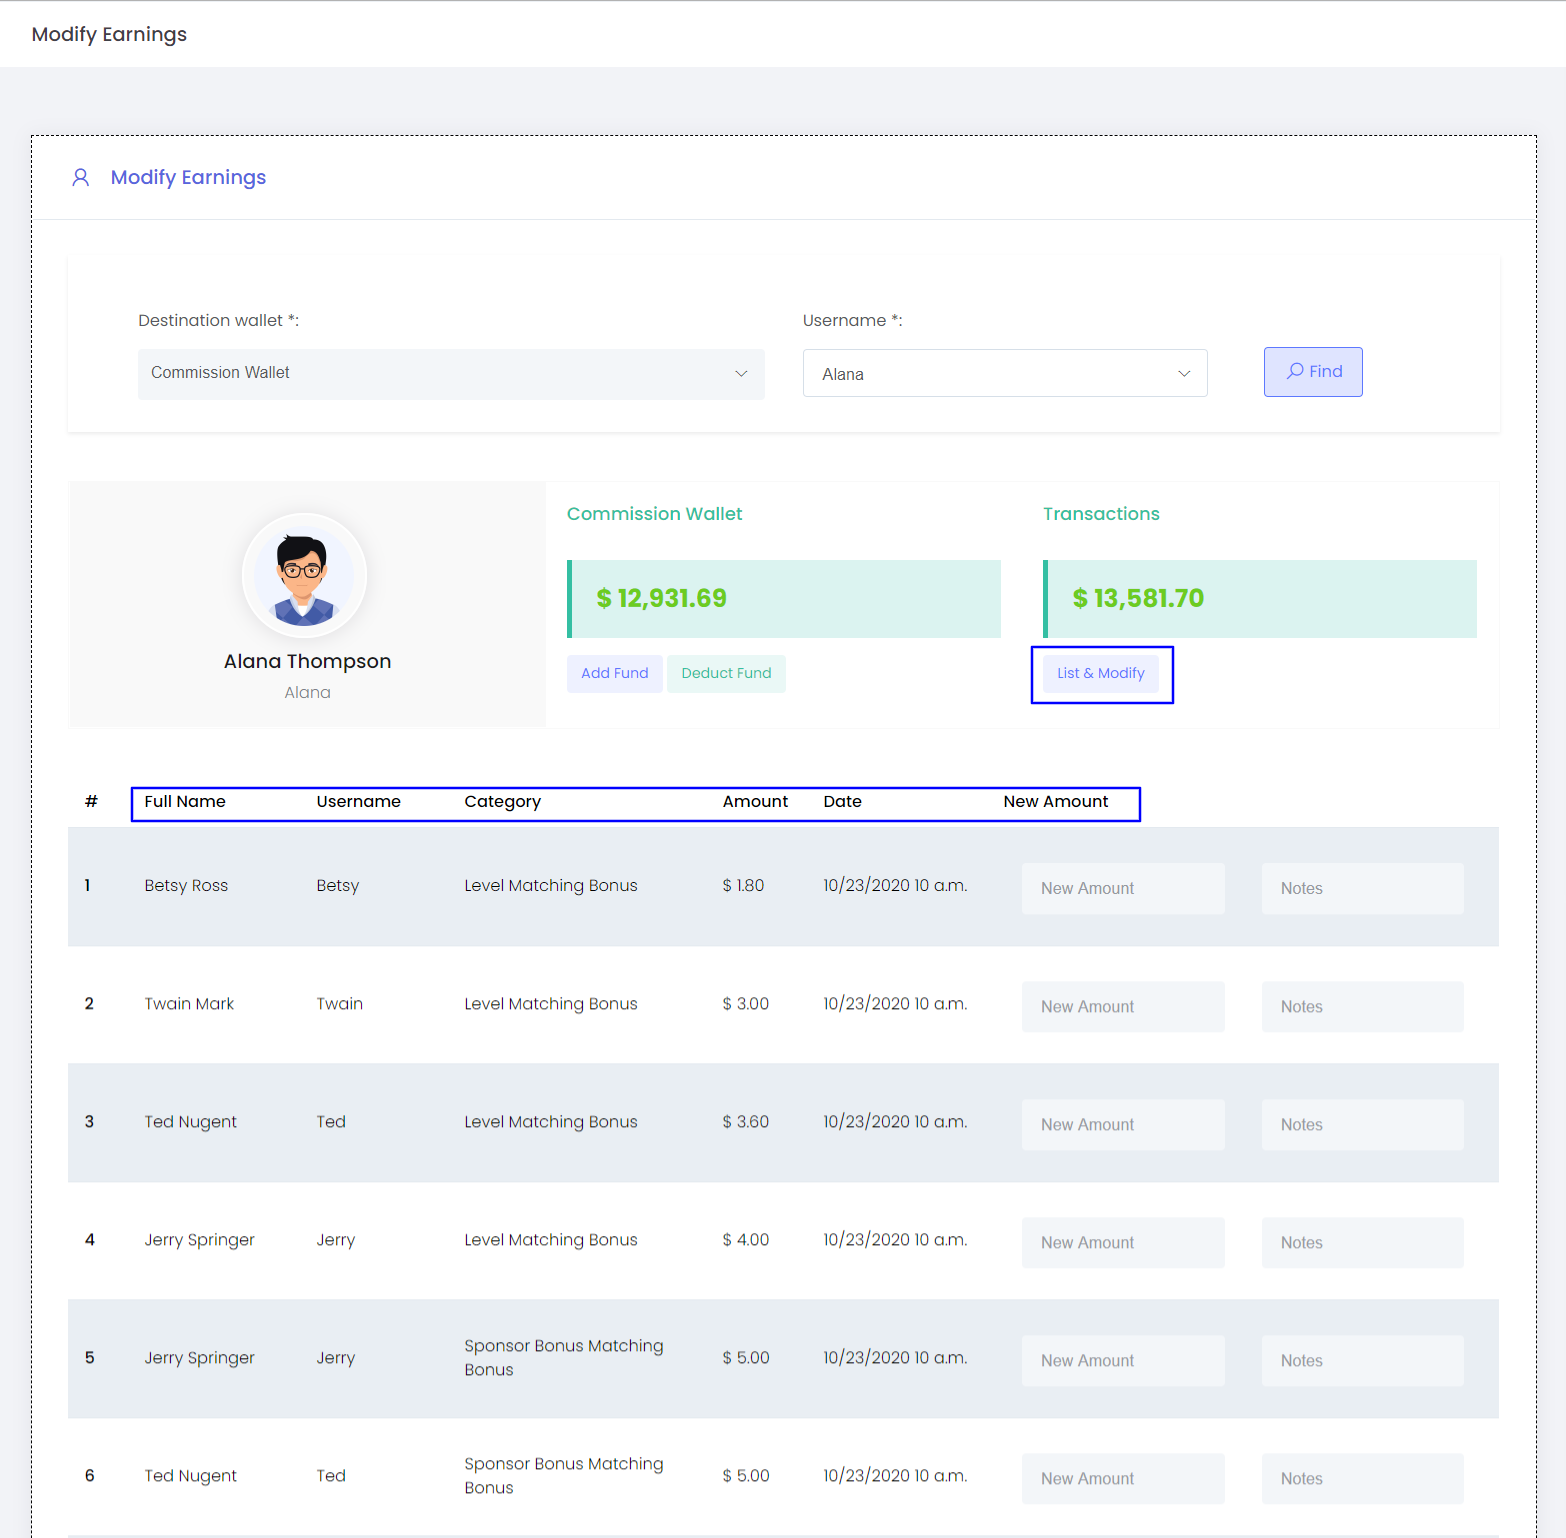
- List& Modify - Admin will have the list of all the transactions of the selected user for the selected wallet. Admin could modify the amount in any of the transactions.
- Full Name - The name of the user from which the bonus is credit
- Username - The username of the user from which the bonus is credit
- Category - The category of the transaction
- Amount - The amount credited to the wallet in that transaction
- Date - The transaction date
- New Amount - The amount to be updated to
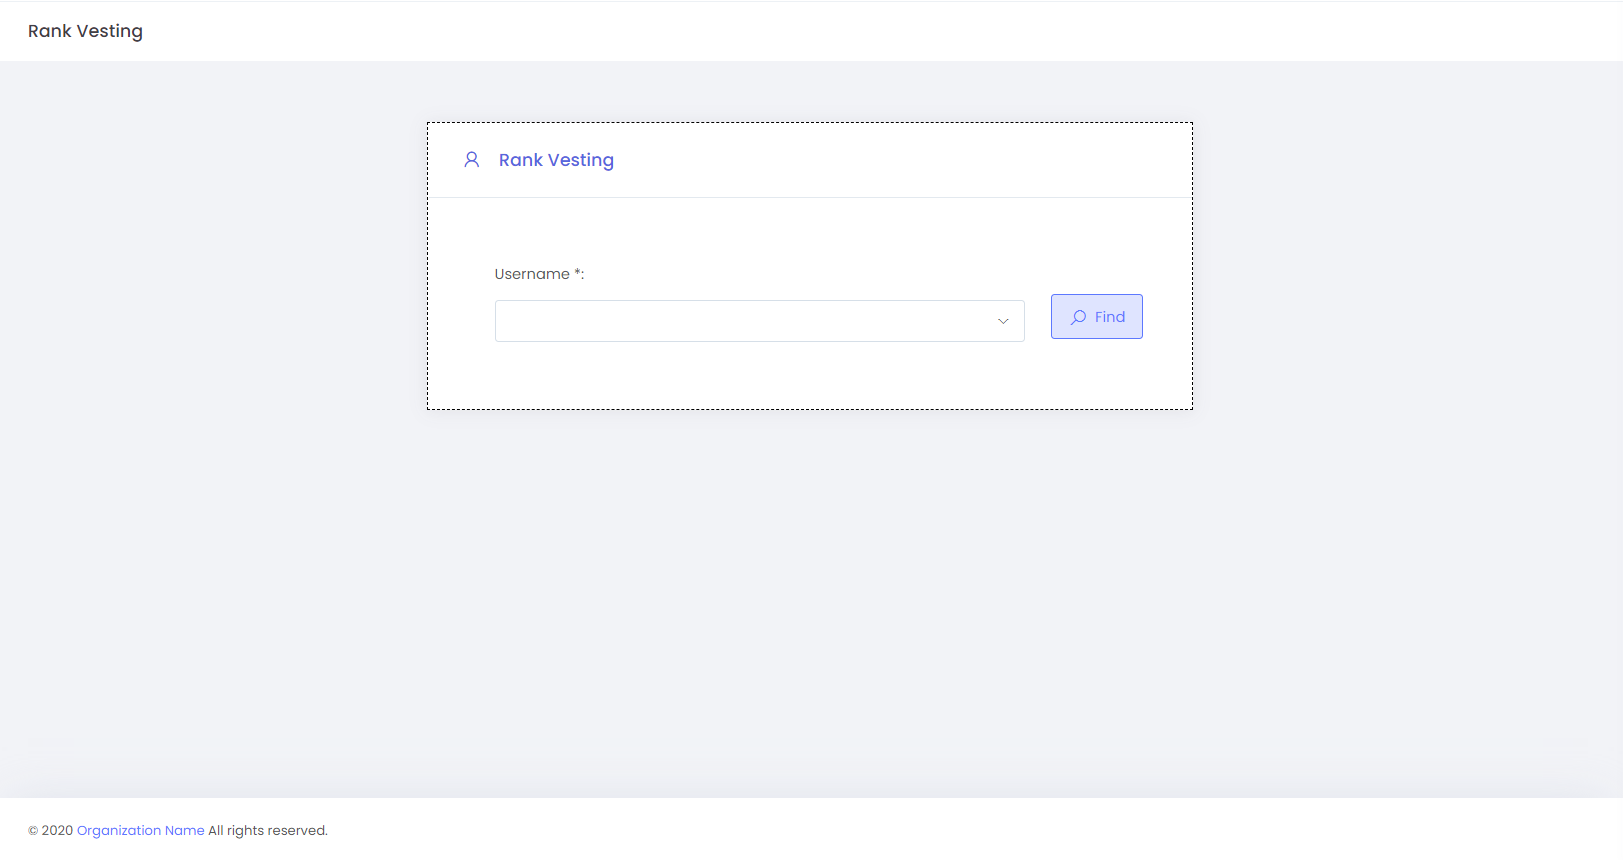
Rank Vesting
Rank vesting means providing the up-grading of ranks. With this option, Admin can provide the rank to the users.
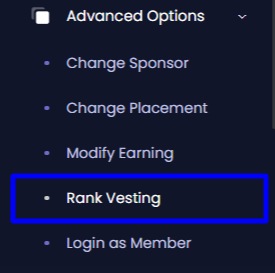
For Eg: If a user has a Rank 3 then Admin can provide higher ranks ie he can give Rank 4 or 5. Depending upon the Admin's wish he can upgrade the ranks.
Step :1
Find the username.
Step: 2
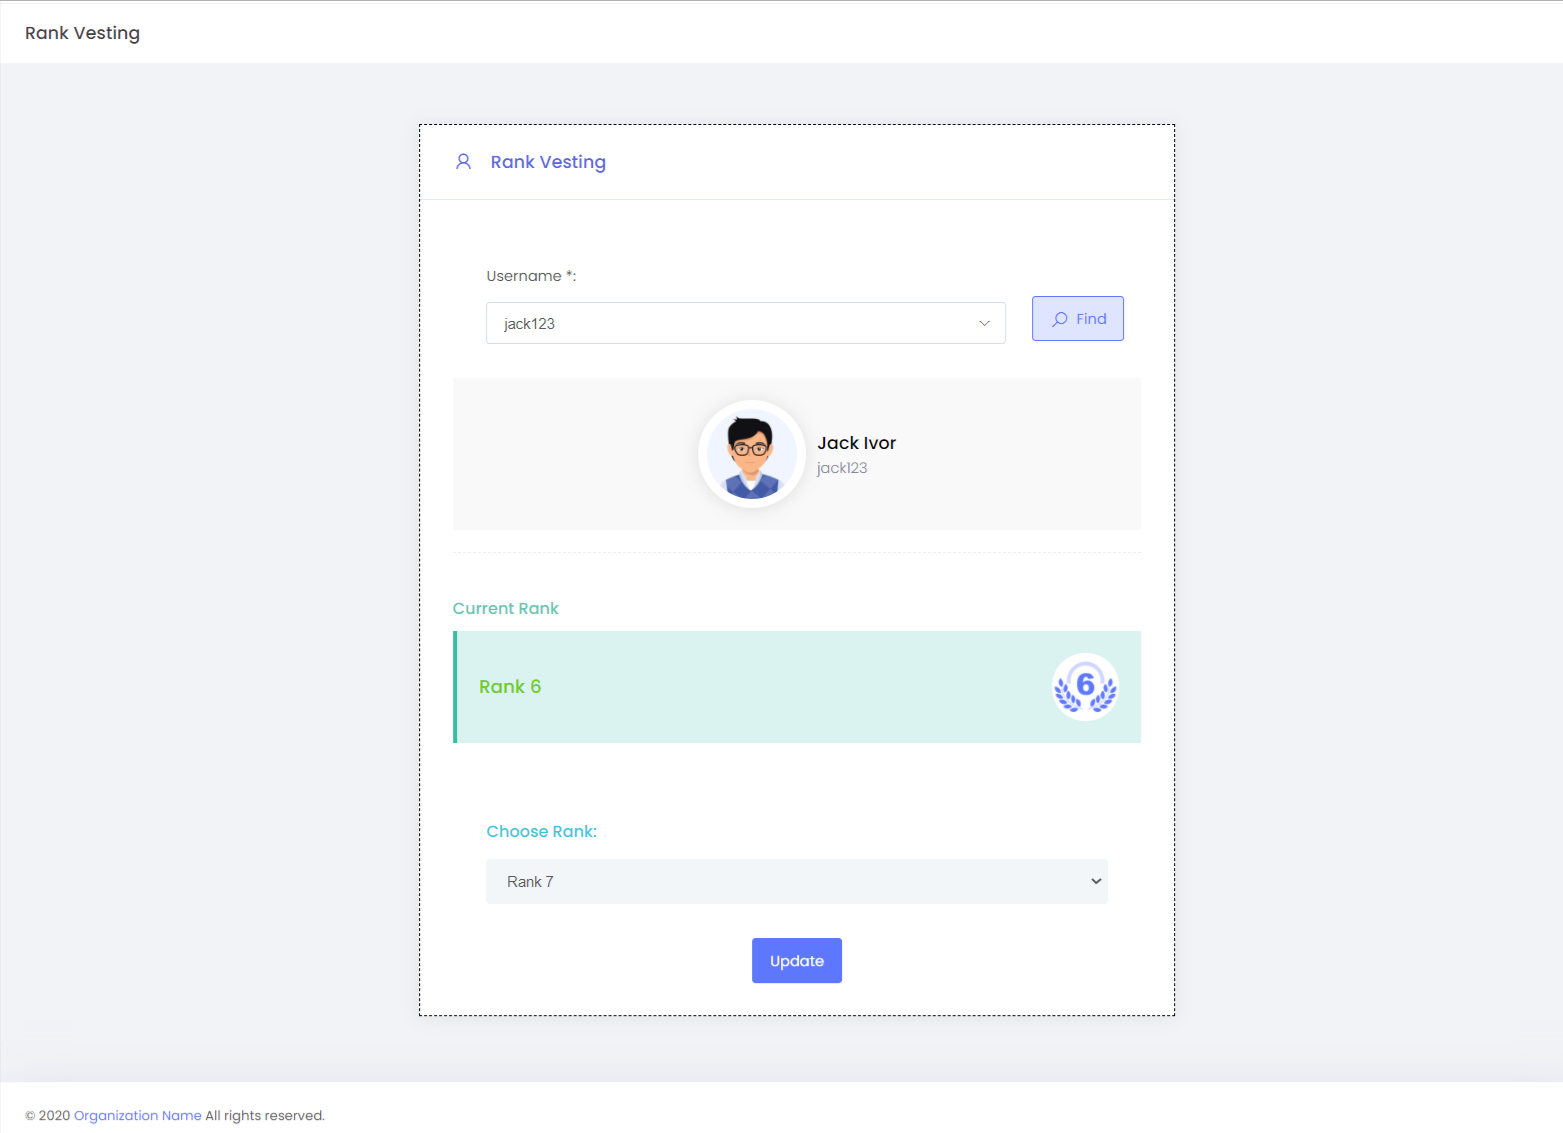
If we update then the user has been provided by Rank 7. Rank vesting has done successfully.
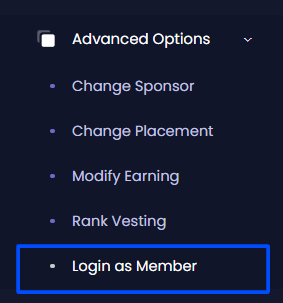
Login as Member
With this option, Admin can able to login in remotely as a user. Admin can take a remote view for the users within the system. According to the Admin's wish, he can take a remote view for any user at a time.
Step 1: Provide a username.
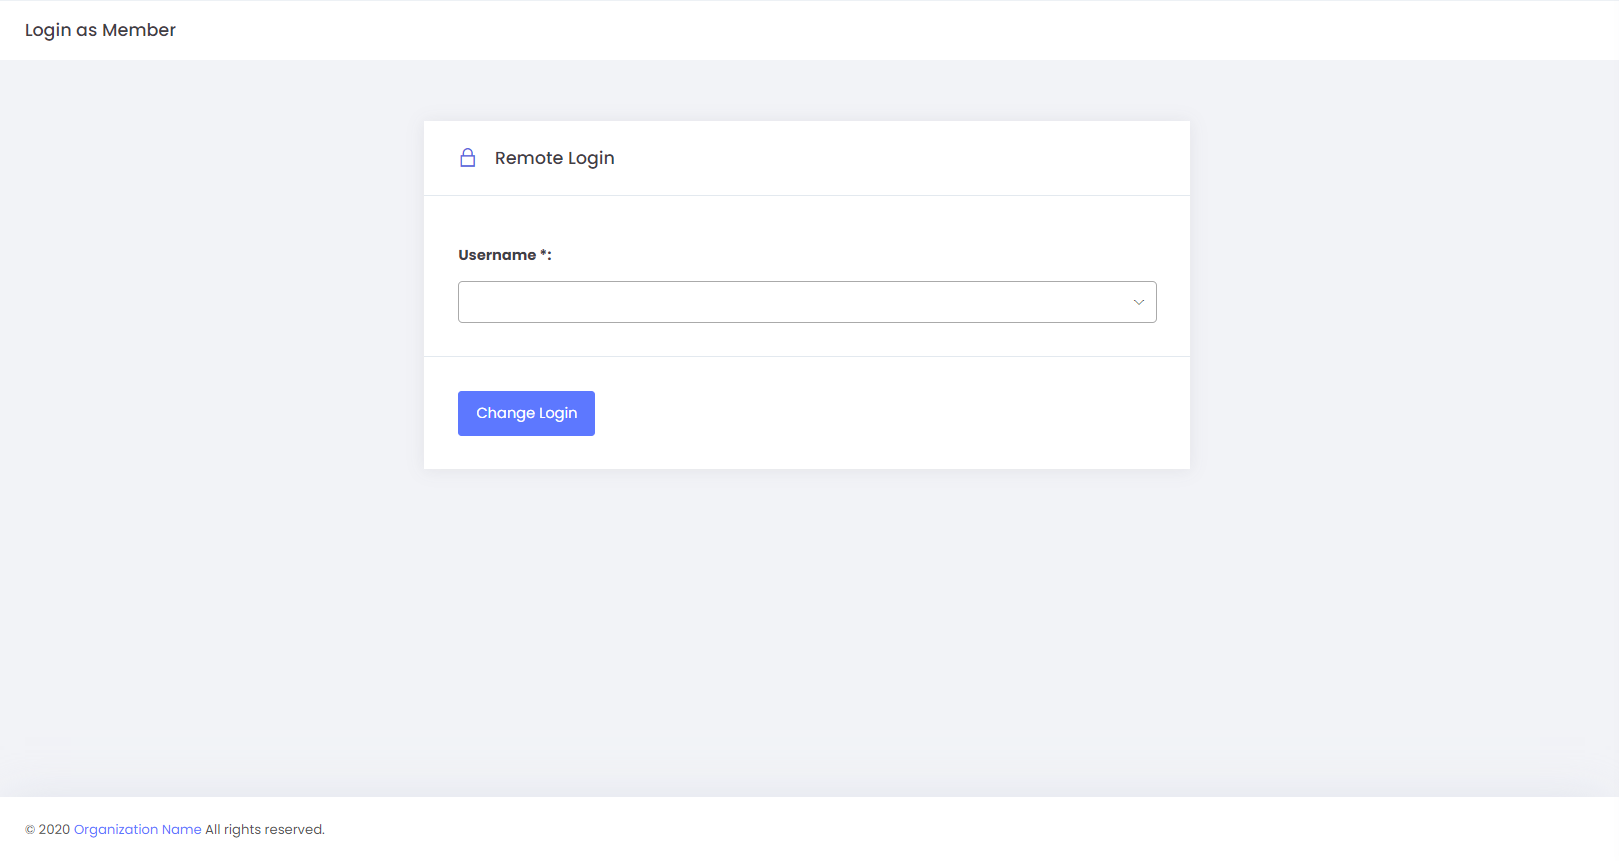
Step 2:
You will be able to login to the user's dashboard.